Incompatible Driver Turns Off Memory Integrity in Windows 11
To handle this error, just run the command via Command Prompt
3 min. read
Updated on
Read our disclosure page to find out how can you help Windows Report sustain the editorial team Read more
Key notes
- Uninstalling the drivers via Device Manager has been quite effective in dealing with this error.
- Accurately running the command through the Command Prompt can deal with this issue.
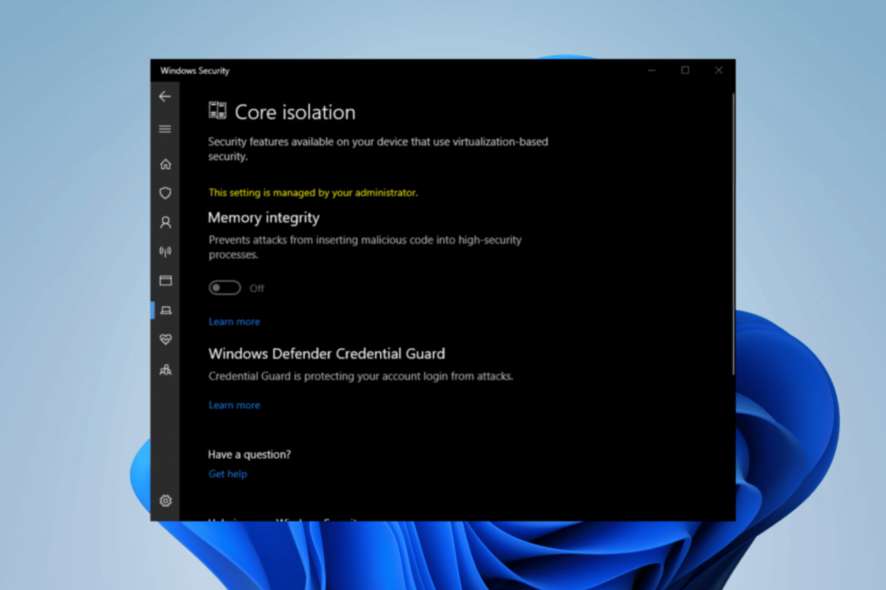
When it comes to safeguarding your Windows system against malicious attacks, memory integrity is a key security feature that should not be overlooked. By leveraging cutting-edge hardware virtualization technology, this feature creates a secure and isolated memory zone impervious to unauthorized access or modification.
The topic resembles a similar issue of memory integrity cannot be turned on, which we addressed in great detail through a comprehensive guide.
We must delve into the root cause to address the issue at hand.
Why is an incompatible driver turning off Memory Integrity in Windows 11?
This issue can be caused by a variety of factors and is known to occur quite frequently:
- Windows Essentials – Windows Essentials have been discontinued since 2017, but they might lurk inside your PC, prompting this issue to occur.
- Not up-to-date drivers – If your drivers are not up-to-date, you might encounter this specific problem from time to time.
- Hidden Files – Some drivers hidden in your system via Device Manager.
What can I do if an incompatible driver turns off Memory Integrity in Windows 11?
- Chat with PC tech support – Your PC tech support team can handle this issue if you can reach them via their official website and be specific about your complaint.
- Update Drivers – Updating your drivers regularly can help stave off this issue.
1. Rename via File Explorer
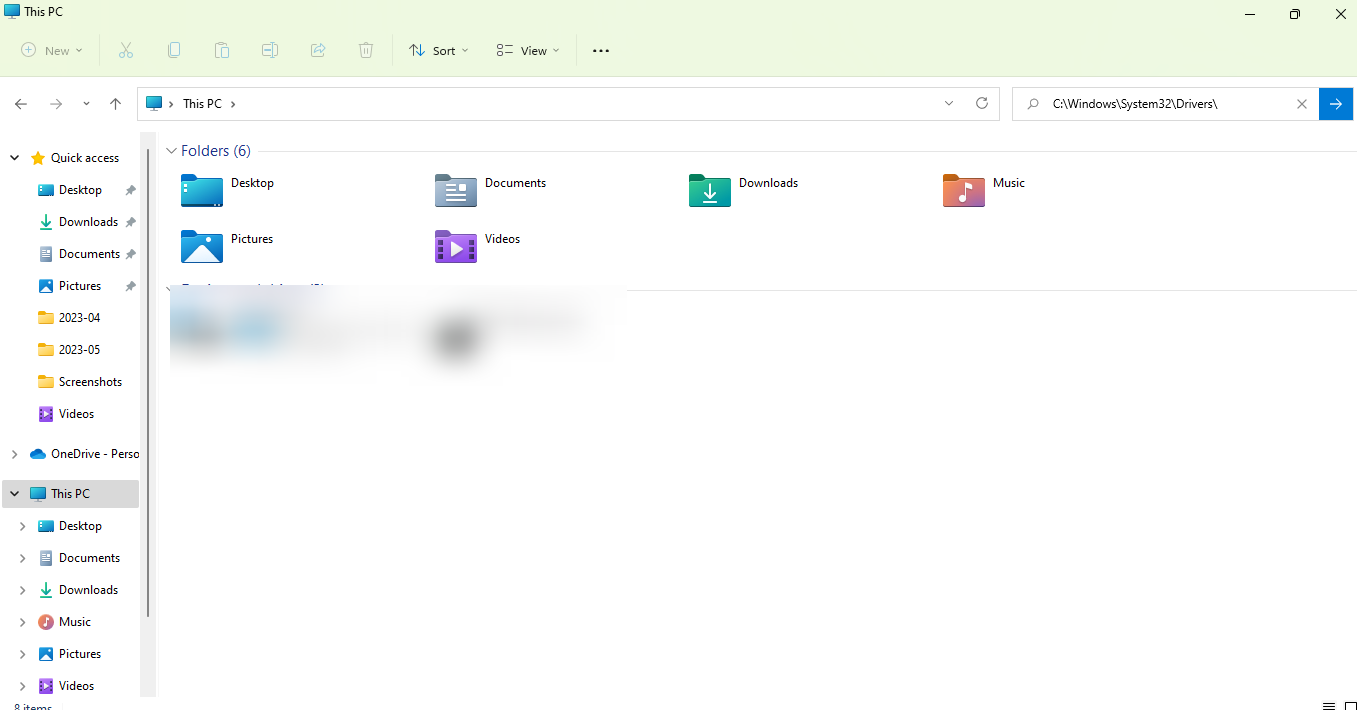
- Lastly, navigate to the following location through File Explorer (be certain hidden files are visible):
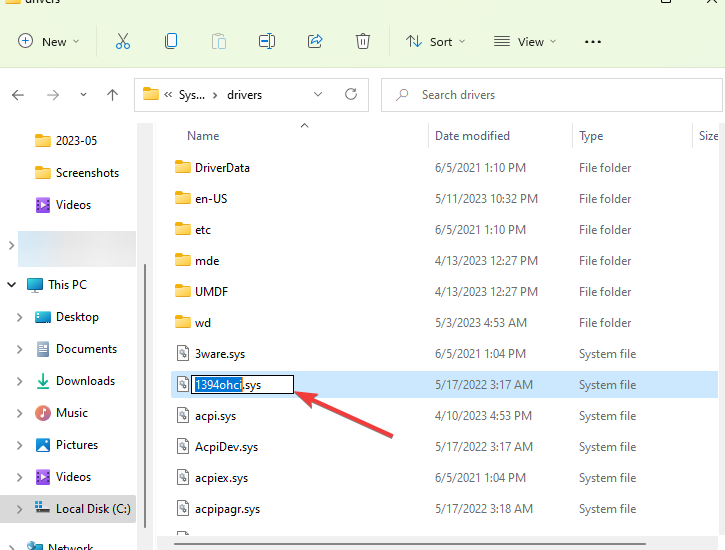
C:\Windows\System32\Drivers\ - Find the driver associated with the problem and rename it.
- Restart the PC.
2. Run the command through Command Prompt
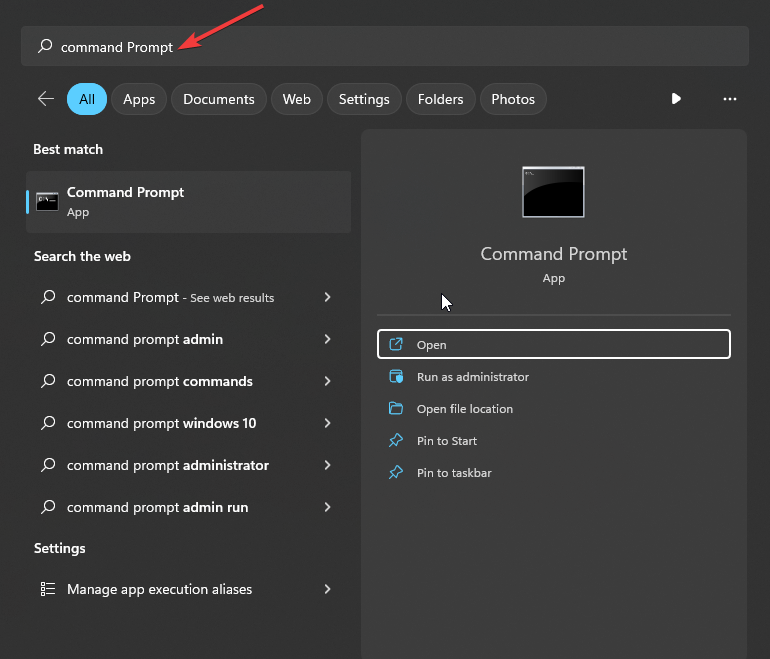
- Type in cmd in Windows search.
- Right-click on Command Prompt and select Run as administrator.
- In the User Account Control window, click Yes.
- Type in the following command, replacing the Published name with the driver name, for example:
pnputil /delete-driver oem33.inf /uninstall /force - Press Enter and restart your PC.
3. Uninstall via Device Manager
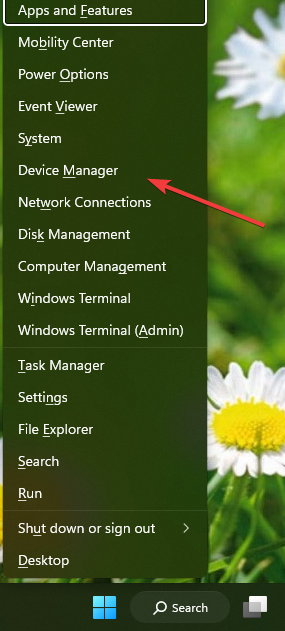
- Hold the Windows + X keys together.
- Click on the Device Manager.
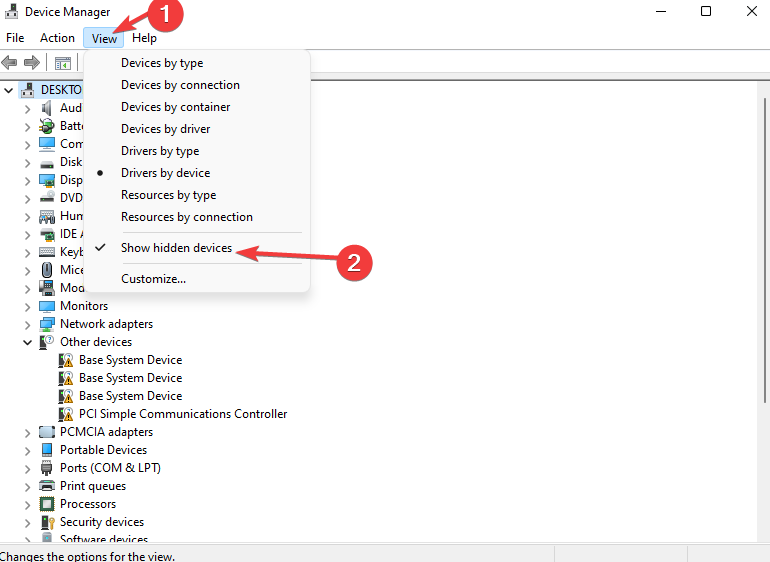
- At the top of the menu click on view and next show hidden files.
- Lastly uninstall or delete the specific driver.
We sincerely hope that this guide has effectively resolved your issue. In case you encounter any additional obstacles, we suggest looking into PxHIpa64.sys incompatible driver, which may offer similar solutions.
We value your input on the most optimal resolution you have discovered. Please drop a comment down below to share your insights with us.
User forum
0 messages