How to Integrate ChatGPT with Gmail [+ 5 Smart Tips]
The best method is to install a Gmail browser extension
2 min. read
Updated on
Read our disclosure page to find out how can you help Windows Report sustain the editorial team Read more
Key notes
- ChatGPT extension for Gmail helps to generate emails and messages professionally.
- This guide will discuss the simple steps to integrate and use ChatGPT with Gmail.
If writing emails is an integral part of your job, then the RepIAI ChatGPT Chrome extension can be an excellent addition to your Gmail add-ons. Integrating and using the extension is very easy and makes your task simpler.
This guide will cover the steps to integrate ChatGPT with Gmail and some tips for using it effectively. Let’s start!
Best tips on using ChatGPT with Gmail
- Input = Output – To get the relevant reply for your mail, you must give clear and concise instructions. If the instructions are specific, the email generated will be more appropriate.
- Create an account on ChatGPT – Before adding the extension, make sure you have signed up on ChatGPT. It makes it easier to use the extension, especially if you are in a hurry.
- Same Gmail account – You must use the same Gmail account to sign up for which you are using the extension.
- Get Ideas – If you want to send a business proposal or guideline, you can use this extension to get outlines and paragraphs.
- Response failures – If ChatGPT comes with an incorrect response, try rephrasing the pointers given or changing the context to make it understandable.
What can I do to integrate ChatGPT with Gmail?
 NOTE
NOTE
1. Install ReplAI – ChatGPT for Gmail
- Login to your Gmail account.
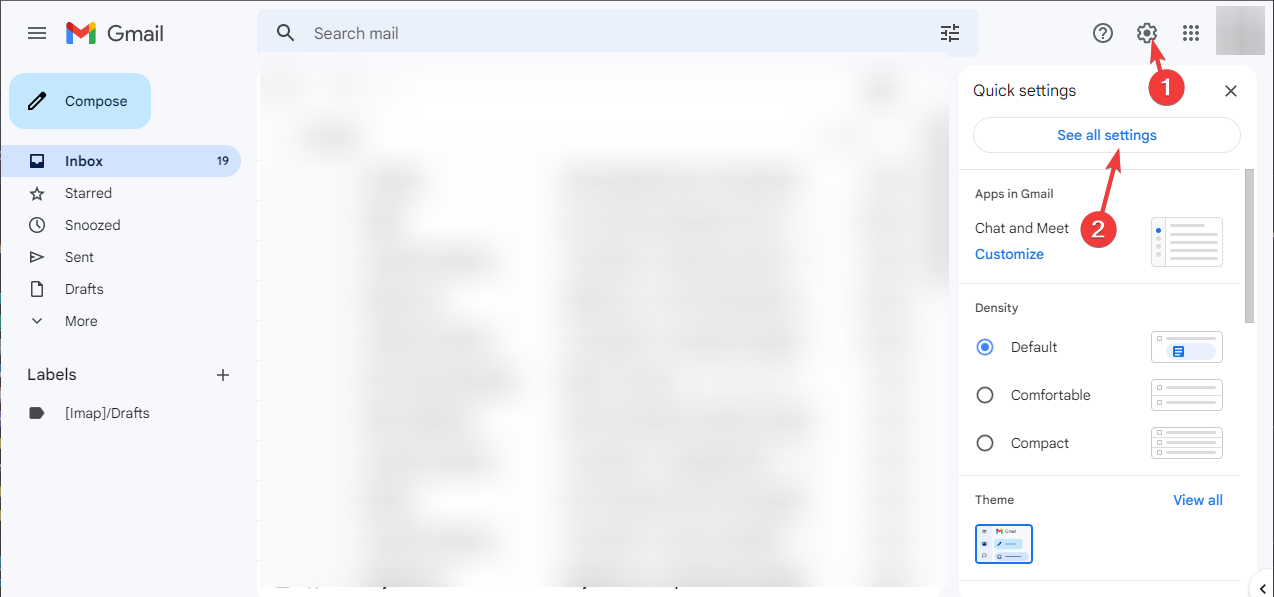
- Go to Settings, then click See all Settings.
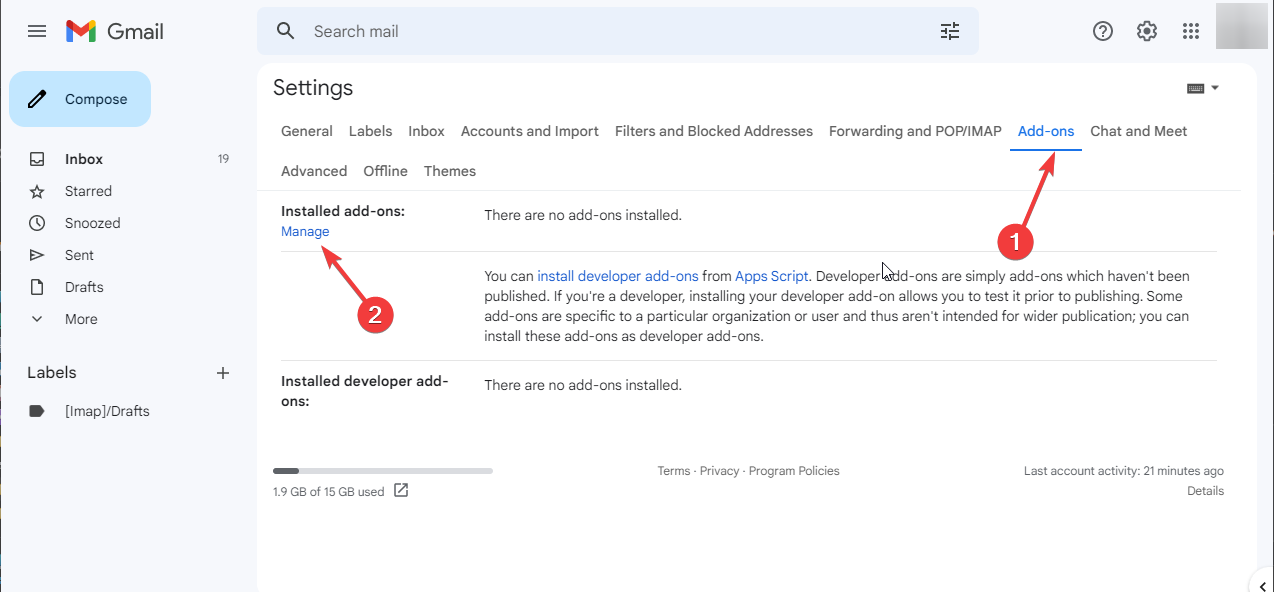
- Now switch to Add-ons and click Manage.
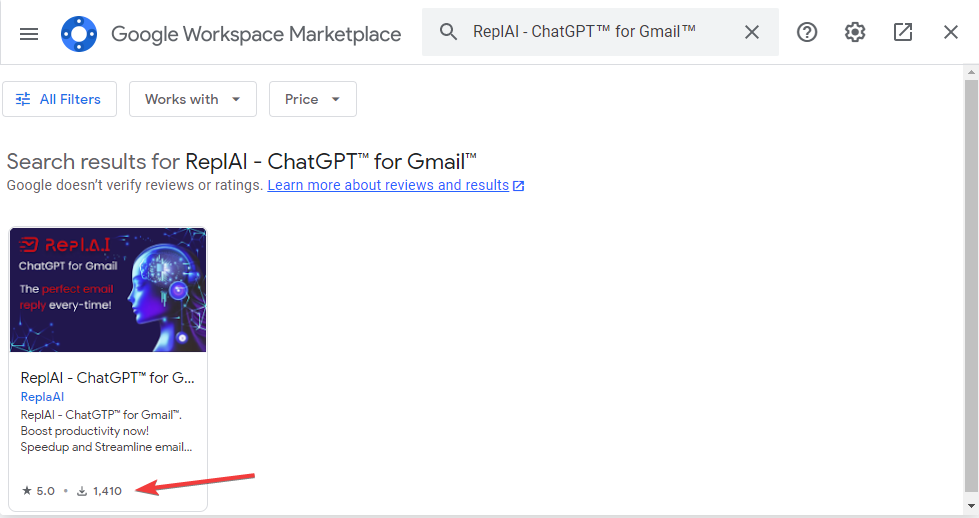
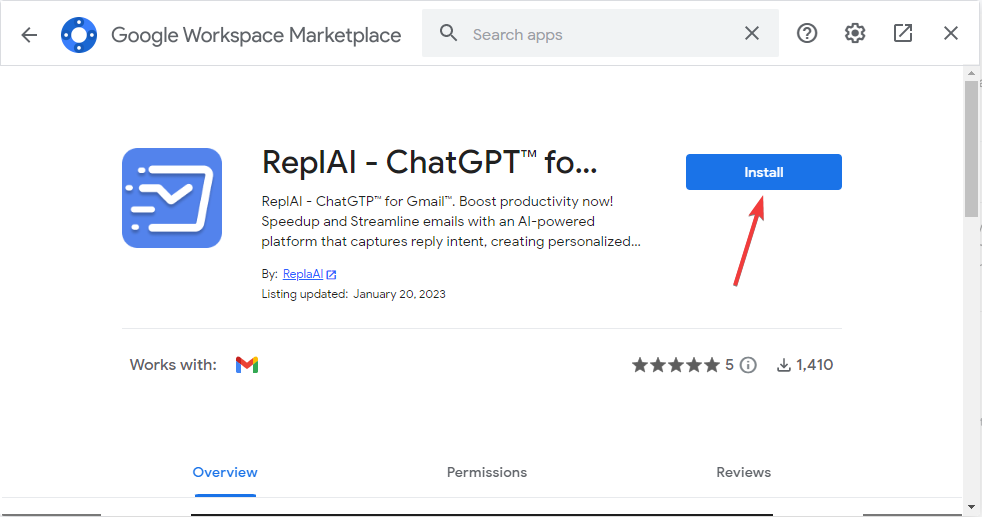
- In the search bar, type ChatGPT. You will get ReplAI – ChatGPT for the Gmail extension.
- Click the Install button.
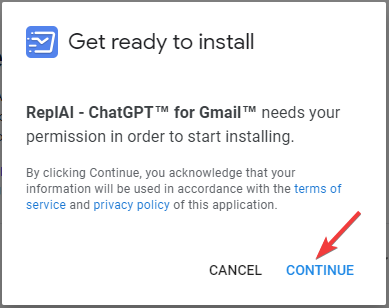
- On the next window, click Continue.
- Now choose your Gmail account.
- Click on Allow, and you are ready to use the extension.
2. Use the extension to compose an email
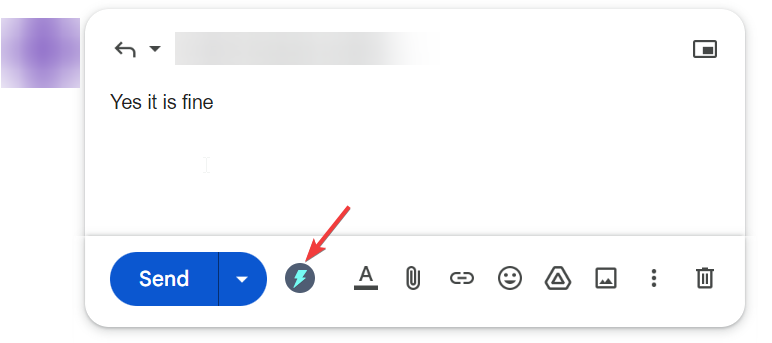
- Go to Gmail, click Compose or Reply.
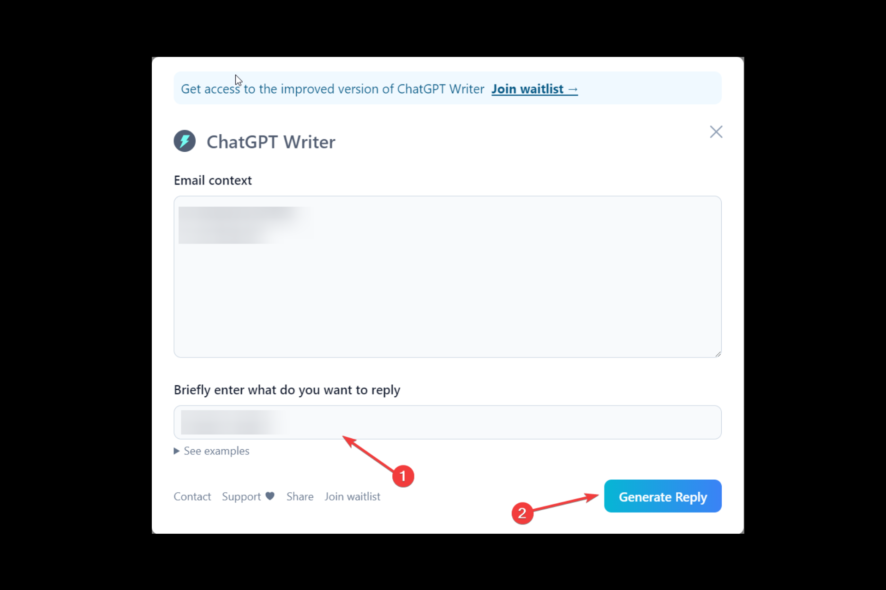
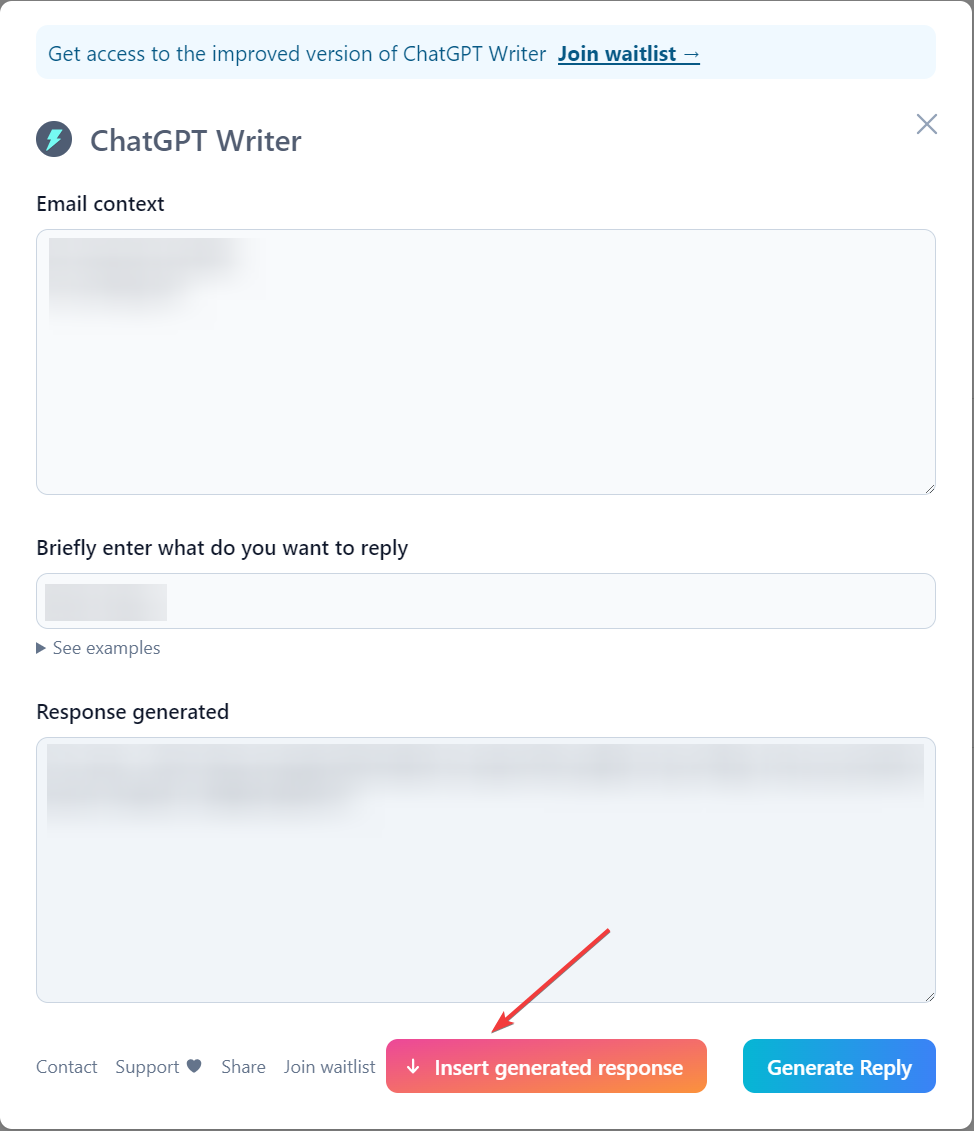
- Locate and click the ChatGPT Writer extension button next to Send; it will ask you to log in.
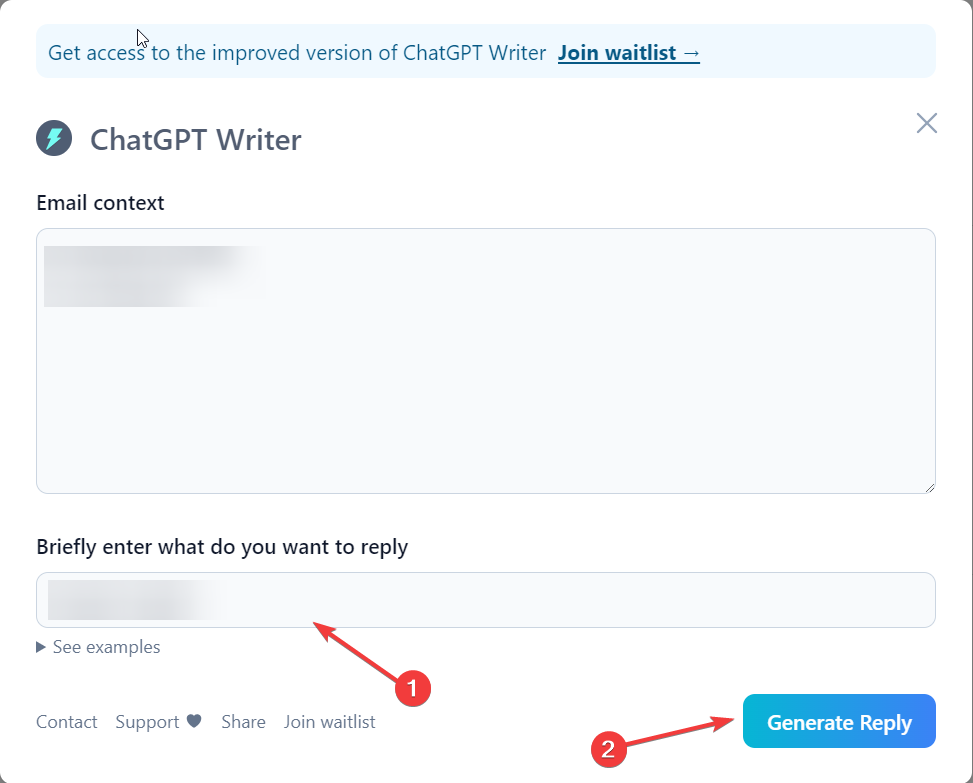
- Once you are logged in, on the ChatGPT writer page, under Briefly enter what you want to reply to type the highlights of what you want to write.
- Click Generate reply button.
- Once you get the reply, click on the Insert generated reply button to get the response copied to the email body.
So, you need to follow these steps to integrate ChatGPT with Gmail successfully. If you have any questions or concerns, please mention them in the comments section below.



User forum
0 messages