Keyboard Works in BIOS but not in Windows: 5 Solutions to Use
Change your BIOS settings or update drivers to fix all keyboard issues
5 min. read
Updated on
Read our disclosure page to find out how can you help Windows Report sustain the editorial team. Read more

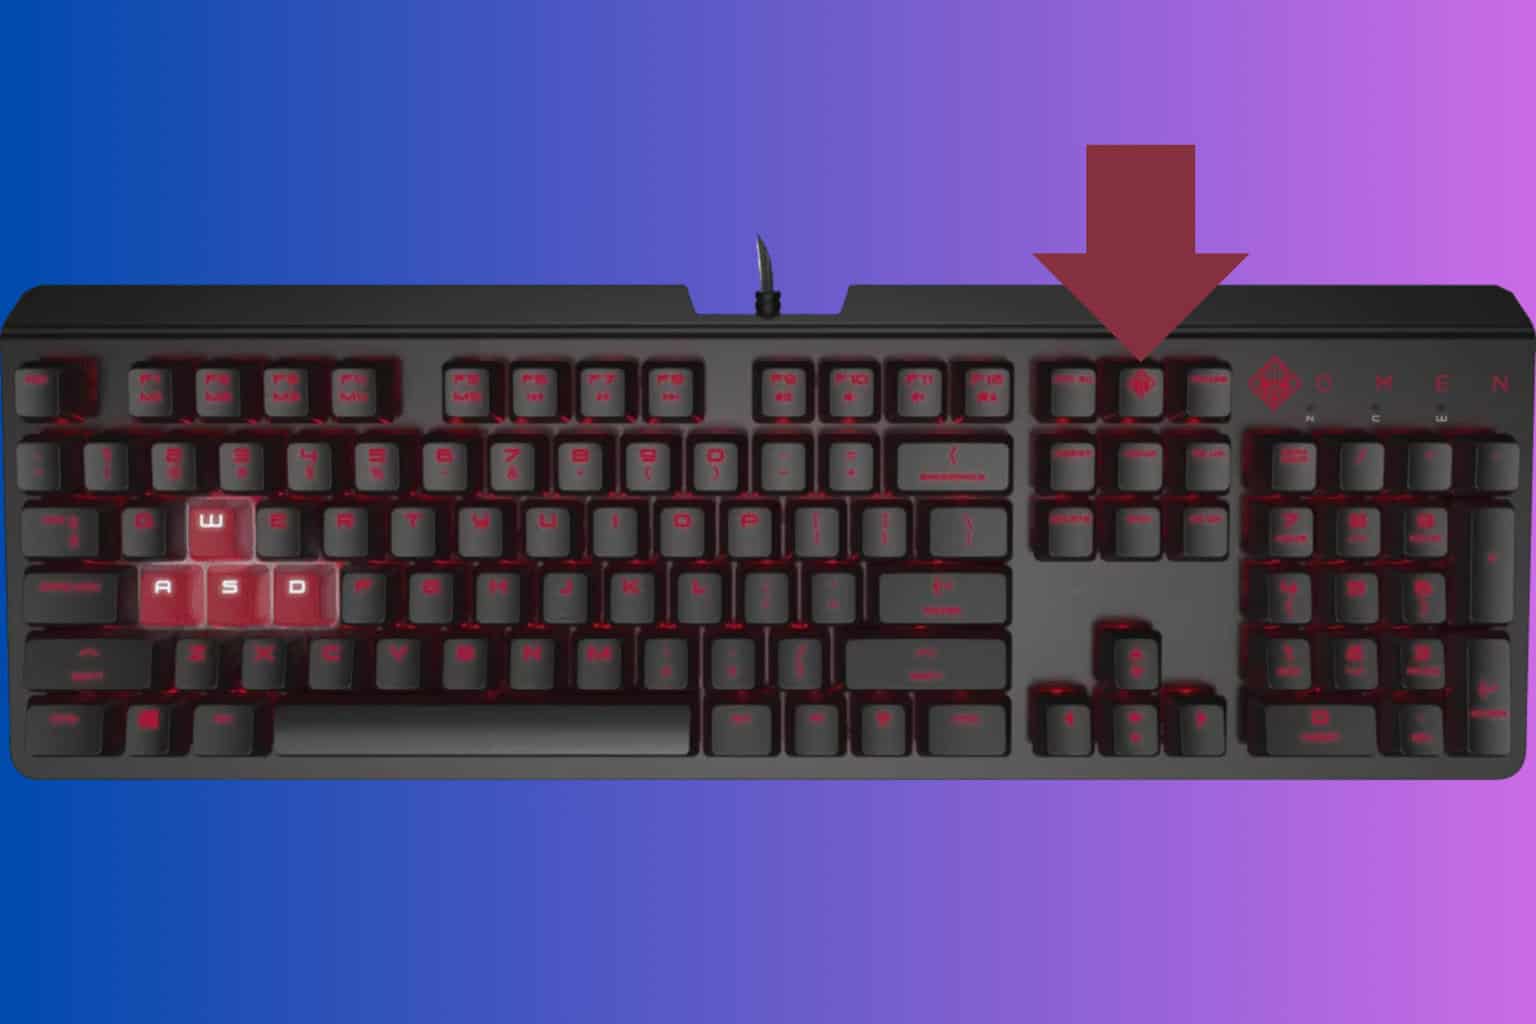
If the keyboard works in BIOS but not in Windows, this is mainly caused by a corrupted keyboard driver, but there are many other causes for this problem. First, if this issue manifests on a laptop, try to find an external keyboard or enable the virtual keyboard in Windows (instructions at the bottom of this article).
What can I do if the keyboard works in BIOS but not in Windows?
1. Connect an external keyboard and adjust your BIOS settings
- Turn off your computer completely and press the Power button again to restart the computer.
- Start pressing the F8 key immediately to enter the BIOS menu. Note THAT on your motherboard, it might be a different key.
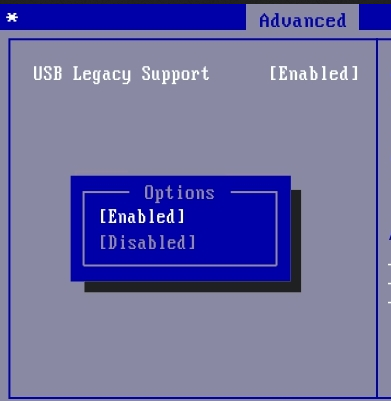
- Use the arrow keys and open the Advanced tab.
- Navigate to the USB Legacy Support and make sure it is set to Enabled.
- Press F10 to save the change and exit the BIOS screen. Let your PC restart.
2. Update drivers
2.1. Update manually
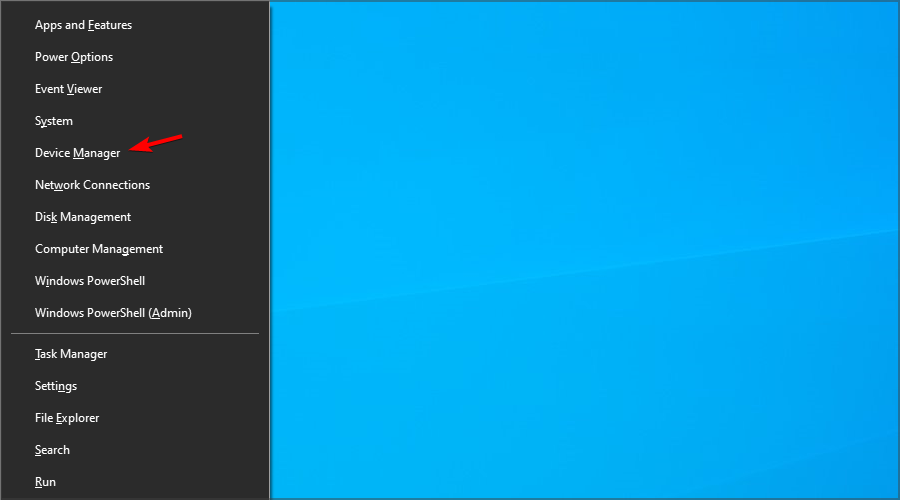
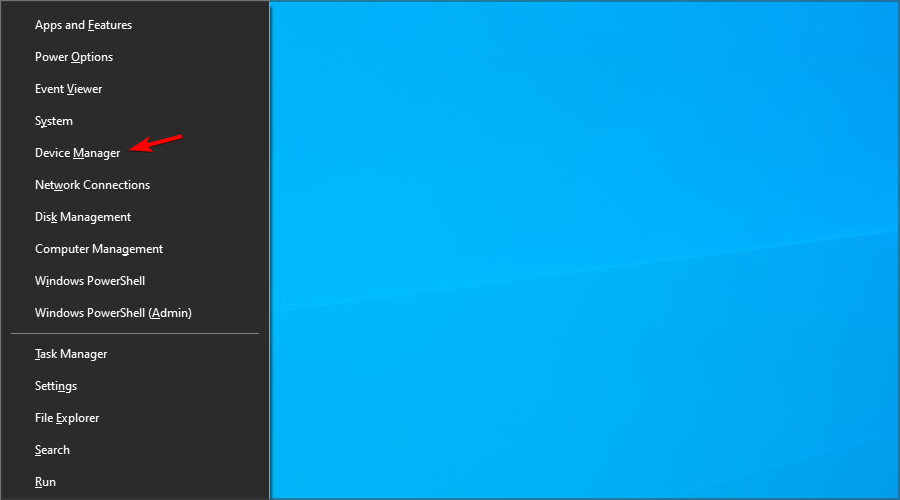
- Right-click the Start button and select Device Manager.
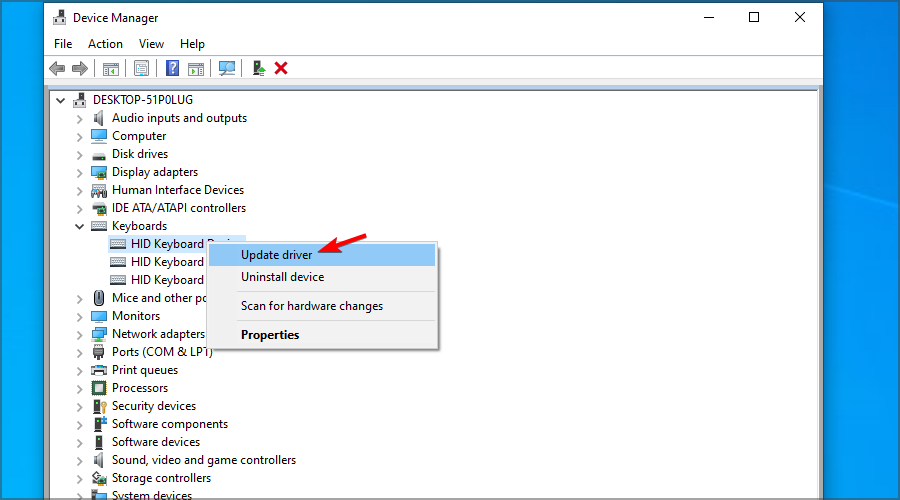
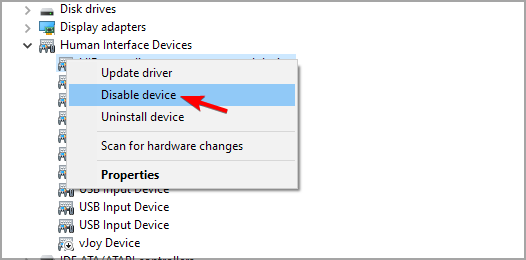
- Click on the device you want to update from the list. Right-click it and choose Update driver.
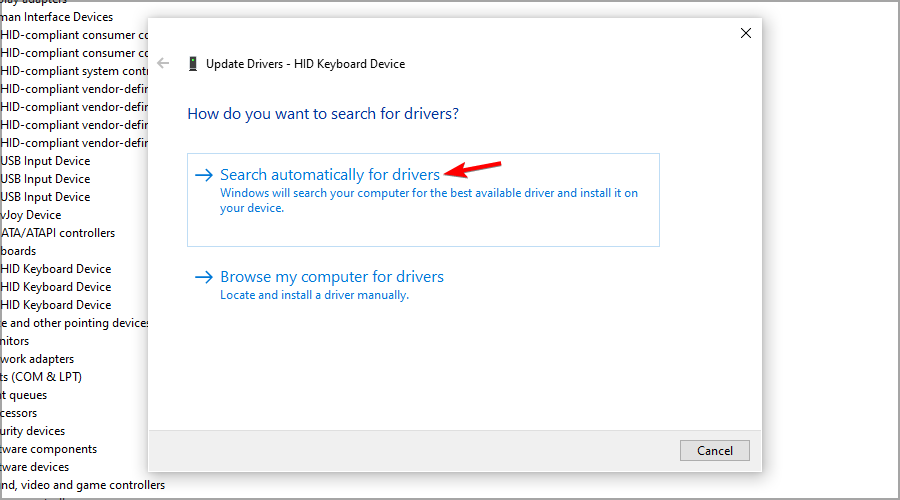
- Click Search automatically for updated driver software.
- Wait while Windows tries to update the driver.
- If Windows 10 doesn’t update it means you need to go to the manufacturer’s official site and download the new files from there.
One way to fix Windows 10 errors is to update the system manually. This simple method can solve some complex problems that affect other drivers.
If your Asus keyboard works in BIOS but not Windows, try updating your drivers.
2.2. Use an advanced tool
Incompatible, missing, or corrupted drivers are the common reason for keyboard and touchpad malfunction.
You can easily take care of this issue with the help of professional driver updating software. These tools will allow you to perform an entire scan of your system and update any driver in just a few minutes.
3. Disable the Intel Integrated Sensor Solutions driver
- Right-click Start button and choose Device Manager from the list.
- In Device Manager, expand the System Devices category.
- Locate and right-click on Intel Integrated Sensor Solutions device.
- Select the Disable device option. Click Yes when prompted to confirm the action.
- Once disabled, close Device Manager and restart the computer.
It is important to Disable the Intel Integrated Sensor Solutions device and not uninstall it.
Uninstalling the device will prompt Windows 10 to reinstall the device after the restart, so simply disable it.
After the restart, check if the keyboard and mouse not working in Windows 10 but works in BIOS issue is resolved.
This error seems to occur due to a malfunctioning sensor in the 2-in-1 touch-enabled HP devices.
Try installing the latest Windows and HP update to apply any fixes the manufacturer releases.
4. User System Restore Points for recovery
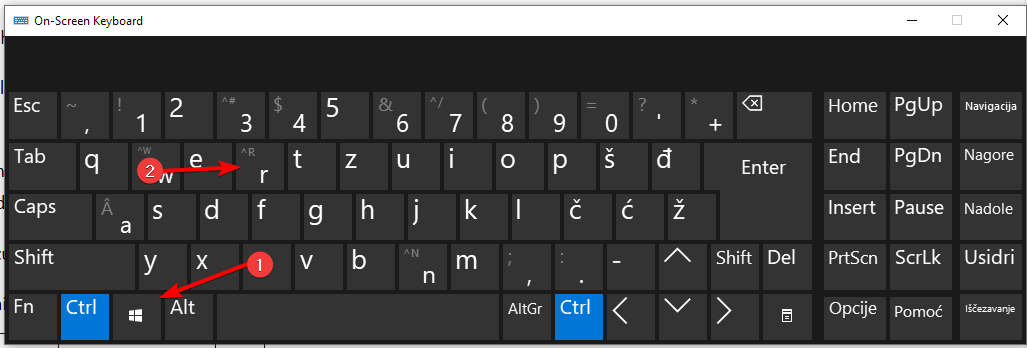
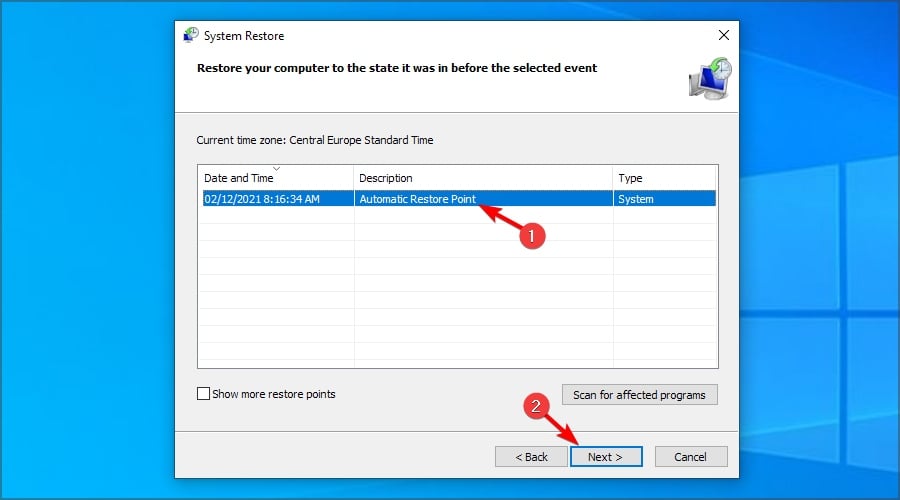
- On the virtual keyboard, press Windows key and then press R.
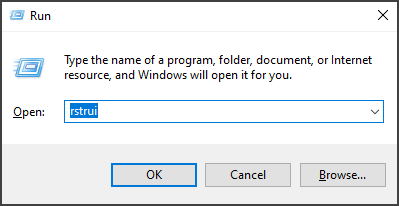
- Enter rstrui and click OK.
- Follow instructions on the screen.
- Choose the most recently created restore point and then click Next.
- Read the description and then click Finish.
Your PC will now restart after successfully restoring your PC to the selected Restore Point. After the restart check if you can use the keyboard and touchpad on your laptop.
5. Attempt repair with Windows installation media
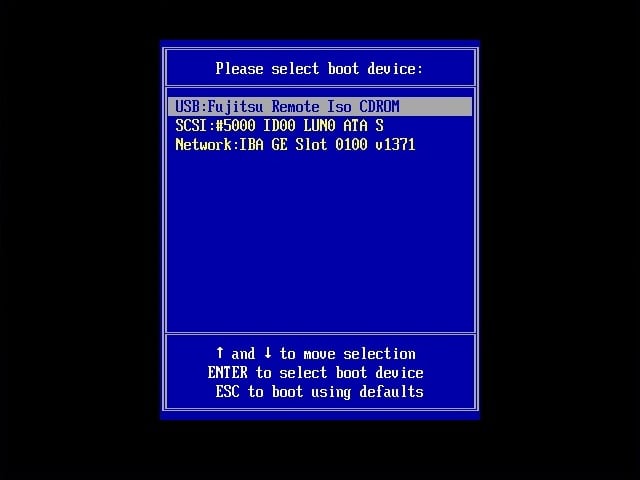
- Turn off your computer and connect your Windows 10 bootable drive to your PC. Here’s how to create a Windows 10 bootable drive, if you don’t have one.
- Boot from your Windows 10 drive. You might need to press F4 or any other key to enter the boot menu and then select your flash drive.
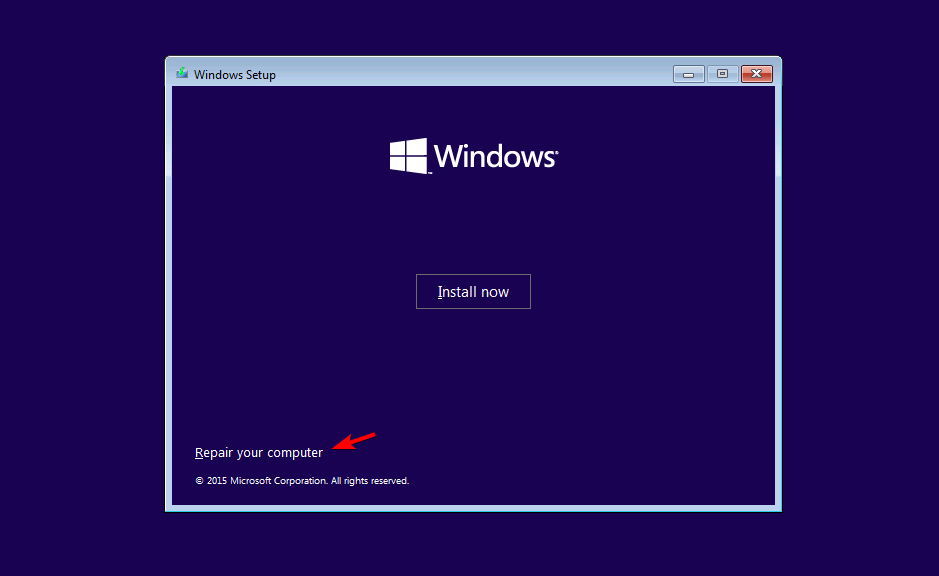
- Turn on the computer and wait for it to enter the Setup menu. Choose the Repair your computer option.
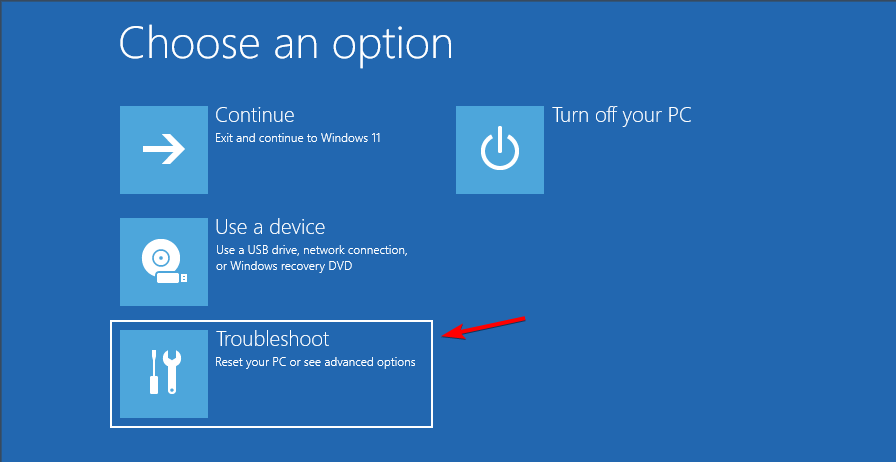
- Choose the Troubleshoot option.
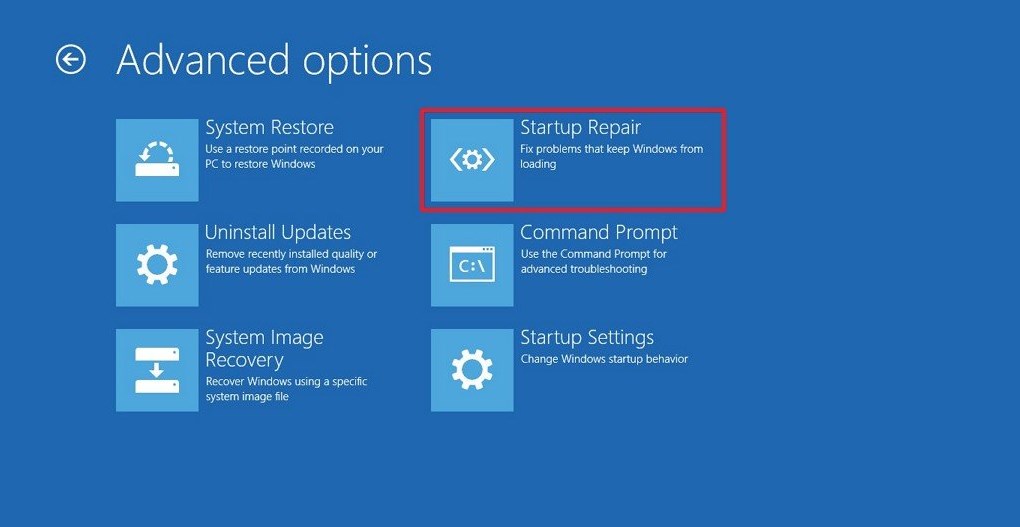
- Select Advanced options.
- Click the Startup Repair option and follow on-screen instructions. You may need to select your admin account and then verify the credentials to complete the process.
Wait for the repair tool to scan the system for issues and fix them, if any. After the restart, check if the keyboard and mouse work in BIOS, not the Windows 10 problem is resolved. If not, clean installing Windows may be your only option.
How do I enable the virtual keyboard on Windows?
On login screen
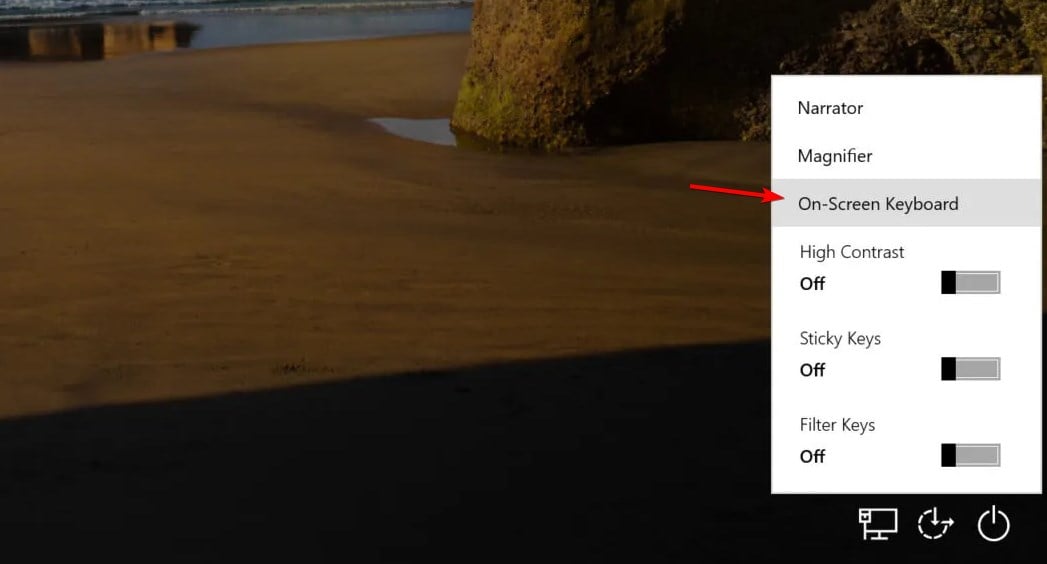
- On the login screen, click the Ease of Access button in the bottom right.
- Now choose On-screen keyboard.
- Enter your password.
In Windows
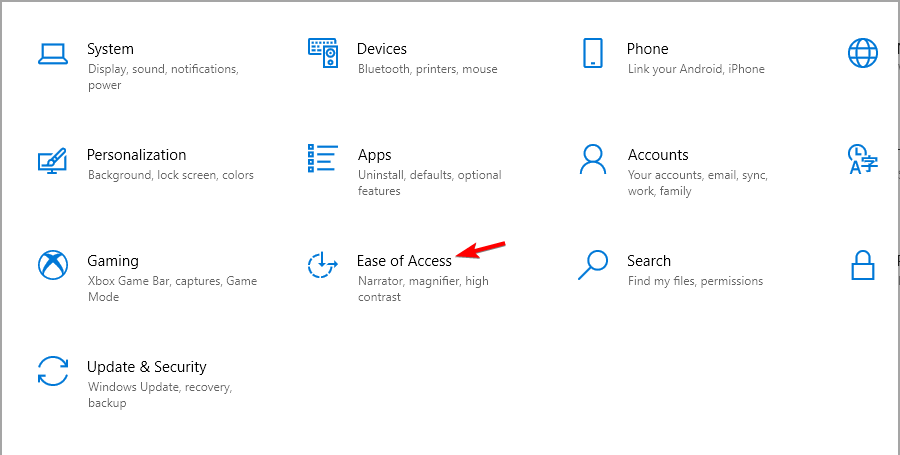
- Click the Start button and then choose Settings.
- Next, navigate to Ease of Access.
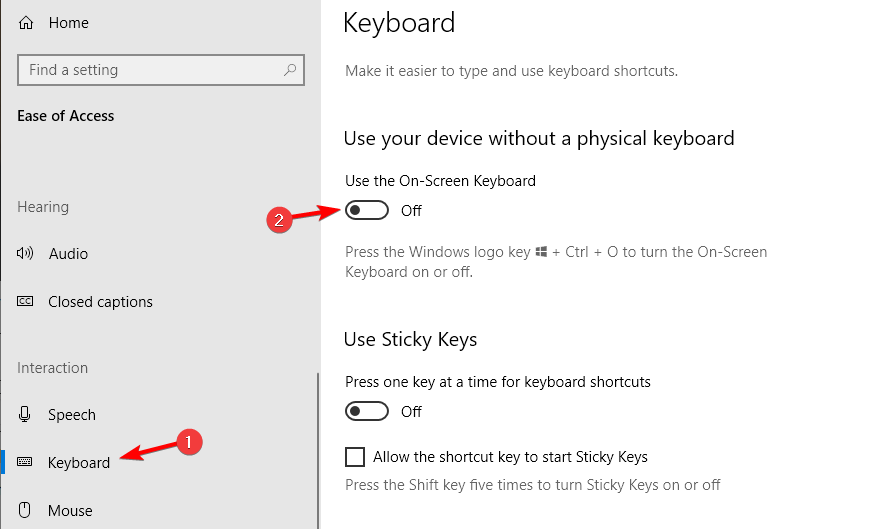
- In the left pane, choose Keyboard. In the right, enable Use the On-Screen Keyboard.
Once you enable virtual keyboard, use it to complete all solutions listed in this guide.
How can I clean install Windows 10?
Clean installing Windows will delete all the data in the installation drive. So, backup your valuable data before proceeding with a clean install. Follow our guide on how to clean install Windows 10 for more instructions.
The keyboard working in BIOS but not in Windows can occur due to a driver glitch or system file corruption, but hopefully, our solutions helped you fix the issue.
Did you find a different solution? Share it with us in the comments below.






User forum
3 messages