Mac is stuck while emptying Trash? Here are our fixes
3 min. read
Updated on
Read our disclosure page to find out how can you help Windows Report sustain the editorial team. Read more
Key notes
- Having your MacBook getting stuck while emptying the trash can be really annoying, but this article could help.
- To fix this problem, you should try restarting Finder and try to empty the Trash again or use the Option key. Scroll down for more steps.
- To never have to worry about not being able to fix Mac problems, check out our Mac Fix Hub.
- Don't hesitate to bookmark our practical Mac section for more up-to-date information on this subject.

Removing unnecessary files is important, but many MacBook users reported that their MacBook is stuck while emptying the Trash. This can be a problem, especially if you need to permanently remove some files, but in today’s article, we’ll show you how to fix that.
What to do if MacBook got stuck while emptying the Trash?
1. Restart Finder and try to empty the Trash again
One way to fix this problem is to simply restart Finder and empty the Trash again. To do that, follow these steps:
- Press Option + Command + Esc to open Force Quit window.
- Select Finder and choose Force Quit.
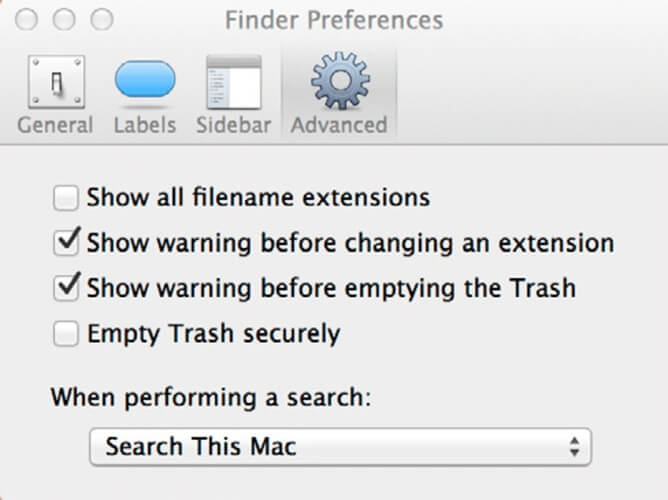
- Now in Finder go to Preferences > Advanced.
- Uncheck Empty Trash securely option.
After doing that, try to empty the Trash again.
2. Use the Command key when emptying the Trash
According to users, if MacBook is stuck while emptying the Trash, you can fix that simply by holding the Command key while emptying the Trash. Some users claim that you just need to press the Command key if the process stops and do that every time the process gets stuck.
3. Use the Option key
According to users, you can permanently delete files without moving them to the Trash. To do that, follow these steps:
- Locate the files you want to remove.
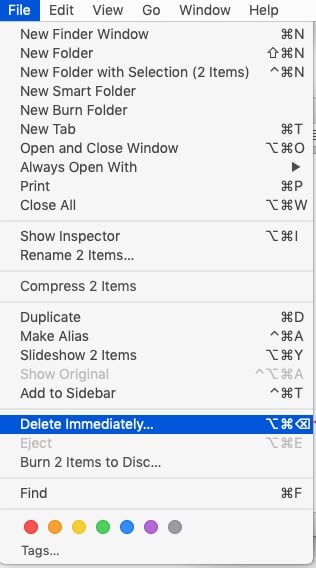
- Select the files, and got to the File menu.
- Press and hold the Option key and select Delete Immediately option.
Keep in mind that this method also works with files that are already in Trash, so be sure to try it out.
4. Use the Terminal
If your MacBook gets struck while emptying the Trash, you can try to remove it using the Terminal. To do that, follow these steps:
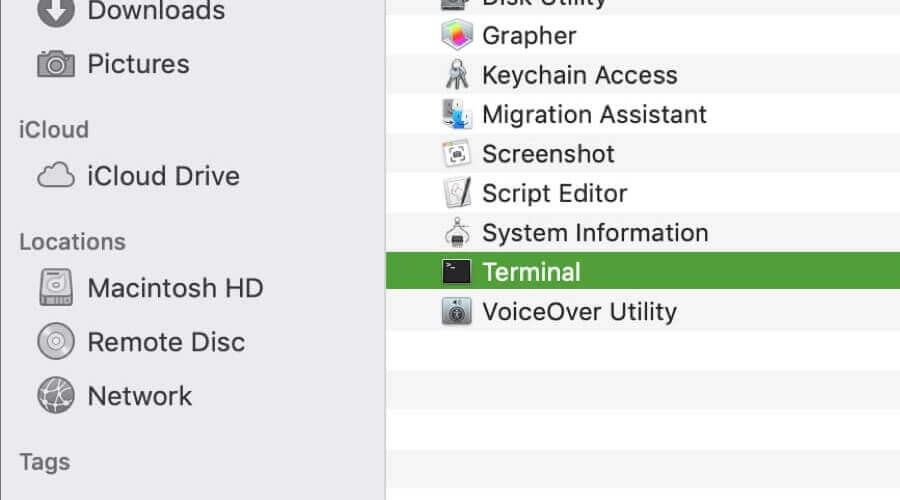
- Go to Applications > Utilities and double-click on Terminal.
- Once the Terminal starts, run the following command:
- sudo rm -rf ~/.Trash/*
After doing that, your Trash should be completely removed. Bear in mind that the Terminal is a powerful tool, so be sure to use it carefully and always run the correct commands.
Some users claim that this method doesn’t work on all versions of macOS, and if that’s the case with you, try this workaround:
- Open Terminal and type sudo rm -R . Do not run the command yet. Also, be sure to leave space after R in the command line.
- Now open Trash, select all files and drag and drop them to the Terminal
- The command will now change to include all the files you added. Press Enter to run the command.
- If required, enter your administrator password.
These are some quick and easy solutions you can use if your MacBook gets stuck while trying to empty the Trash.
FAQ: Learn more about the Trash app on Macbook
- Where is the trash can on Mac?
The Trash can application can be found on the right side of the dock, or by opening the Go To window and typing trash.
- How do I uninstall an app on my Macbook Pro?
You should open Finder, search for the application you want to remove, and either drag it to the Trash or press the Command + Delete keys after selecting it.
- How do I right-click on a Macbook Pro?
To perform a right-click on MacBook Pro, you need to press the Control key while tapping the mouse button or trackpad.
[wl_navigator]




User forum
0 messages