Fix: Microsoft Compatibility Telemetry Uses too Much CPU
Check the best fixes on the web!
4 min. read
Updated on
Read our disclosure page to find out how can you help Windows Report sustain the editorial team Read more
Key notes
- Many users reported that a Microsoft Compatibility Telemetry process consumes a high CPU in the Task Manager.
- The process comes built-in, though not critical, and there are a few ways to fix things.
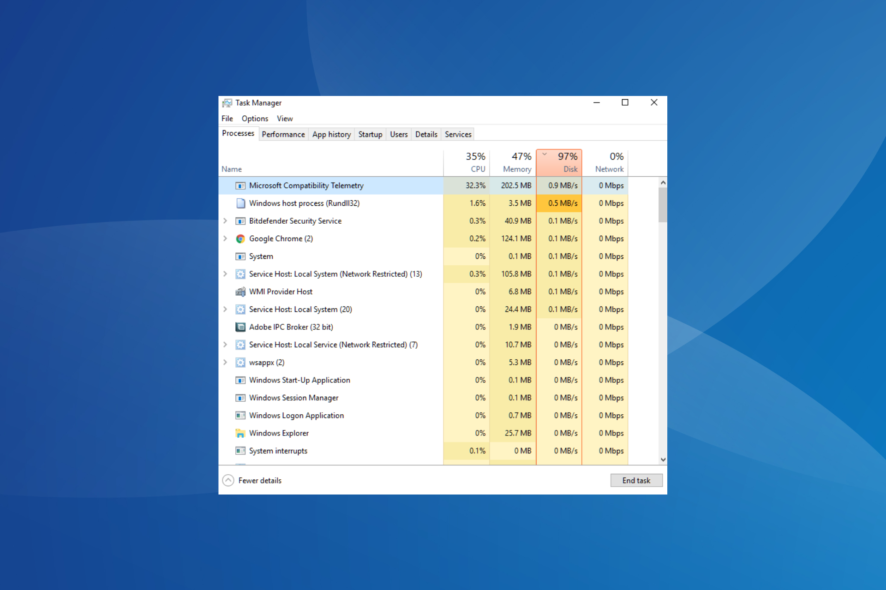
Microsoft Compatibility Telemetry, a service meant to share the PC’s performance feedback with Microsoft, is often found to be using high CPU in Windows.
How do I fix Microsoft Compatibility Telemetry high CPU usage?
1. Disable from Task Scheduler
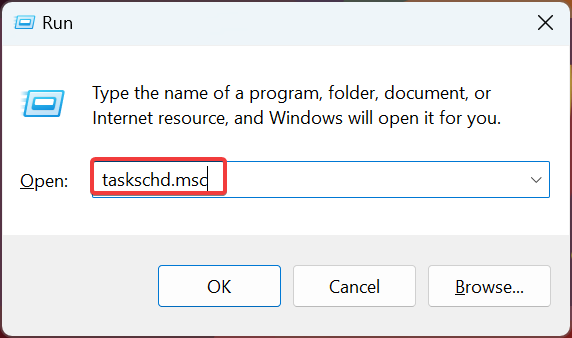
- Press Windows + R to open Run, type taskschd.msc, and then hit Enter.
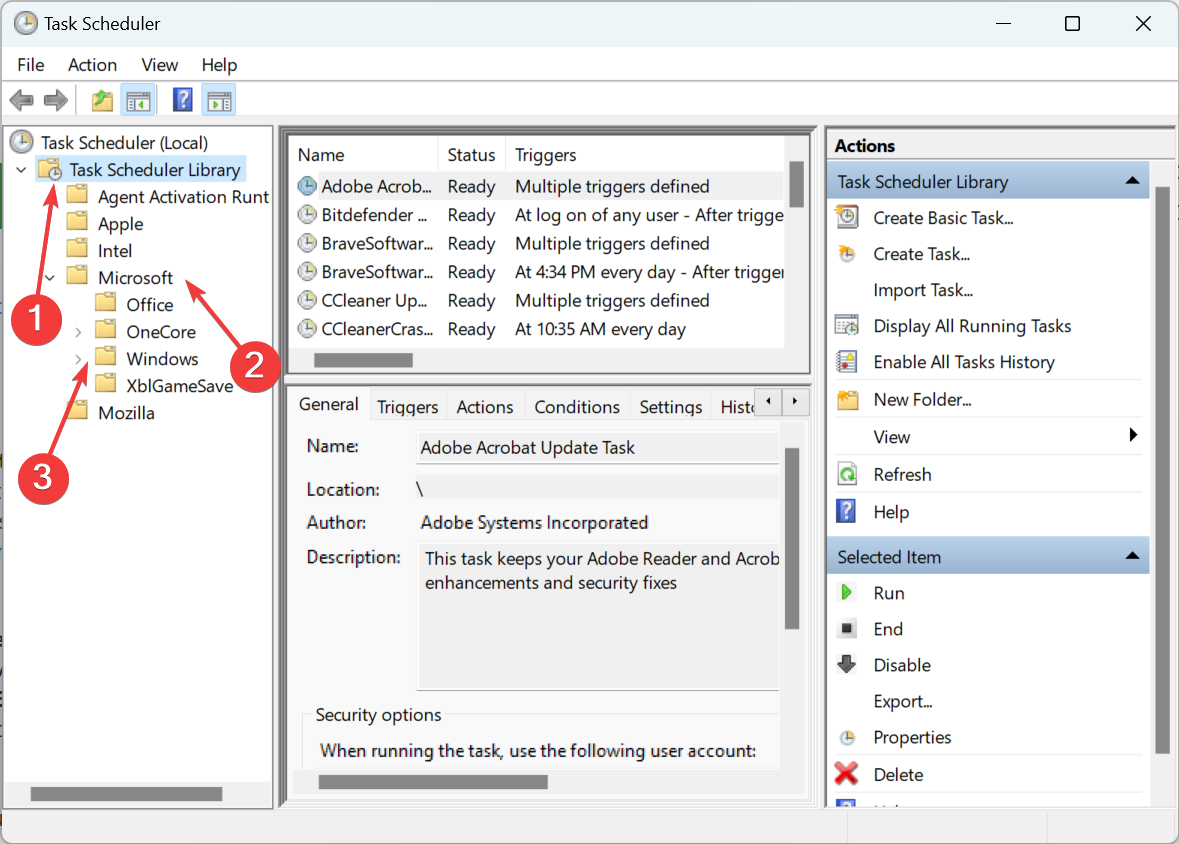
- Now, expand Task Scheduler Library, choose Microsoft, and double-click on Windows.
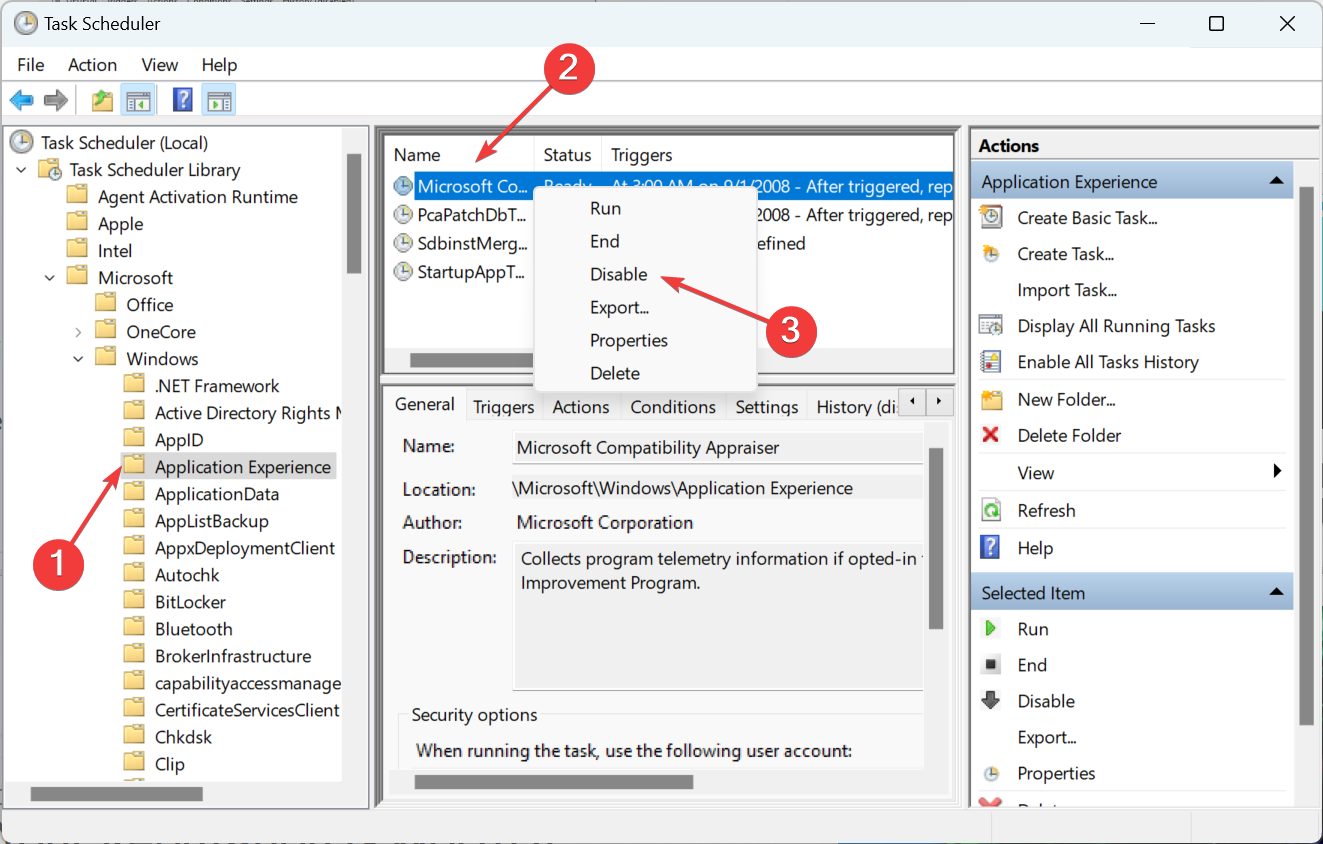
- Select Application Experience, right-click on Microsoft Compatibility Appraiser and choose Disable from the context menu.
That’s it! Once done, restart the computer for the changes to effect, and the Microsoft Compatibility Telemetry high CPU in Windows 11 should be fixed.
Remember that the task may be recreated after a while, so you must repeat the same steps. A more straightforward option would be to make more substantial changes, and Registry Editor helps do just that.
2. Edit the registry
- Press Windows + R to open the Run command, type regedit in the text field, and click OK.
- Click Yes in the UAC prompt.
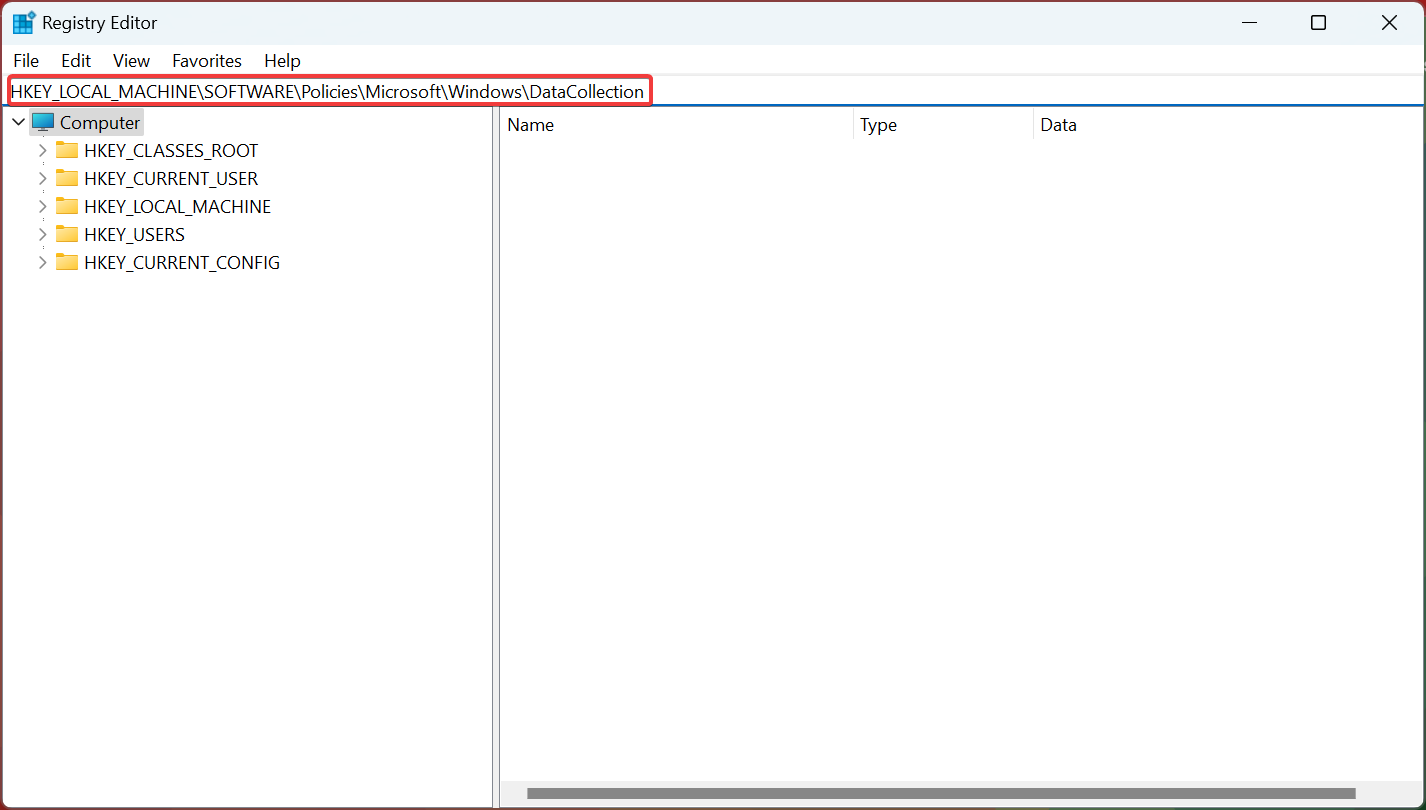
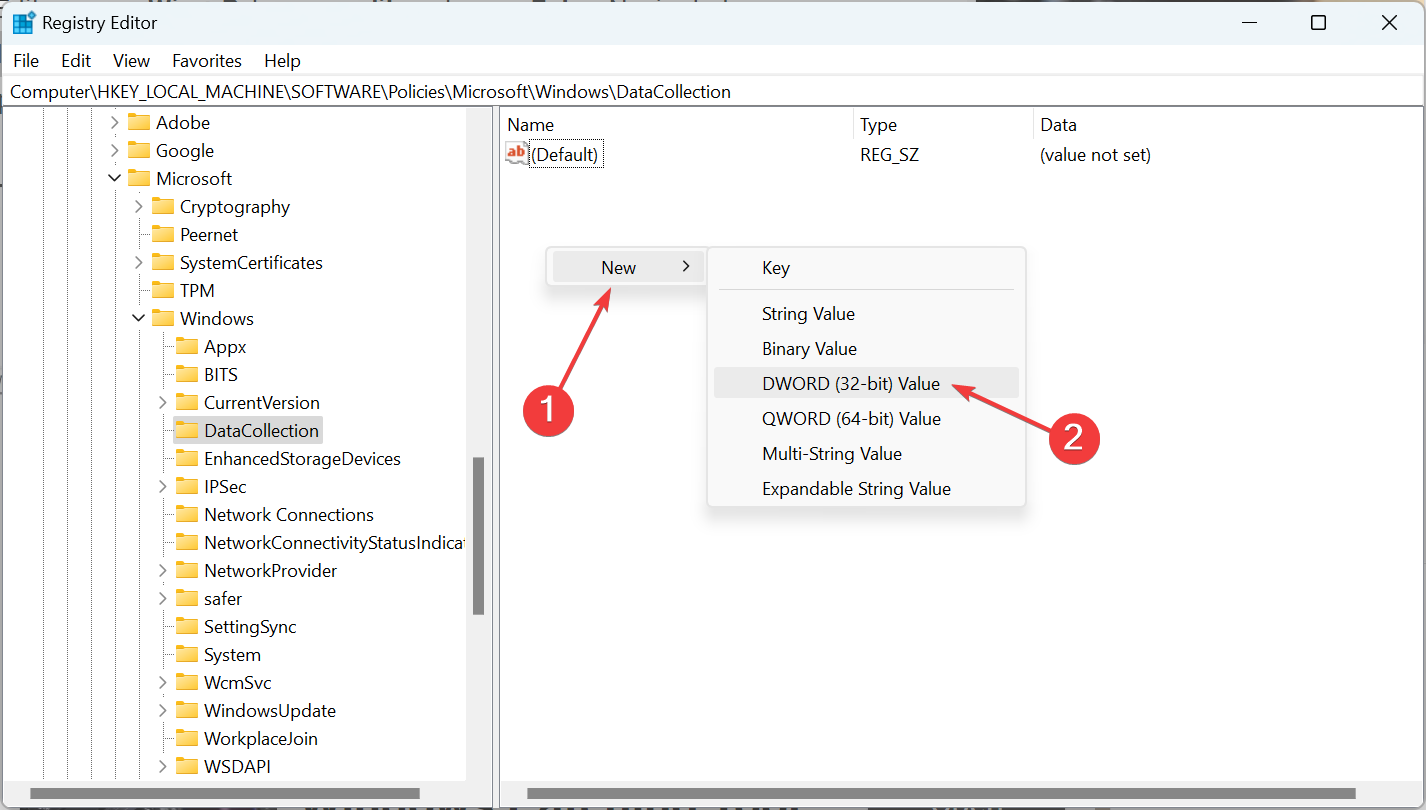
- Paste the following path in the address bar and hit Enter:
HKEY_LOCAL_MACHINE\SOFTWARE\Policies\Microsoft\Windows\DataCollection - Right-click on the empty portion, hover the cursor over New, and then choose DWORD (32-bit) Value, and name it AllowTelemetry.
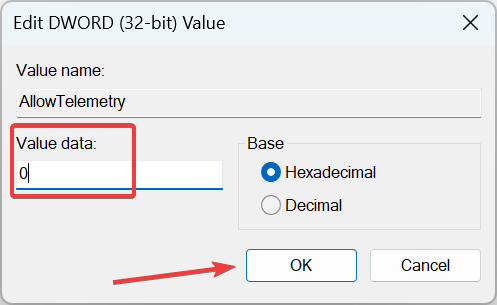
- Once done, double-click on the entry, enter 0 under Value data, and click OK to save the changes.
- Finally, restart the computer for the changes to come into effect.
After making the changes, the task shouldn’t be created again, and the high CPU usage issue would be resolved for good. However, in case it persists, it heads to the next solution.
3. Modify settings
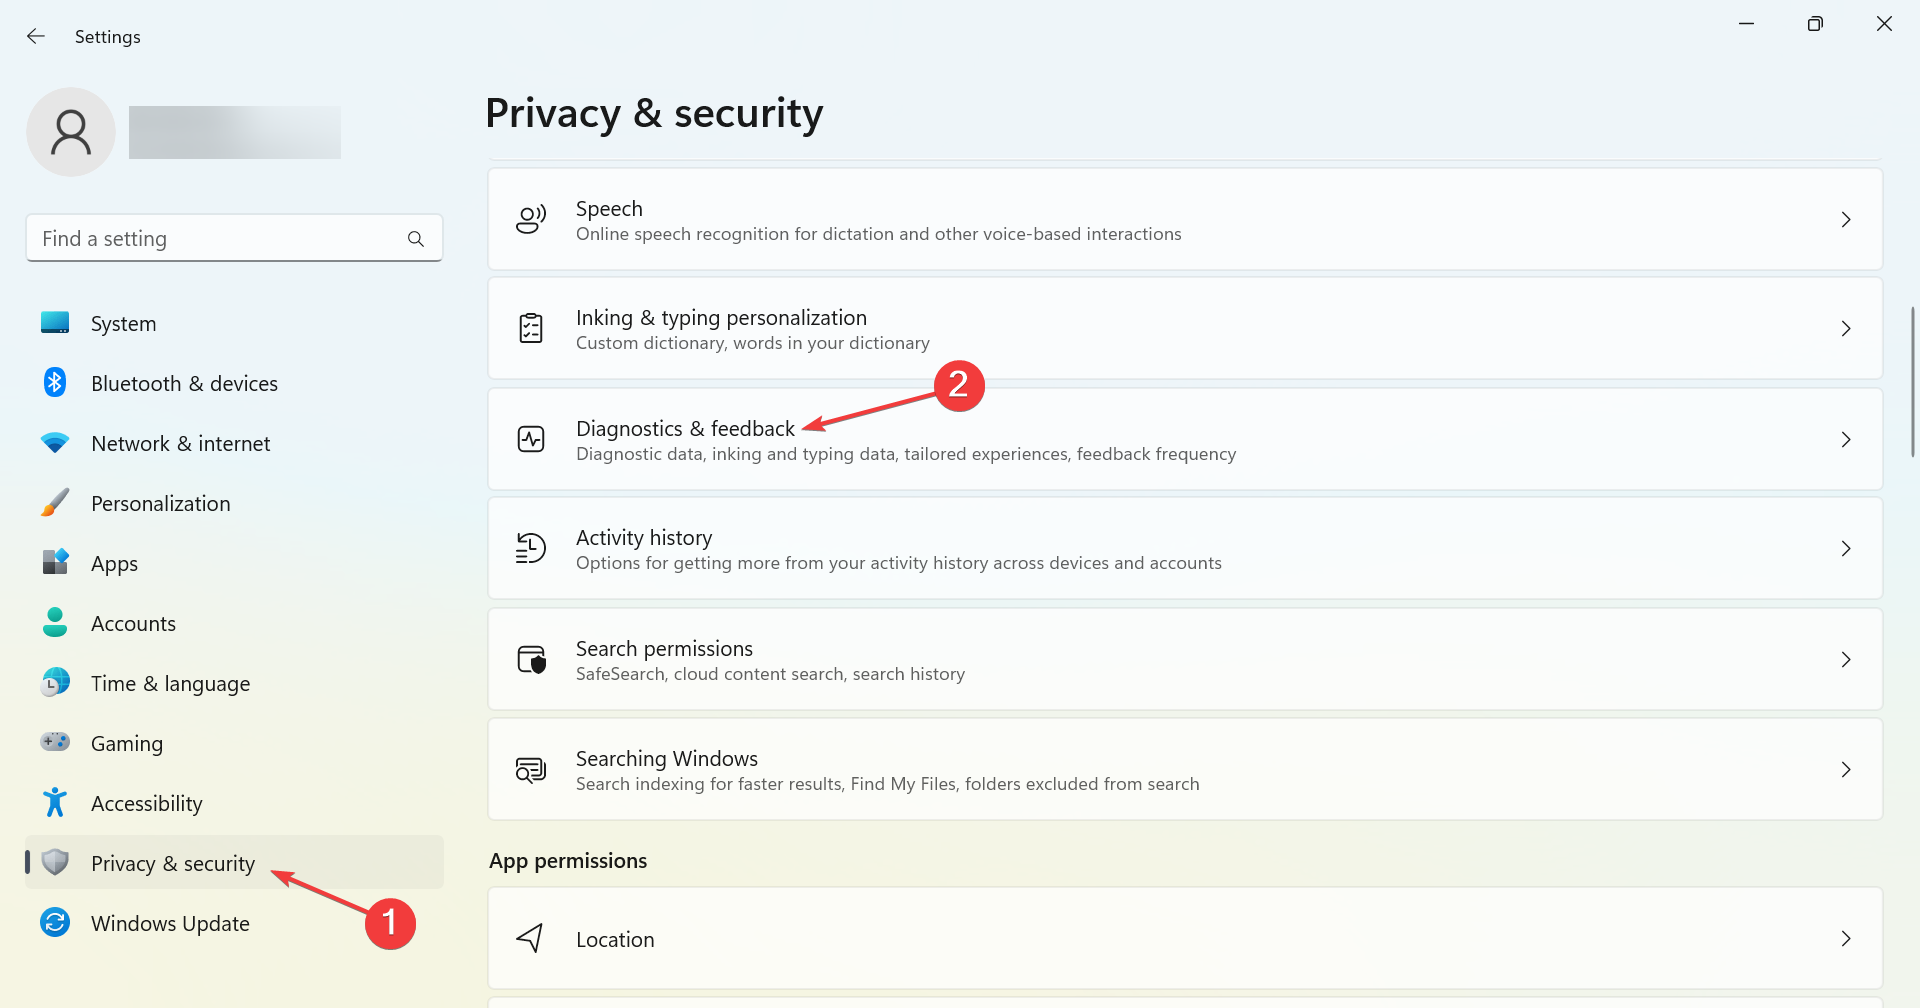
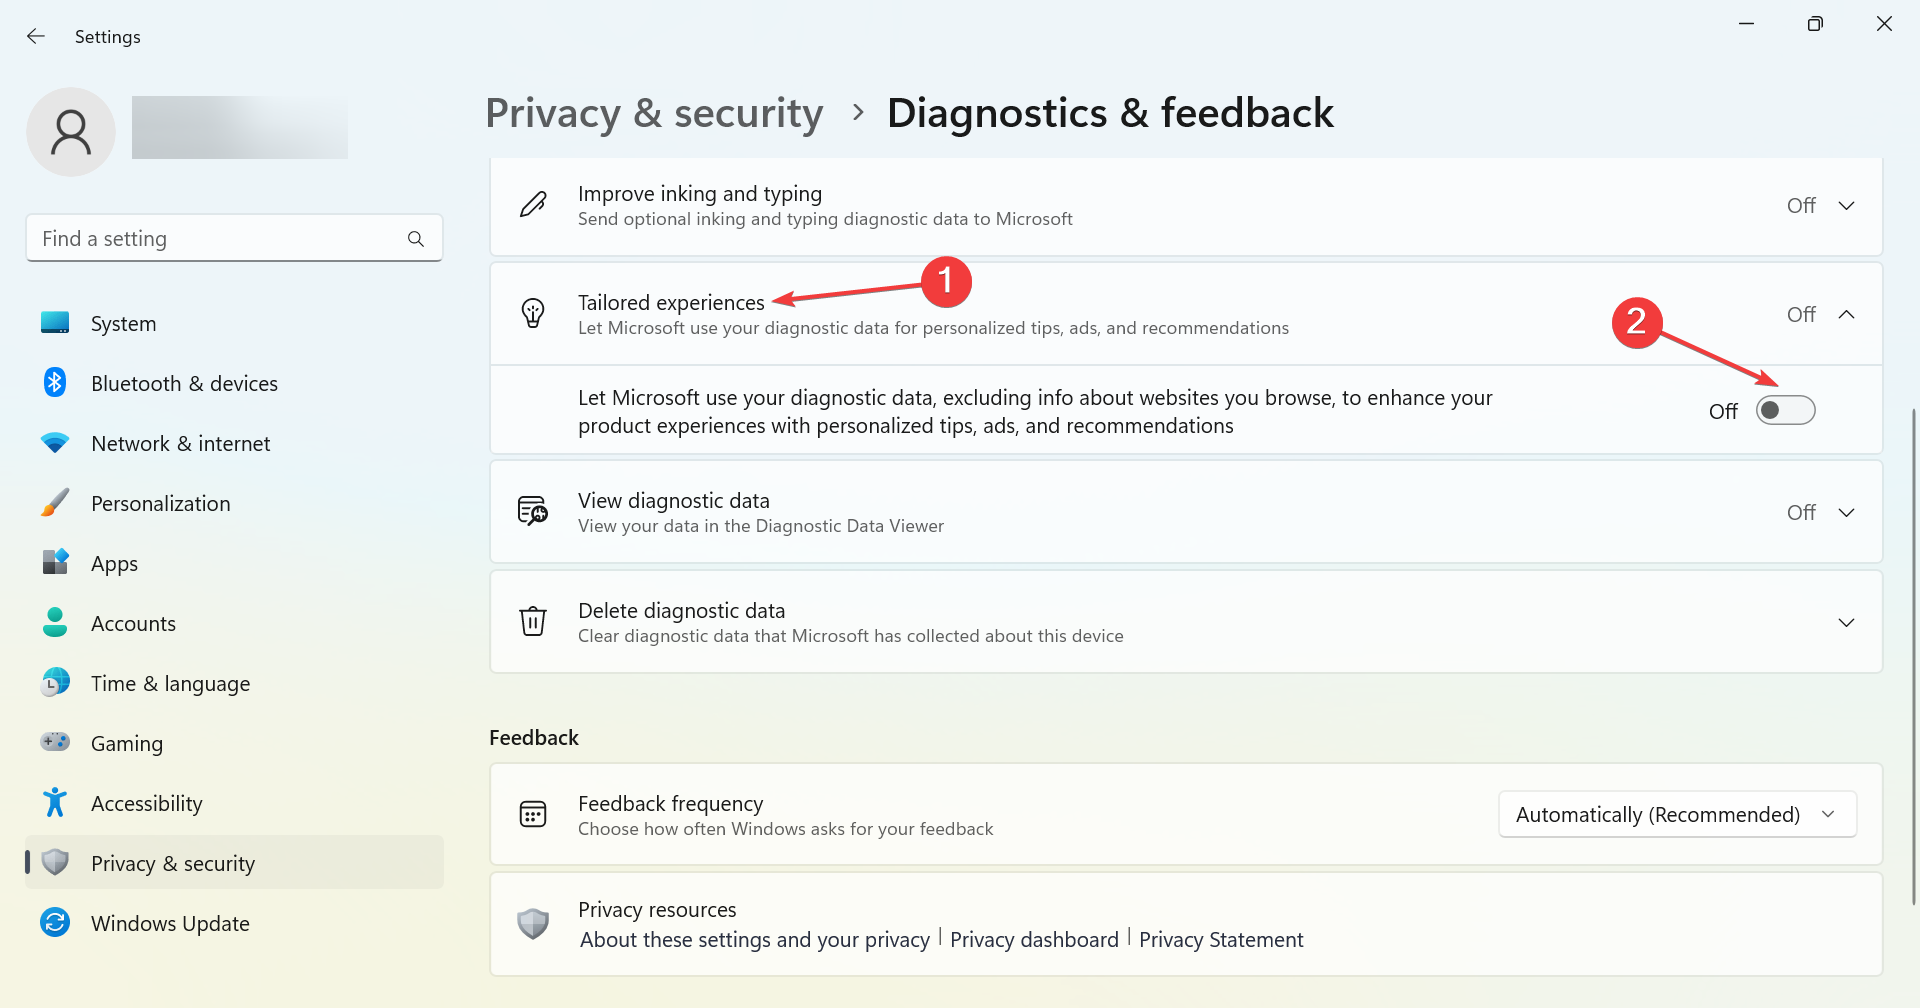
- Press Windows + I to open Settings, choose Privacy & Security from the navigation pane, and then click on Diagnostics & feedback.
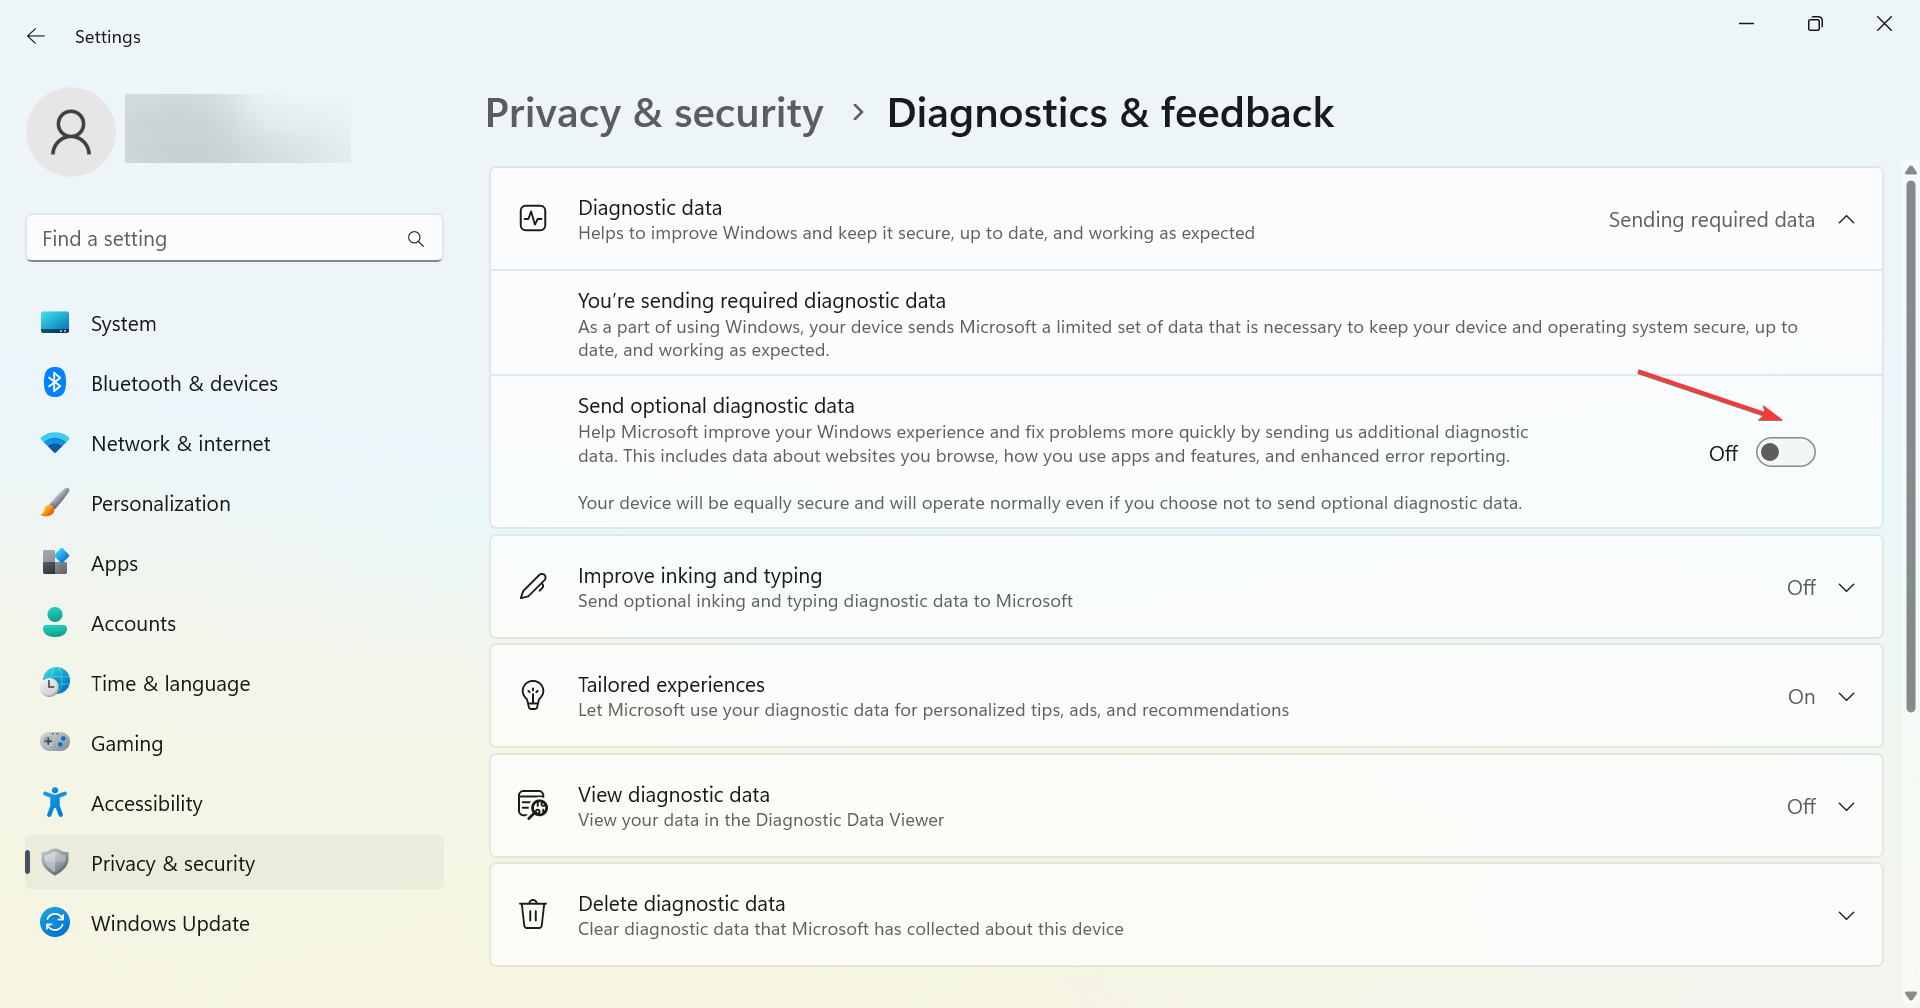
- Now, disable the toggle for Send optional diagnostic data.
- Next, expand Tailored experiences and then disable the toggle under it.
- Once done, verify whether the problem is resolved.
If the Microsoft Compatibility Telemetry continues to use a high CPU level, head to the following method.
4. Delete the file
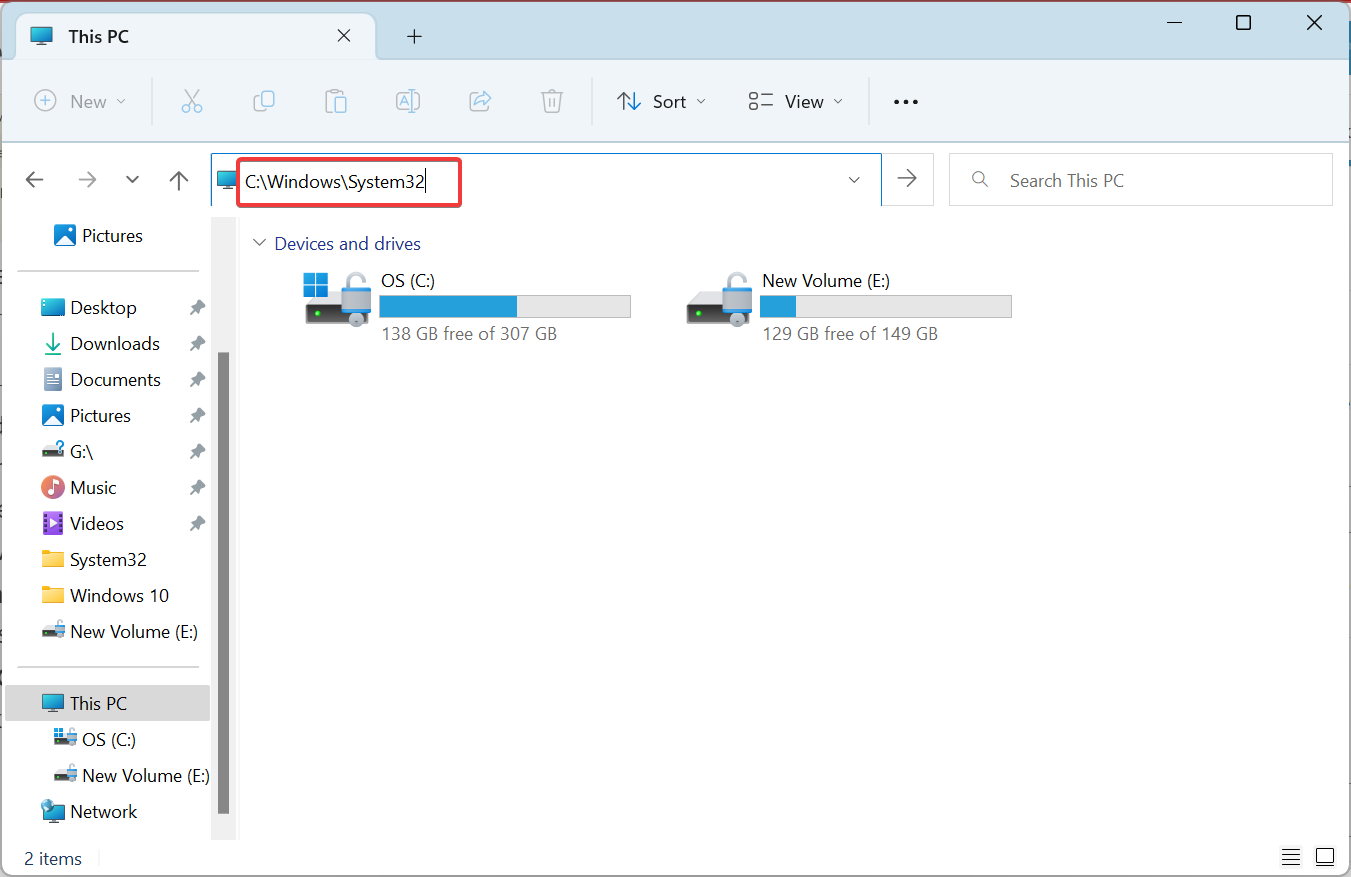
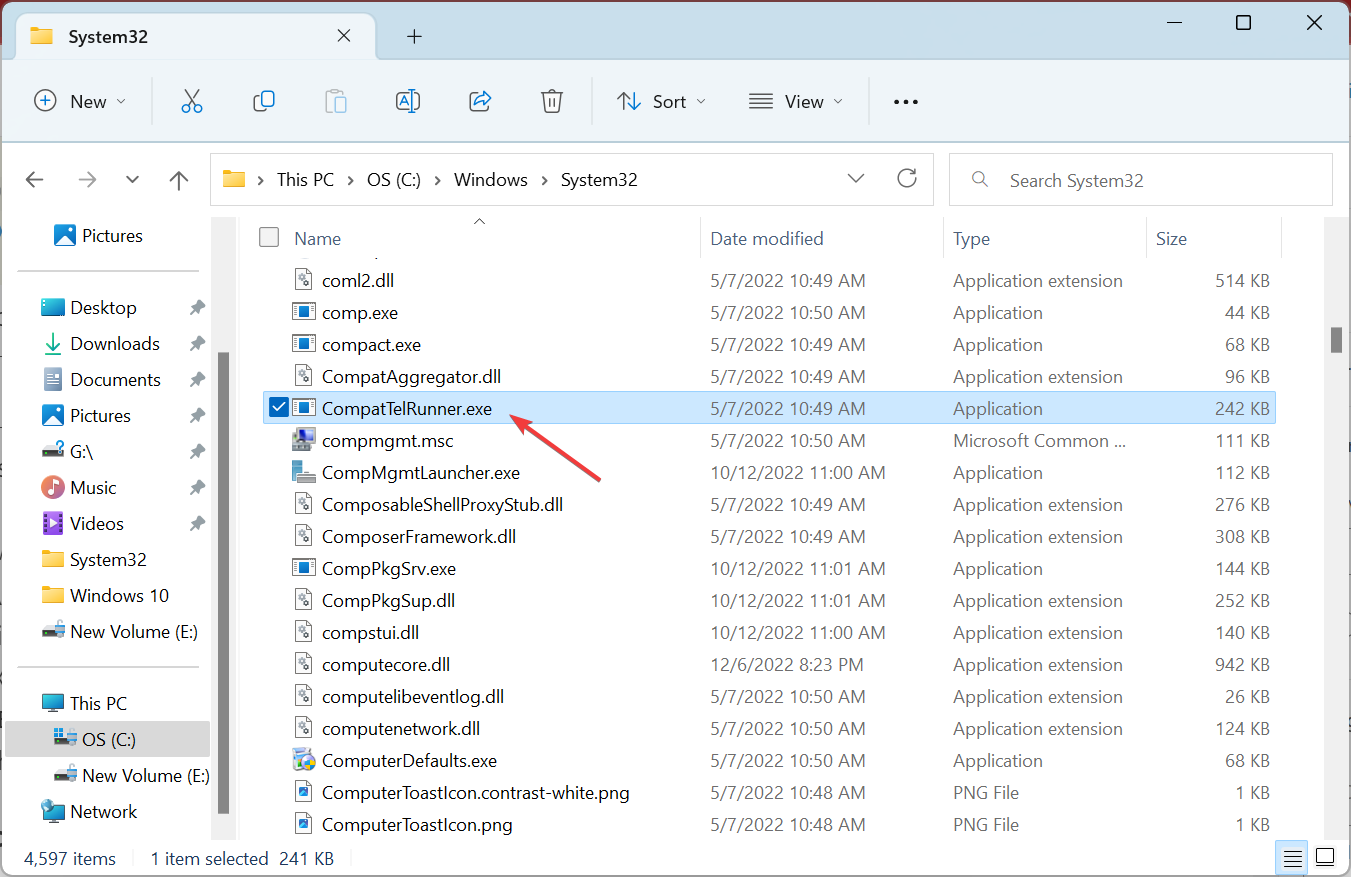
- Press Windows + E to open File Explorer, paste the following path in the address bar, and then hit Enter:
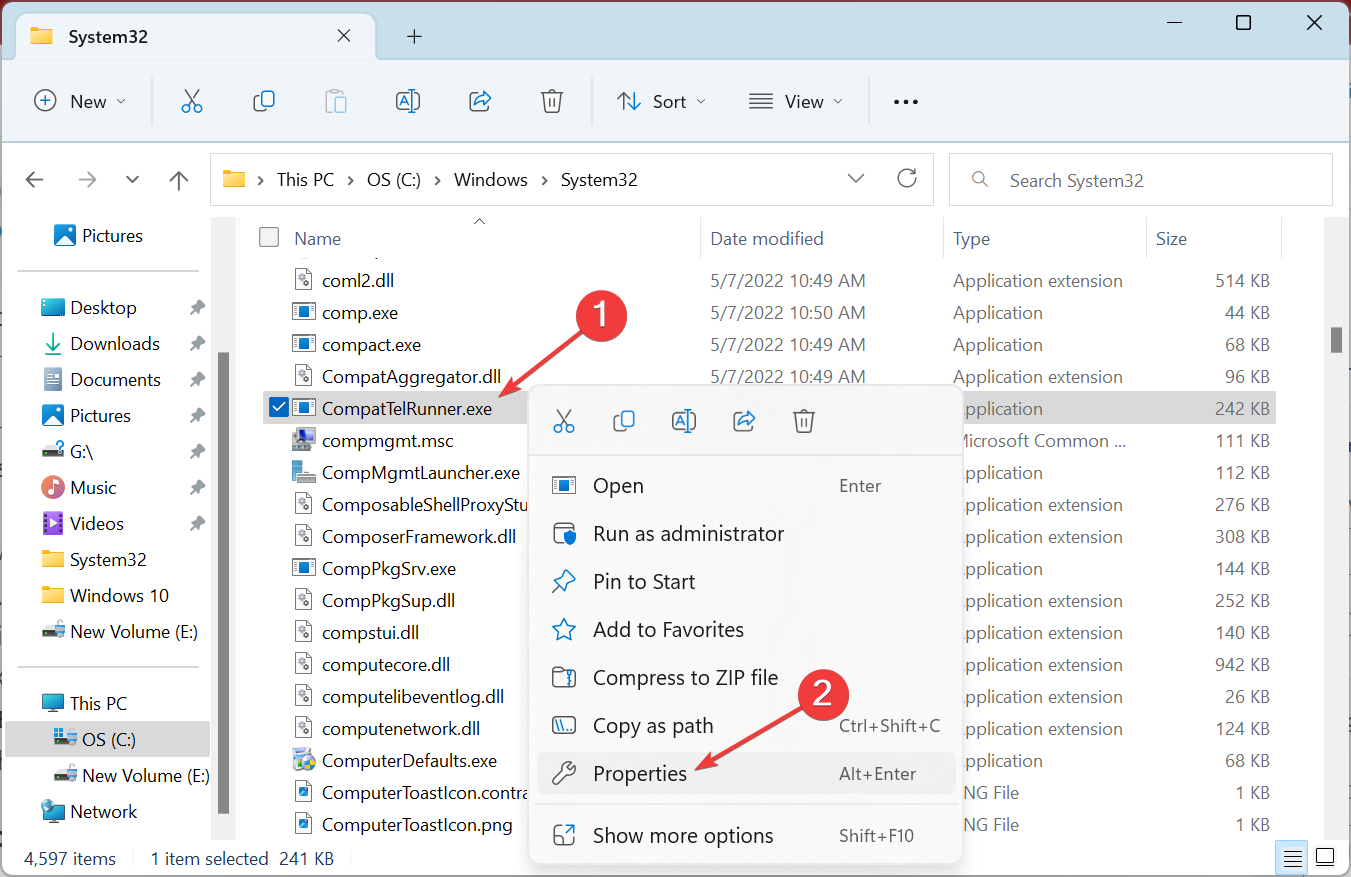
C:\Windows\System32 - Right-click on the CompatTelRunner.exe file and select Properties.
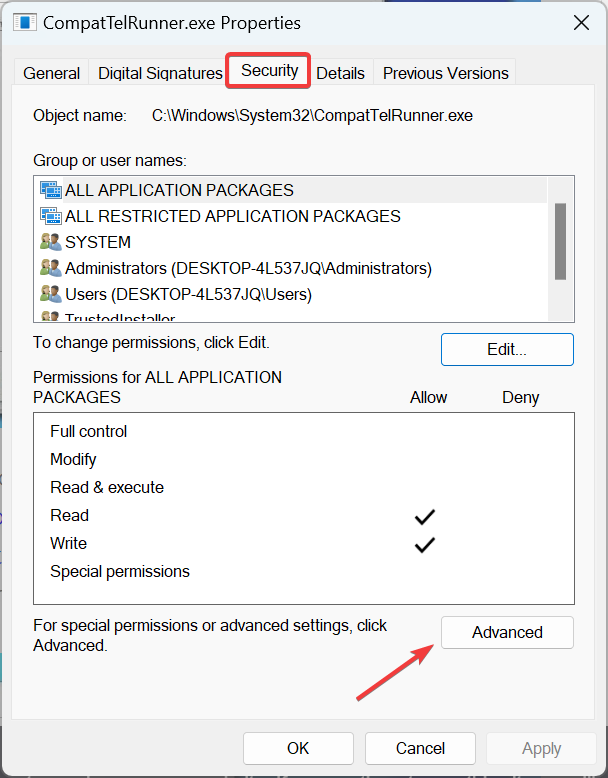
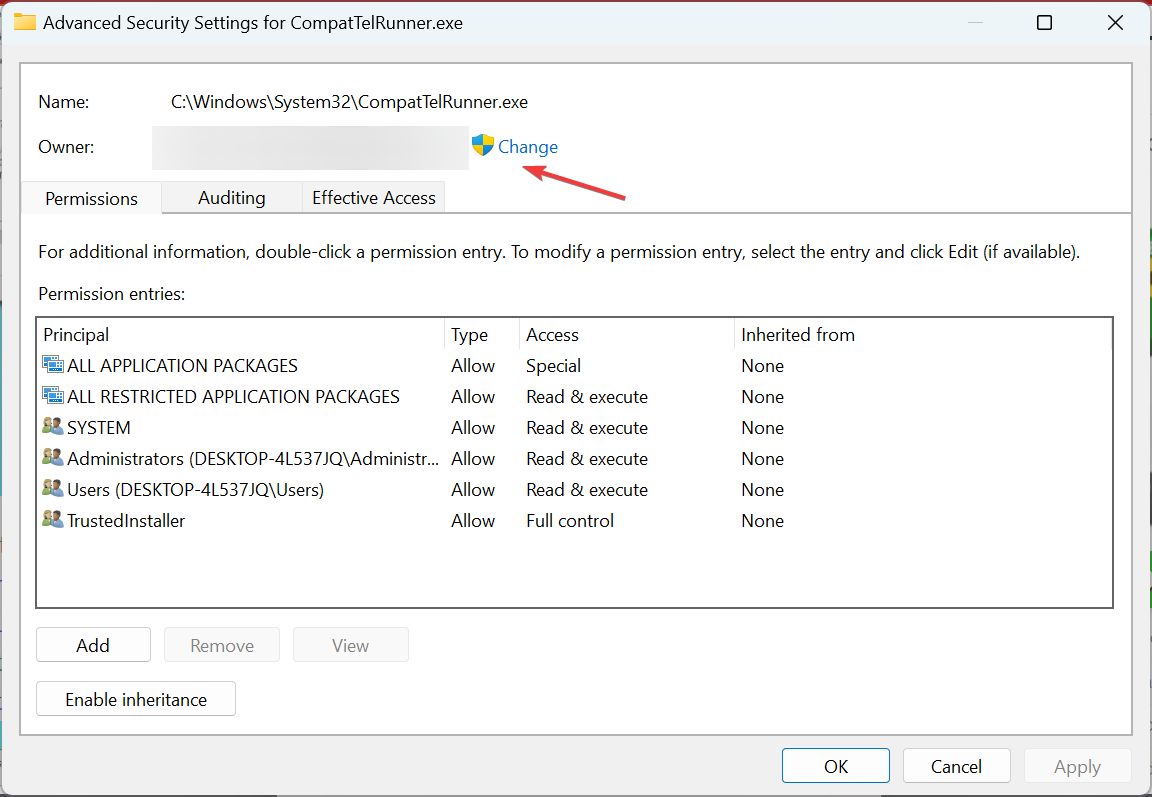
- Navigate to the Security tab, and click Advanced.
- Now, click on Change.
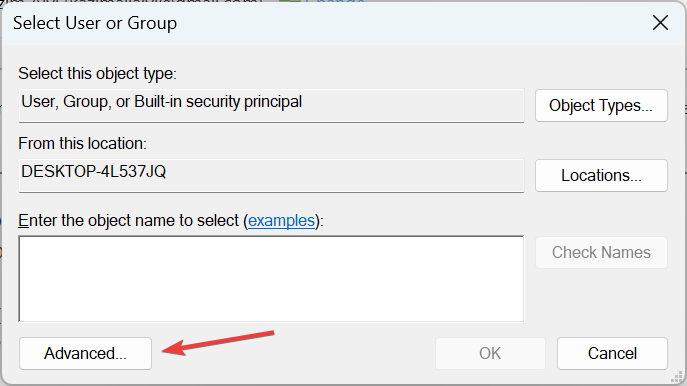
- Click on Advanced.
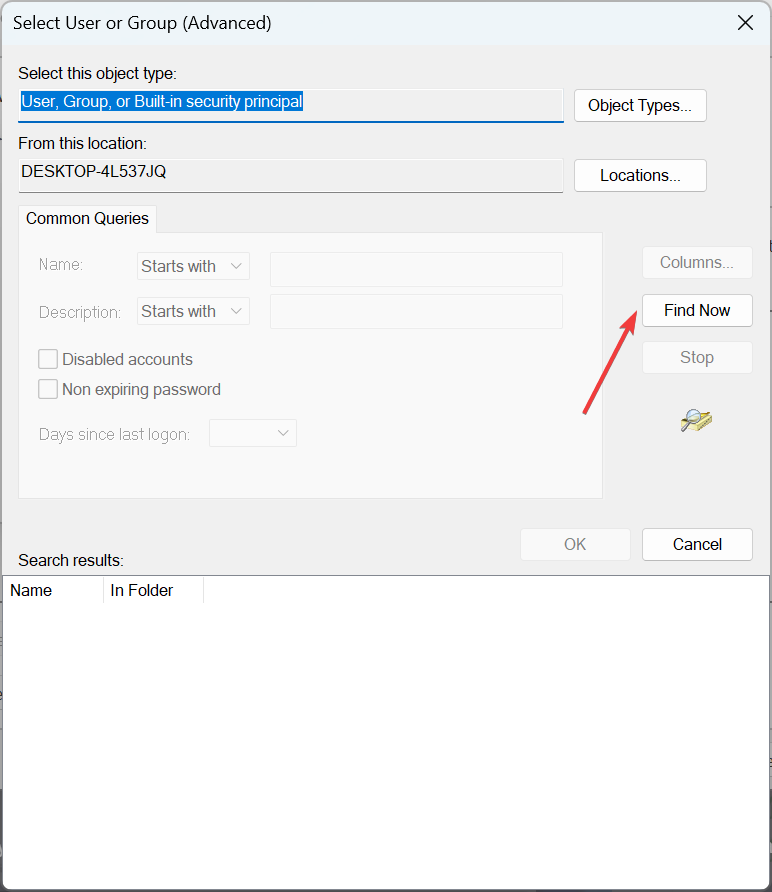
- Choose the Find now button.
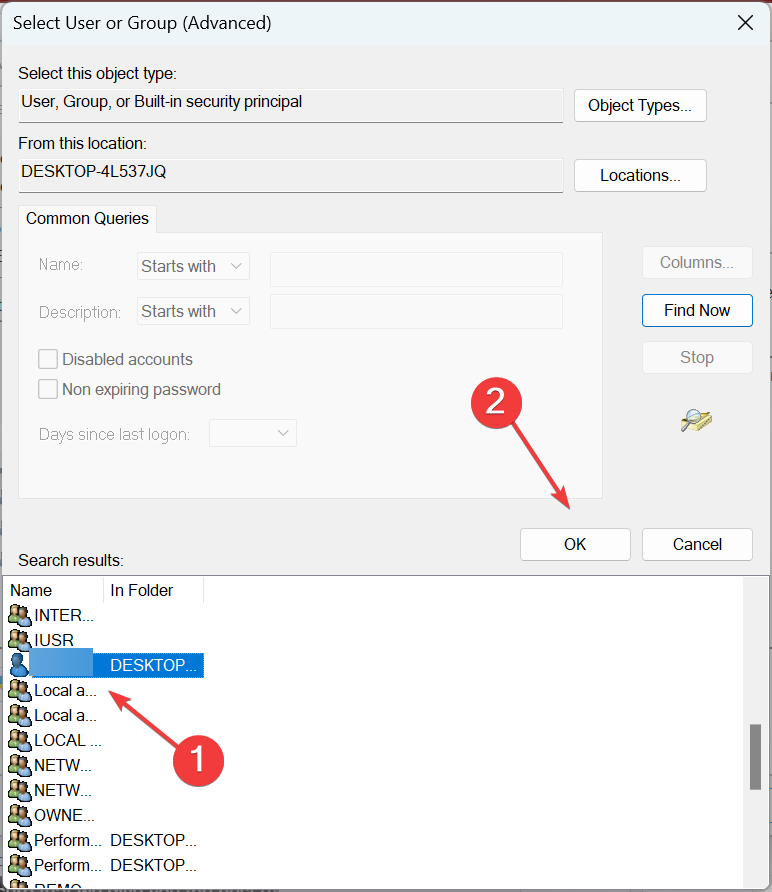
- Select the current user account from the list, and click on OK.
- Click OK on all subsequent windows to save the changes.
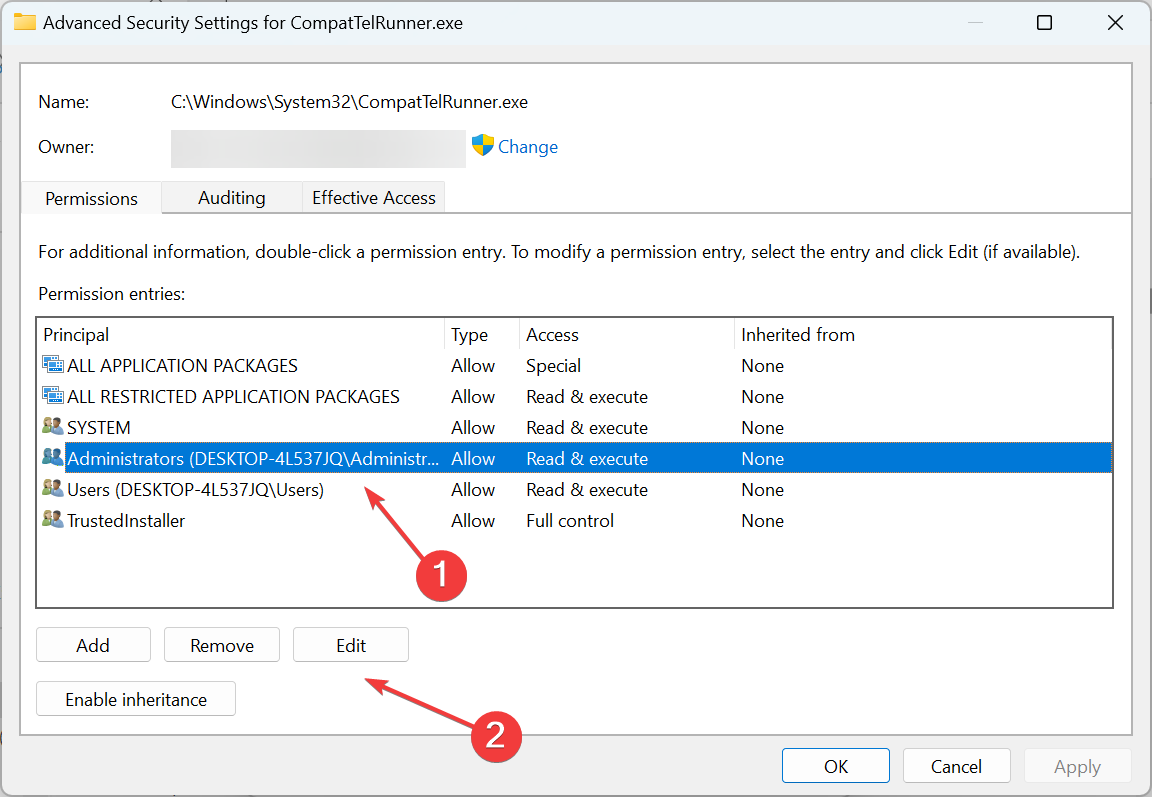
- Again, head to Advanced security properties for CompatTelRunner, choose the administrator account from the list and click Edit.
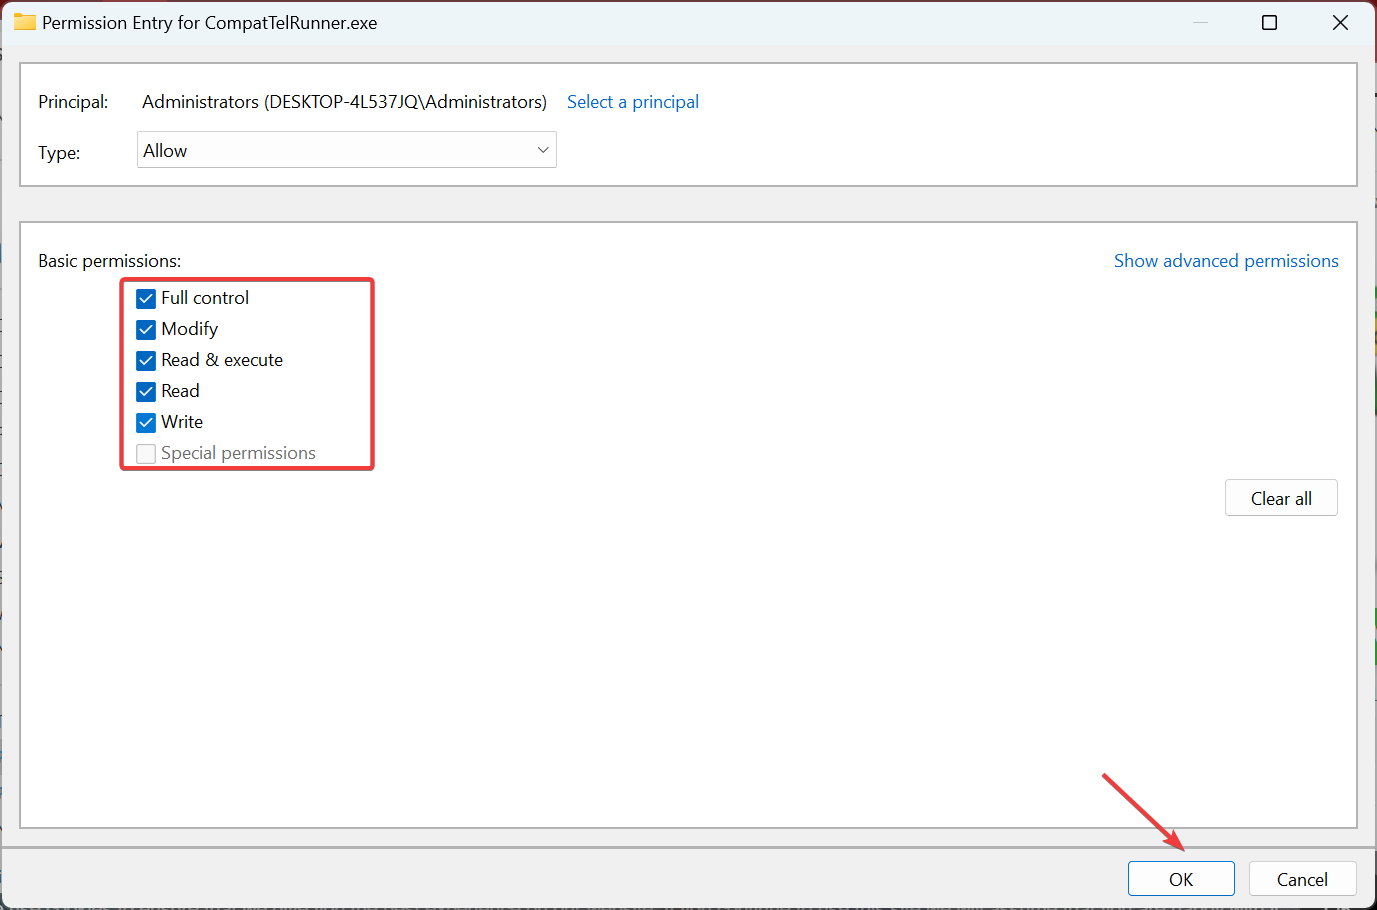
- Make sure all the available checkboxes are ticked and click OK to save the changes.
- Finally, click OK on all the previously opened Windows.
- Once done, select the file, and hit the Del key.
- After CompatTelRunner.exe is deleted, restart the computer for the changes to effect.
That’s it! If Microsoft Compatibility Telemetry used high CPU no matter what, deleting the file should do the trick.
Also, if you ever want to get the file back, locate it on another PC running the same iteration, edition, and version of the OS, and transfer the file.
5. Check for other issues
If nothing worked, it could be another issue with the PC causing Microsoft Compatibility Telemetry high CPU usage in Windows 11. So first, we recommend you check for corrupt system files—many fixed things by running the DISM tool.
As a last resort, you can always factory reset Windows 11 or reinstall the OS, the latter being a far more effective troubleshooting technique, fixing many issues with the PC.
Once you have resolved the Microsoft Compatibility Telemetry high CPU usage problem, find out how to make Windows 11 faster than ever. If you have any queries or know of a solution not listed here, drop a comment below.

