Microsoft Edge Not Connecting to Internet: Fix & Make It Work
Switching to a Private network should do the trick
Key notes
- Microsoft Edge is the built-in browser that comes with Windows 10, and some users reported that is not working at all for them.
- To fix this issue, make sure that DNS Client is running, and that Edge isn’t blocked by your antivirus or firewall.
- Also, find out if you can reinstall Microsoft Edge.

Microsoft Edge is just one of many new features of Windows 10, and just like it’s the case with other notable features, users are satisfied with it. But some users reported that Microsoft Edge is not working.
This could be due to a range of issues, including both problems with the browser and your computer itself.
So we prepared a list of the solutions that worked for most users to help everyone who faces this problem.
But first, here’s the list of all the potential Edge problems you can resolve with the solutions we presented:
- Microsoft Edge won’t open
- Microsoft Edge crashes
- Microsoft Edge runs slow
- Microsoft Edge not working after update
- Microsoft Edge keeps freezing
- Microsoft Edge crashes after opening a tab
Why is my Microsoft Edge not working?
As is the case with other browsers, Micorosft Edge too could not be working if the Network Settings on your device are misconfigured. So, make sure you check them and revert any recent changes.
Other than that, running an outdated version of the browser or having such extensions installed too can cause issues with Edge. Also, make sure that your computer is not running low on resources since that would affect the functioning of apps, including that of Microsoft Edge.
Besides, the presence of malware, corrupt system files or browsing data, third-party app conflicts, or an improper installation of the browser is just as likely to be the culprit here.
If you can’t pinpoint the underlying cause when Microsoft Edge is not working, try the solutions in the listed sequence to quickly eliminate the problem.
Continuously having problems with your browser is enough reason to consider switching to a new one, at least for the time being. Not only it’s frustrating to have to stop whatever you are doing in order to fix your browser not working, but it’s also time-consuming.
Quick Tip:
There are plenty of good browsers out there, but we believe Opera One has all the elements that will make any user happy. The primary goal is efficiency and easy workflow management.
Workspace, tab islands, free VPN, integrated social media in the taskbar, video pop-out, integrated messenger and AI are just a few of the features that Opera One brings. See for yourself if it’s a match for you.

Opera One
Designed to make your virtual life easier and your workflow even more organized.What can I do if Microsoft Edge stops working in Windows 10?
1. Switch to Private Network
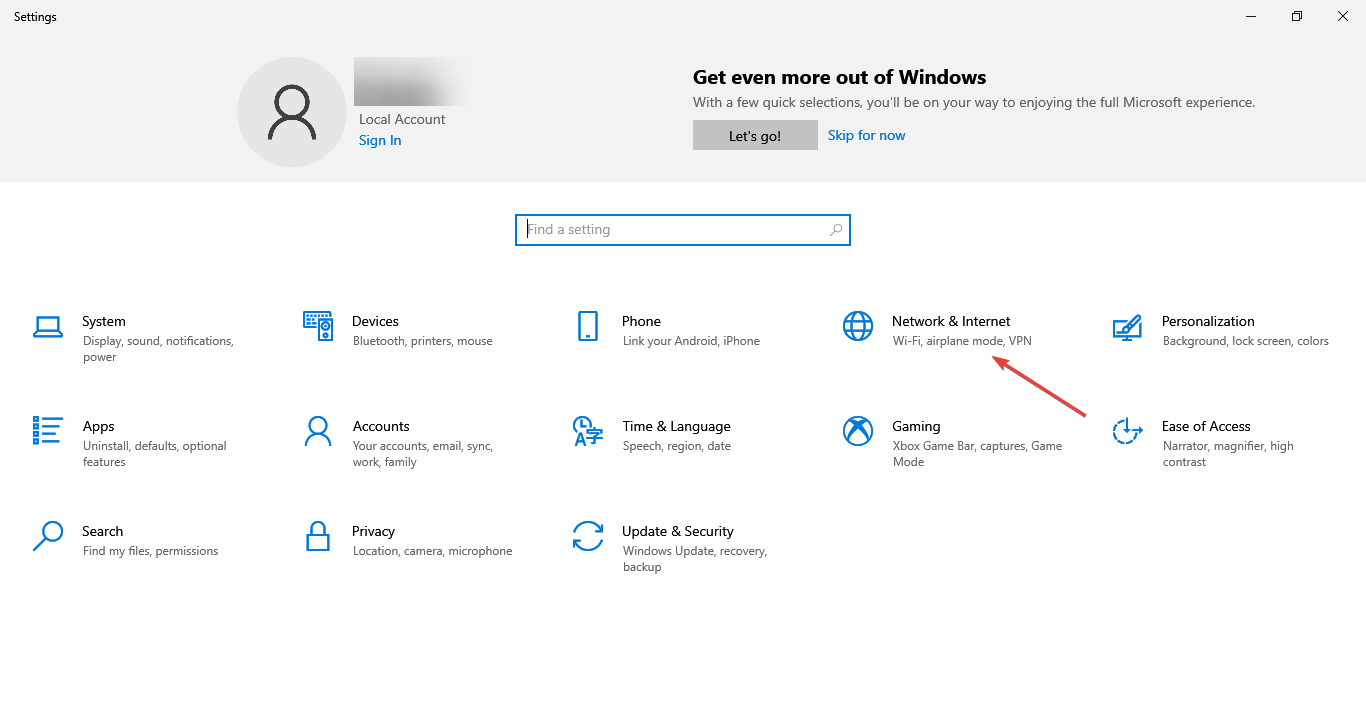
- Press Windows + I to open the Settings app, and then select Network & Internet.
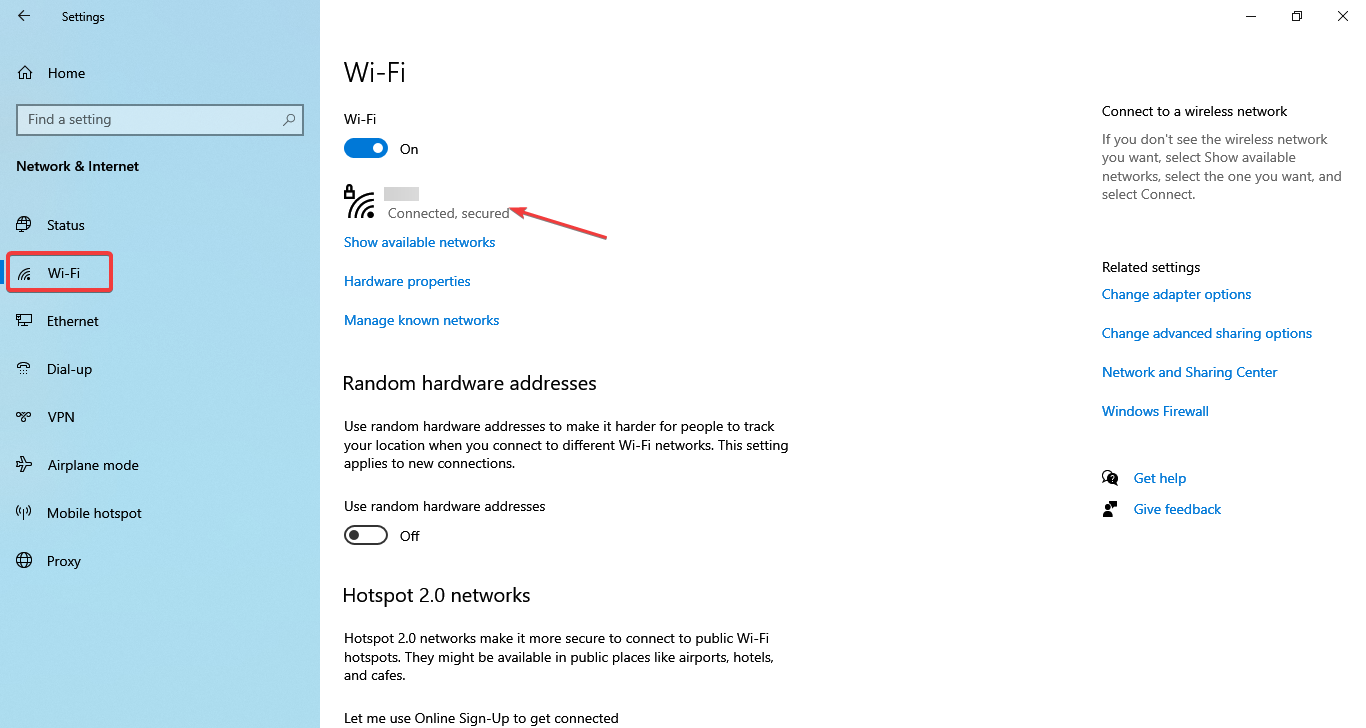
- Select Wi-Fi from the left, and then click on the current network.
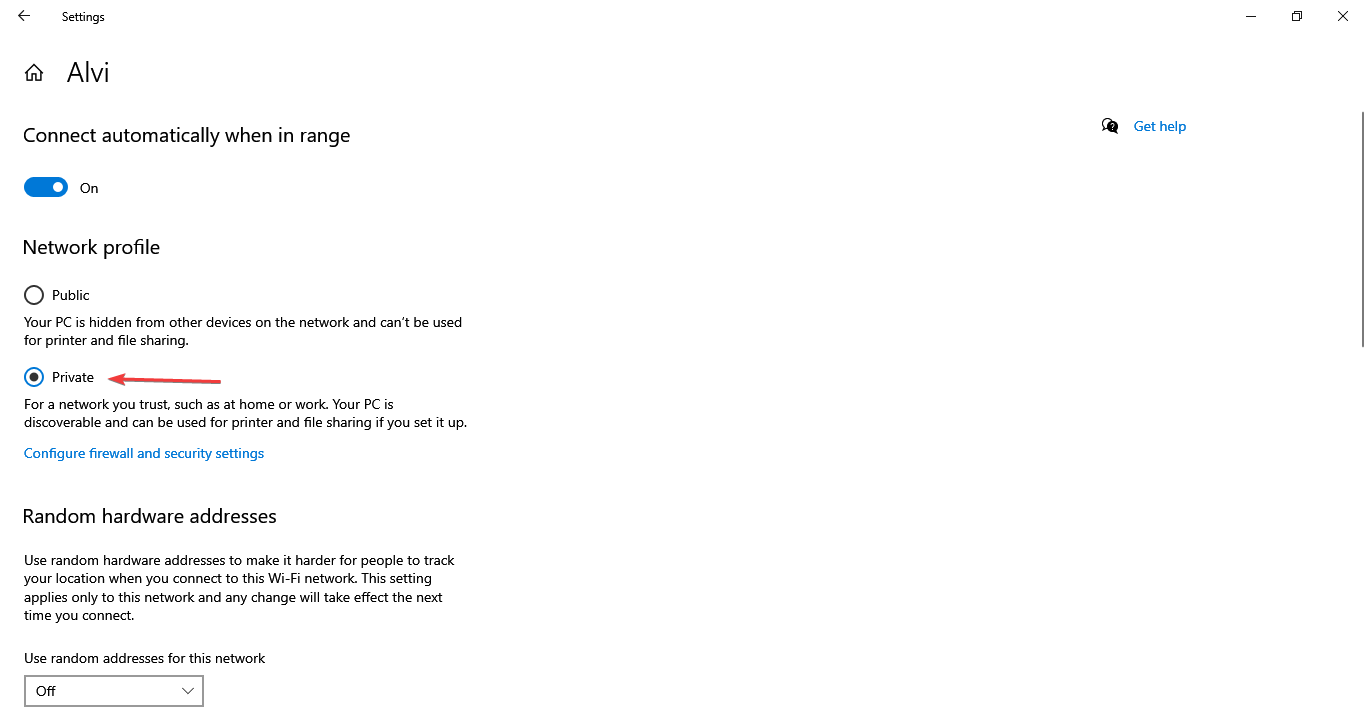
- Next, select the Private option here.
- Restart your computer for the changes to come into effect.
This option sets your iInternet connection to Private, and Microsoft Edge won’t recognize any threats to your privacy. If Microsoft Edge is still not working, head to the next method.
2. Enable DNS Client
- Press Windows + R to launch Run, type services.msc in the text field, and click on OK.
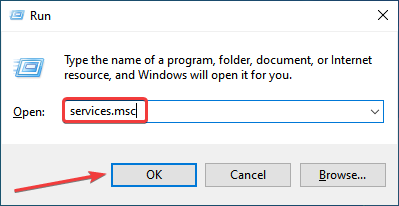
- Find DNS Client and check its Status. If the service is not running, right-click on it and choose Start.
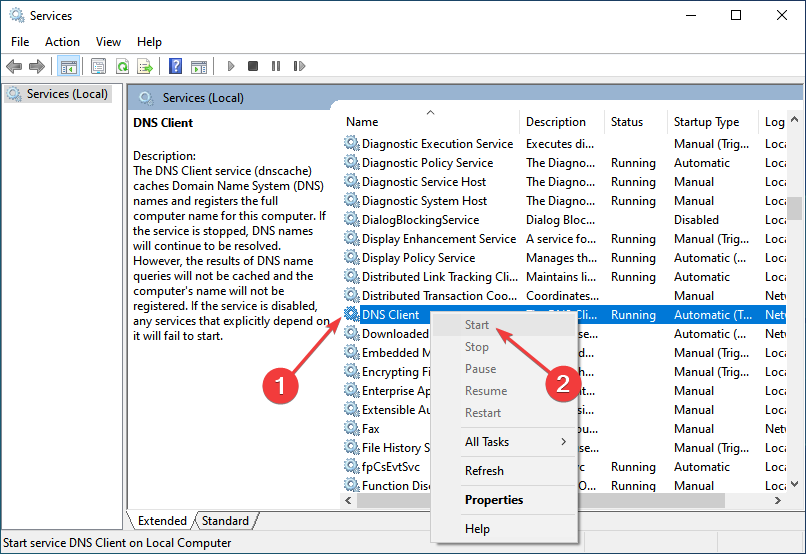
- Restart your computer for the changes to come into effect.
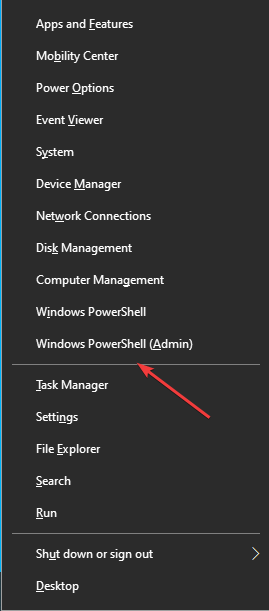
3. Register app packages
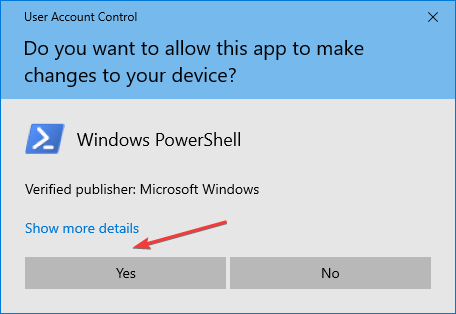
- Press Windows + X to open the Power User menu, and then select Windows PowerShell (Admin).
- Click Yes in the UAC prompt that pops up.
- Now, paste the following command and then hit Enter:
Get-AppXPackage | Foreach {Add-AppxPackage -DisableDevelopmentMode -Register "$($_.InstallLocation)AppXManifest.xml"}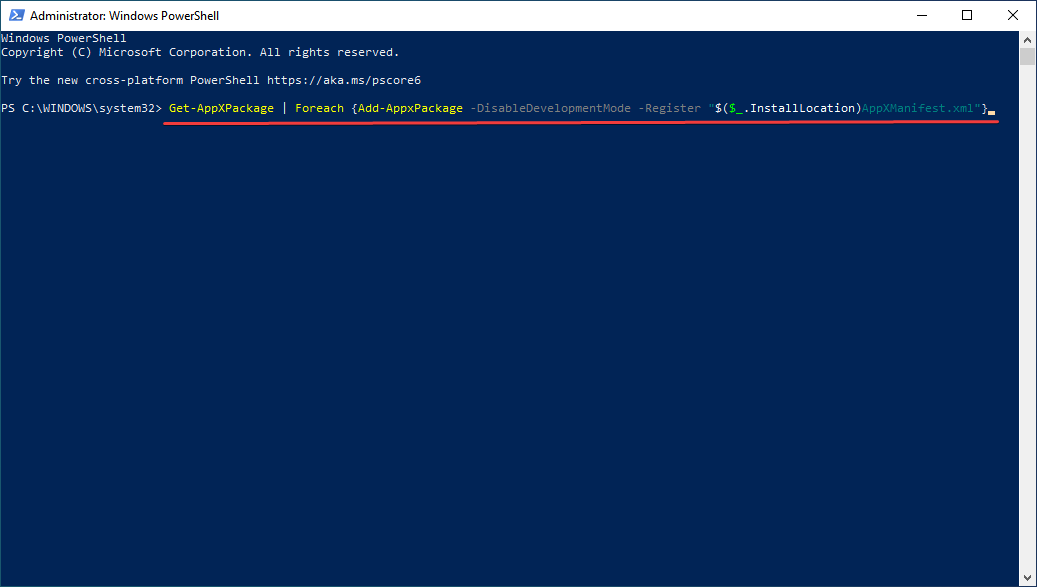
Once done, restart your computer for the changes to come into effect. If Microsoft Edge is not working but Chrome is, this method might help fix the problem.
4. Run the App Troubleshooter
- Press Windows + I to open Settings and select Update & Security.

- Select Troubleshoot from the tabs on the left.
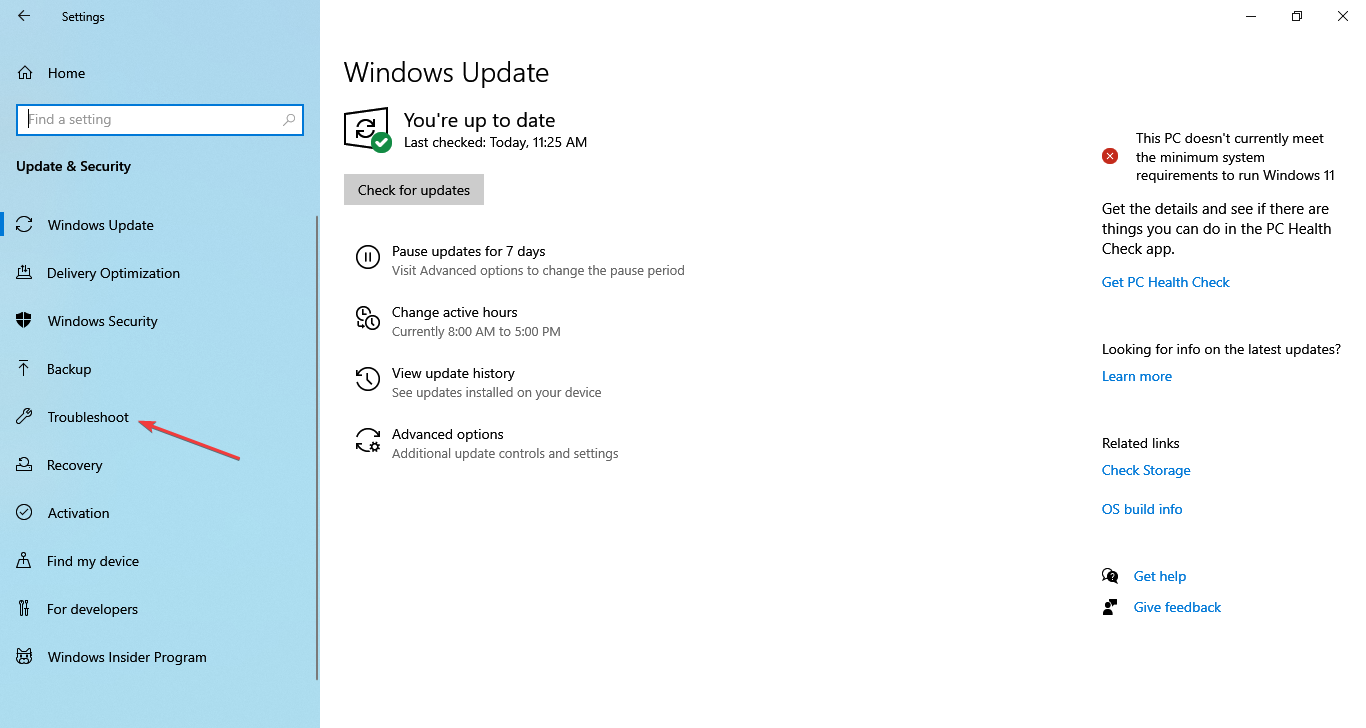
- Click on Additional troubleshooters.
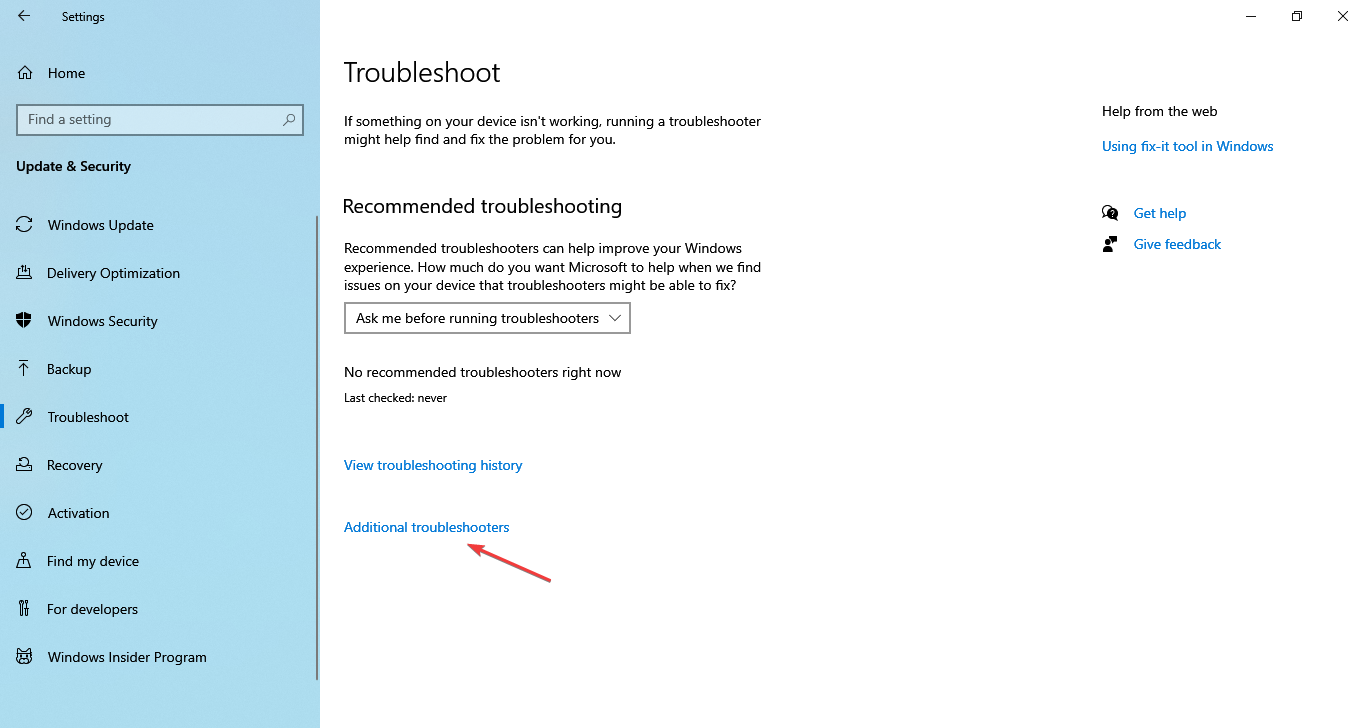
- Now, select Windows Store Apps, and then click on Run the troubleshooter.
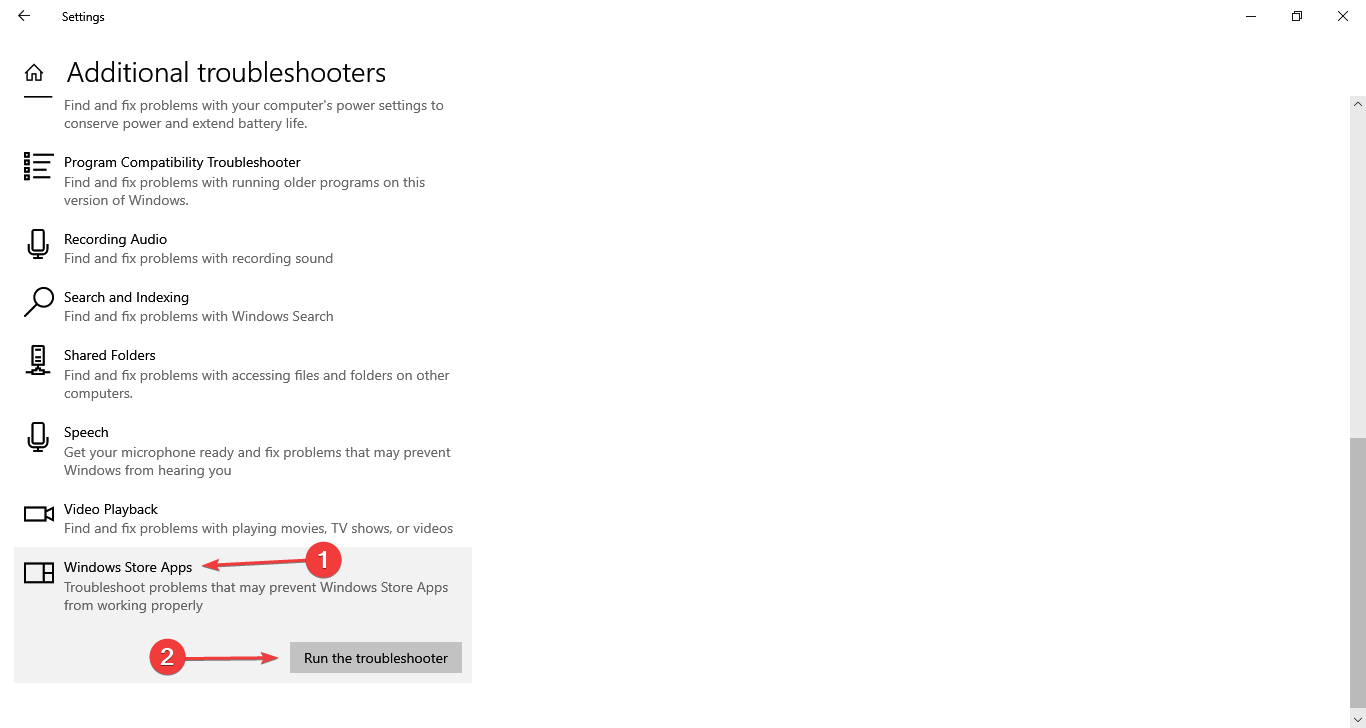
- Restart your computer for the changes to come into effect.
5. Run the SFC scan
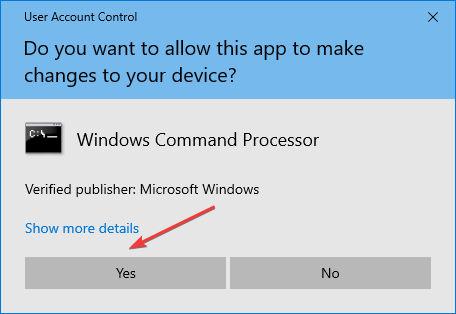
- Press Windows + R to open the Run command, type cmd in the text field, hold Ctrl + Shift, and then click on OK.
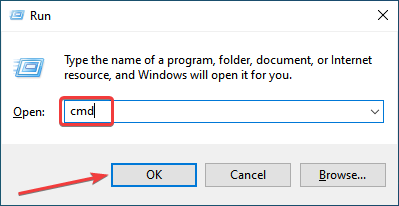
- Click Yes in the UAC prompt.
- Paste the following command and then hit Enter:
sfc /scannow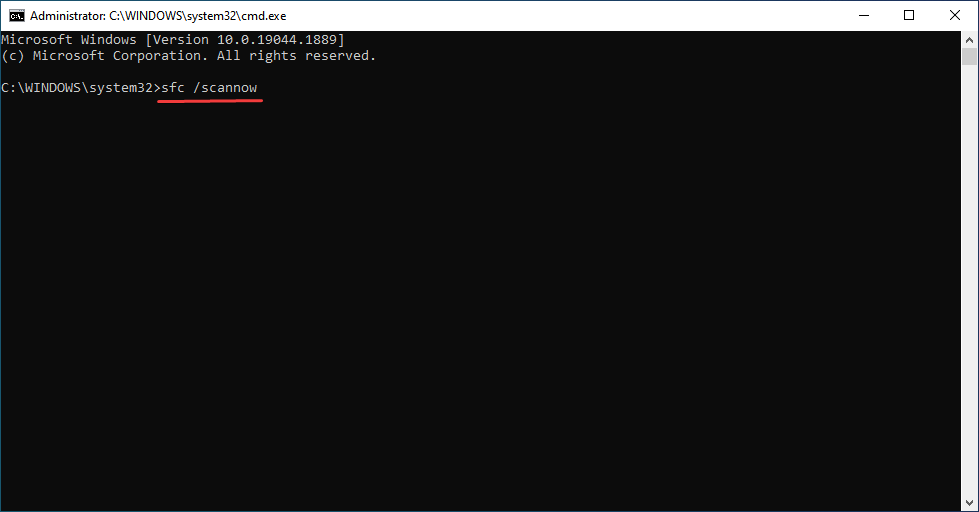
- Wait for the process to finish, and then restart your computer.
Once done, check if the Microsoft Edge not working problem is resolved. In case the browser is still not working, head to the next method.
6. Run DISM
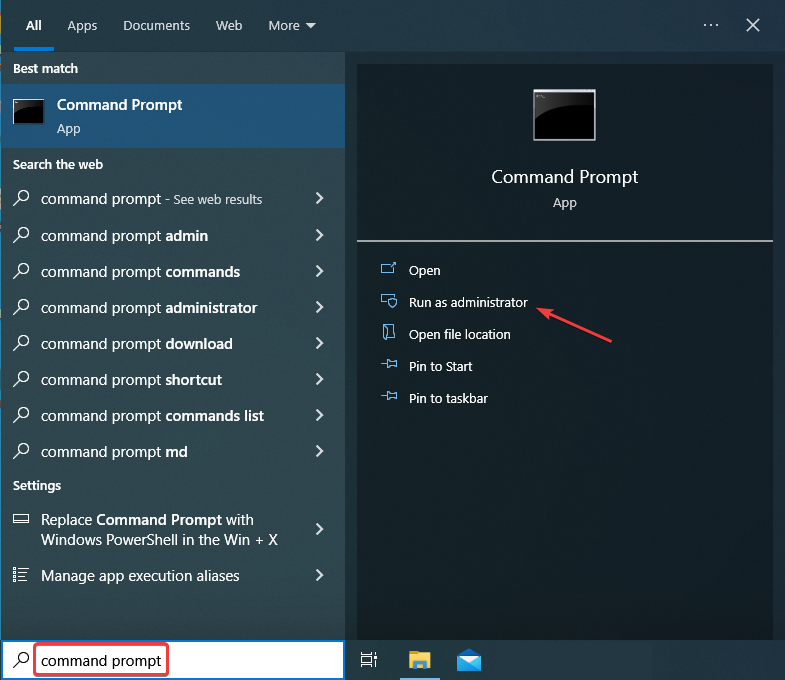
- Type command prompt in the Search bar, and then click on Run as administrator.
- Click Yes in the UAC prompt.

- Paste the following command and press Enter:
DISM.exe /Online /Cleanup-image /Restorehealth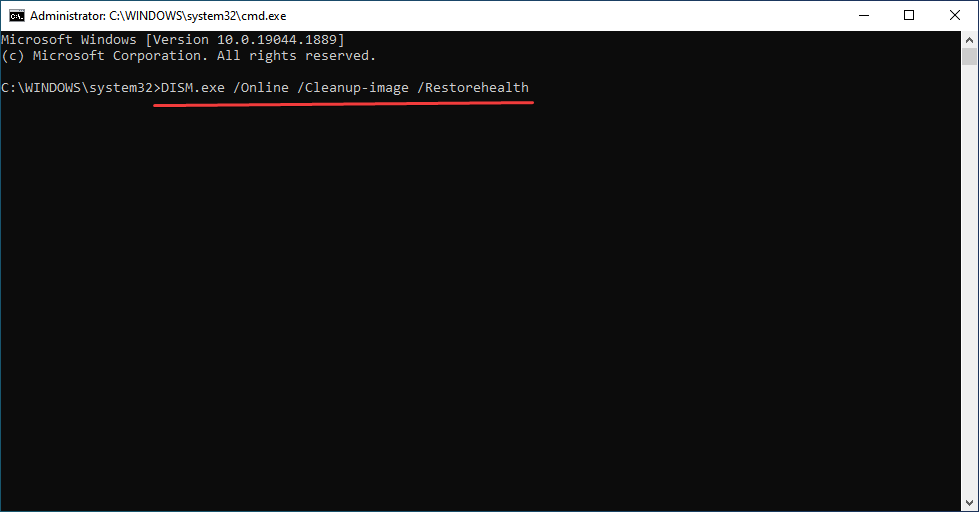
- Wait for the process to finish, and then restart your computer.
- In case the DISM can’t obtain files online, try using your installation USB or DVD. Insert media and then execute the following command:
DISM.exe /Online /Cleanup-Image /RestoreHealth /Source:C:RepairSourceWindows /LimitAccess - Make sure to replace C:RepairSourceWindows path of your DVD or USB and follow the on-screen instructions to complete the process.
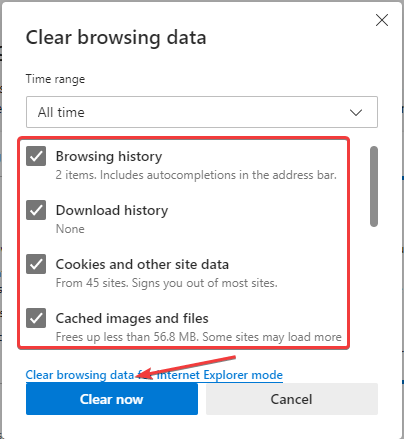
7. Clear the cache and data
- Open Microsoft Edge, and then press Ctrl + Shift + Del to open the Clear browsing data utility.
- Click on the Time range dropdown menu, and select All time.
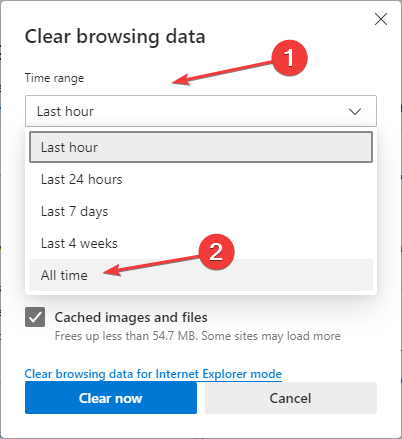
- Select all the entries here, and then click on the Clear now button.
8. Turn off the firewall
- Go to Search, type Windows Defender Firewall, and then click on the relevant search result.
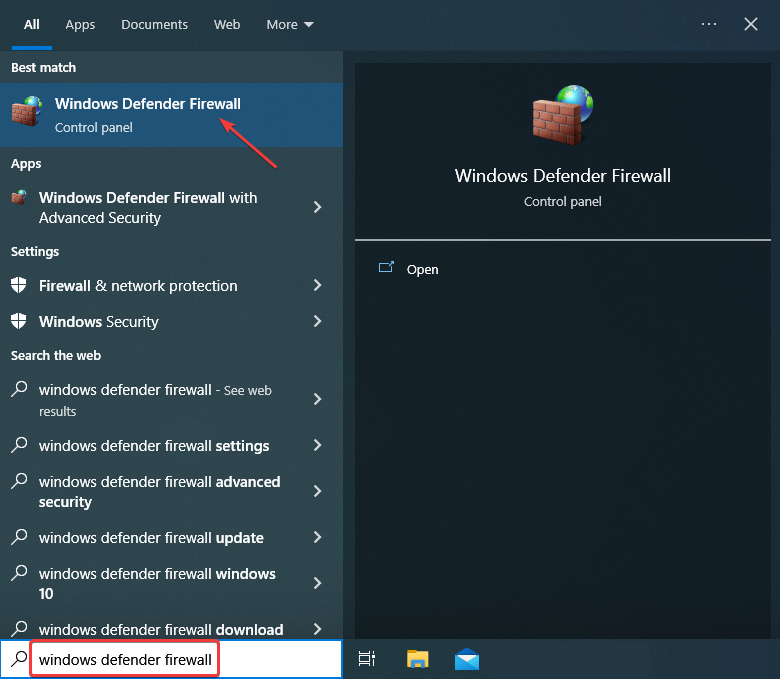
- Select Turn Windows Defender Firewall on or off.
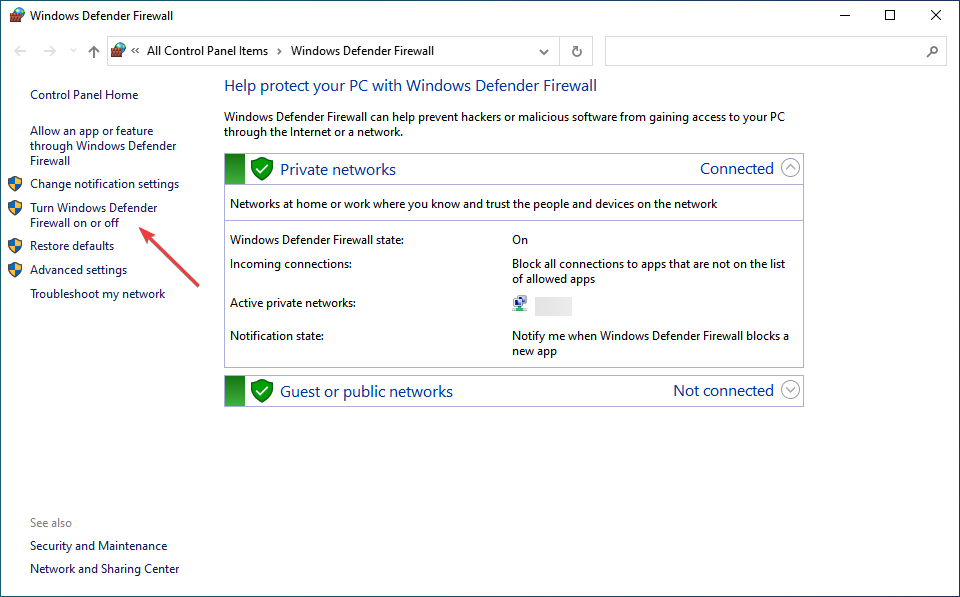
- Select Turn off Windows Defender Firewall for both Private and Public networks, and then click OK to save the changes.

Once done, verify if Microsoft Edge starts working, and you can both open and access it without any trouble.
9. Change your antivirus
It’s already known that third-party antivirus programs don’t live in harmony with Windows 10 and its features. Sure, you might not experience any problems whatsoever.
But it’s quite possible that switching to another reliable and effective antivirus where users have not reported this error would do the trick.
10. Install the latest updates
- Press Windows + I to launch Settings, and then select Update & Security from the options here.
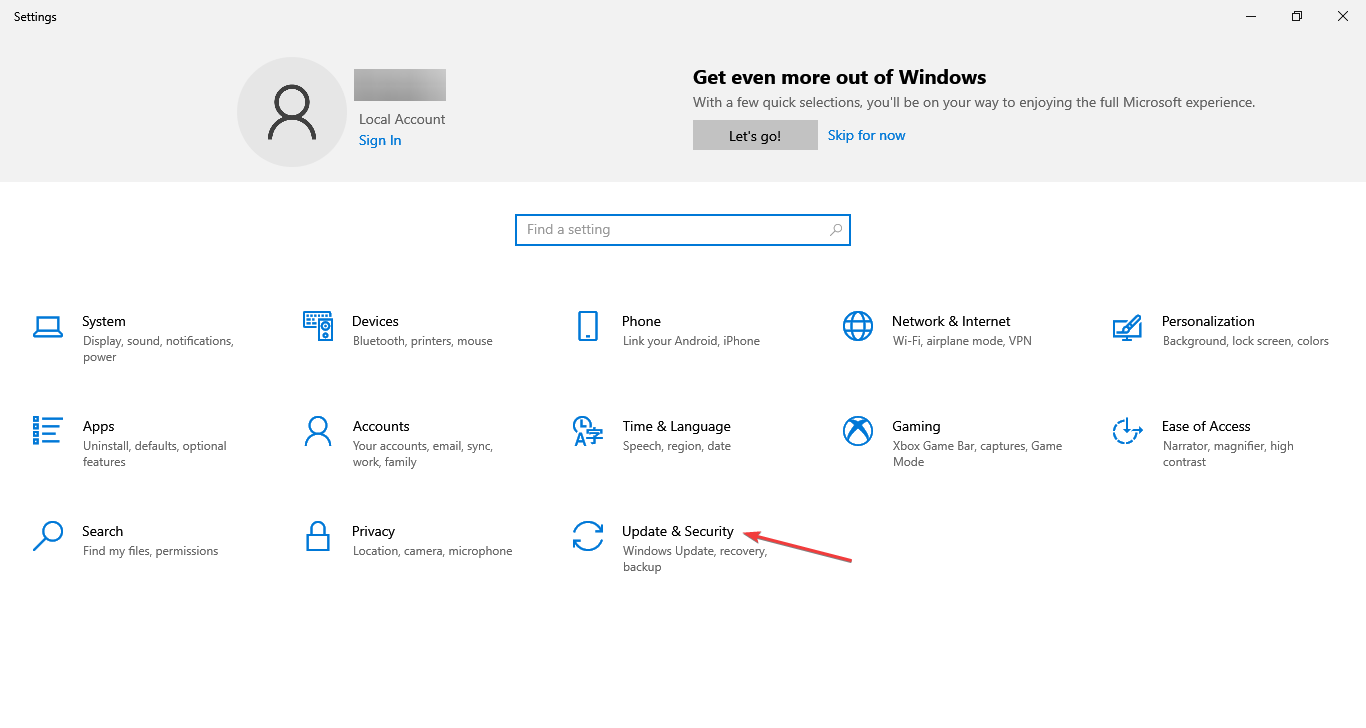
- Click on Check for updates on the right.
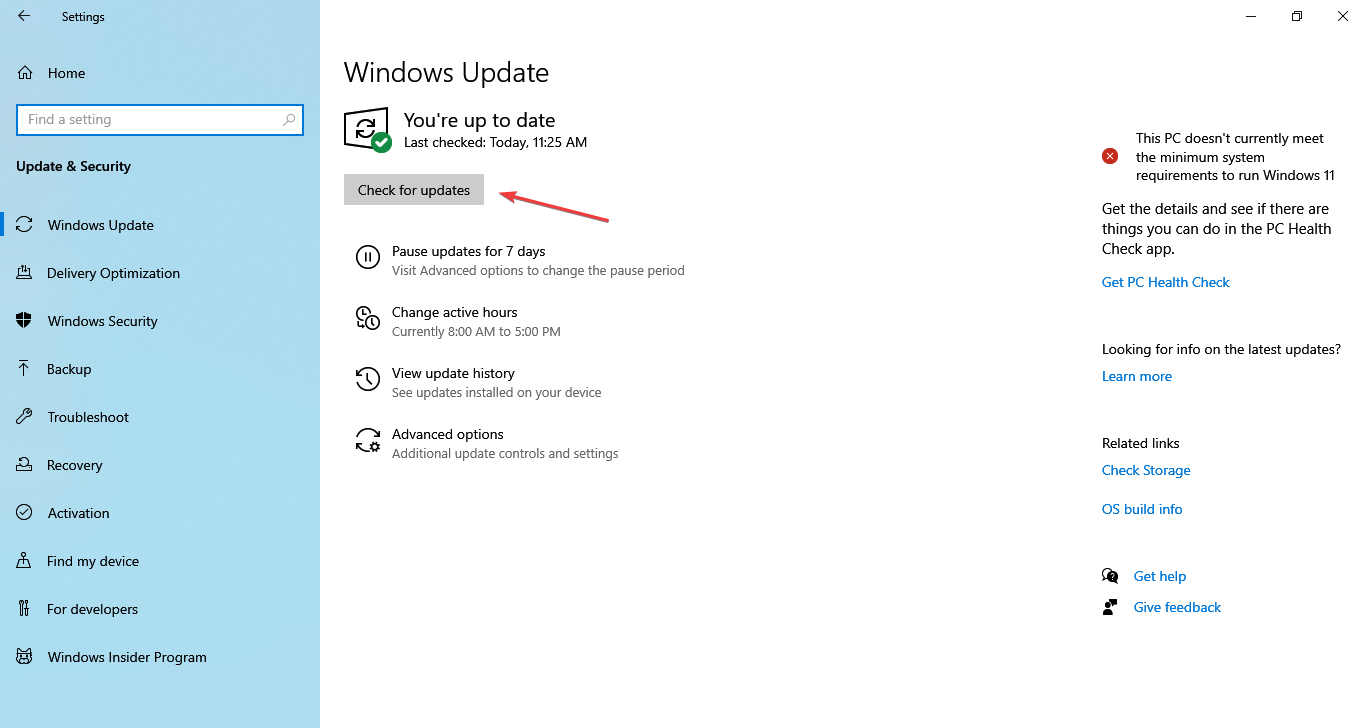
- If any updates are available, download and install them.
Microsoft delivers Edge updates through Windows Update. So, if the problem that’s bothering you is widespread, the company, most likely, has already released a solution or is working on it.
Once the updates are installed, the Microsoft Edge not working problem should be fixed. If not, head to the next method.
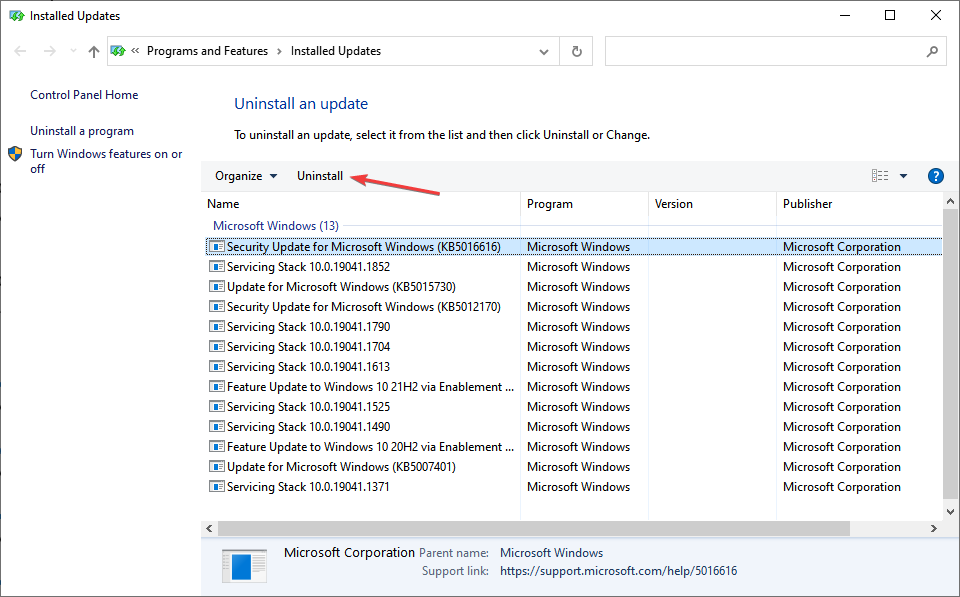
11. Uninstall the latest updates
- Press Windows + I to open Settings, and then click on Update & Security.

- Select View update history from the options on the right.
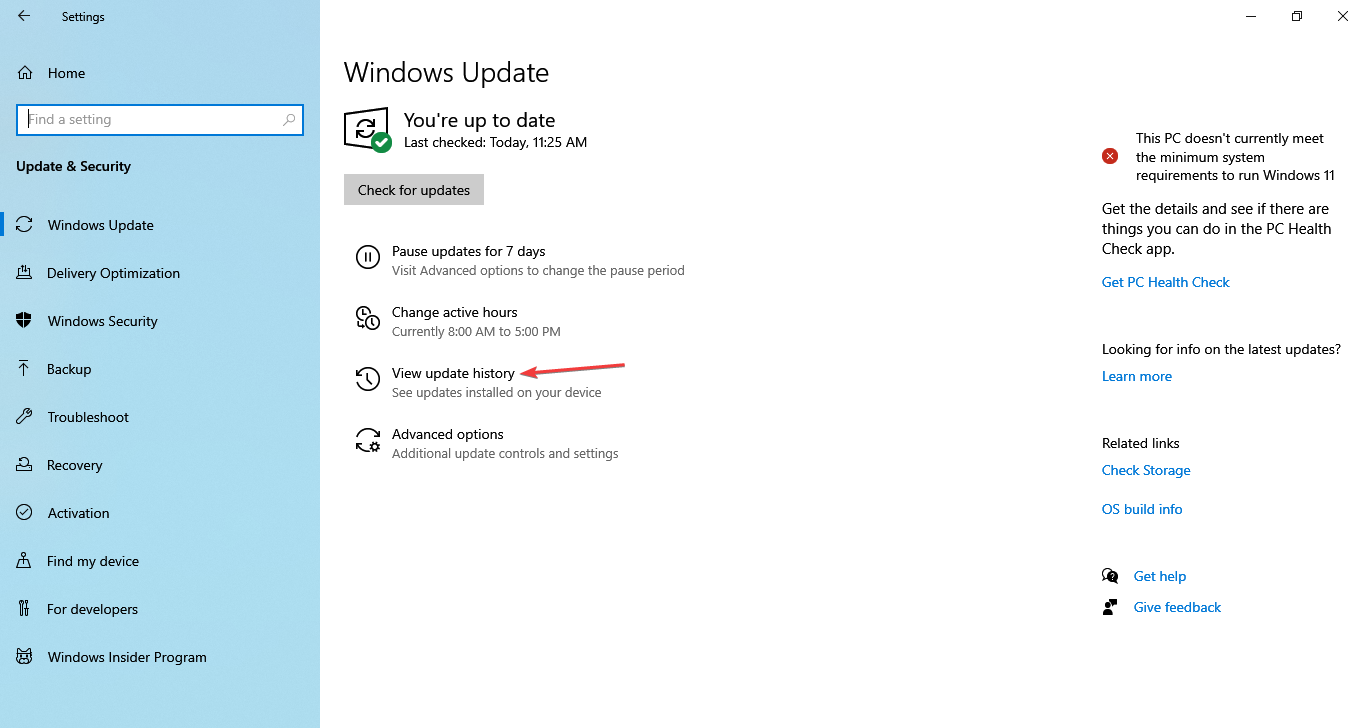
- Click on Uninstall updates.
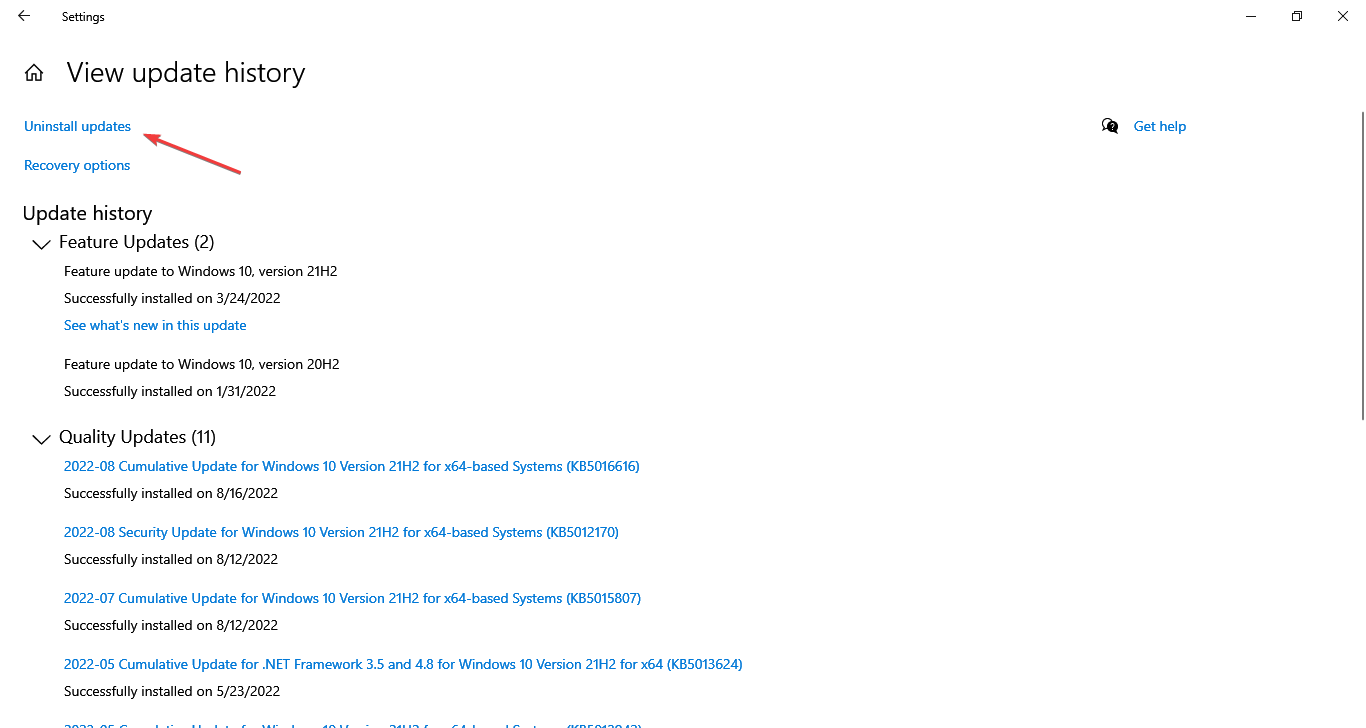
- Select the last installed update, and then click on Uninstall.
- Click Yes in the confirmation prompt.
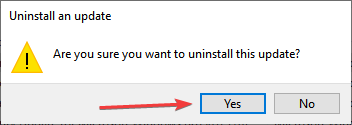
Once done, restart the computer for the changes to apply and check if the Microsoft Edge not working problem is eliminated.
12. Change the security permissions
- Press Windows + E to open the File Explorer, paste the following path in the address bar, and then hit Enter:
C:\ProgramData\Microsoft\Windows - Locate the WER folder, right-click on it and then choose Properties.
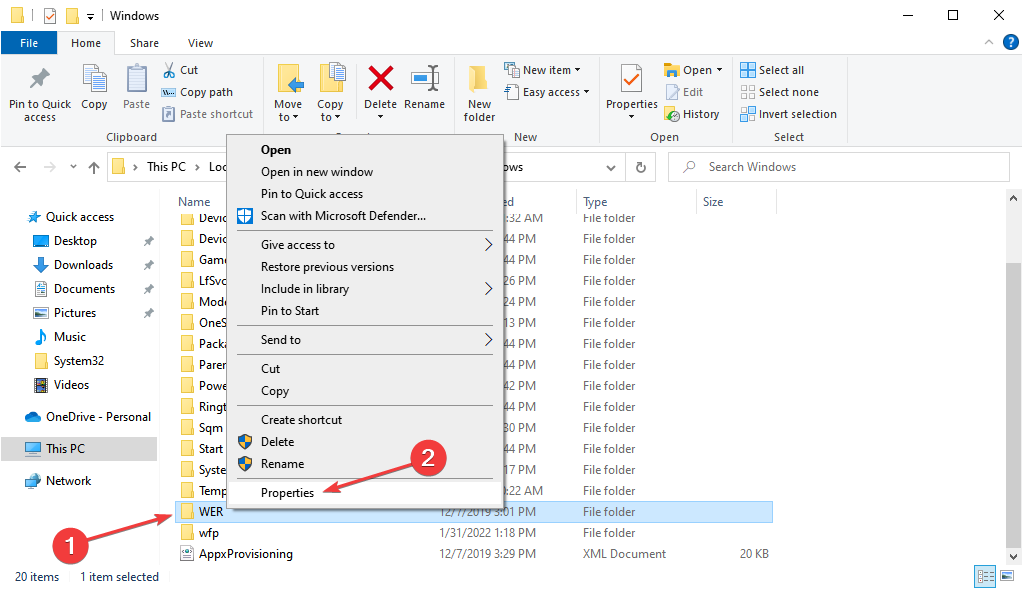
- Go to the Security tab and then click the Edit button.
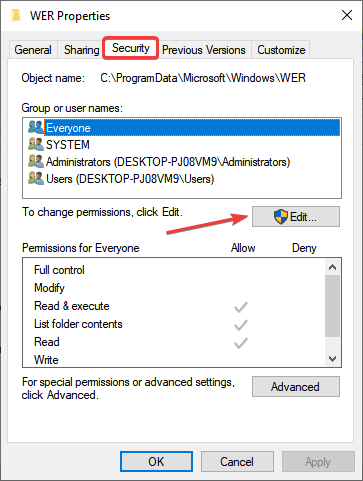
- Select APPLICATION PACKAGES user and check the Read & execute, List folder contents, and Read options in the Allow column.
- Click Apply and then OK to save changes.
Once done, Microsoft Edge would now start working, and you should not encounter problems with it anymore.
Can I reinstall Microsoft Edge?
Yes, you can reinstall Microsoft Edge, and the tool for it comes built-in with Windows. It comes in handy for users facing issues with the browser and when the other methods fail to work.
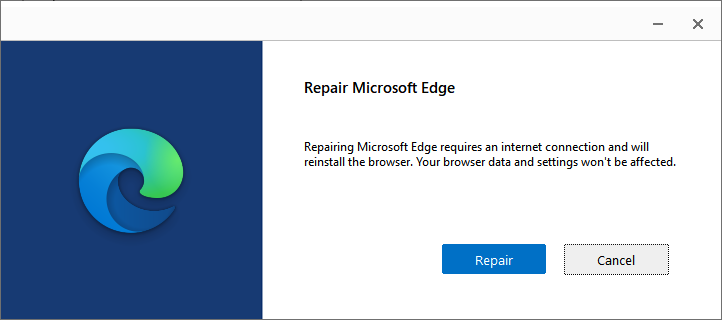
To do that, simply try to Modify/Uninstall Edge, and it will automatically open the Repair tool, which will reinstall the browser. The best part about it, your browser data and configured settings remain unaffected after the process.
That’s it, we hope these solutions helped you solve the problem with the Microsoft Edge browser.
Also, find out how to reduce Edge’s CPU usage in Windows.
If you have any comments, questions or suggestions, just let us know in the comments below.
Read our disclosure page to find out how can you help Windows Report sustain the editorial team. Read more


Improve this guide


User forum
15 messages