FIX: More data is available
7 min. read
Updated on
Read our disclosure page to find out how can you help Windows Report sustain the editorial team Read more
Key notes
- The only good news regarding this error is that it is not something that leads to more severe issues, such as BSoDs or data loss.
- Modifying registries can fix this particular error, but some users have problems accessing the Registry Editor. Luckily enough, we’ve got the subject covered.
- It is not uncommon to stumble upon Windows 10 errors while using the PC, but we have articles that cover most topics.
- System Errors are common, but by following the solutions mentioned below you will get rid of them.

System errors, such as ERROR_MORE_DATA can cause some problems on your Windows 10 PC. This error comes with More data is available message, and today we’re going to show you how to fix it properly.
How do I fix ERROR_MORE_DATA?
1. Edit your registry
Optional: Modifying the registry can be potentially dangerous, especially if you don’t do it properly. This can cause system instability issues, therefore it’s highly recommended to back up your registry before making any changes.
To do that, click on File > Export. In Export range select All. Now enter the desired name, choose a secure location and click the Save button. After doing that, you can use the newly created registry file to restore your registry to the previous state.
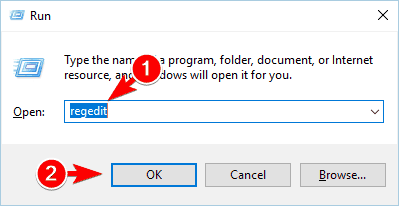
- Navigate to the following location in the left pane.:
- HKEY_LOCAL_MACHINESOFTWAREMicrosoftWindowsCurrentVersionSideBySide
- In the right pane, locate PublisherPolicyChangeTime entry.
- According to users, it should be changed to REG_SZ format during the install.
- Delete that entry before building the MSI file and the problem should be fixed.
Several users reported this problem while trying to create MSIs for imaging. It seems that certain registry values are changed, and that is causing this problem to appear.
To fix the issue, you need to manually edit your registry by following the steps mentioned above.
This is a specific solution, so it won’t work for most users. However, if you’re trying to create MSIs for imaging, we suggest you try this solution out. If you can’t find the aforementioned registry key, this solution doesn’t apply to your PC so you can just skip it.
2. Update .NET Framework
Many applications require .NET Framework to work properly, and if your .NET Framework is outdated, you might experience this and many other errors.
If you’re getting this error frequently, you might be able to fix it by installing the latest version of the .NET Framework. Simply download .NET Framework, install it, and check if that solves your problem.
3. Run the applications directly
Users reported No more data is available error message while trying to run certain applications. This error can appear while trying to run Backup Exec License Assessment Tool using Remote Desktop Protocol.
To fix this problem, you need to run the application directly by logging into the machine. After doing that, the problem should be resolved.
4. Use third-party repairing software
Windows errors are often caused by corrupted files or compatibility problems with certain programs. A thorough diagnosis of your OS can identify the exact issues and help you fix them.
We recommend using specialized third-party software to perform deep scanning of your PC and optimize your system.
5. Remove Bonjour
According to users, this problem can appear due to Bonjour. This error causes network problems, but you can fix it by removing Bonjour.
This application installs automatically with iTunes, but since it works as a multicast DNS client, it can cause problems in your network.
To fix the problem, you just need to remove Bonjour by following these steps:
- Press Windows Key + I to open the Settings app.
- Go to System section and choose Apps & features.
- Locate Bonjour on the list, select it and click the Uninstall button.
If you don’t want to use Settings app, you can remove Bonjour by doing the following:
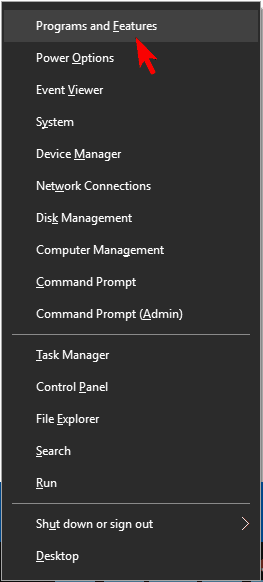
- Press Windows Key + X to open Win + X menu and choose Programs and Features.
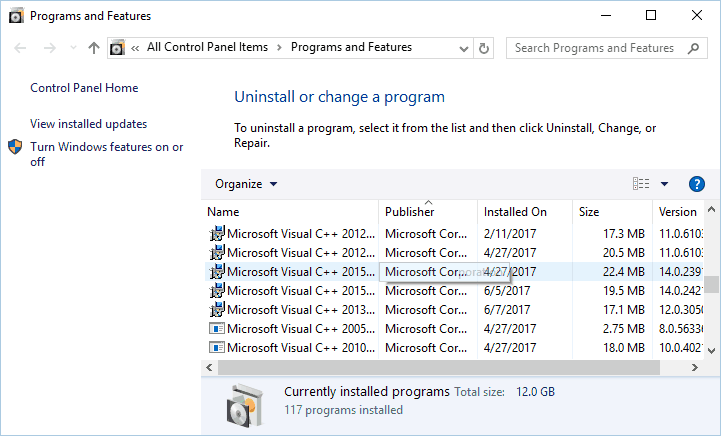
- Once the Programs and Features window opens, locate Bonjour on the list, double click it and follow the onscreen instructions to remove it.
6. Use Safe Mode
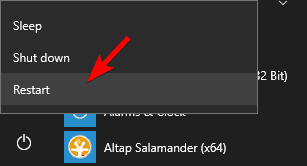
- Open Start Menu, click the Power button, press and hold the Shift key and choose Restart from the menu.
- List of options will appear. Click on Troubleshoot > Advanced options > Startup Settings. Click the Restart button.
- After your PC restarts, you’ll see a list of options.
- Press the appropriate keyboard key to select any version of Safe Mode.
- In most cases it’s best to select Safe Mode with Networking by pressing 5 or F5 key.
If this problem keeps appearing, you can try using Safe Mode. This is a special segment of Windows that runs with default applications and drivers, so it’s perfect for troubleshooting. To enter Safe Mode, you need to follow the steps mentioned above.
Once you enter Safe Mode, check if the same problem appears. If not, it’s possible that the issue is caused by your configuration or by third-party applications. If that’s the case, you need to go back to regular Windows 10 and find and remove the problematic app.
7. Use System Restore
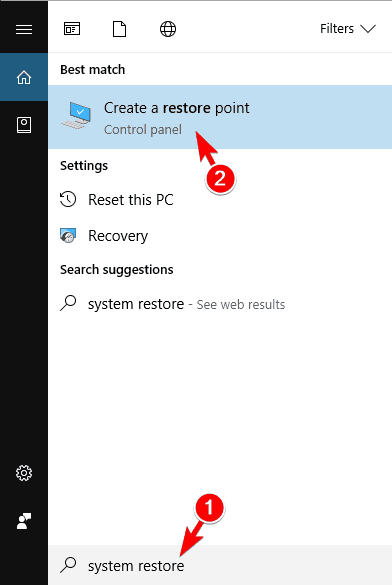
- Press Windows Key + S and enter system restore.
- Select Create a restore point from the menu.
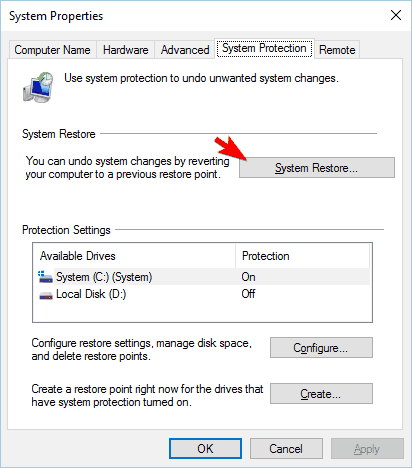
- System Properties window will appear.
- Click on System Restore button.
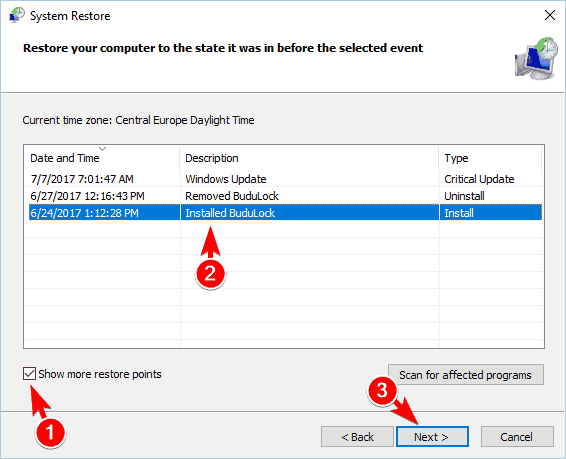
- When System Restore starts, click on Next.
- Check Show more restore points option and select the desired restore point.
- Now click on Next button to continue.
- Follow the instructions on the screen to complete the restoration process.
If this problem started appearing recently, you might be able to fix it simply by using System Restore. This is a useful feature that allows you to restore your system to a previous state.
To use System Restore, follow the steps written above. After your PC is restored, check if the problem still persists.
8. Create a new user account
In some cases, this problem can occur if your user account is corrupted. To fix that problem, you need to create a new user account from scratch. This is rather simple and you can do it by following these steps:
- Press Windows Key + I to open the Settings app.
- Go to Accounts section.
- Navigate to Family & other people in the left pane.
- In the right pane click on Add someone else to this PC.
- Select I don’t have this person’s sign-in information.
- Now choose Add a user without a Microsoft account.
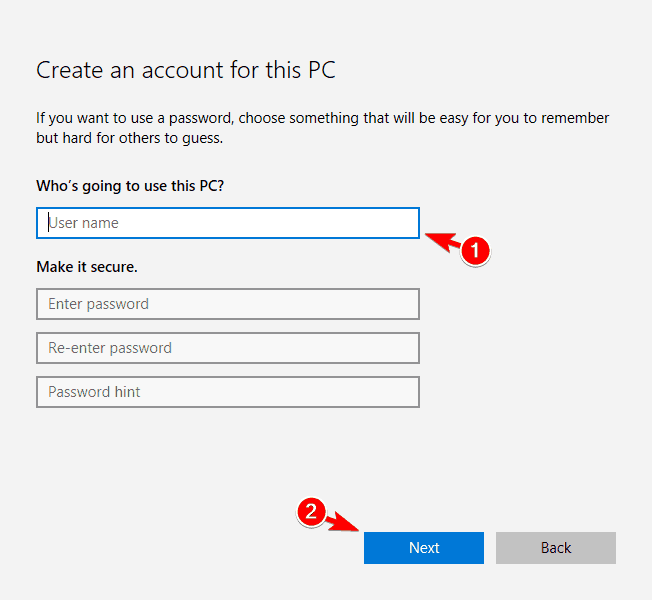
- Enter the desired user name and click on Next.
After you create a new user account, you need to switch to it. Check if the problem appears on a new user account. If not, it means that your account is corrupted, so you might want to switch permanently to a new user account.
9. Reset Windows 10
Note: You will need a Windows 10 installation media, so be sure to create one using Media Creation Tool. To reset Windows 10, follow these steps:
- Open the Start Menu, click the Power button, press and hold the Shift key and choose Restart from the menu.
- Select Troubleshoot > Reset this PC > Remove everything.
- You might be asked to insert Windows 10 installation media.
- Select your version of Windows and choose Only the drive where Windows is installed > Just remove my files.
- Keep in mind that this process will remove all files from your system drive, so be sure to back them up beforehand.
- Once you’re ready to start, click the Reset button.
- Follow the instructions on the screen and wait for the reset process to finish.
If the error message still occurs, you might want to try resetting Windows 10. This is a drastic solution and it will remove all files from your system drive, so we urge you to create a backup.
After the reset is complete, you’ll have a clean installation of Windows 10. Keep in mind that you’ll need to install all your applications again.
After you do that, check if the problem still persists. We have to mention that this is a drastic solution that will remove all your files from the system drive, so use it as a last resort.
By following all of the steps mentioned above, you should be able to bypass this particular Windows error, and you will have your system running optimally in no time.
While there are plenty of solutions to try, we would like to know which ones worked best for you, so do not hesitate to let us know by leaving us a message in the comments section below.

