Windows Start Menu Scrolling Up: 5 Easy Fixes to Use
A malfunctioning Xbox game controller is the main cause for this issue
5 min. read
Updated on
Read our disclosure page to find out how can you help Windows Report sustain the editorial team. Read more
Key notes
- If your Windows Start Menu is scrolling up by itself, it might be down to your game controller.
- To fix this issue, you might need to uninstall and reinstall your mouse drivers.
- Re-registering Cortana using PowerShell is another quick and effective solution to this issue.
The Windows Start Menu scrolling up the issue can quickly mar your user experience. It removes the ease of searching and quick access to apps on the Start Menu.
The causes of the auto-scrolling vary, with some users claiming that even the Windows Search bar keeps scrolling. Thankfully, this issue can be easily fixed, as shown in the following sections of this guide.
Why does my Windows Start Menu scroll up and down by itself?
The Windows Start Menu auto-scrolling up and down is usually due to hardware issues. However, you can’t rule out the possibility of software causing this problem. Below are some of the reasons your Start Menu is scrolling by itself:
- Faulty game controller: Most users reported that their Windows Start Menu moved on their own because they had their Xbox game controller plugged in. This can be because something is pressing down some keys or the controller is malfunctioning. The solution here is to remove the controller.
- Problematic system files: Corrupt or faulty system files are among the prominent causes of this issue. Repairing and restoring these files using the built-in tools or dedicated software should regain normalcy.
- Faulty mouse driver: Your mouse drivers serve as the connecting medium between the hardware and your PC. When these wrong drivers lead to all sorts of problems, including this issue, uninstalling and reinstalling these drivers should fix the issue.
How can I fix the Windows Start menu scrolling up?
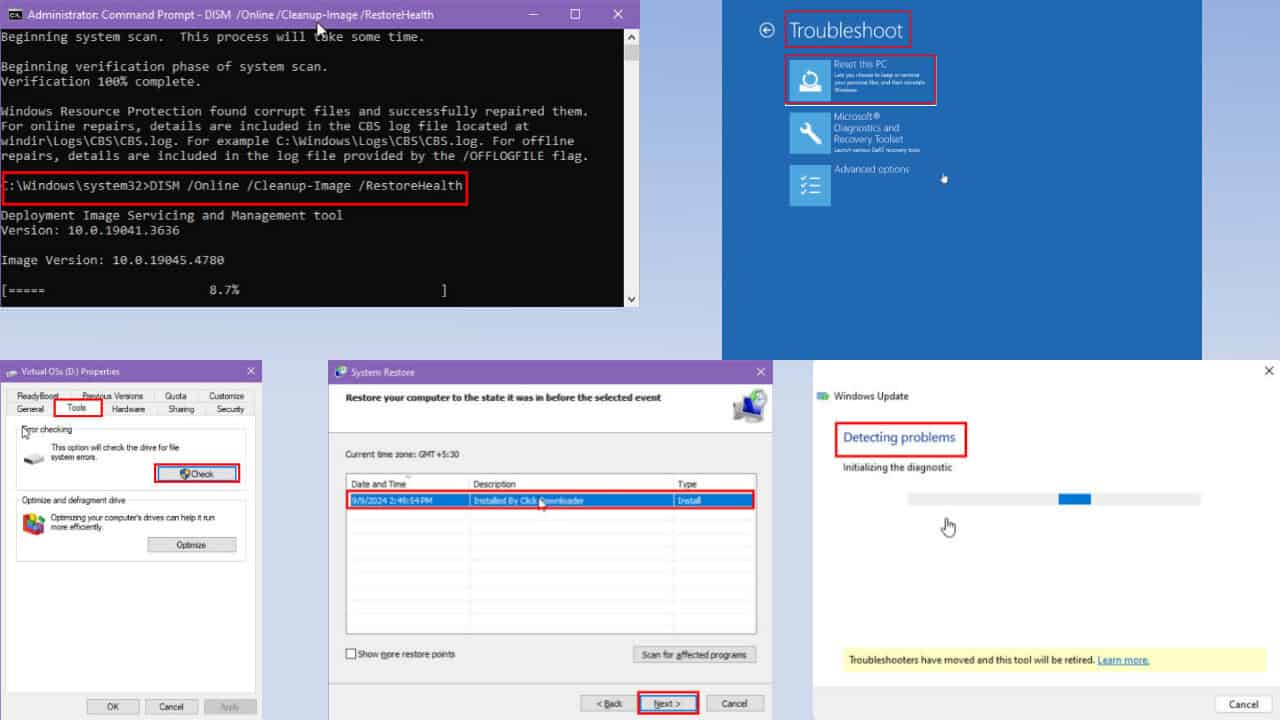
1. Repair system files
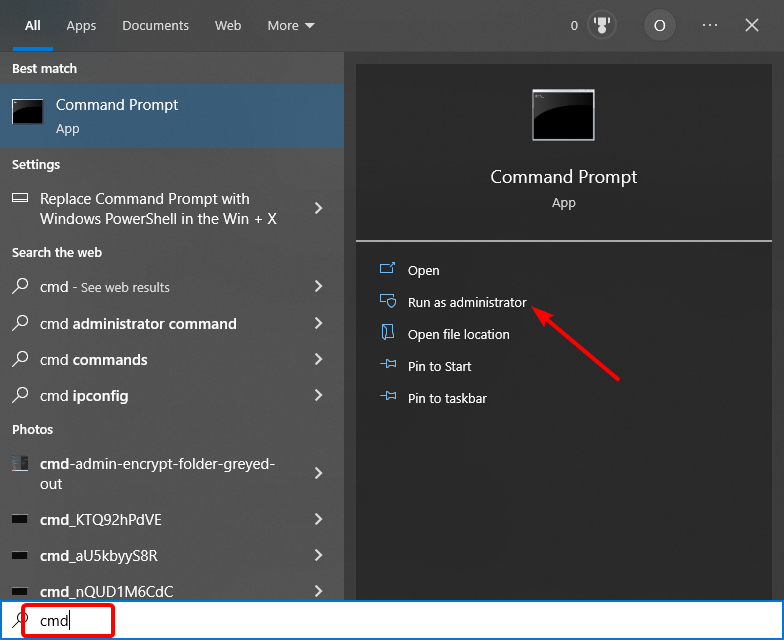
- Press the Windows key + S, type cmd, and select Run as administrator under Command Prompt.
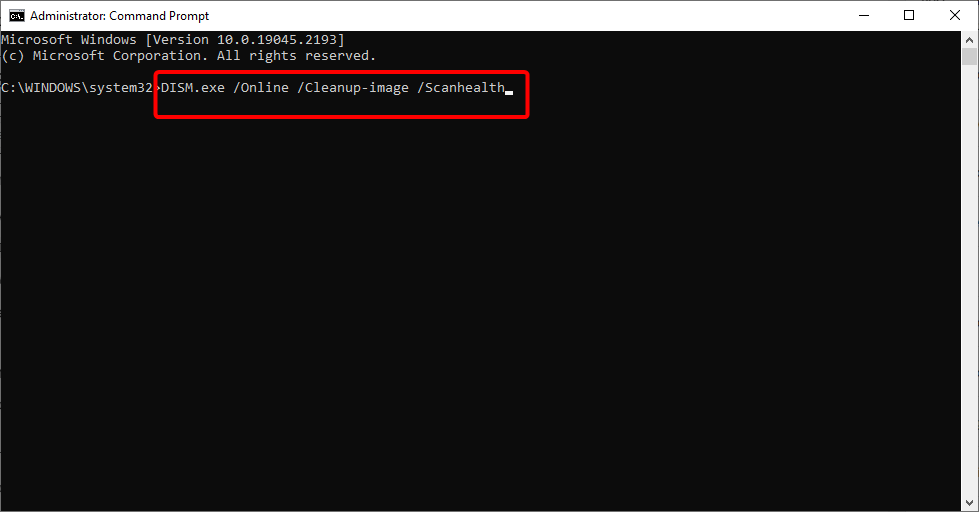
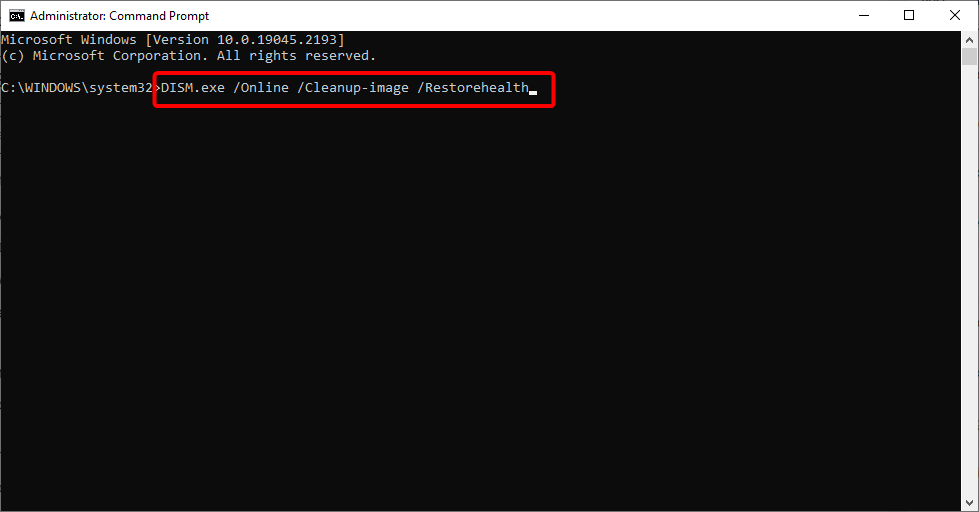
- Type the commands below and press Enter after each:
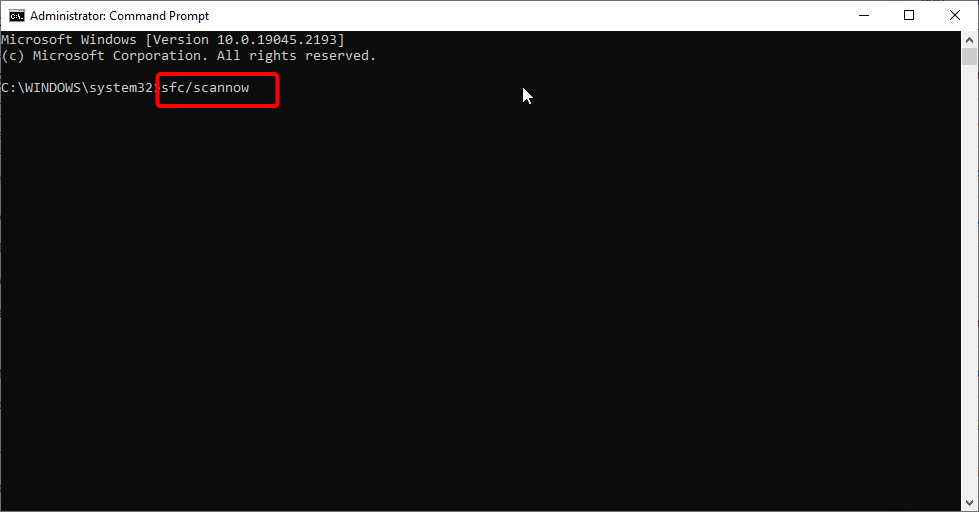
DISM.exe /Online /Cleanup-image /ScanhealthDISM.exe /Online /Cleanup-image /Restorehealth - Wait for the commands to finish running, type the command below, and hit Enter:
sfc/scannow - Restart your PC when this command completes running.
Broken system files can cause the Windows Start Menu to scroll up the issue. Running the SFC and DiSM scans should help fix and restore these files.
Alternatively, you can use a dedicated tool to repair your PC. These tools save you the stress of typing commands, which always carries the risk of errors.
What’s more, they are lightweight, fast, and pretty effective because they replace all malfunctioning files with healthy elements. It might just be everything you need to get your PC working well.
2. Create a new Admin account
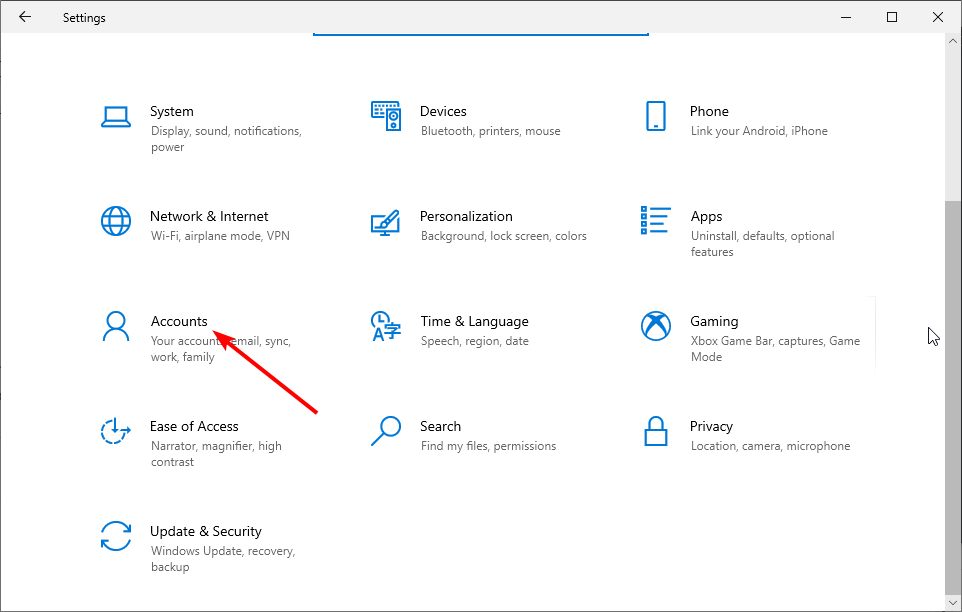
- Press the Windows key + I and select Accounts.
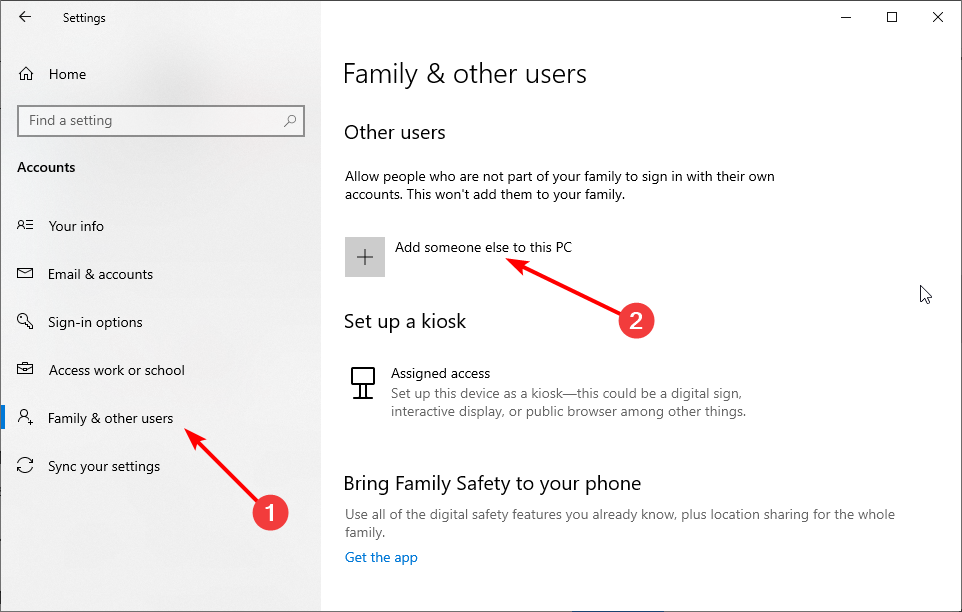
- Click on Family & other people and select Add someone else to this PC under Other people.
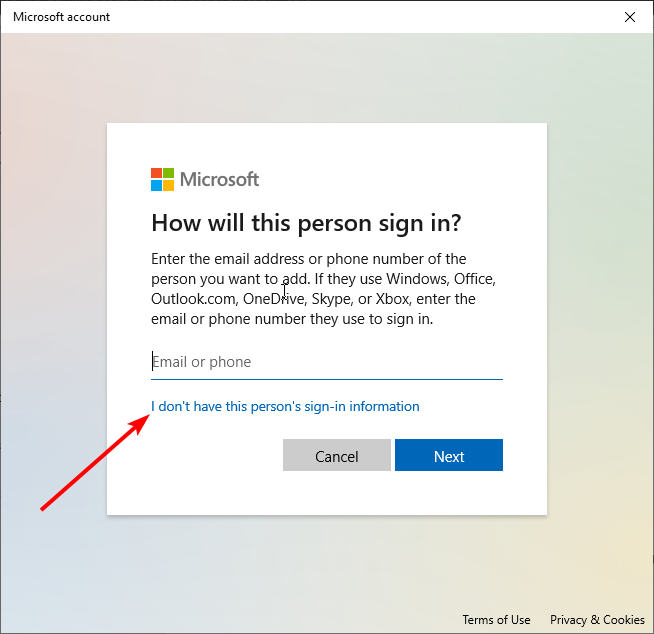
- Click I don’t have this person’s sign-in information.
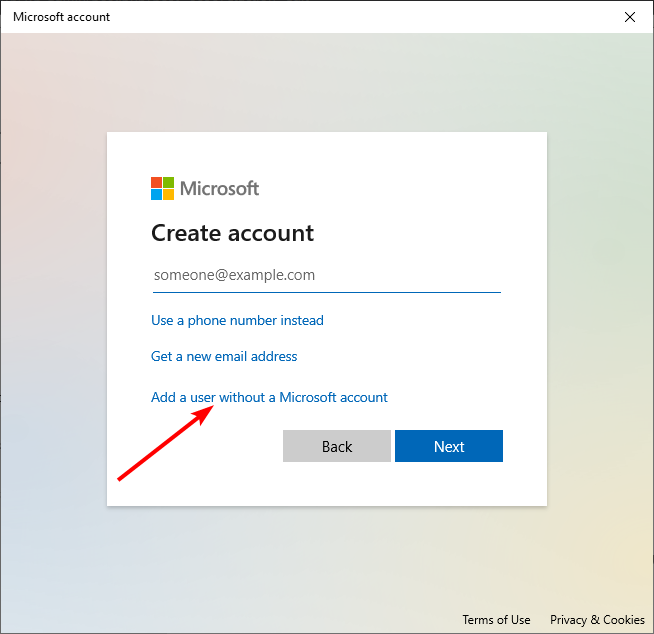
- Select Add a user without a Microsoft account.
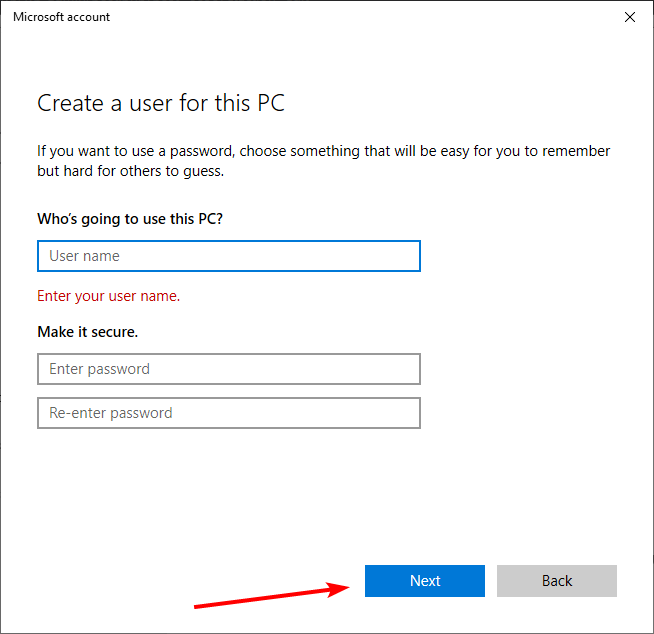
- Enter the Username, and password, fill in other required fields, and click Next.
- Now, sign out of your current account, sign in to the new one, and check if the issue persists.
If the problem is solved, you need to change the account to administrator and move your files. Is Windows Settings scrolling down unexpectedly? We’ve got tried-and-true methods to help you regain control.
3. Uninstall and reinstall mouse drivers
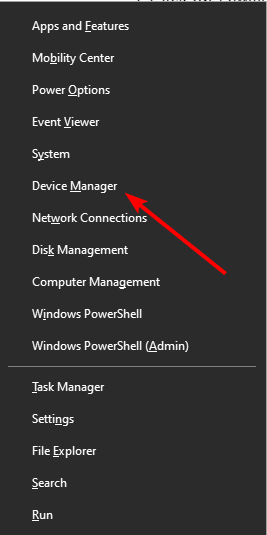
- Press the Windows key + X and select Device Manager.
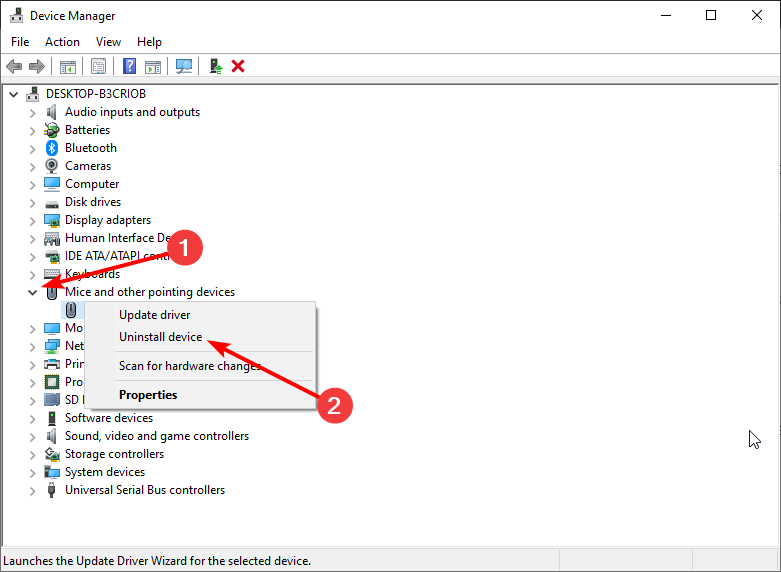
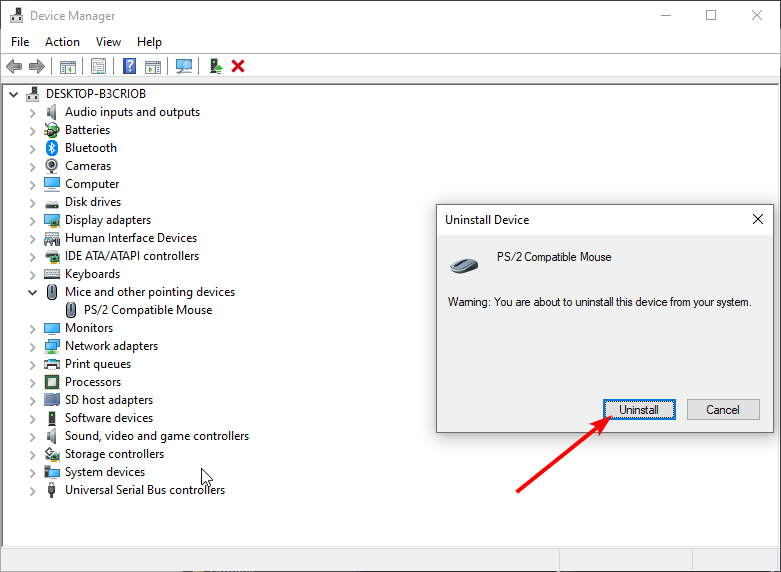
- Double-click the Mice and other pointing devices option and right-click your mouse driver.
- Choose the Uninstall device option.
- Now, click the Uninstall button.
- Finally, go to your mouse manufacturer’s website to download the latest version of the driver.
A faulty mouse driver is another well-known cause of the Windows Start Menu scrolling up issue. This is especially true for an external mouse. Uninstalling and reinstalling the driver should fix this problem here.
4. Re-register Cortana
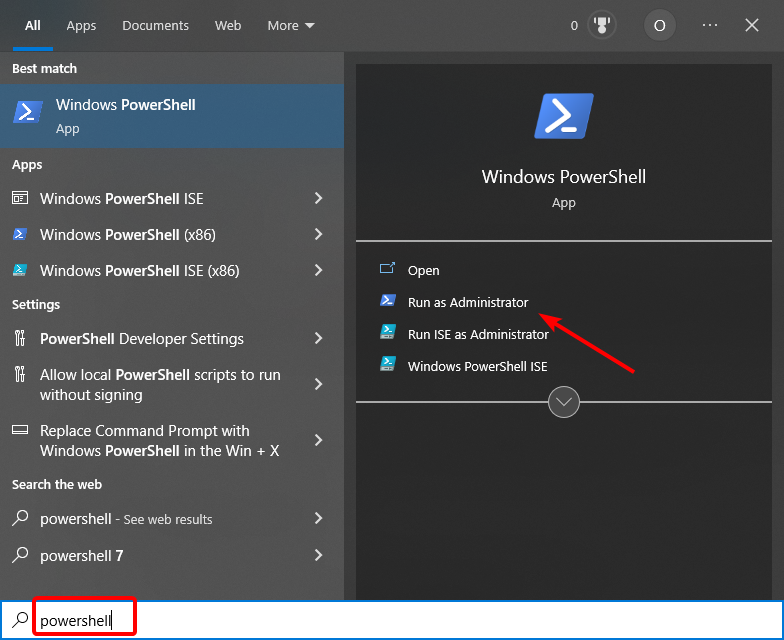
- Press the Windows key, type powershell, and click Run as administrator under Windows Power Shell.
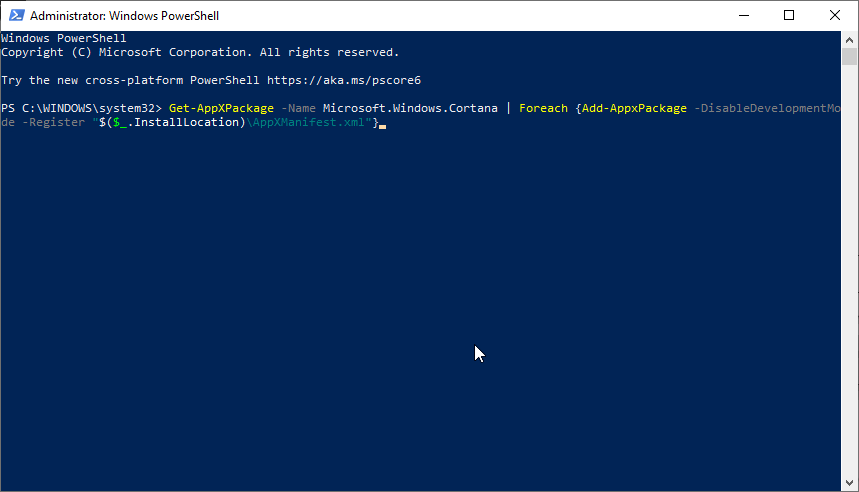
- Copy and paste the command below and hit Enter:
Get-AppXPackage -Name Microsoft.Windows.Cortana | Foreach {Add-AppxPackage -DisableDevelopmentMode -Register "$($_.InstallLocation)\AppXManifest.xml"} - Now, wait for the command to complete.
Sometimes, it is not only the Windows Start Menu that keeps scrolling up. It also affects Windows Search. In this case, you need to re-register Cortana using PowerShell and restart your PC.
5. Restart Windows Explorer
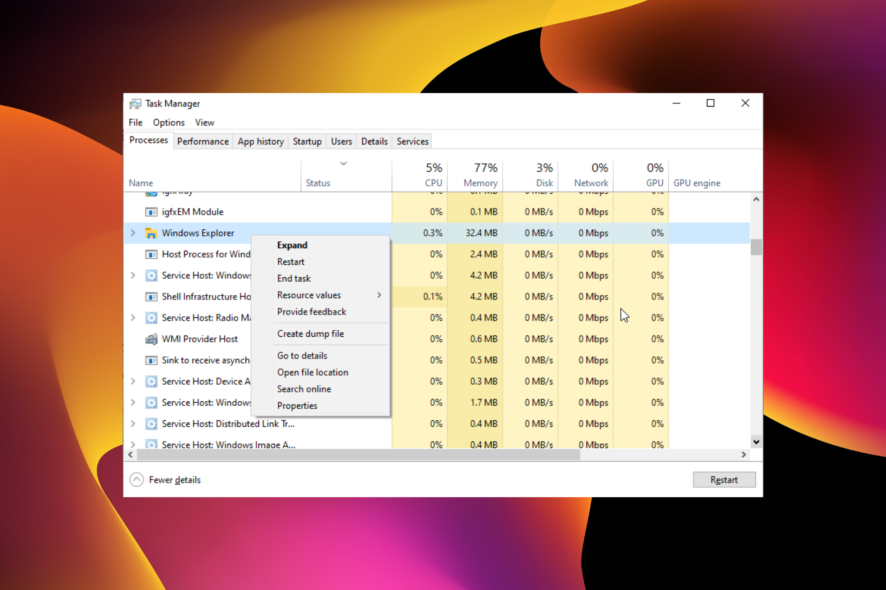
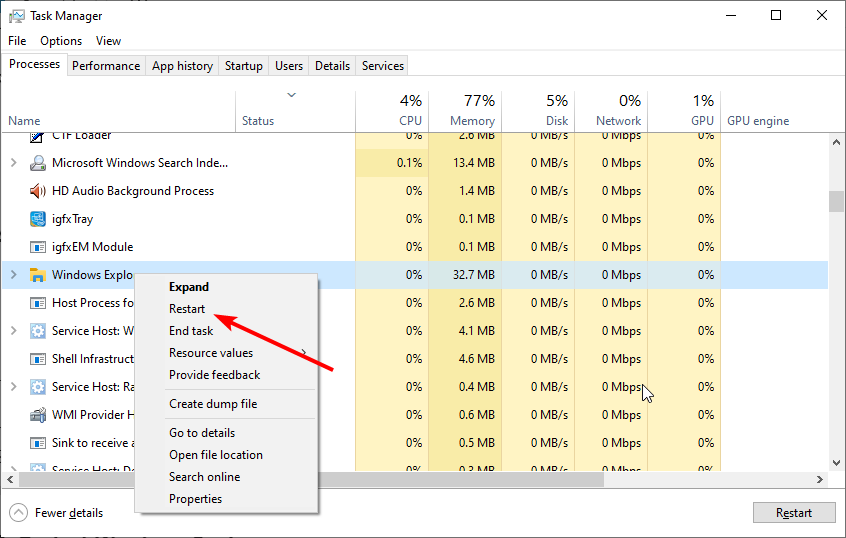
- Press the Shift + Ctrl + Esc keys to launch the Task Manager.
- Right-click on Windows Explorer and click Restart.
- Now, check if the problem persists.
If your Windows menu keeps moving on its own, it might be due to problems with the Windows Explorer process. According to users, restarting the process should fix this issue
Even more, we recommend removing your Xbox controller or any other game controller. Another thing to try is to remove your wireless mouse’s USB receiver and connect it to another port. This might prompt your PC to reinstall the driver.
The Windows Start Menu scrolling up issue is a frustrating problem for users. Thankfully, it is one of the easiest to fix, as shown in this guide.
If you are facing related issues like the Start Menu disappearing on Windows 10, check our detailed guide to fix it effortlessly.
Feel free to let us know the solution that helped you solve this problem in the comments below.



User forum
1 messages