Windows 10/11 Network Discovery won't Stay On
4 min. read
Updated on
Read our disclosure page to find out how can you help Windows Report sustain the editorial team. Read more
Key notes
- Network Discovery keeps turning off issue can occur due to firewall and services problem.
- Check out the steps in the article below to troubleshoot Network Discovery related issues.
- For more troubleshooting guides don't hesitate to check out our thorough Fix section.
- The Windows 10 Hub features a great selection of articles to help you make the most out of your PC.
Network Discovery in Windows 10 allows computers and other devices to be discovered on a network. For this to happen, the Network Discovery function must stay on.
According to Microsoft, this issue can occur if the dependency services for Network Discovery are not running or if your Firewall is blocking the Network Discovery function.
In this article, we explore a few troubleshooting steps to help you resolve the Windows 10 Network discovery won’t say on issue for good.
What can I do if Network Discovery keeps turning off?
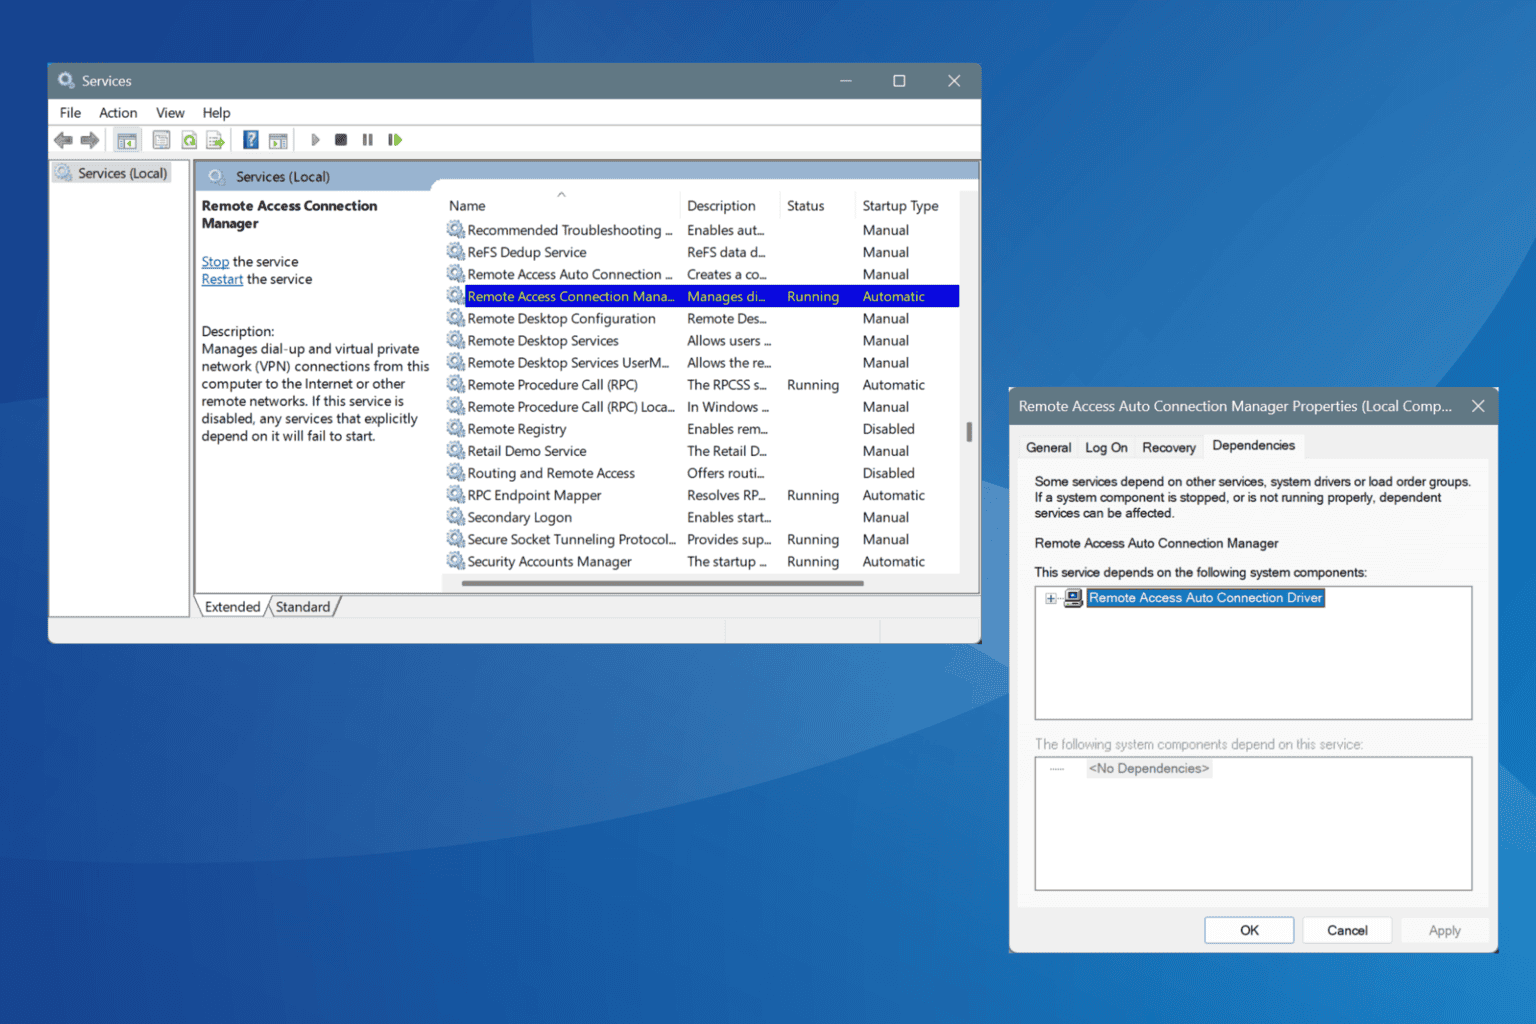
1. Check dependency services settings
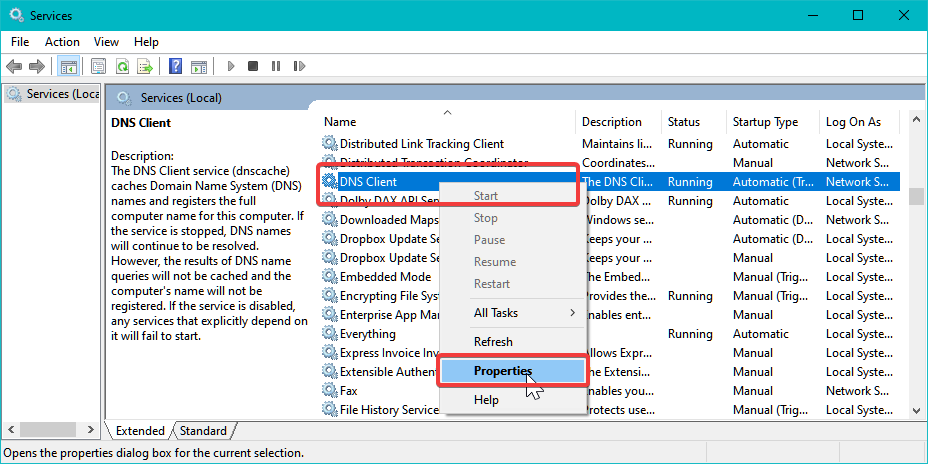
- Press the Windows key + R.
- Type services.msc and click OK.
- Search for and right and click on DNS Client service.
- Select Properties.
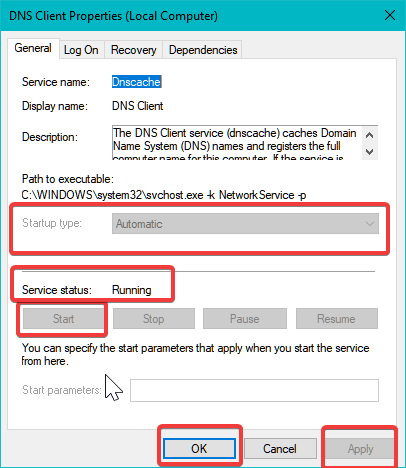
- In Properties, check if the Service status shows running.
- If not, click on Start.
- Also, make sure the Startup Type is set to Automatic.
- Click Apply and OK to save the changes.
- Next, repeat the steps for all the services listed below:
Function Discovery Resource Publication
SSDP Discovery
UPnP Device Host - Make sure to save the change and then exit the Services window.
Restart your PC and check if Network Discovery stays on. As discussed earlier, the Network Discovery related issues occur if one of the aforementioned services are not running. Starting the services should fix the problem.
2. Update your Windows drivers
The Windows 10 Network Discovery issue might be connected to problematic drivers, but you can solve this in a timely manner by using a trusted third-party program with advanced capabilities of downloading, installing, and fixing Windows drivers.
You can prevent these problems by using an automatic tool that will search and install the correct drivers on your computer with just a few clicks. That's why we recommend you use Outbyte Driver Updater. Here's how to do it:
- Download and install the Outbyte Driver Updater app.
- Launch the software.
- Wait for the app to detect all incompatible drivers.
- Afterward, it will show you a list of the drivers found to select the ones to Update or Ignore.
- Click on Update & Apply Selected to download and install the newest versions.
- Restart your PC to ensure the applied changes.

Outbyte Driver Updater
Use this software and solve all driver-related issues from your PC.3. Check your sharing options
- Click on the Network icon in the taskbar.
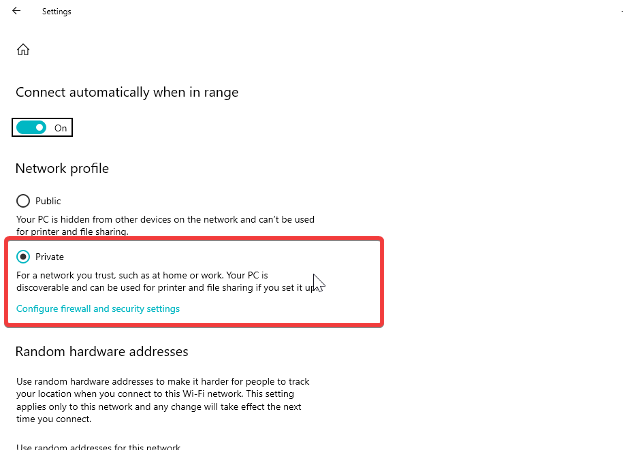
- Select your current network and click on Properties.
- Scroll down and make sure he Network Profile is set to Private.
- Press Windows key + I.
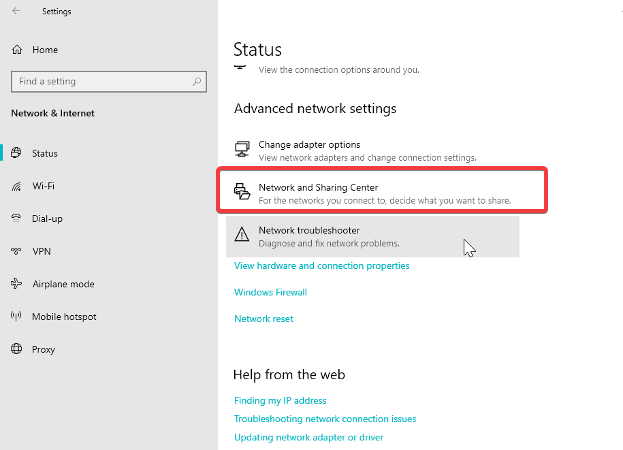
- Open Network and Internet.
- Click on Network and Sharing Center.
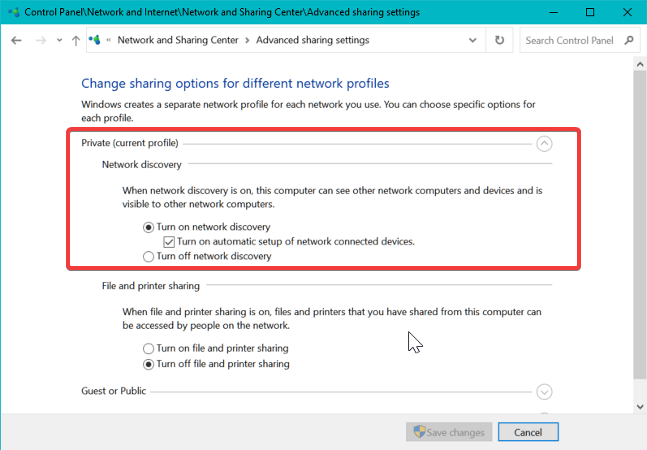
- From the left pane, click on Change advanced sharing settings.
- Under Network Discovery, select Turn on Network Discovery.
- Make sure ‘Turn on automatic setup of network-connected devices’ box is checked.
- Click Save Changes.
Try accessing the network and sharing options again to see if the issue is resolved.
4. Allow Network Discovery through Firewall
- Press the Windows key + R.
- Type control and click OK.
- In Control Panel, go to System and Security.
- Click on Windows Defender Firewall.
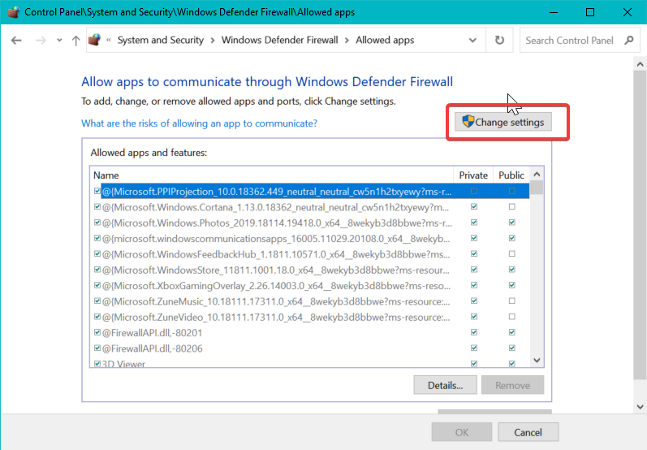
- From the left pane, click on Allow an app or feature through Windows Defender Firewall.
- Click on Change Settings.
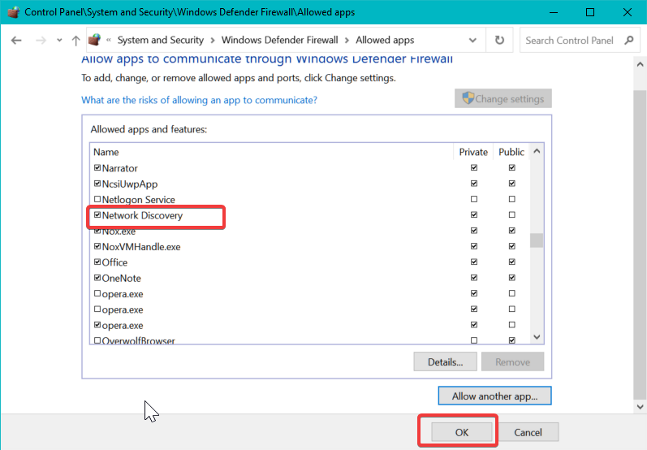
- Scroll down and locate Network Discovery.
- Check the box to enable Network Discovery.
- Click OK to save the changes.
Once done, try to turn on Network Discovery again to see if it stays on. You may also have to configure to allow Network Discovery on any third-party firewalls installed on your computer.
5. Run network troubleshooter
- Press Windows key + I.
- Open Update & Security.
- From the left pane, select Troubleshoot.
- Click on Additional Troubleshooters.
- Select Network Adapter.
- Click on the Run the troubleshooter
- The network troubleshooter will scan the system for network issues and recommend some fixes.
- Once done, run the troubleshooter for Shared Folders.
6. Reset network settings
- Click on Start and select Settings.
- Go to Network and Internet.
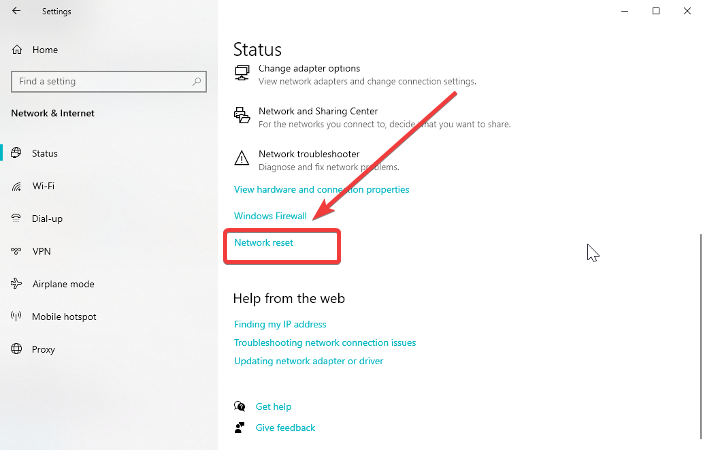
- In the Status tab, scroll down and click on Network Reset.
- Click on Reset Now.
This will remove and then reinstall all your network adapters, and set other network components back to their original settings. The PC will restart, so wait till it reboots to see for any improvements.
The Network Discovery won’t stay on issue usually occurs if the dependency function in services is not running. In other cases, it could be due to a firewall blocking the connection.
Follow the above steps and let us know which method worked for you in the comments.




User forum
4 messages