What is NVIDIA Share.exe & How to Fix Its Errors
The file is associated with Nvidia graphics cards software
![]() 4 min. read
4 min. read
![]() Updated on
Updated on
Share this article

Improve this guide
Read our disclosure page to find out how can you help Windows Report sustain the editorial team Read more
Key notes
- Nvidia Share.exe is a software component developed by Nvidia Corporation.
- It enables users to capture and share gameplay footage, screenshots, and live streams on Nvidia-powered machines.
If you have encountered NVIDIA Share.exe on your Task Manager and wondering what it is, this guide can help!
We will delve into the purpose of NVIDIA Share.exe, exploring its functionalities with effective solutions to fix the common issues related to it.
What is NVIDIA Share.exe?
NVIDIA Share.exe is an integral part of NVIDIA’s GeForce Experience software suite, designed to enhance the gaming experience on computers equipped with the company’s graphics cards.
It enables users to capture and share their gaming moments effortlessly, whether recording gameplay footage, capturing screenshots, or streaming live gameplay sessions.
The file is usually located in C:\Program Files (x86)\NVIDIA Corporation\NVIDIA GeForce Experience
However, like any software application or process, NVIDIA Share.exe can encounter errors that hinder its proper functioning.
These errors may manifest in various ways, such as crashes, unresponsive behavior, or issues with capturing or sharing content.
How can I fix the errors related to NVIDIA Share.exe?
Before engaging in advanced troubleshooting steps, you should consider performing the following checks:
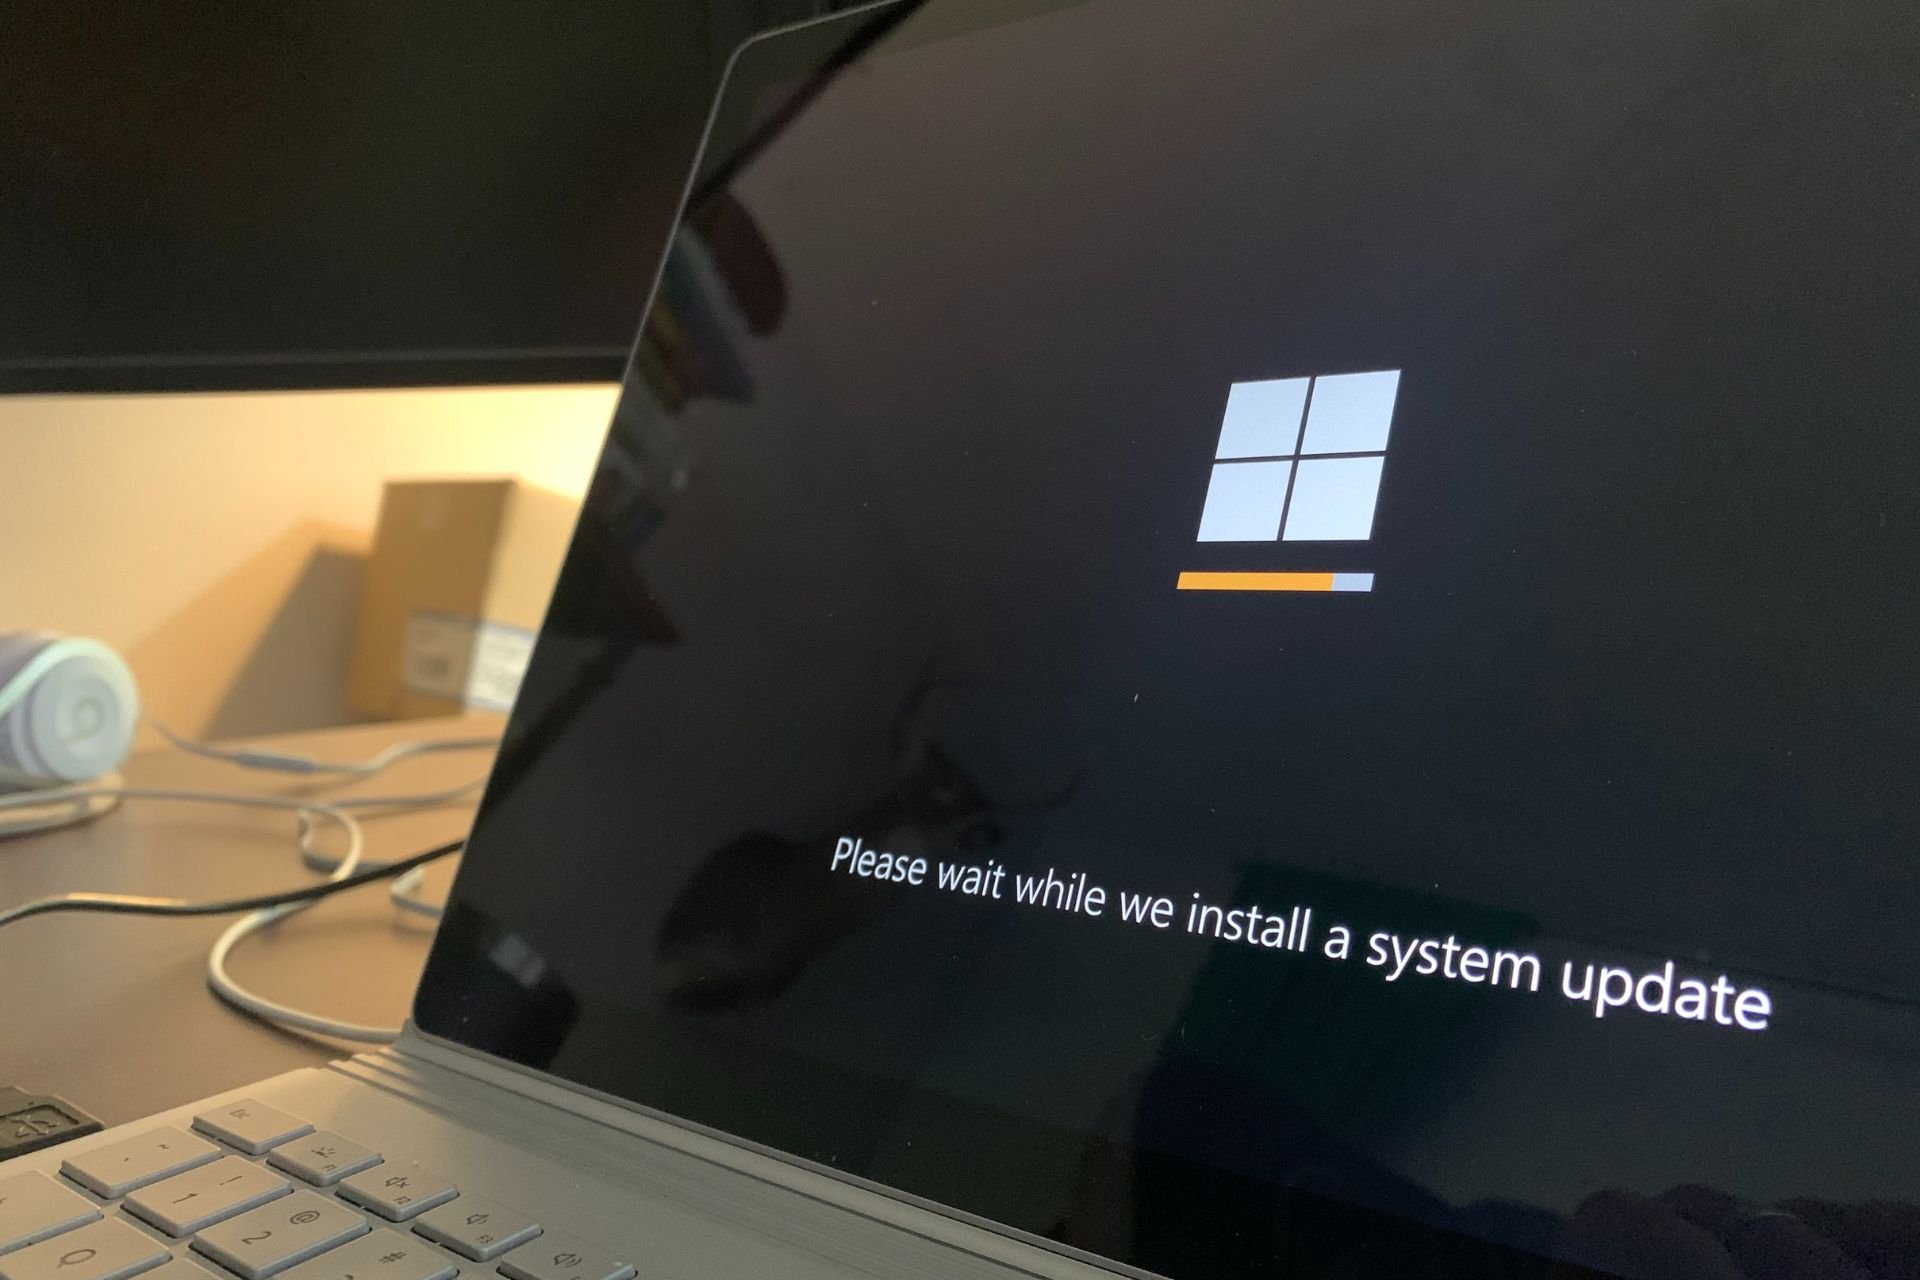
- Try restarting your computer.
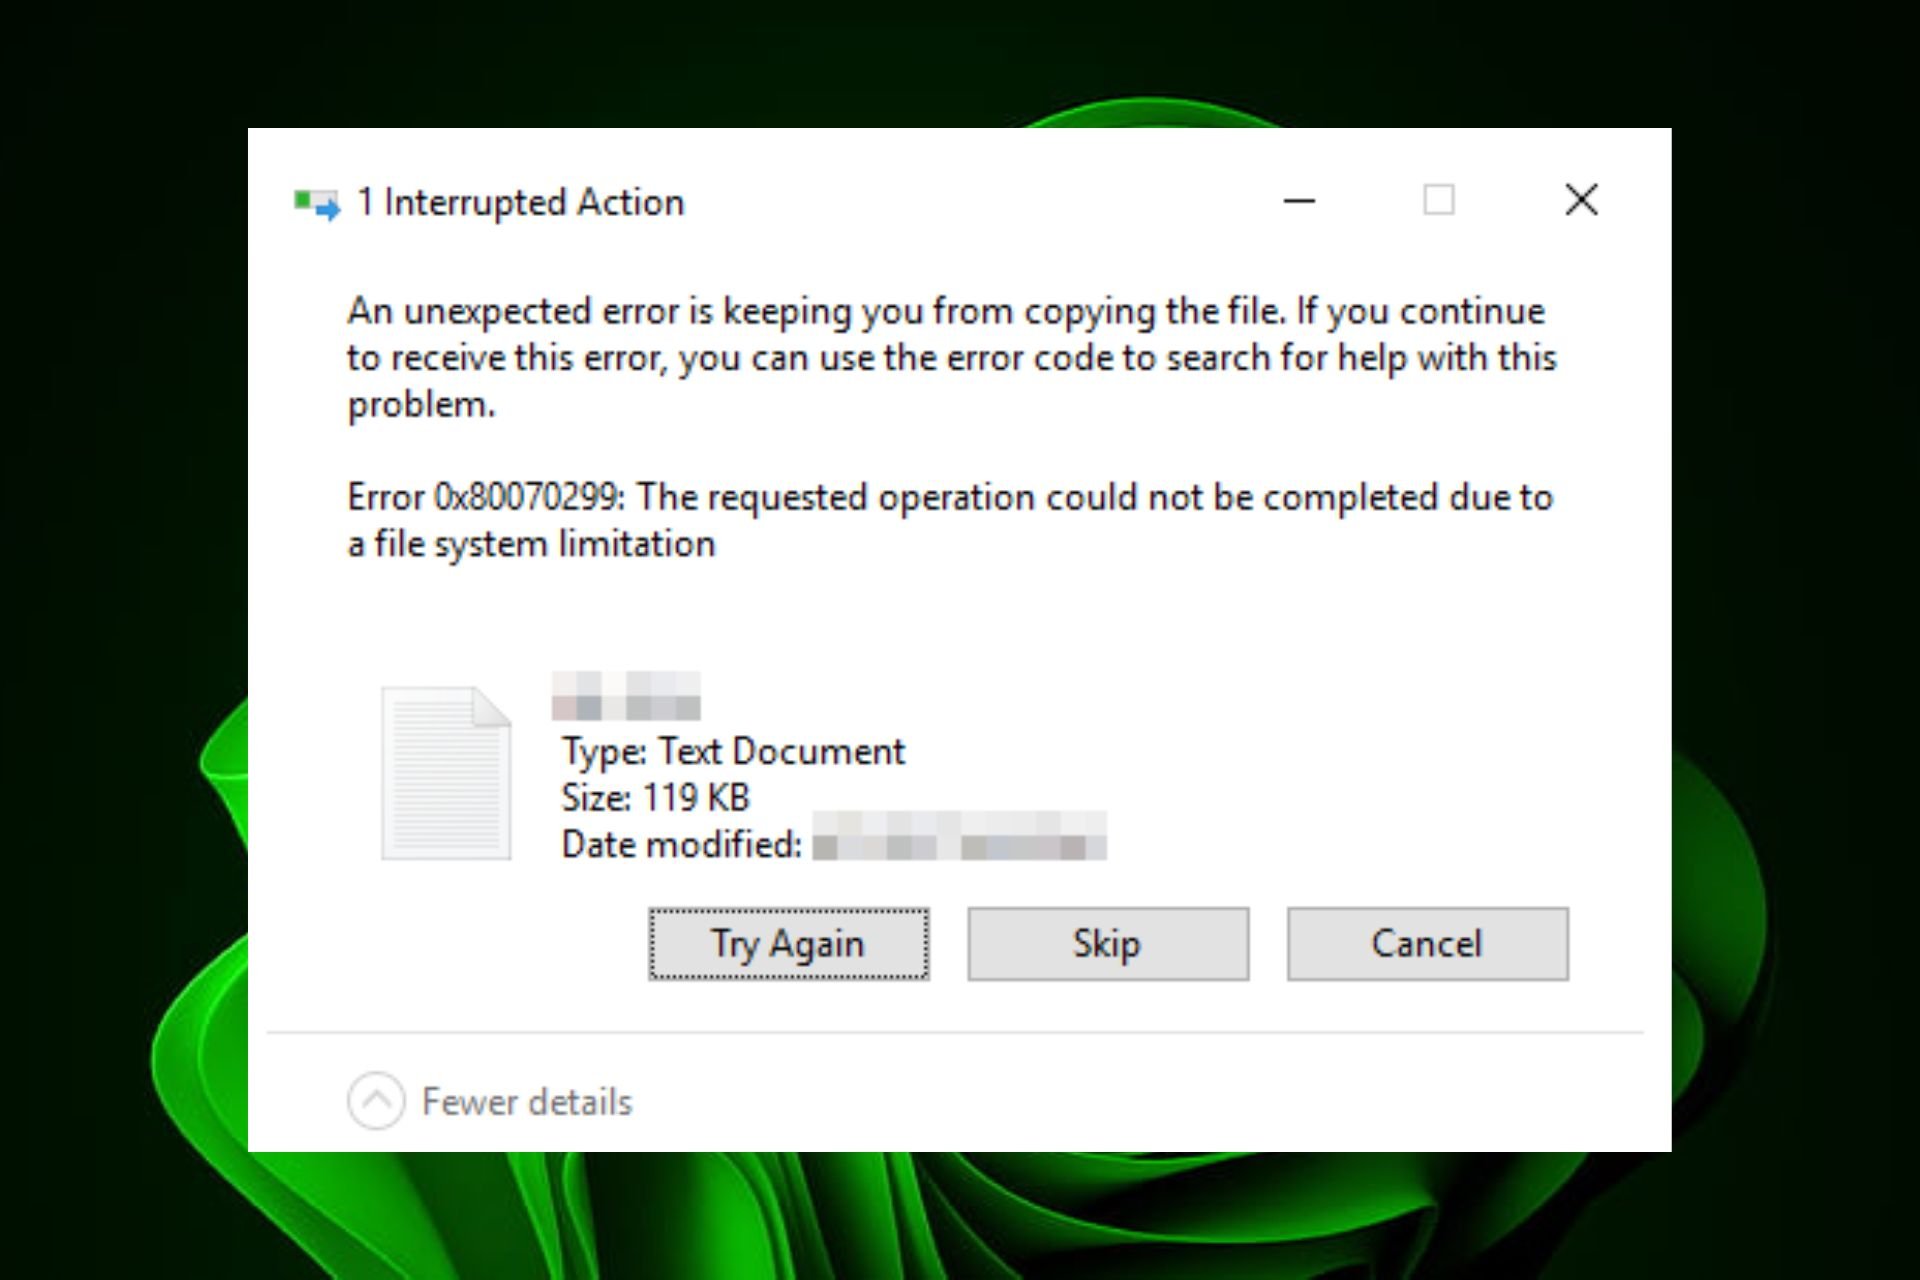
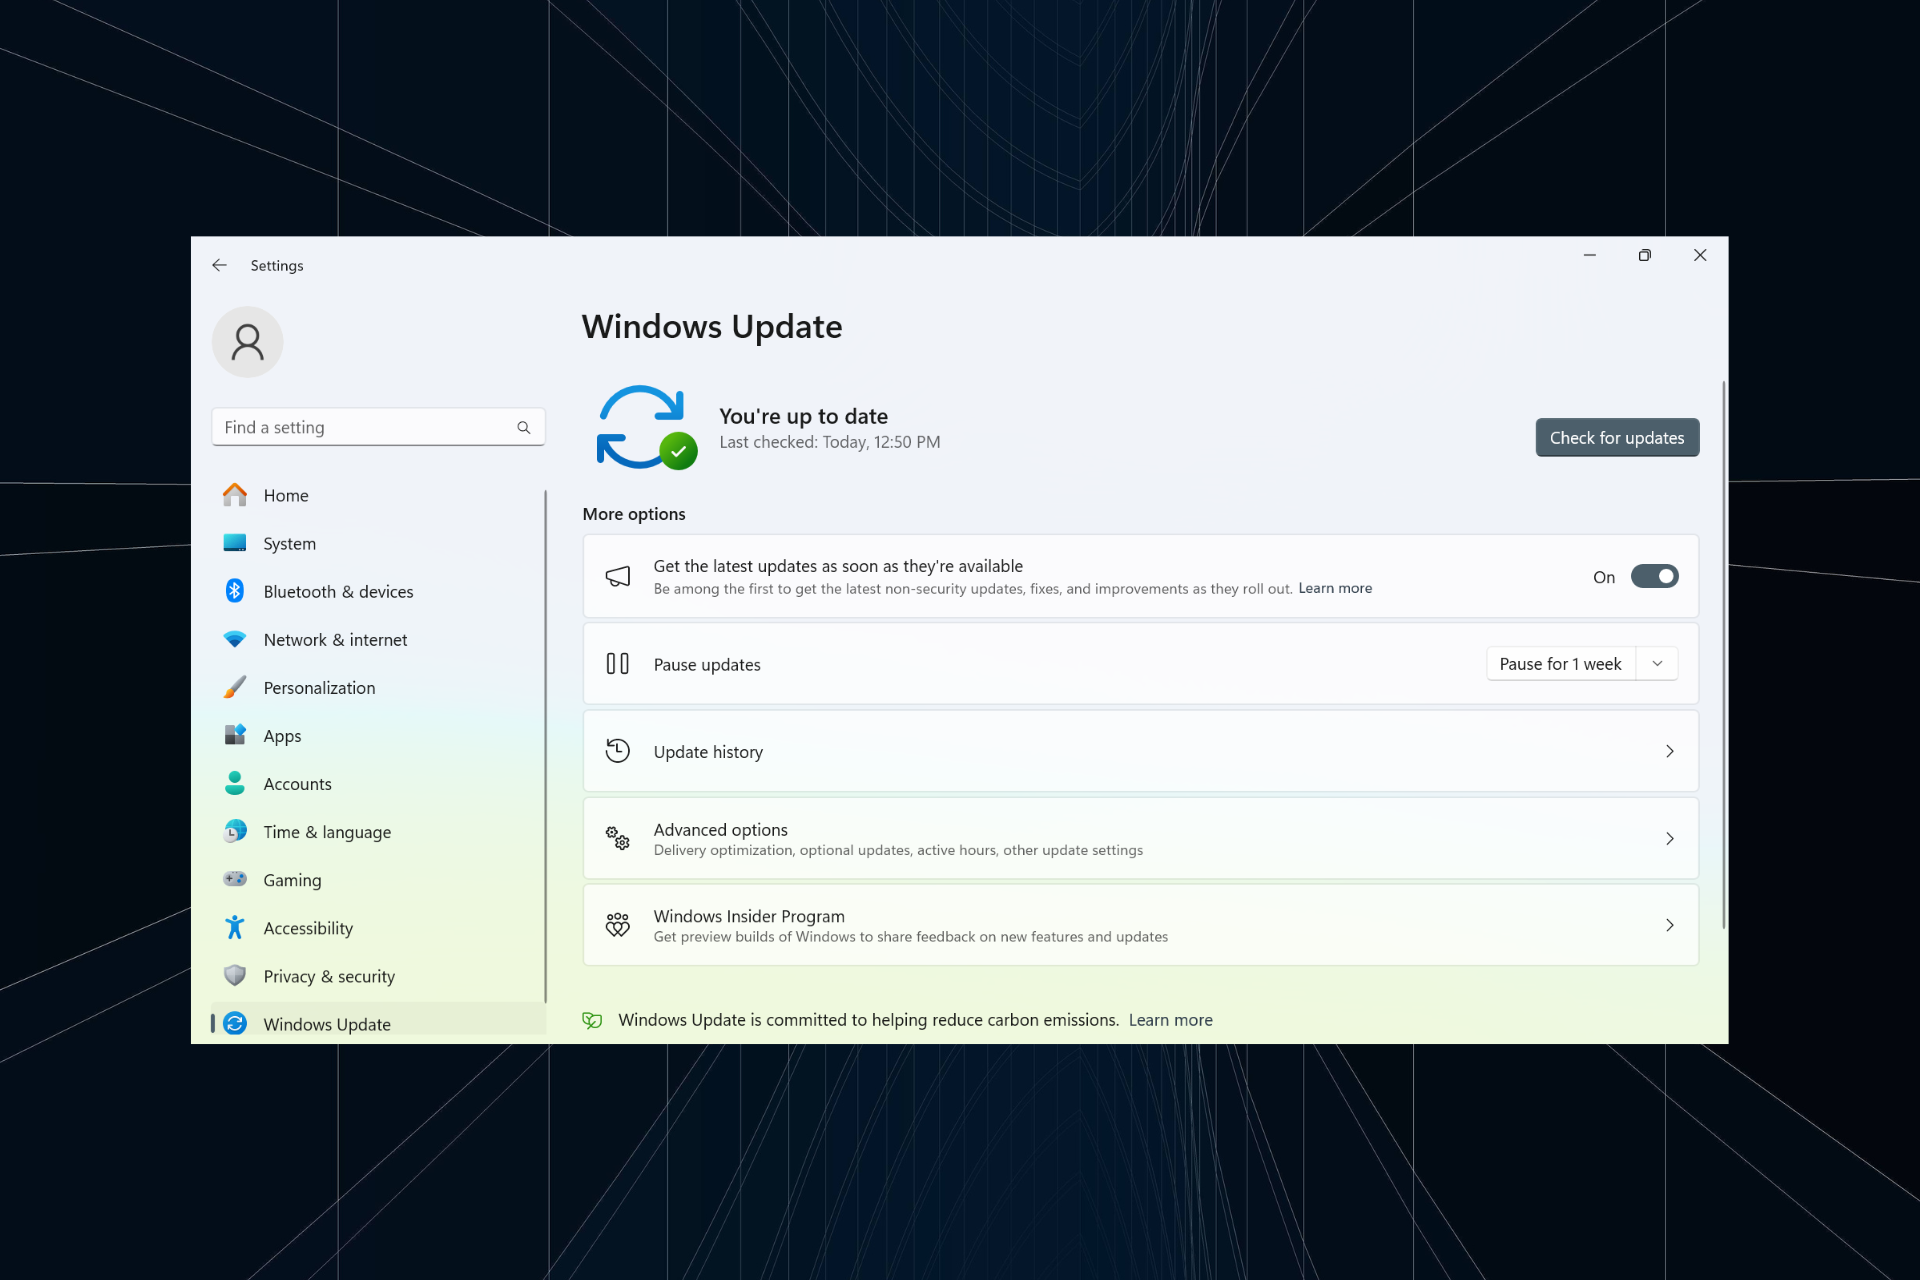
- Make sure Windows is up to date.
Once you finish these checks, move to the detailed solutions to fix the problems.
1. Run the app in Compatibility mode
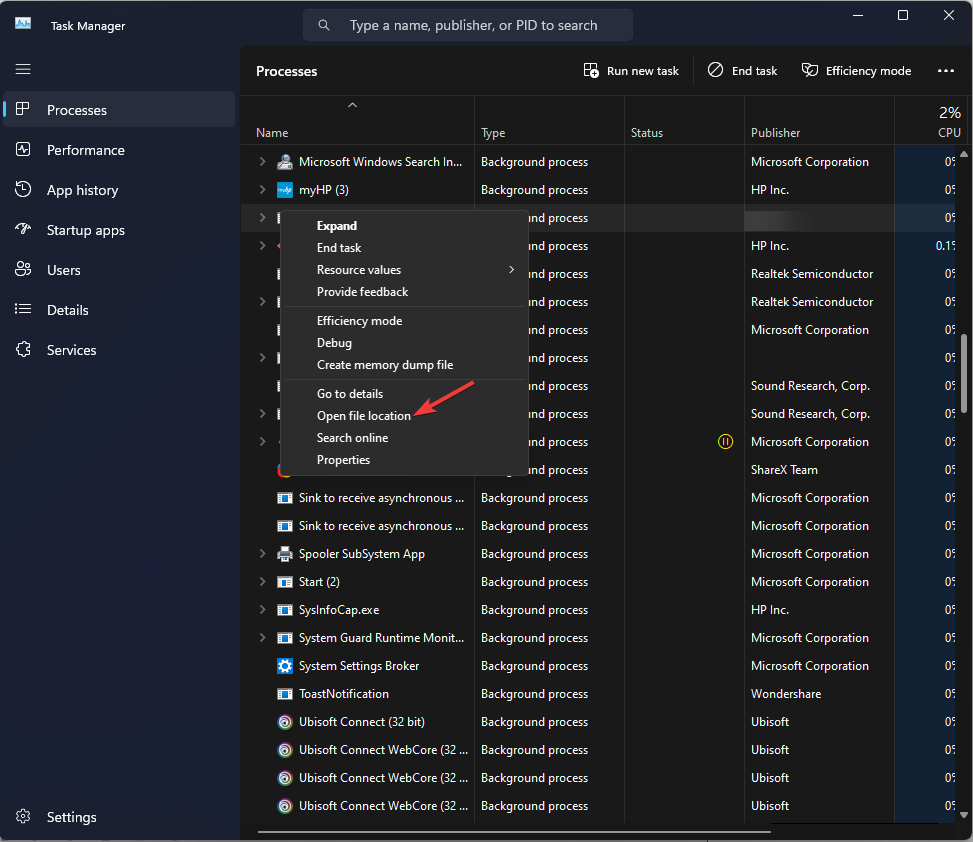
- Press Ctrl + Shift + Esc to open the Task Manager app.
- Go to the Processes tab, locate NVIDIA Share, and right-click it to select Open File Location.

- On the File Explorer window, right-click NVIDIA Share and choose Properties.
- Switch to the Compatibility tab, under Compatibility mode, and place a checkmark next to Run this program in compatibility mode for.

- Now from the drop-down, select Windows 8. Click Apply, then OK to confirm the changes.

2. Renable NVIDIA Share
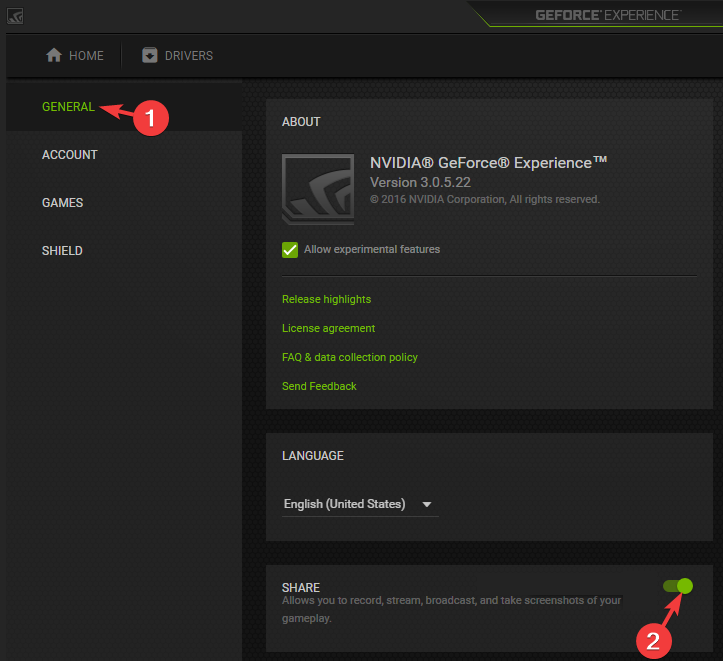
- Press the Windows key, type geforce experience, and click Open.
- Locate and click Settings from the top right corner.
- Go to General, then toggle off the switch near Share to deactivate it.

- Close the app, restart the computer, follow the same steps, and turn on the NVIDIA Share to check if the issue persists.
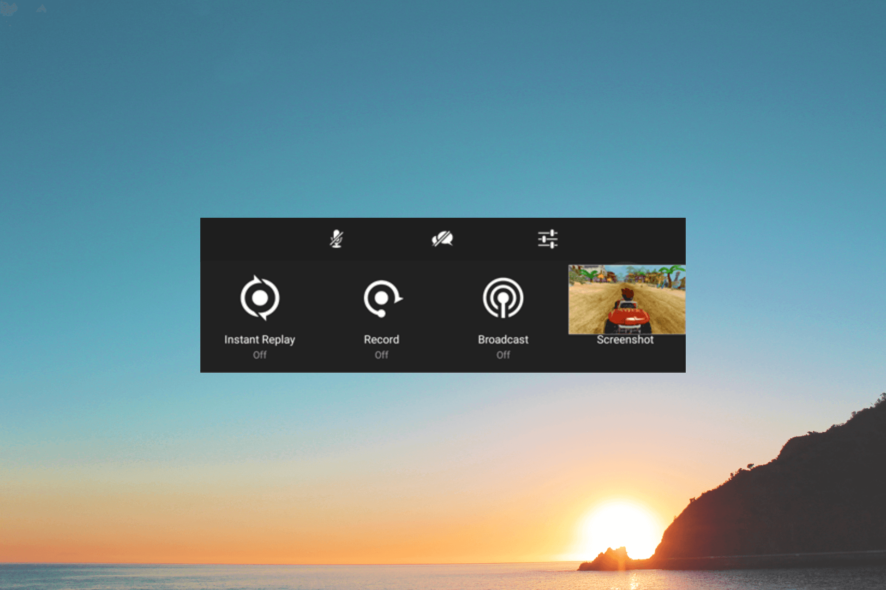
3. Disable the Instant Replay option
- Press the Windows key, type geforce experience, and click Open.
- Now press Alt +Z to open the in-game overlay.
- Choose the Instant Replay option and click the Turn off option to disable it.

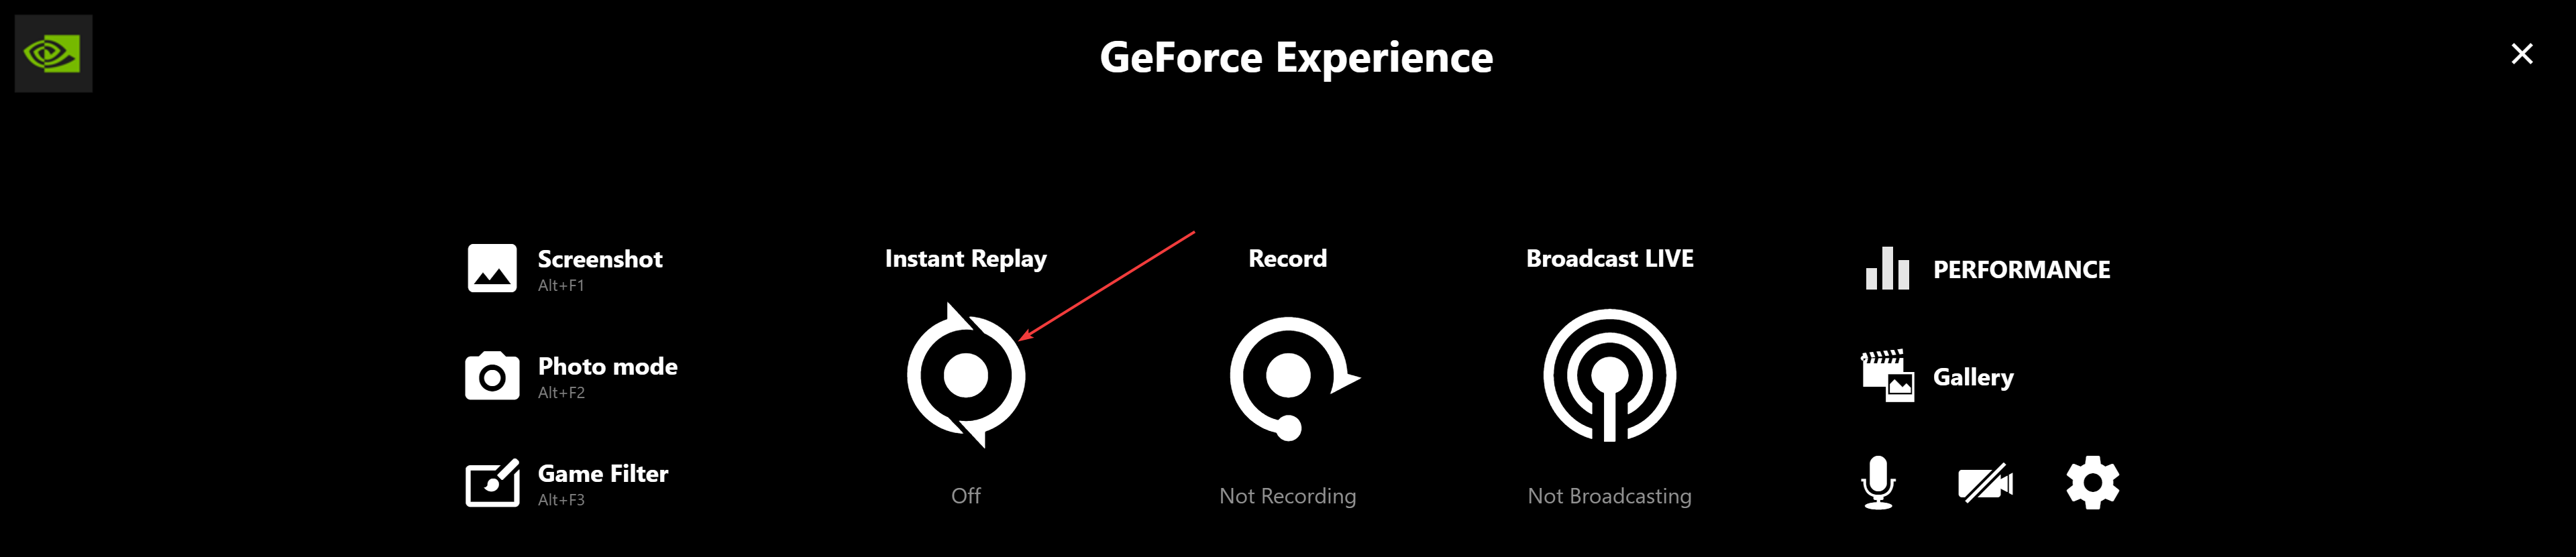
If you want to enable it afterward, follow the steps mentioned above. Alternatively, you can press Alt + Shift + F10 to turn Instant Replay on or off quickly.
4. Update the NVIDIA driver
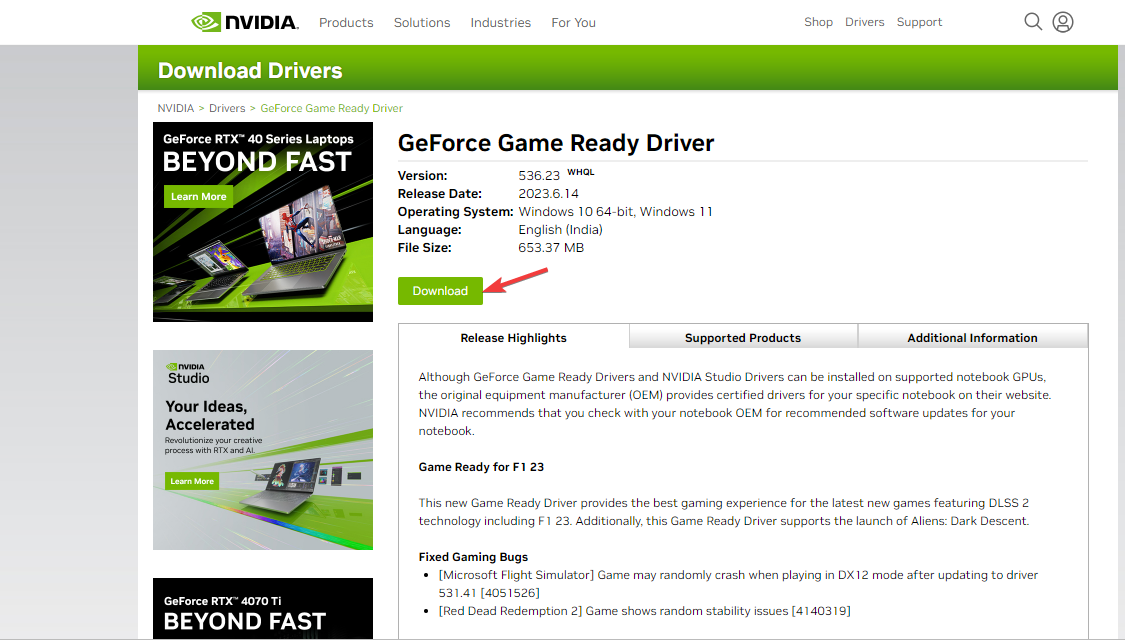
- Go to NVIDIA’s official website.
- Select the Product type, series, and other information related to the driver, then click Search.

- Click Download.

- Once the file is downloaded, double-click it and follow the onscreen instructions to complete the process.

- Download and install the Outbyte Driver Updater app.
- Launch the software and wait for the app to detect all incompatible drivers.
- Now, it will show you a list of all faulty drivers to select the ones to Update or Ignore.

- Click on Update & Apply Selected to download and install the newest versions.
- Restart your PC to ensure the applied changes.


OutByte
Keep your GPU in a flawless state without worrying about possible driver issues.5. Roll Back the driver
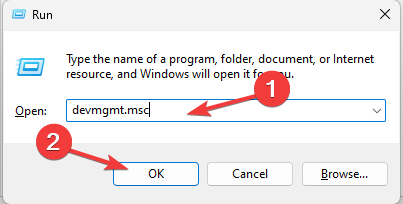
- Press Windows +R to open the Run dialog box.

- Type devmgmt.msc and click OK to open the Device Manager.
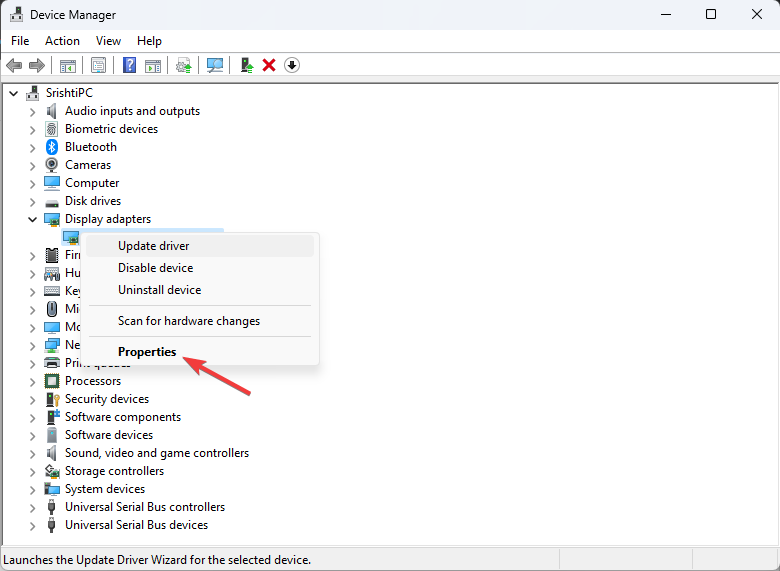
- Locate Display adapters and click it to expand it.
- Right-click the NVIDIA driver and select Properties.

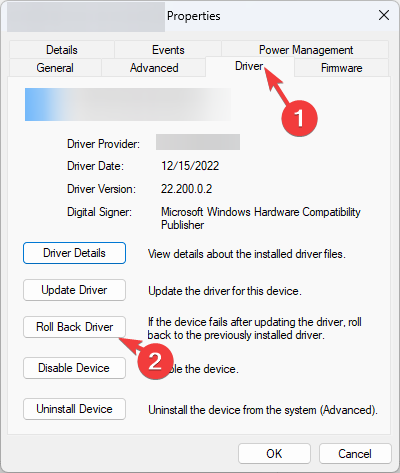
- On the Properties window, switch to the Driver tab and click the Roll Back Driver button.

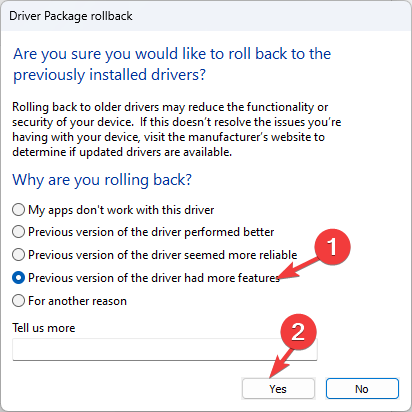
- Now on the next window, select the reason to restore the driver to the previous version and click OK.

- Restart your computer to save the changes.
6. Reinstall the GeForce Experience app
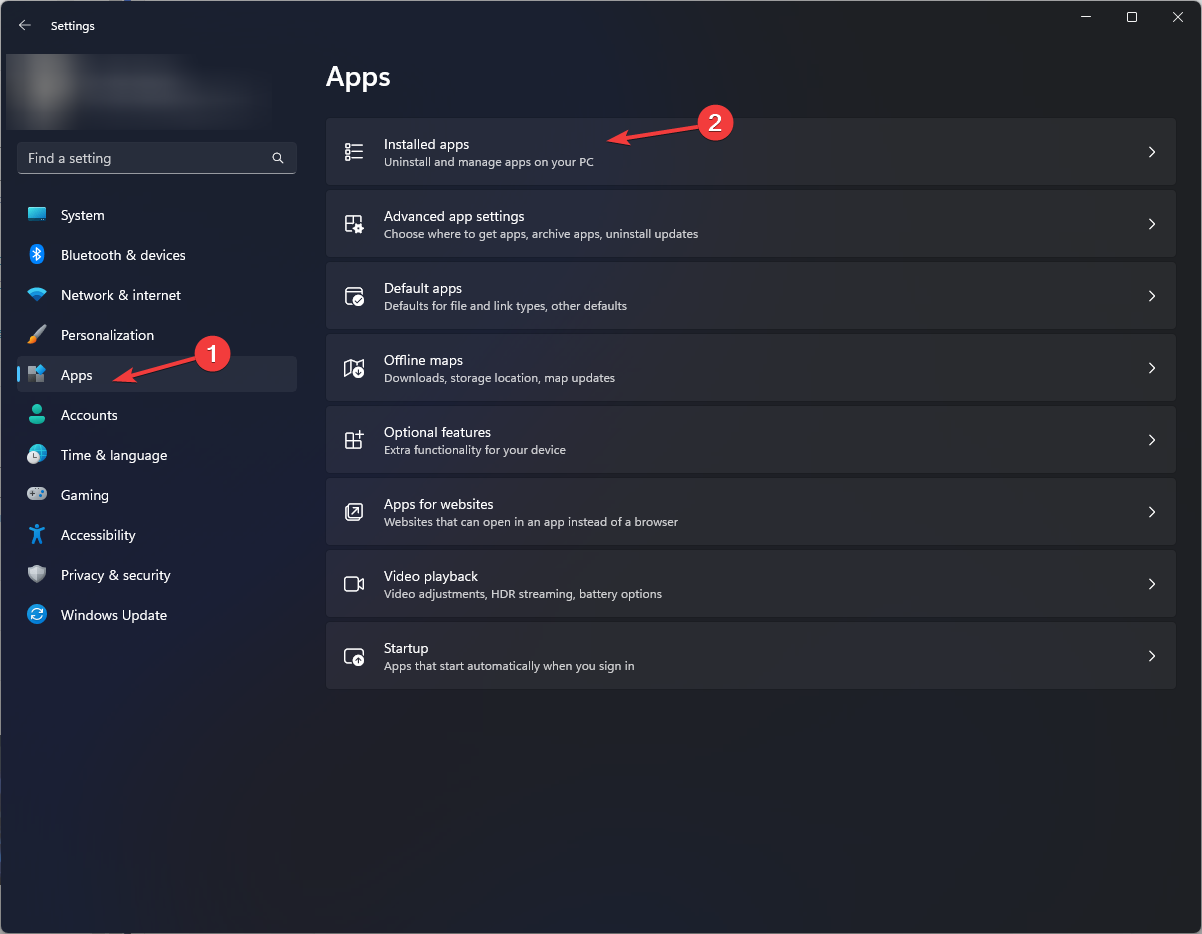
- Press Windows + I to open the Settings app.
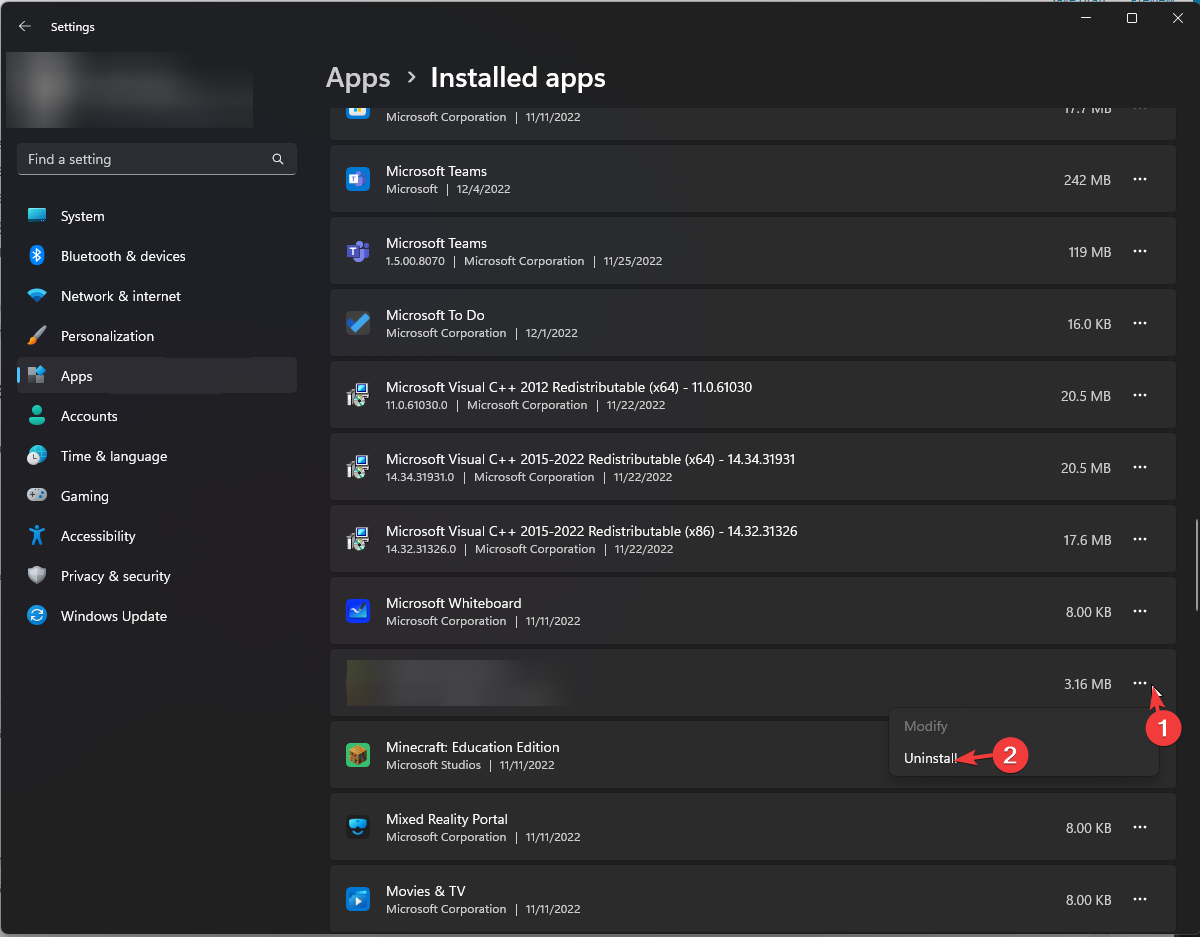
- Go to Apps, then click Installed apps.

- Locate GeForce Experience, click the three dots, and select Uninstall.

- Again click Uninstall and follow the onscreen instructions to complete the process.
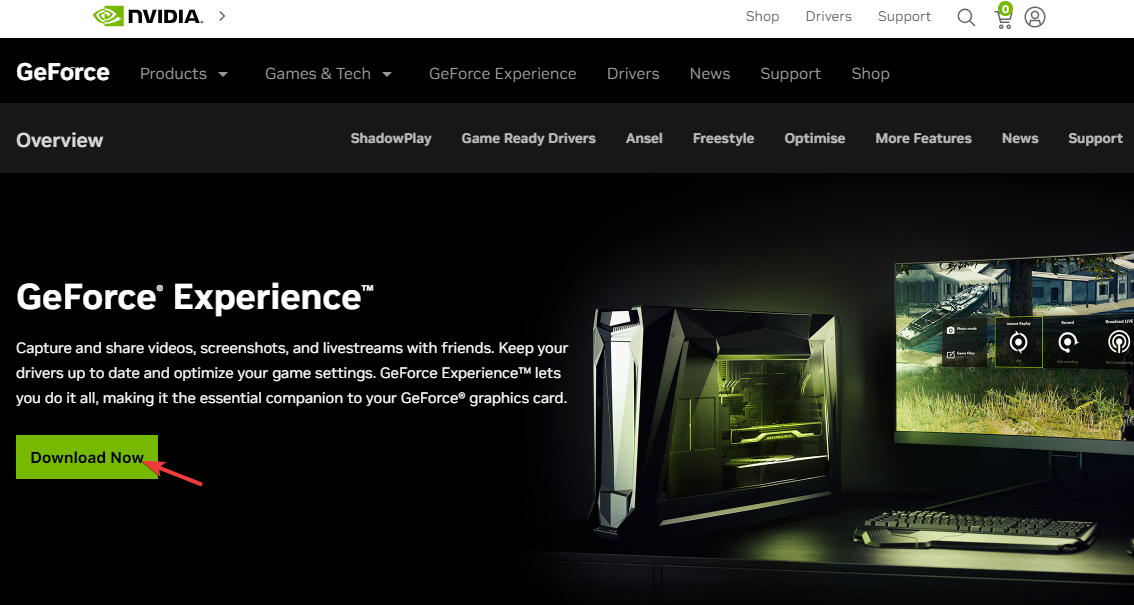
- Now, go to the official website of GeForce Experience and click on Download Now.

- Once the file is downloaded, follow the onscreen instructions to complete the process.
So, these are methods you can use to overcome any issues related to NVIDIA Share.exe and maximize your gaming experience.
If you are facing other issues, such as NVIDIA GeForce Experience Not Starting with Windows, we recommend you go through this informative guide to find solutions.
Please feel free to give us any information, tips, and your experience with the subject in the comments section below.