How to Fix the PASSIVE_INTERRUPT_ERROR BSoD
This error is usually related to the IRQL_NOT_LESS_OR_EQUAL BSoD
![]() 4 min. read
4 min. read
![]() Updated on
Updated on
Share this article
Improve this guide
Read our disclosure page to find out how can you help Windows Report sustain the editorial team. Read more
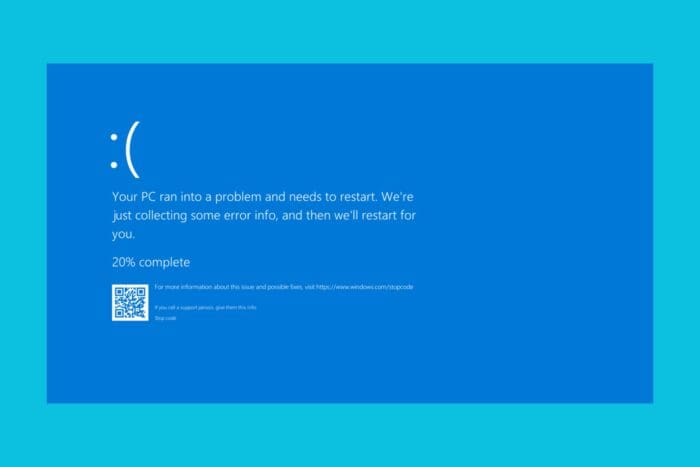
The PASSIVE_INTERRUPT_ERROR BSoD has a value of 0x0000013B and it signals that the kernel has detected issues with the passive-level interrupt. It usually comes after another, more common BSoD, IRQL_NOT_LESS_OR_EQUAL. Interrupt errors are usually due to RAM issues, but the causes include corrupted system files and faulty drivers.
First, shut down your PC and reseat the memory modules on the motherboard. Make sure that they are compatible with your system and check for any signs of damage.
How do I fix PASSIVE_INTERRUPT_ERROR BSoD?
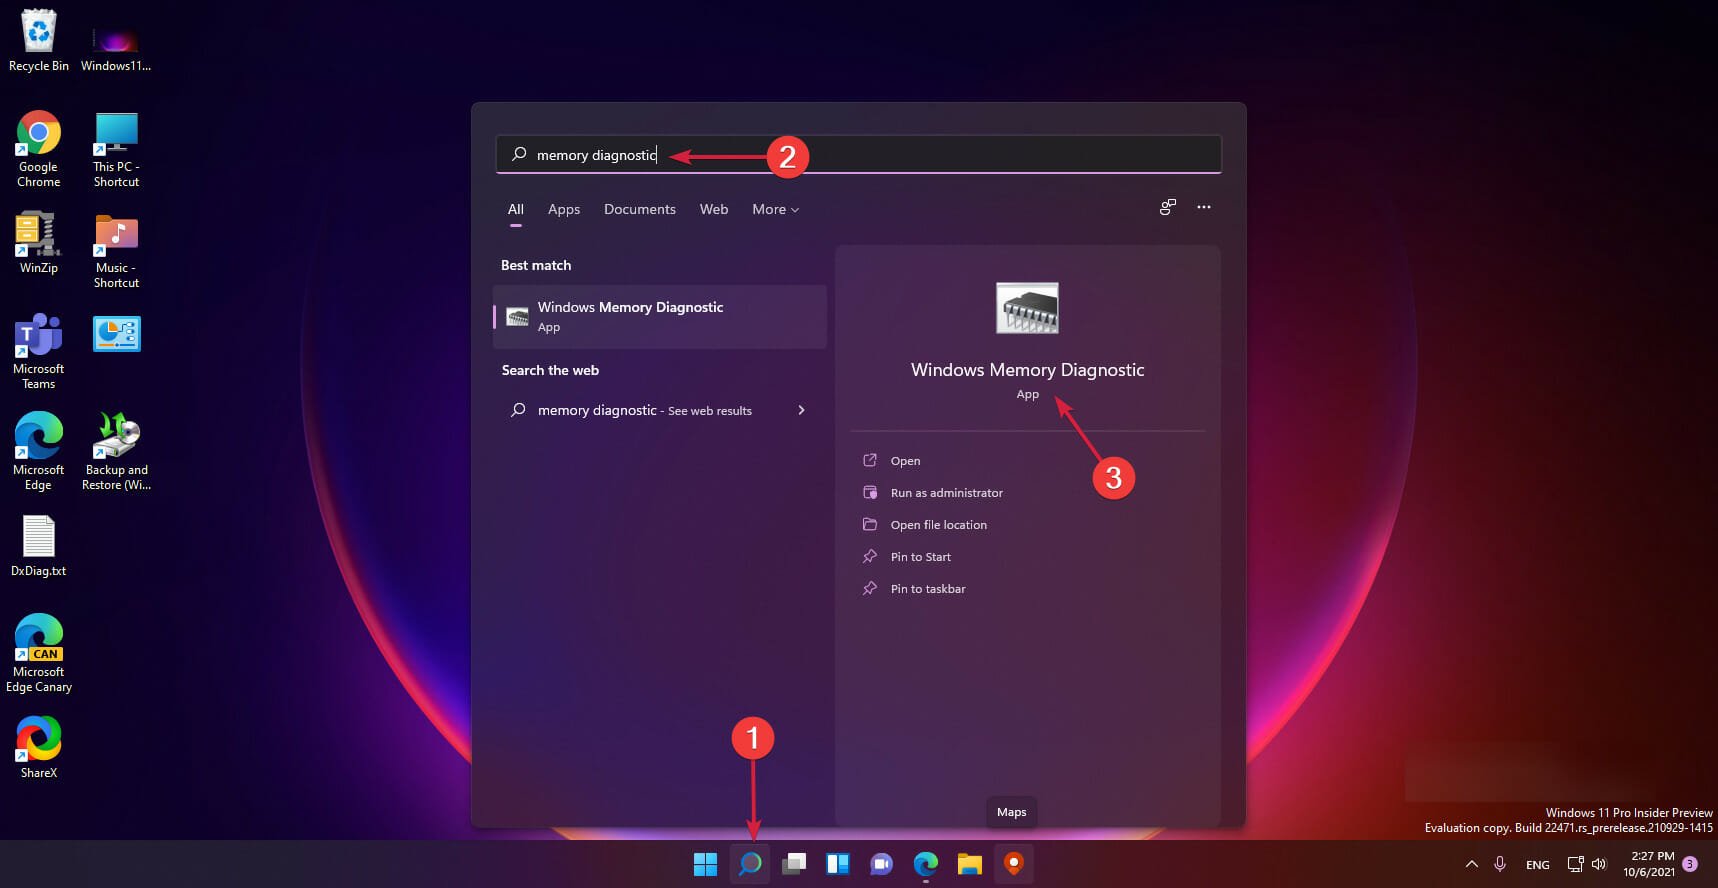
1. Check for memory problems
- Click the Start button, type memory diagnostic, and select the app from the results.
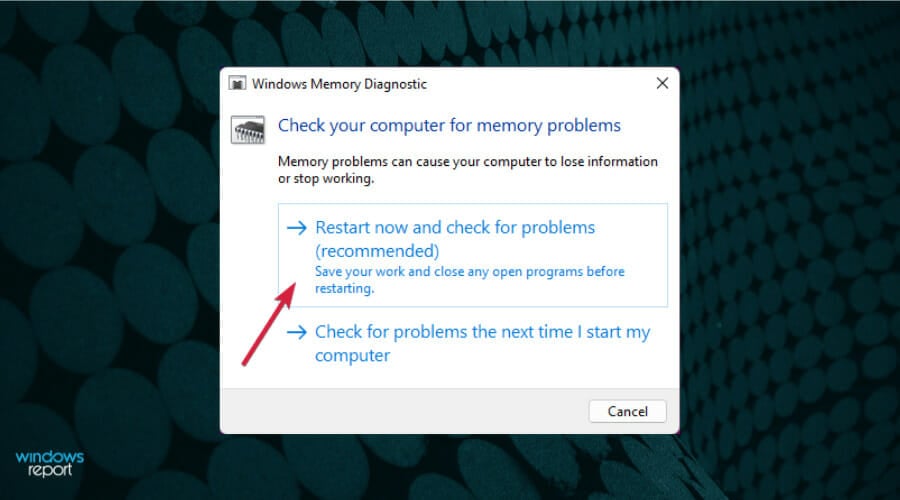
- Choose the first option, Restart now and check for problems.
- The PC will restart and make the necessary check for your RAM and if it finds any problems, you will receive a report so you can deal with the issue.
Luckily, the PASSIVE_INTERRUPT_ERROR doesn’t cause a restart loop, so you will be able to boot normally and apply the solution above. If the scan finds any issues with the RAM, reseat the affected module and repeat the test. If the results are the same, try with another set of RAM or replace the damaged one.
2. Update, uninstall or rollback your drivers
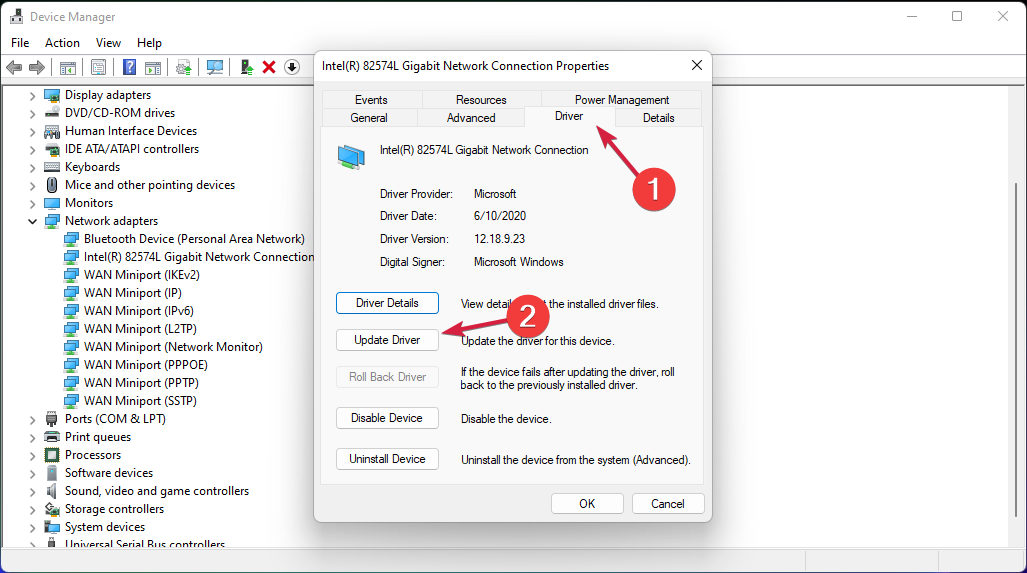
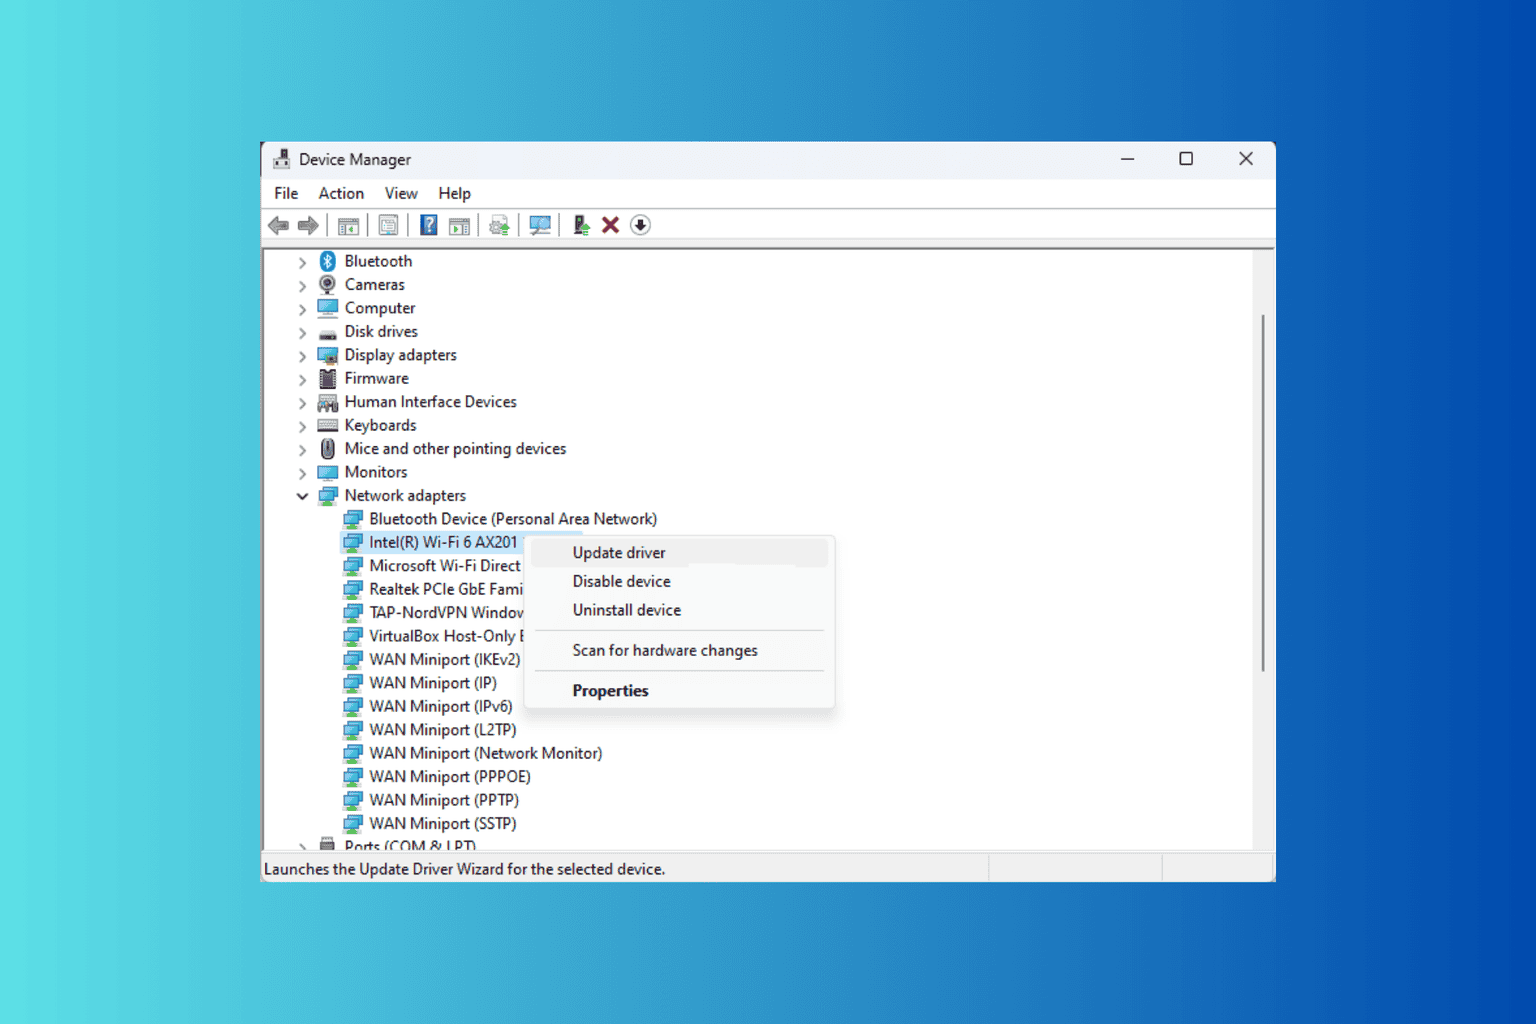
- Right-click the Start button and select Device Manager.
- Expand the categories one by one and look for any yellow mark next to one of the drivers.
- Right-click the driver, and select Properties.
- Now click on the Driver tab and then start by selecting Update driver. If the system will find a better driver, it will install it. If not, you can also try the Roll Back Driver or the Uninstall Device options, one by one, and see if that changes the situation.

If you can’t find any yellow marks, the situation will be a bit more complicated because you will need to perform the solution above for the majority of component drivers. That can be tedious and time consuming so we recommend using a dedicated driver updater instead. The best of them will perform the check and updating in just a couple of seconds automatically.
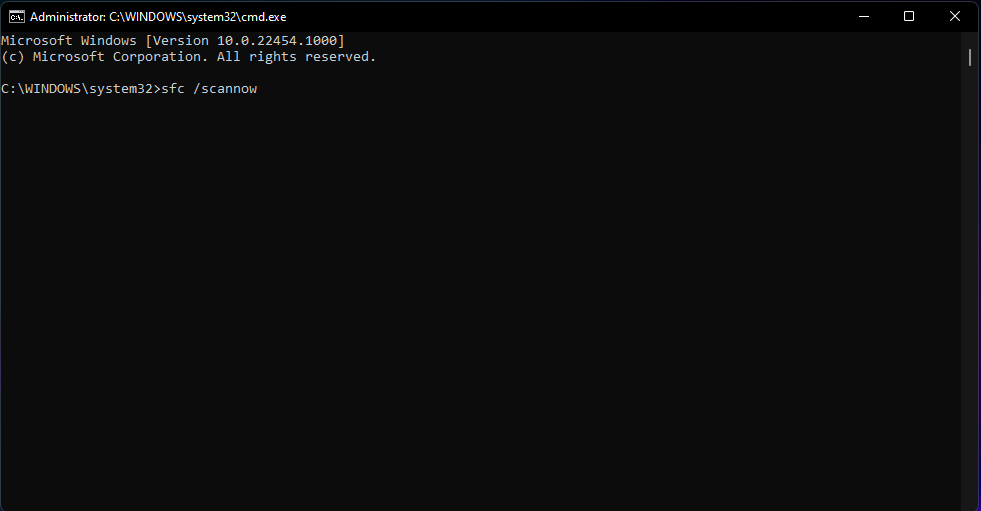
3. Run the SFC scan
- Click the Search button from the Taskbar, type cmd, and select Run as administrator to start Command Prompt with full privileges.
- Type or paste the following command and press Enter to run it:
sfc /scannow - Wait for the scan to finish as it will take a few minutes. If there are any corrupted system files, the tool will detect and repair them.
4. Restore your system to a previous point
- Press Windows + R to launch the Run command dialog box, enter rstrui.exe in the text field, and either click OK or hit Enter to launch System Restore.
- Click Next at the bottom to proceed.
- Now, select a restore point before the PASSIVE_INTERRUPT_ERROR started to show up, and then click on Next.
- Verify the details, and then click on Finish to start the restore process.
If the PASSIVE_INTERRUPT_ERROR is not caused by hardware issue, restoring your system before it happened will fix the problem. However, remember that this action will undo any installations you’ve performed since then.
Also, keep in mind that this solution only works if you created a restore points in Windows 11 before, to help bypass such issues at ease.
We hope that by applying the solutions above, you managed to fix the PASSIVE_INTERRUPT_ERROR BSoD and your system works fine now. If you have any questions related to this issue, leave a comment in the dedicated section below.


User forum
0 messages