7 Simple Ways to Fix the PUBG Anti-Cheat Error
Did you know using a VPN other than Proxifier can fix the issue?
5 min. read
Published on
Read our disclosure page to find out how can you help Windows Report sustain the editorial team Read more
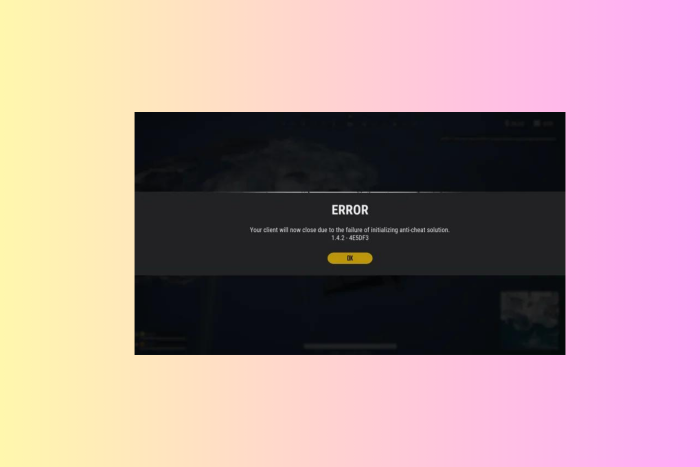
Many users have encountered Your client will close due to the failure of initializing anti-cheat solution issue while launching or playing PUBG. To begin with, ensure there are no unwanted third-party apps installed, and use an ethernet cable instead of a Wi-Fi connection.
This anti-cheat error could occur due to antivirus software interference, corrupted/missing game files, or outdated app.
How can I fix the Anti-Cheat error in PUBG?
1. End all app-related processes
- Press Ctrl + Shift + Esc to open Task Manager.
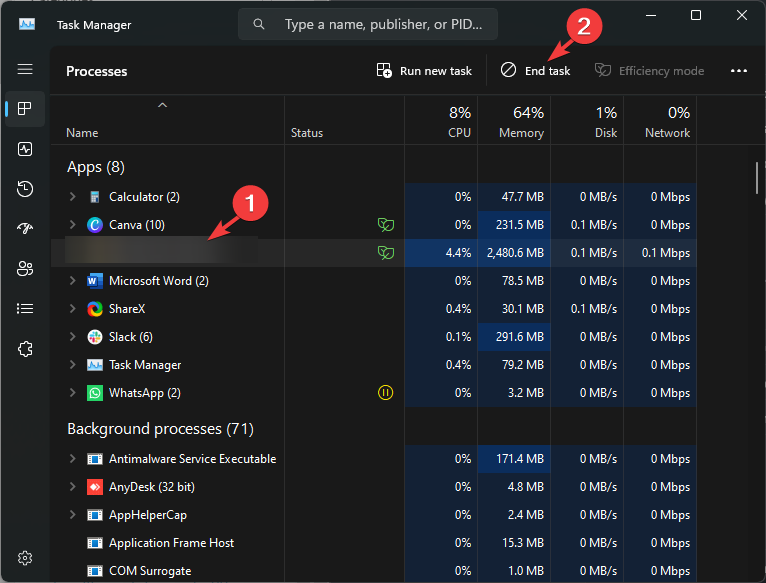
- Go to the Processes tab, locate all processes related to PUBG and your gaming client, select them one by one and click End Processes.
Once you have ended all the processes related to PUBG, consider using a VPN to play the game. If you are already using one, try disabling it.
Some of the users have also reported that switching from Proxifier to another VPN helped them resolve the issue.
2. Delete the anti-cheat file
- Press Ctrl + Shift + Esc to open Task Manager.
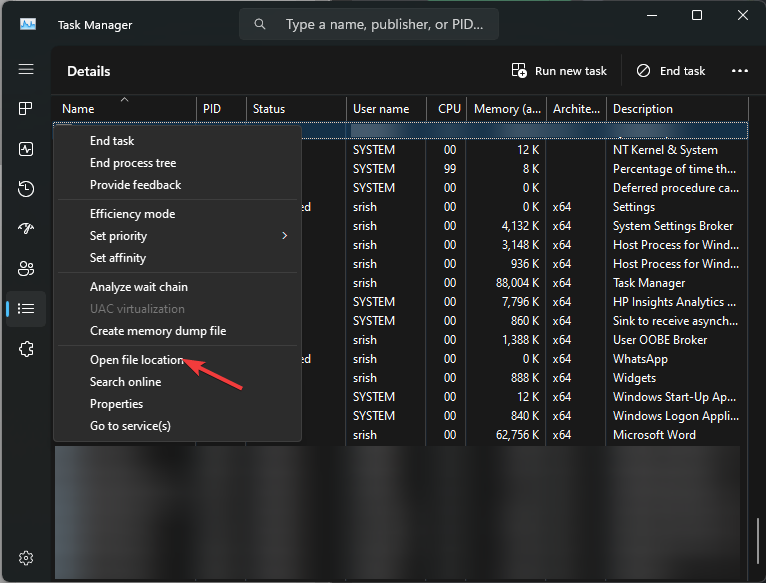
- Navigate to the Details tab, locate zksvc.exe, right-click it and select Open file location.
- You will redirected to the file location, select zksvc and click the Delete icon.
- Now try opening Steam or your game client and run PUBG.
3. Disable Overlay on the game client
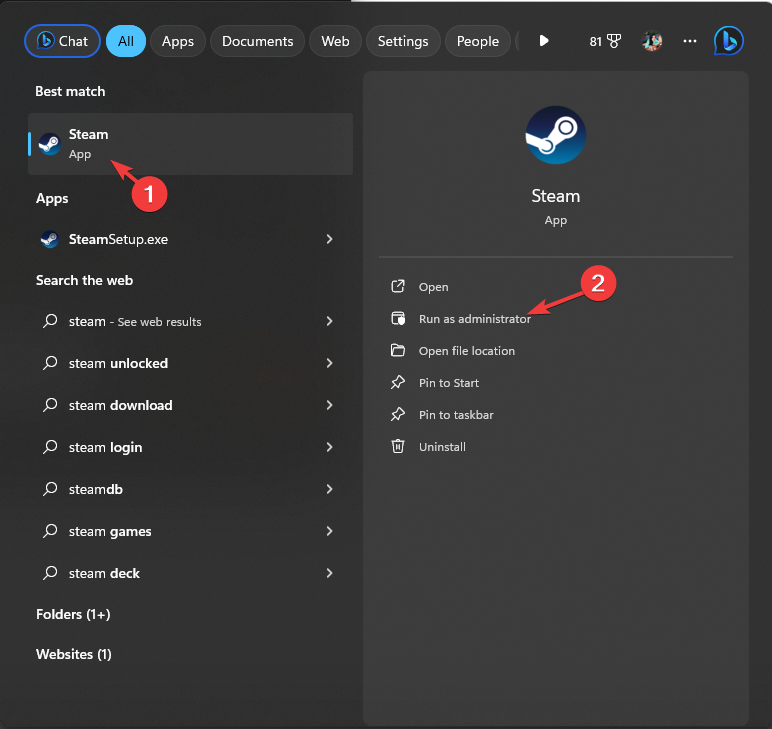
- These steps will vary from one game client to another; here, we are using Steam to demonstrate the steps. Press the Windows key, type steam and click Open.
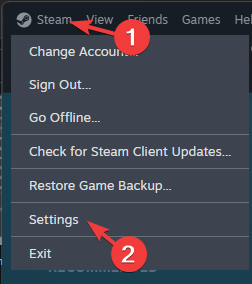
- Click Steam, then select Settings from the drop-down menu.
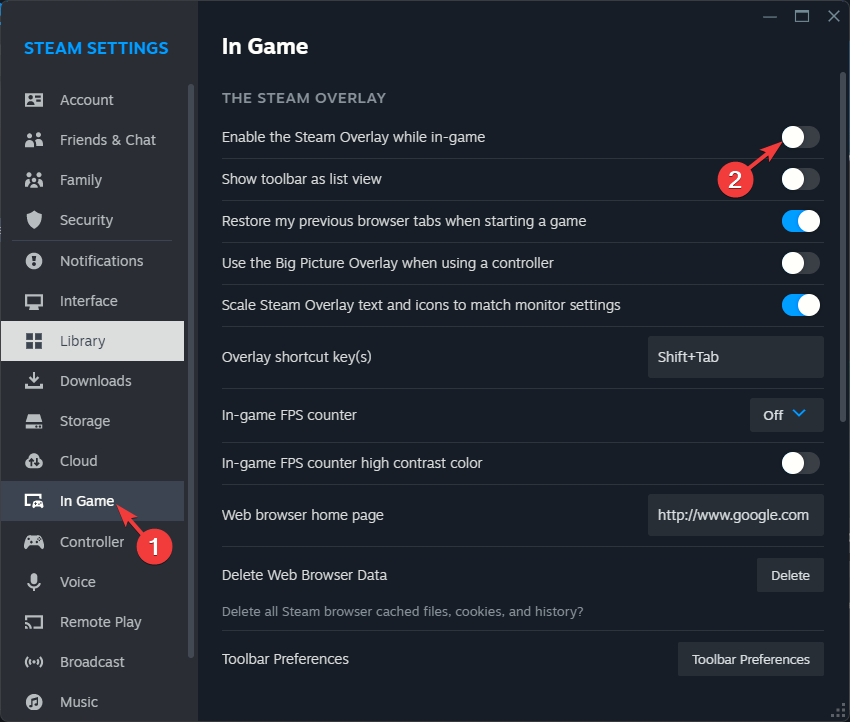
- Go to the In-Game tab, and turn off the toggle for the Enable the Steam Overlay while in-game option.
4. Verify the game files’ integrity
- Press the Windows key, type steam and click Open.
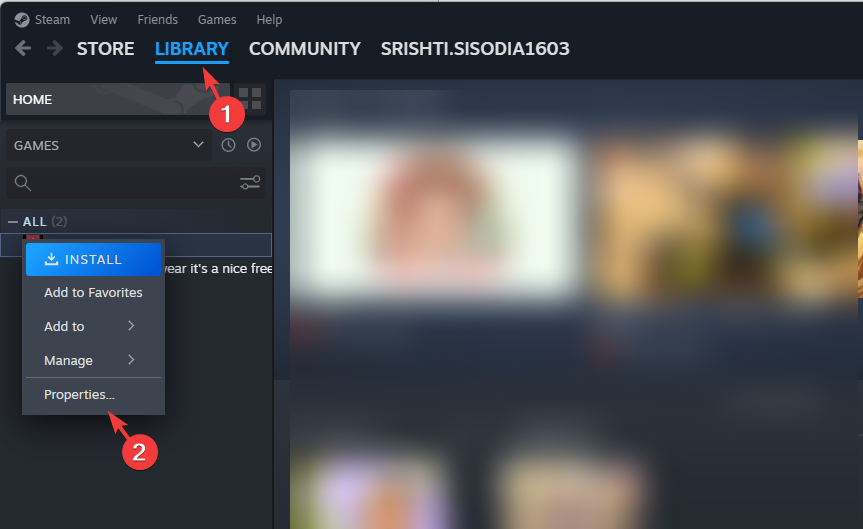
- Go to Library, select the game and click Properties.
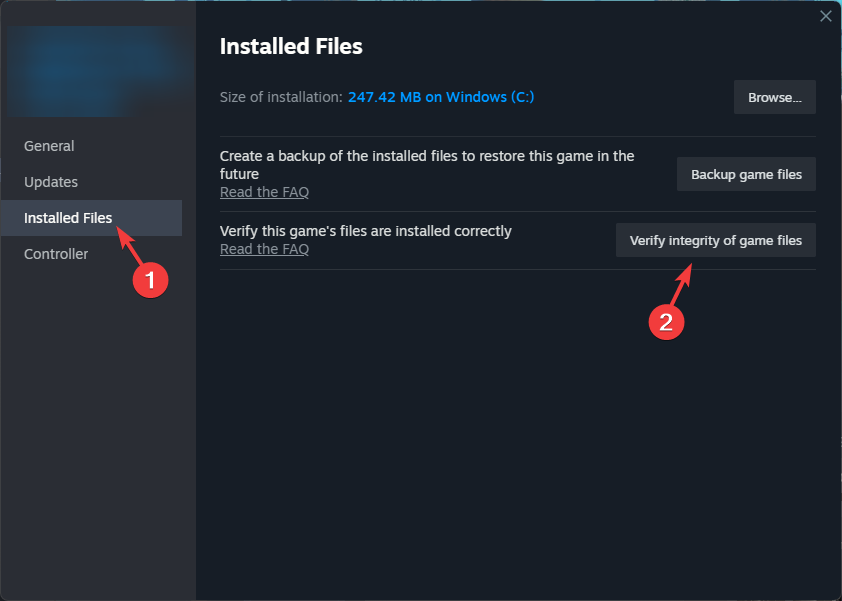
- Now select the Installed files option, and click Verify the integrity of game files.
- Wait for the process to complete; the scan will repair or replace the missing game files to fix the issue.
5. Disable the Windows Firewall temporarily
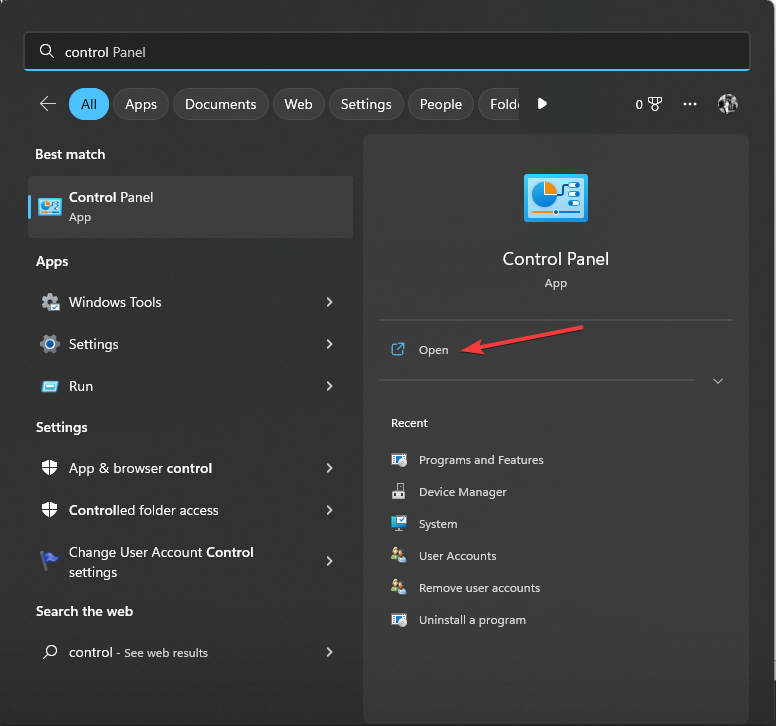
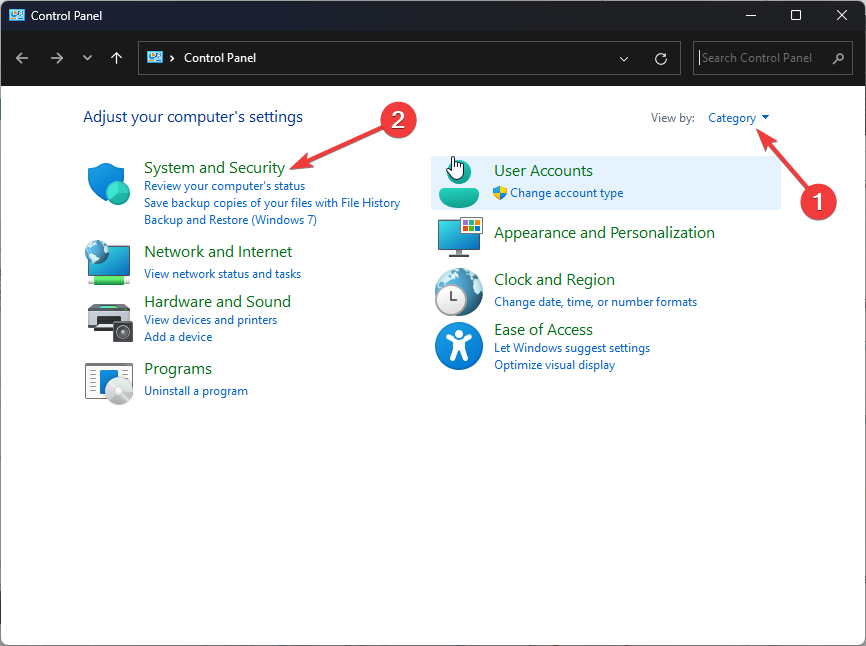
- Press the Windows key, type control panel and click Open.
- Select Category for View by, then click System and Security.
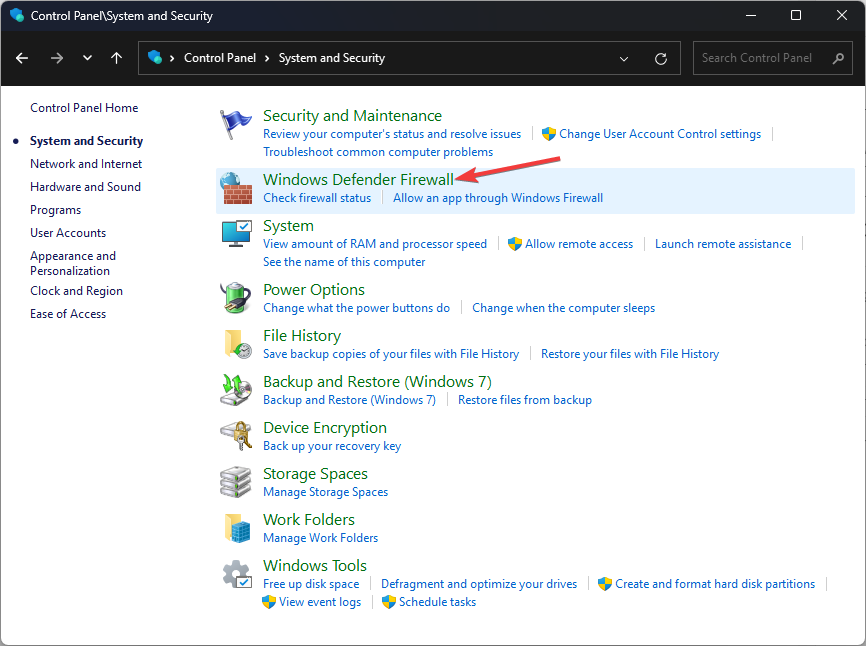
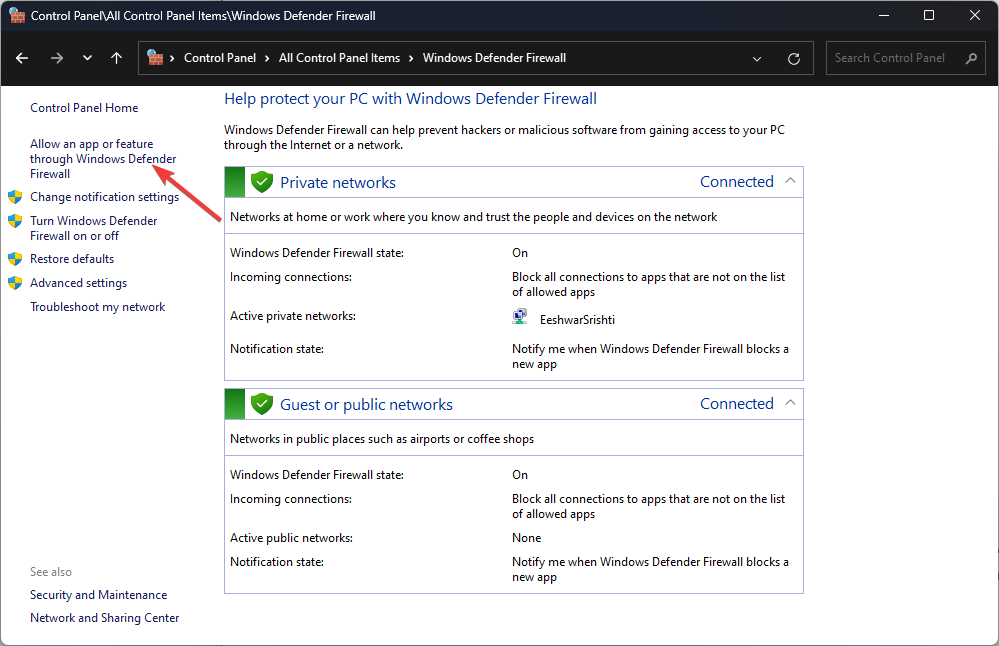
- Click Windows Defender Firewall.
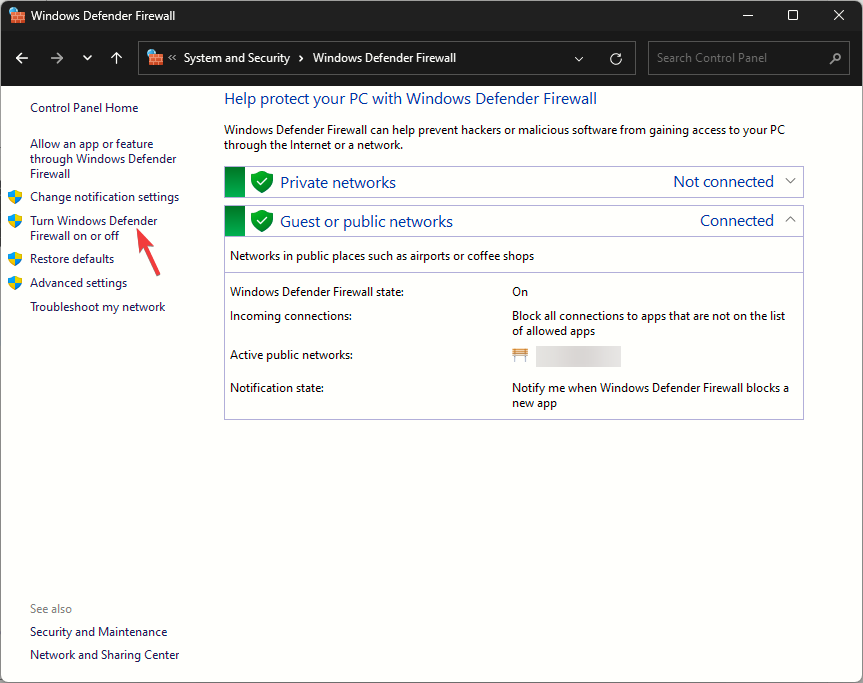
- From the left side of the following window, click the Turn Windows Defender Firewall on or off setting.
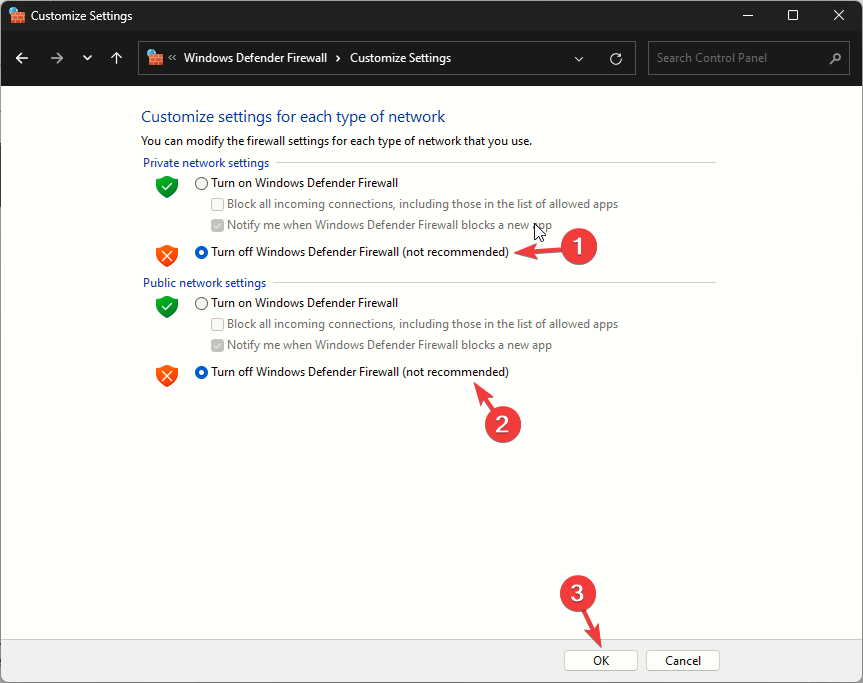
- Select Turn off Windows Defender Firewall (not recommended) for both Public and Private network settings, then click OK.
Now try playing PUBG, and if you don’t encounter any errors, follow these steps to add the game to the allowed apps list:
- In the Control Panel window, go to Windows Defender Firewall again using the steps mentioned above.
- From the left side, select the Allow an app or feature through Windows Defender Firewall option.
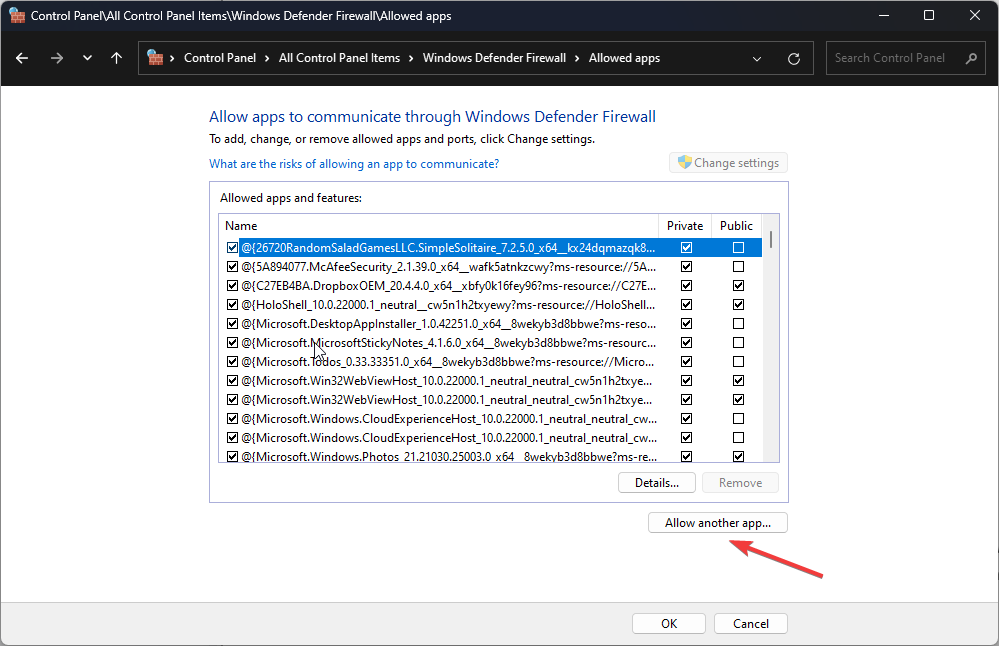
- Scroll through the list to check if PUBG is listed; if not, then click Allow another app.
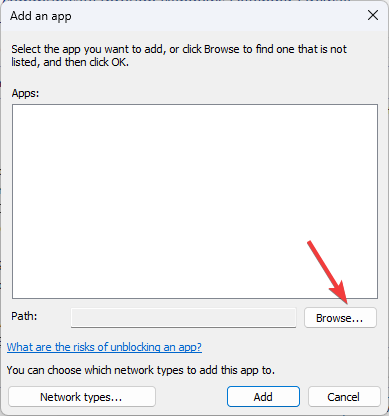
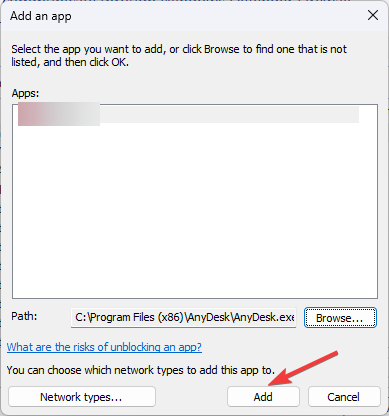
- Click Browse, locate the application file from the Program Files folder, and click Open.
- Select Add.
- Now, the app will be added to the Allowed apps list. Checkmark the Private and Public options, then click OK to save the changes.
Allowing the game to communicate freely on your computer is important to avoid other issues like the Black screen at launch on PUBG; check out this guide to learn more.
Remember to reverse engineer the steps mentioned to turn on the Firewall to ensure your Windows is protected.
6. Reinstall the game
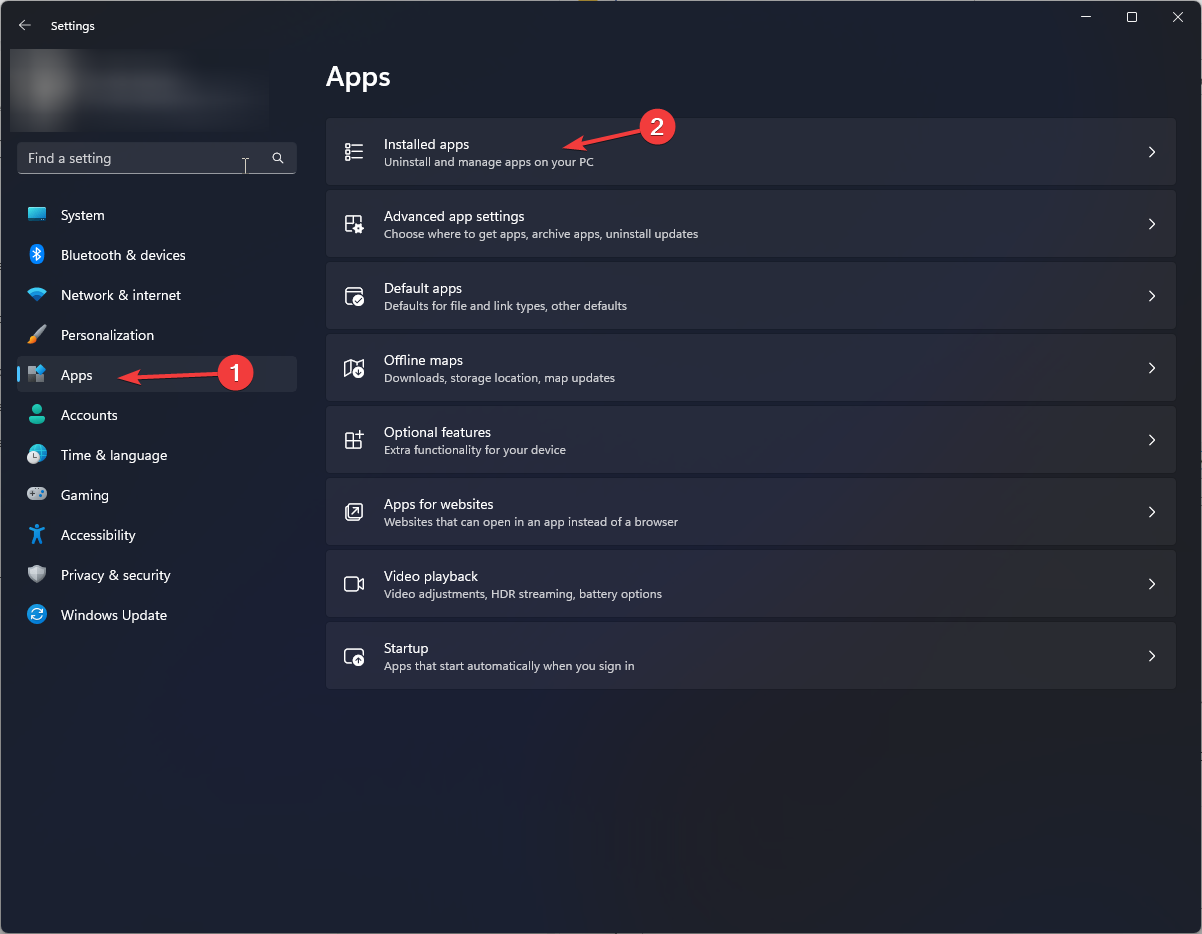
- Press Windows + I to open Settings.
- Go to Apps, then click Installed apps.
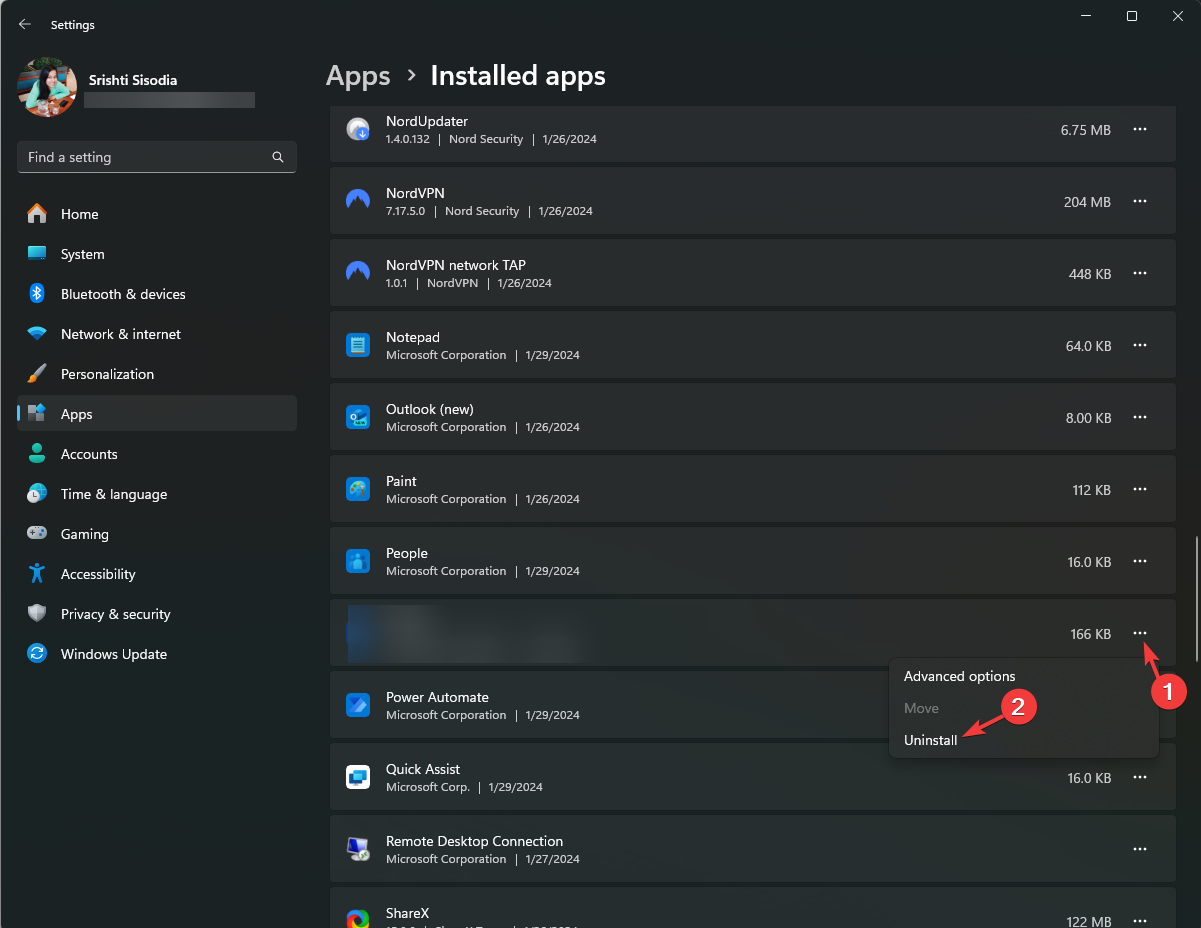
- Locate PUBG, click the three dots icon, and select Uninstall.
- Click Uninstall to confirm.
- Press Windows + E to open File Explorer; navigate to this path after replacing username with your user account name:
C:\Users\username\AppData\Local\ - Select the TslGame and WELLBIA folders, and click the Delete icon to remove them.
- Next, go to this path:
C:\Program Files (x86)\Steam\steamapps\common\PUBG - Select the PUBG and click Delete.
- Now locate and open the BattlEye folder, select & delete the BEService_pubg.exe file
- Navigate to this path and delete the PUBG and UNCHEATER folder:
C:\Program Files\Common Files - Press the Windows key, type steam and click Open.
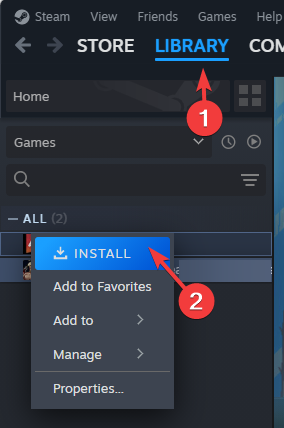
- Go to Library, select the game, and click Install.
7. Change your DNS address to Google DNS
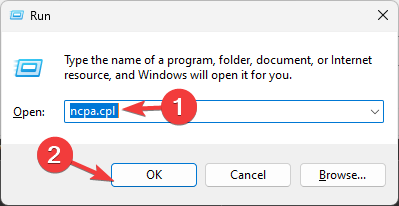
- Press Windows + R to open the Run window.
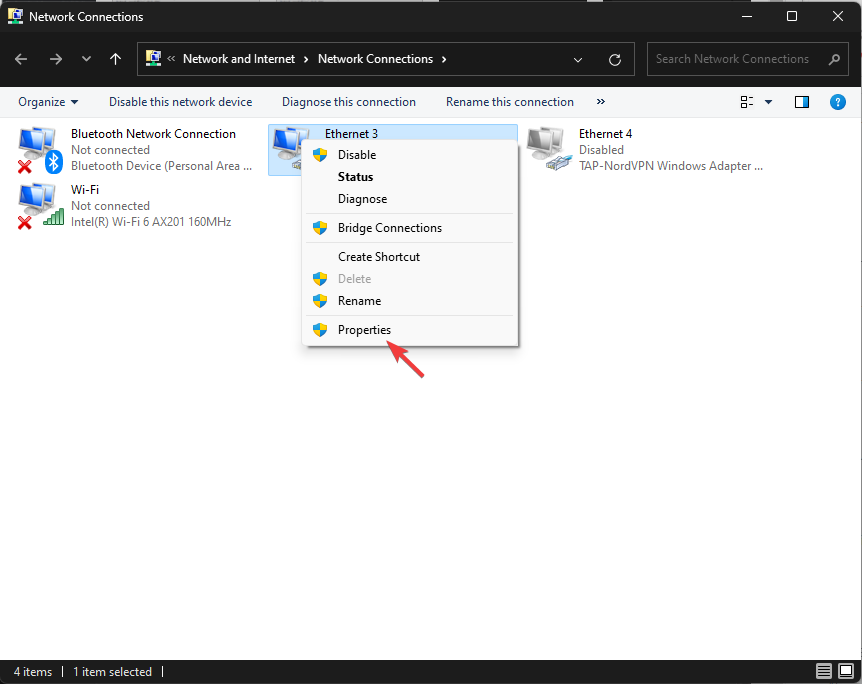
- Type ncpa.cpl and click OK to open the Active Connections window.
- Right-click the active connection and select Properties.
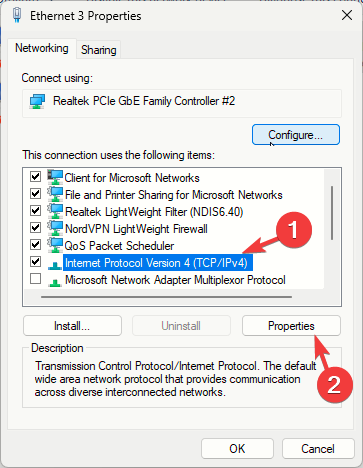
- From This connection uses the following items box, select Internet Protocol Version 4 (TCP/IP), and click the Properties button.
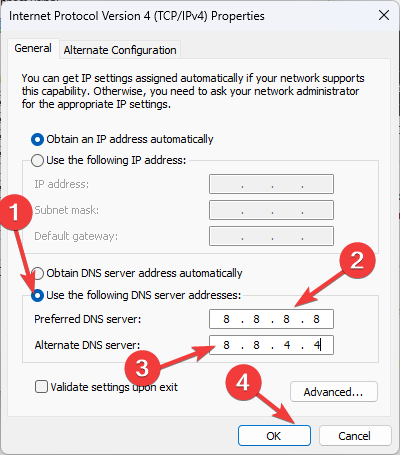
- Select Use the following DNS addresses.
- For Preferred DNS, type 8.8.8.8, and for Alternate DNS, type 8.8.4.4.
- Click OK, then click Close.
Changing the DNS address can help you fix other launching errors, like PUBG won’t start after the update; check out the detailed guide to learn more.
If nothing works for you, try changing the gaming client and installing PUBG again. In conclusion, to fix PUBG anti-cheat errors, display game overlay, verify game files’ integrity, or disable Windows Firewall temporarily.
WR experts also recommend you opt for Google DNS, choose a different VPN service if using Proxifier, or reinstall the PUBG app to fix this issue once and for all.
In case PUBG crashes on launch, it could be due to outdated drivers; read this guide to learn more about the issue.
If you have any questions or suggestions about the PUBG anti-cheat error, feel free to mention them in the comments section below.

