FIX: The remote connection was denied in Windows 10/11
8 min. read
Updated on
Read our disclosure page to find out how can you help Windows Report sustain the editorial team Read more
Key notes
- Connecting to another Windows computer without being physically present can be done using Remote Desktop from Windows.
- One cause of Remote Desktop errors is when your account is not authorized for remote login
- In case of such errors, we must check that the proper settings are enabled, among other things.
- One could always employ the use of third-party remote desktop tools when the default ones malfunction.

Remote Desktop is one of the simplest ways to fix problems on a computer remotely, but it seems that this feature has some issues on Windows 10.
Users reported The remote connection was denied error on Windows 10.
The full error reads:
the connection was denied because the user account is not authorized for remote login windows 10
We’ve looked over several solutions for this issue, and have put them together in this detailed article, as you can see below.
How can I fix the remote connection was denied error?
1. Change Remote settings
According to users, they are unable to start the Remote Desktop session due to this error, so in order to fix this problem, you need to check Remote settings on your host computer. To do that, follow these steps:
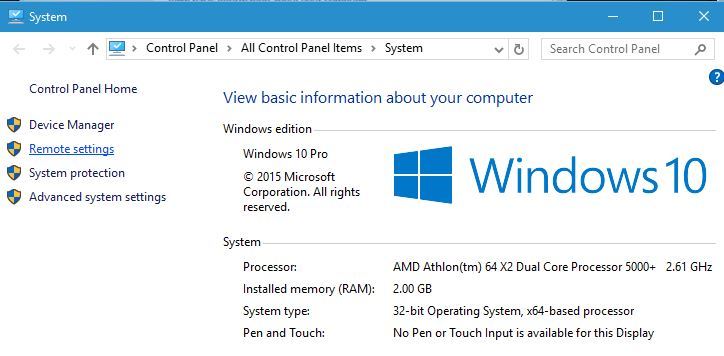
- Press Windows Key + S and enter system. Choose System from the menu.
- Select Remote settings from the left pane.
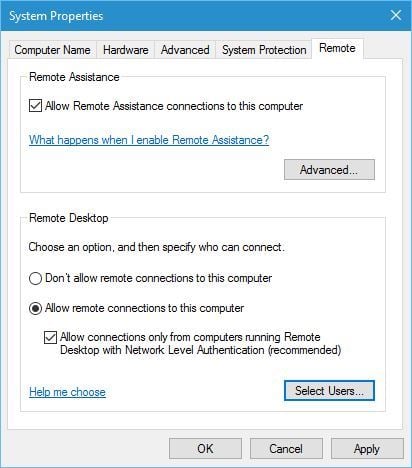
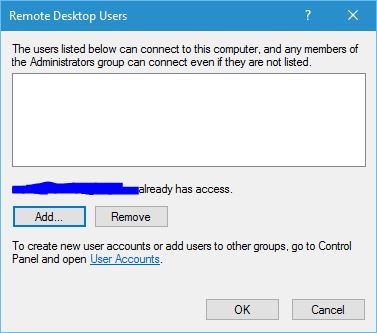
- Be sure that Allow remote connections to this computer option is selected and click Select Users.
- Click the Add button.
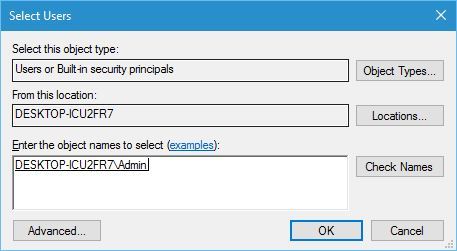
- Enter the user name in Enter the object names to select and click Check Names. Be sure to enter the computer name before the user name like this: COMPUTERNAMEusername.
- Save changes, and try to use Remote Desktop again.
If you have Remote Desktop Users group, be sure to add it by following the steps above.
2. Change Local Security Policy settings
Sometimes you can get The remote connection was denied error if your Local Security Policy settings are incorrect. To fix this problem you need to edit Local Security Policy by following these steps:
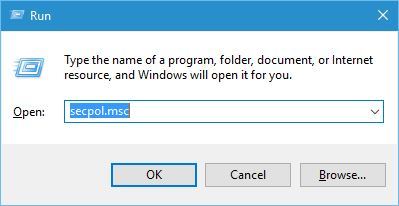
- Press Windows Key + R and enter secpol.msc. Click OK or press Enter to run it.
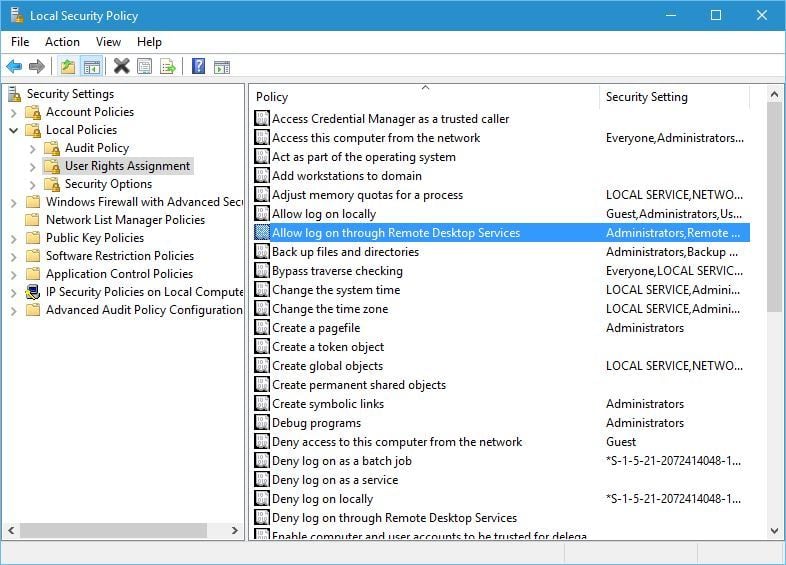
- When Local Security Policy window opens go to Local Policies > User Rights Assignment in the left pane.
- In the right pane locate Allow log on through Remote Desktop Services and double click it.
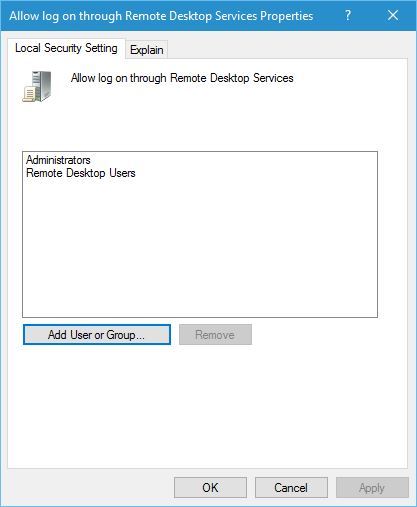
- Click Add User or Group button.
- Enter the user name or group name in the Enter the object names to select and click Check Names button. If your input is valid, click OK to save changes. If you have the Remote Desktop Services group, be sure to add it.
3. Delete local and roaming profile
Few users claim that you can fix this problem by deleting local and roaming profiles. We don’t know if this solution works, but you might want to try it.
4. Set the Remote Desktop Services logon to Network Service
Users reported that The remote connection was denied error appears if the Remote Desktop Services service logon is set to Local System. To change that, follow these steps:
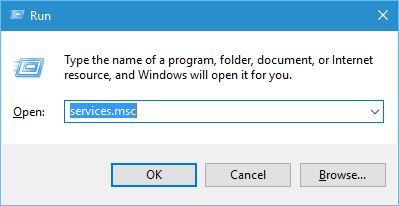
- Press Windows Key + R and enter services.msc. Press Enter or OK.
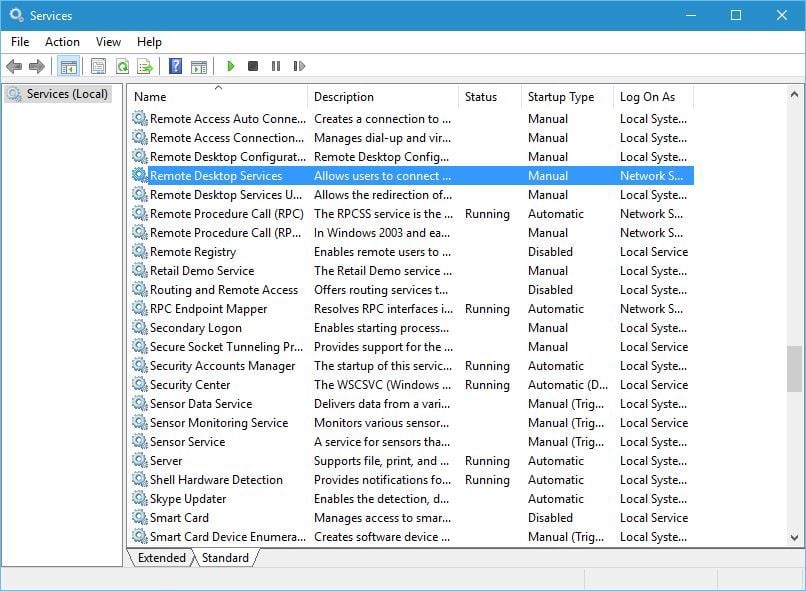
- When Services window opens, locate Remote Desktop Services and double click it.
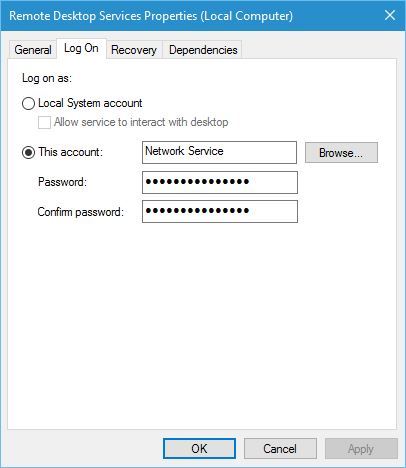
- When the Properties window opens, go to Log On tab and make sure that Local System account isn’t selected.
- After Network Service is selected, click Apply and OK to save changes.
After changing the Remote Desktop Services service logon to Network Service, the issue should be completely resolved.
5. Alter your registry
One solution that users proposed is to edit your registry. To fix this problem you need to grant certain permissions to the Users group. Before we start, we have to mention that editing your registry can cause certain issues, therefore you might want to create a backup of your registry just in case. To edit your registry, do the following:
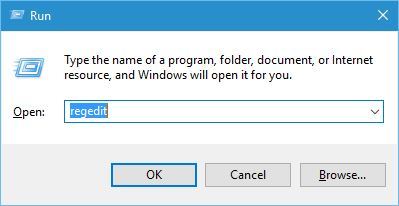
- Press Windows Key + R and enter regedit. Press Enter or click OK.
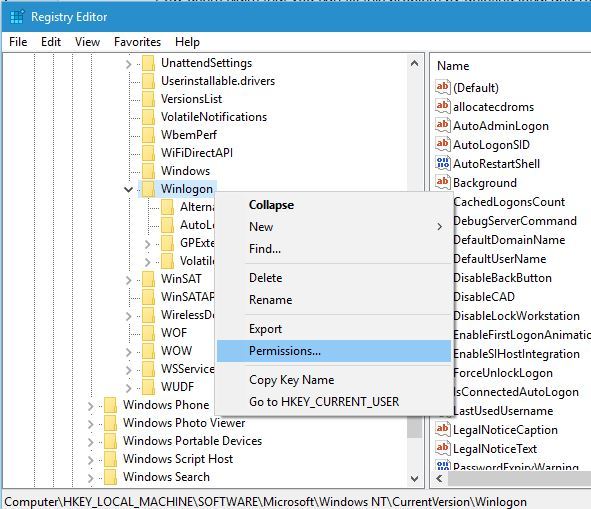
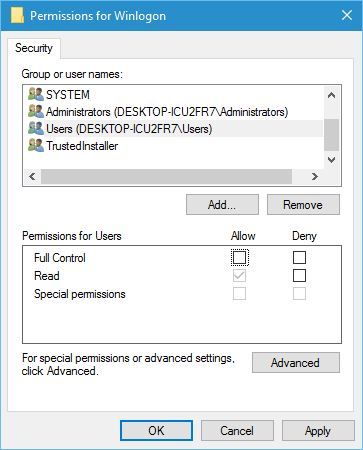
- Navigate to the HKEY_LOCAL_MACHINESOFTWAREMicrosoftWindows NTCurrentVersionWinlogon key in the left pane, right-click it and choose Permissions.
- In Group or user names select Users. Make sure that Users group has Read permissions set to Allow. After setting the Read permissions to Allow, click Apply and OK to save changes.
6. Recreate Domain Certificates
After a bit of research, few users found out that their logon server was giving them Event 29 warning, and that warning was the cause of this problem. To fix this problem you need to recreate Domain Certificates by following these steps:
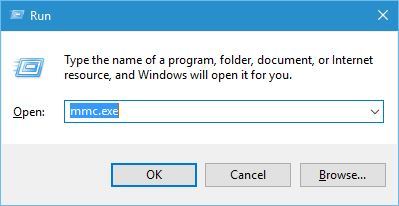
- On the main domain controller, press Windows Key + R. Enter mmc.exe and press Enter to run it.
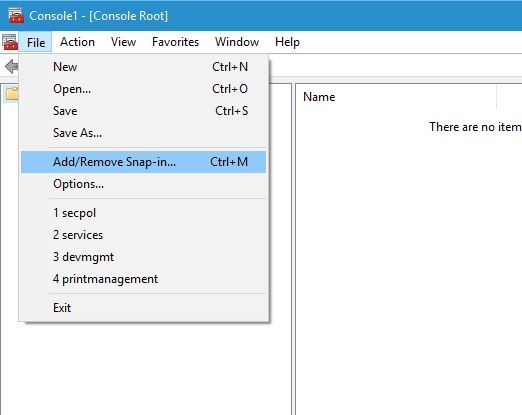
- Go to File > Add/Remove Snap-in.
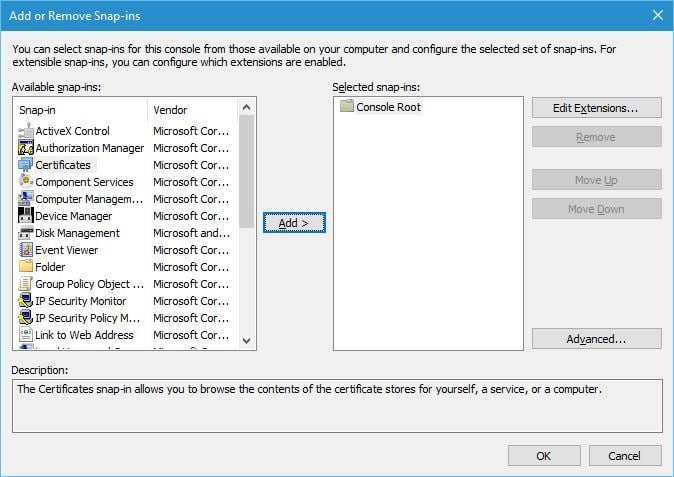
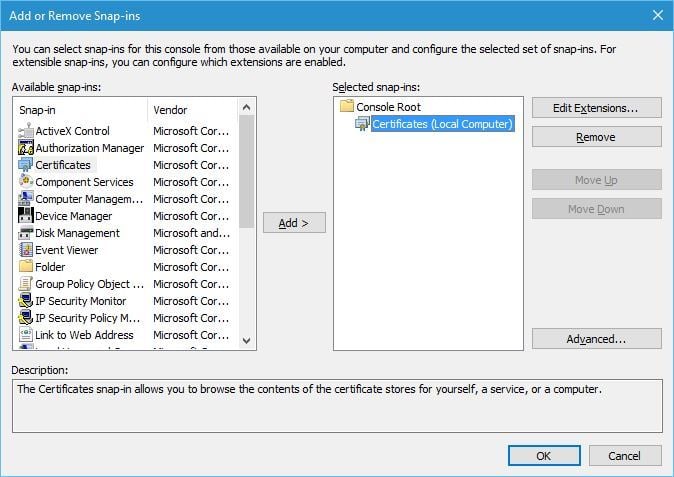
- Select Certificates and click the Add button.
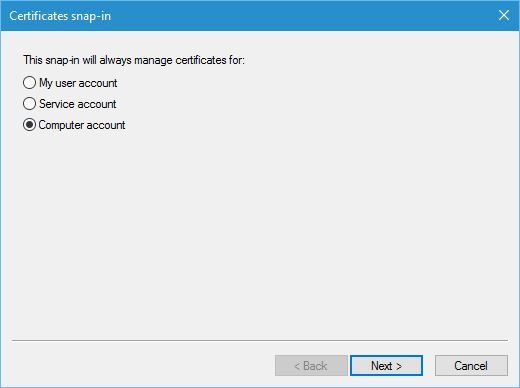
- Select Computer account and click Next.
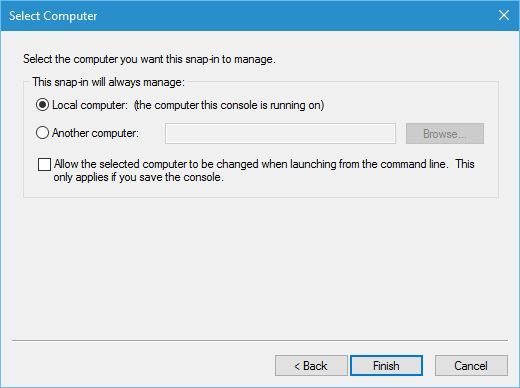
- Now click the Finish button.
- Click the OK button.
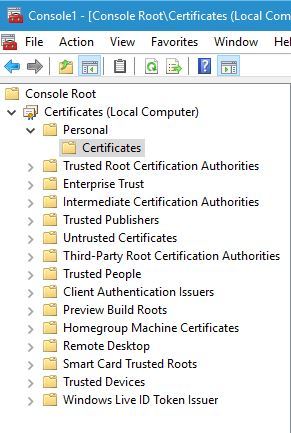
- Go to Certificates (Local computer) > Personal > Certificates.
- Locate old domain controller certificate, right-click it and choose Delete. Click Yes to confirm that you want to delete the certificate.
After deleting the certificate, you need to request the new one by following these steps:
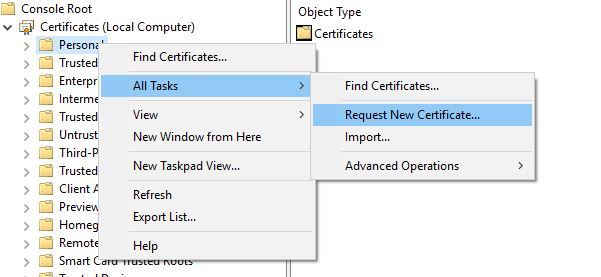
- Expand Certificates (Local Computer) and right click Personal. Select All Tasks > Request New Certificate.
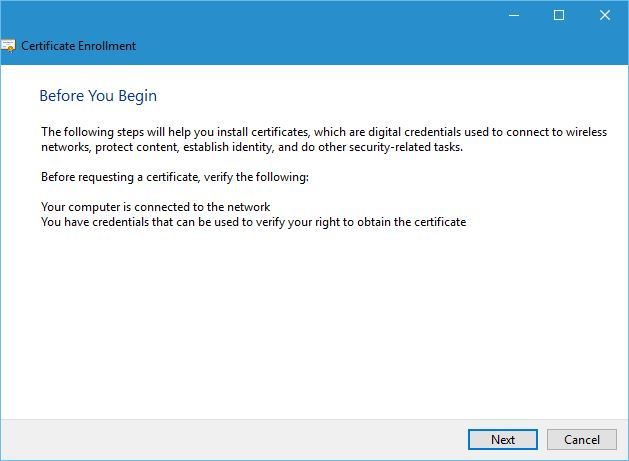
- Follow the instructions in the wizard to request a new certificate.
Lastly, you just need to verify the certificate. To perform this step you need to be a member of the Domain Admins group or have the appropriate privileges assigned to your account by your administrator. To verify the Kerberos Key Distribution Center (KDC), follow these steps:
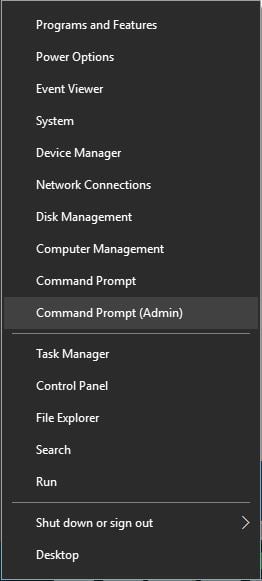
- Open Command Prompt as administrator. To do that, press Windows Key + X and select Command Prompt (Admin) from the menu.
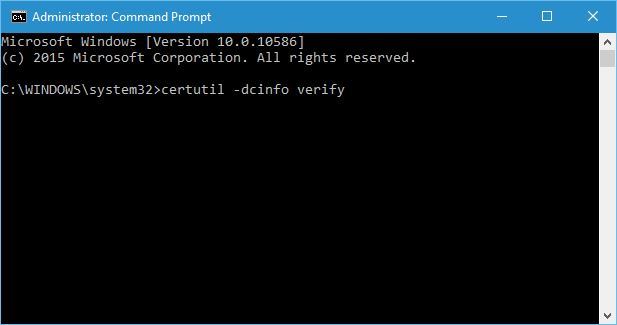
- When Command Prompt opens, enter certutil -dcinfo verify and press Enter to run it.
If the procedure is successful, reboot the domain controller and the server that you’re trying to connect to and the issue should be resolved.
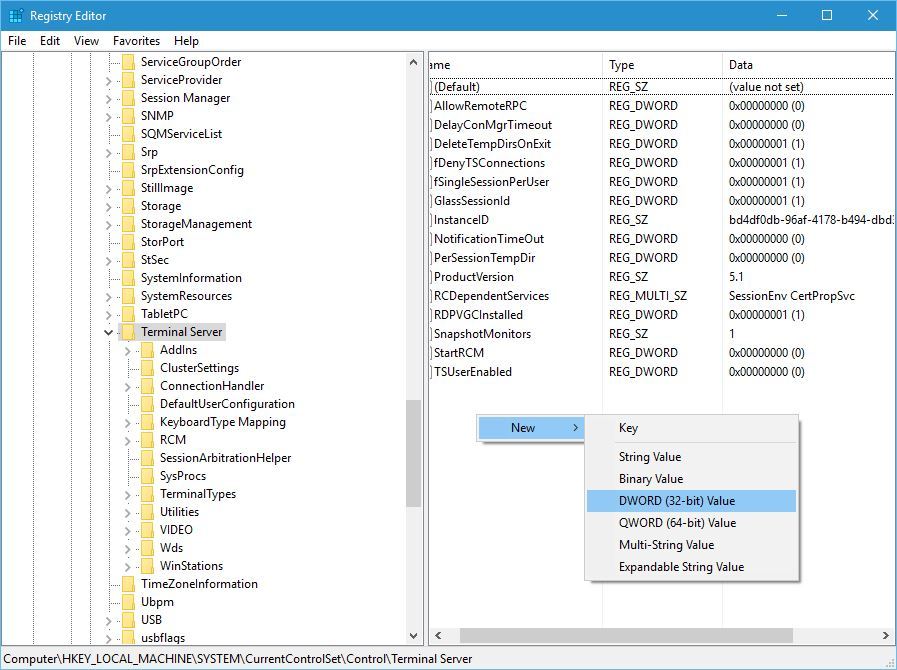
7. Create a new DWORD
According to users, you can fix this problem by creating a new DWORD in the registry. To do that, follow these steps:
- Start Registry Editor.
- In the left pane navigate to the following Server key:
HKEY_LOCAL_MACHINESYSTEMCurrentControlSetControlTerminal - In the right pane, right-click the empty space and choose New >DWORD (32-bit) Value.
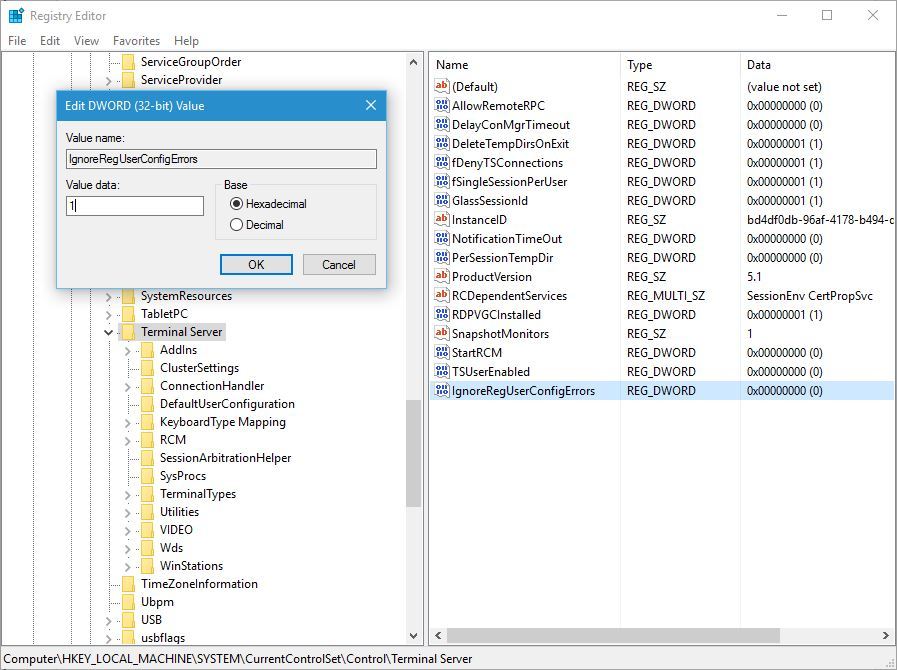
- Enter IgnoreRegUserConfigErrors as the name of the new DWORD and double-click it to open its properties.
- Once the properties window opens, set the Value data to 1. Click OK to save changes.
8. Align the MaxTokenSize for the server
According to users, you should be able to connect to the server by using the mstsc.exe /admin command. After that, you need to align MaxTokenSize for this server and that should solve the issue.
9. Add domain users instead of Remote Desktop users
Users reported The remote connection was denied error on their PC while trying to use Remote Desktop feature, and according to them, they were unable to add Remote Desktop users for some strange reason.
To circumvent this issue, it’s suggested that you add domain users instead of Remote Desktop users. After doing that, this error should be fixed.
FIX: Remote connection denied because of username and password combination
1. Turn on CHAP and CHAPv2
Users reported this issue while trying to use VPN, and in order to fix it you’ll need to turn on CHAP and CHAPv2. By default Windows 10 disables these features, so you’ll need to enable them.
To do that, simply locate your VPN network, right-click it and choose Properties from the menu. Go to the Security tab and make sure that you check Microsoft Chap Version 2 (MS-CHAP v2). After doing that, click Apply and OK to save changes.
2. Use rasphone command
You can quickly connect to your VPN by using the rasdial command, but sometimes you can get The remote connection was denied error while using this command.
To circumvent this issue, users are suggesting to use rasphone command instead. To use it, simply start the command-line tool, enter rasphone -d “Your VPN connection name” and press Enter.
3. Create NTLMv2 Compatibility DWORD
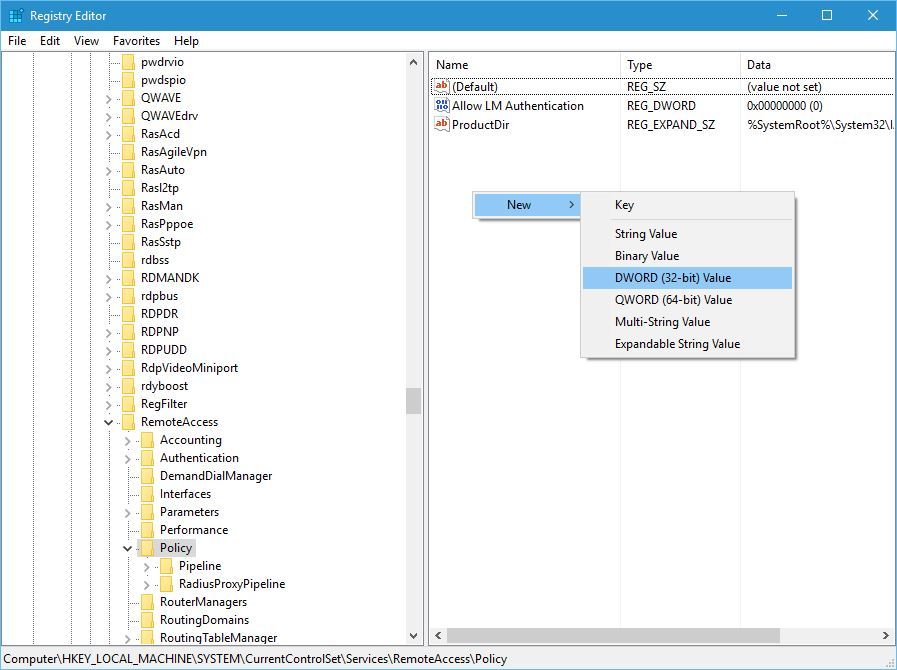
You should be able to fix this problem by adding a certain DWORD to the registry. To do that, follow these steps:
- Start Registry Editor and go to the
HKEY_LOCAL_MACHINESYSTEMCurrentControlSetServicesRemoteAccessPolicykey in the left pane. - In the right pane, right-click the empty space and choose New > DWORD (32-bit) Value. Enter NTLMv2 Compatibility as the name of the new DWORD.
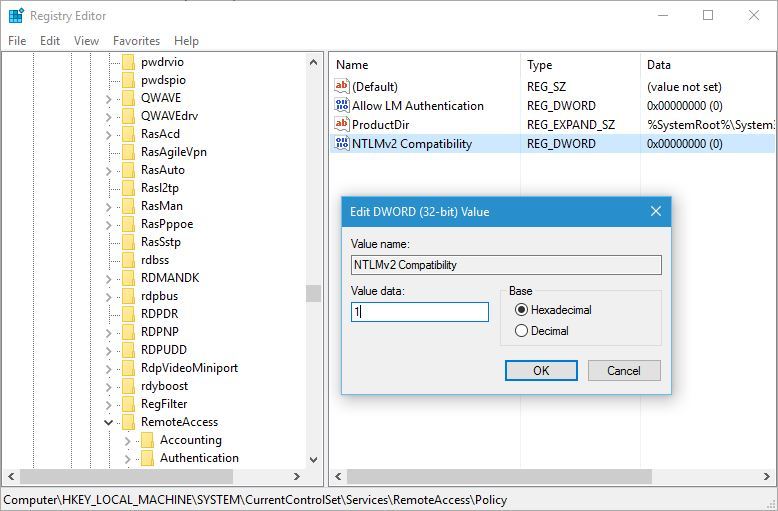
- Double click NTLMv2 Compatibility DWORD to open its properties.
- When the Properties window opens, enter 1 in the Value data field and click OK to save changes.
- Close Registry Editor.
In case the error keeps occurring, another viable option is trying a different remote management software. Mikogo is a popular alternative that works well across multiple platforms. It comes with a free version which is enough for controlling one device at a time.
The remote connection was denied error can prevent you from using Remote Desktop or VPN, but we hope that you managed to fix this issue by using one of our solutions.
Make sure your connection speed is good enough, otherwise see our list of the fastest VPNs.



User forum
2 messages