How to Rename an External Hard Drive on Windows 11
The easiest way is to use File Explorer
4 min. read
Updated on
Read our disclosure page to find out how can you help Windows Report sustain the editorial team. Read more
Key notes
- To rename the external drive in Windows 11, open File Explorer, select the external drive and press F2.
- Continue reading to learn the detailed steps!
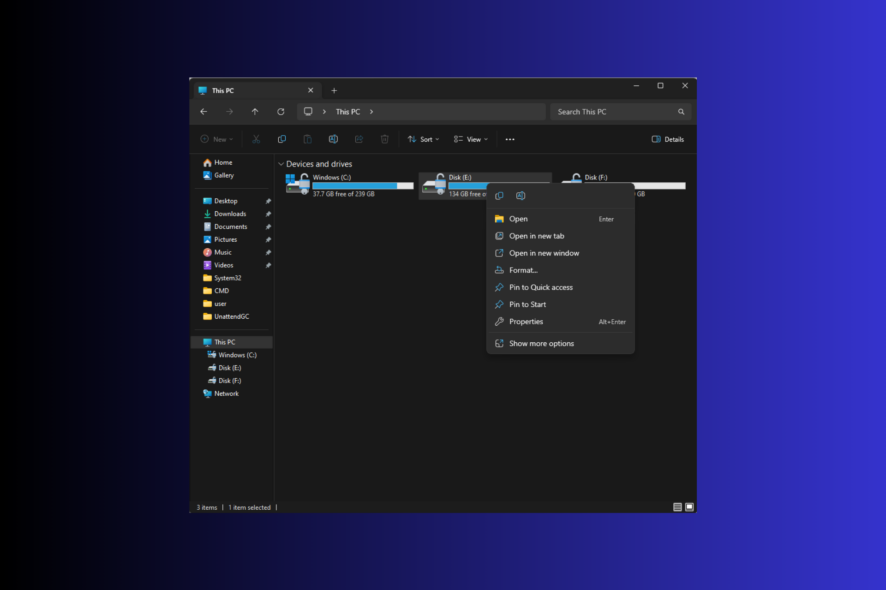
Renaming an external hard drive on Windows 11 is a simple task and can help you organize your storage devices and make them recognizable.
In this guide, we will explore several methods with step-by-step instructions to perform this task safely, helping in the file management process.
Can you rename a hard drive without losing data?
Yes, you can rename a hard drive without losing data on it, as it is a non-destructive operation that changes the display name of the drive, leaving its content as it is.
How do I rename my external hard drive on Windows 11?
Before proceeding with any steps to rename your USB drive on Windows 11, go through the following preliminary checks:
- Ensure you have logged in via a user profile with administrative rights.
- Make sure you have the external hard drive safely connected.
- Remember, you can assign a unique name of up to 11 characters for FAT drives or 32 characters for NTFS drives with spaces.
1. Using the keyboard shortcut
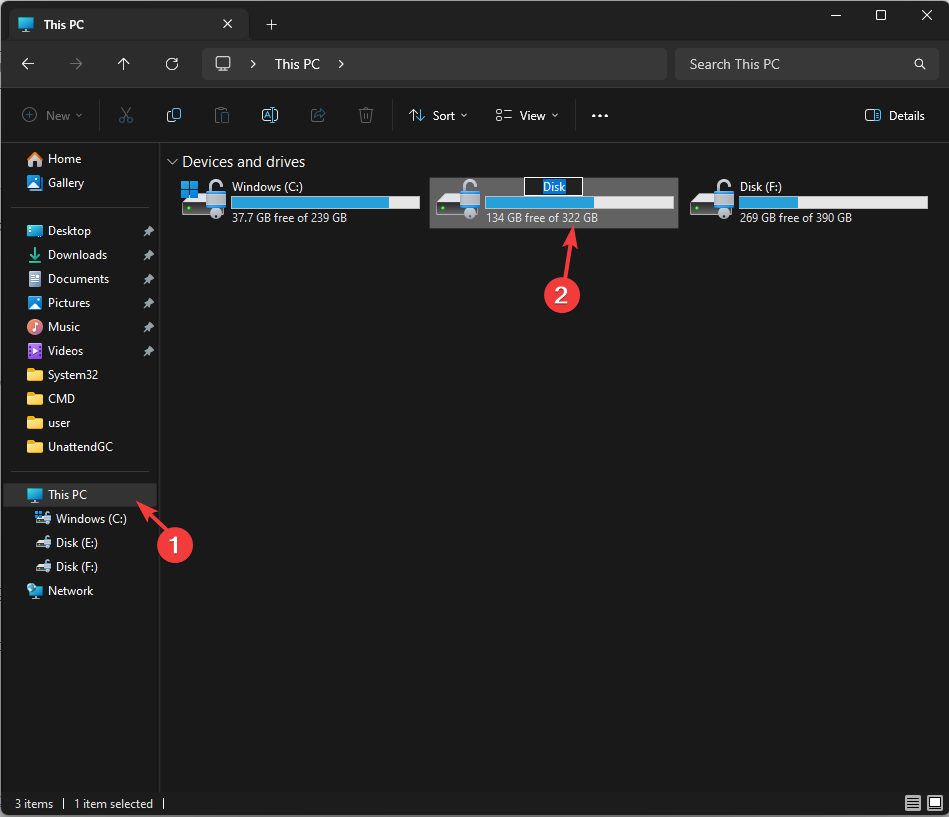
- Press Windows + E to open File Explorer.
- Click This PC, select the drive you want to rename, then press F2.
- Type in the name to change the volume label and hit Enter.
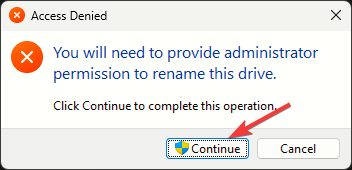
- If you get a prompt, click Continue to complete the process.
2. Using the Context menu
- Press Windows + E to open File Explorer.
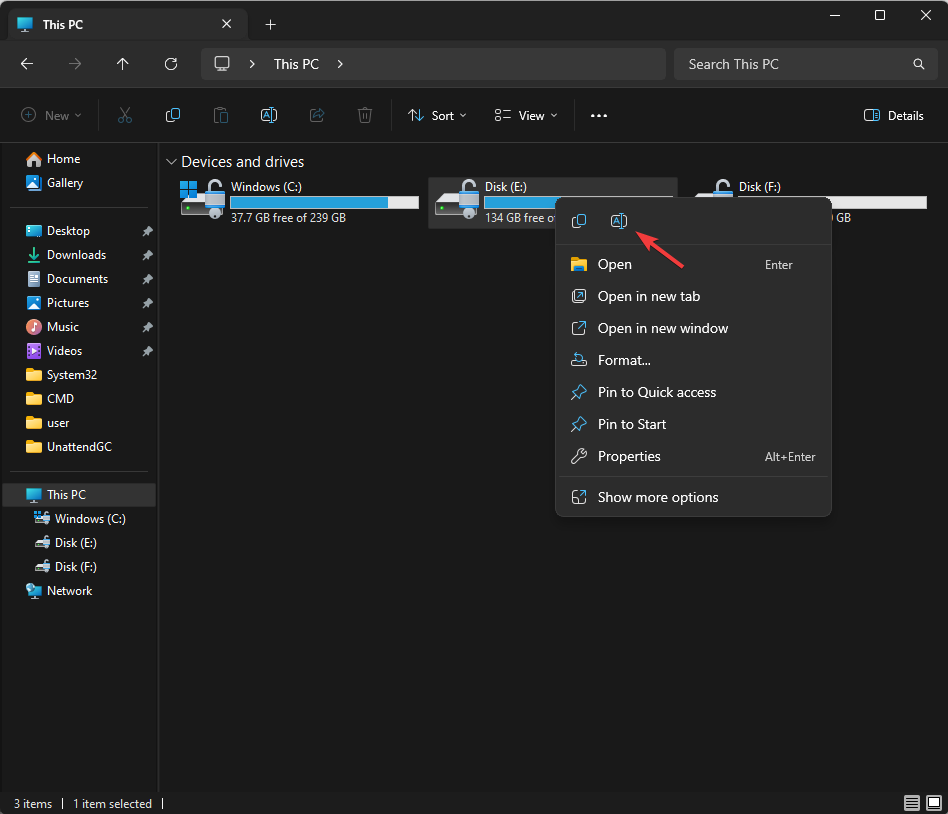
- Click This PC, right-click the drive you want to change the name for, and select Rename from the context menu.
- Input the new name and press Enter.
- Click Continue if prompted to approve the action.
3. Using the Properties window
- Press Windows + E to open File Explorer.
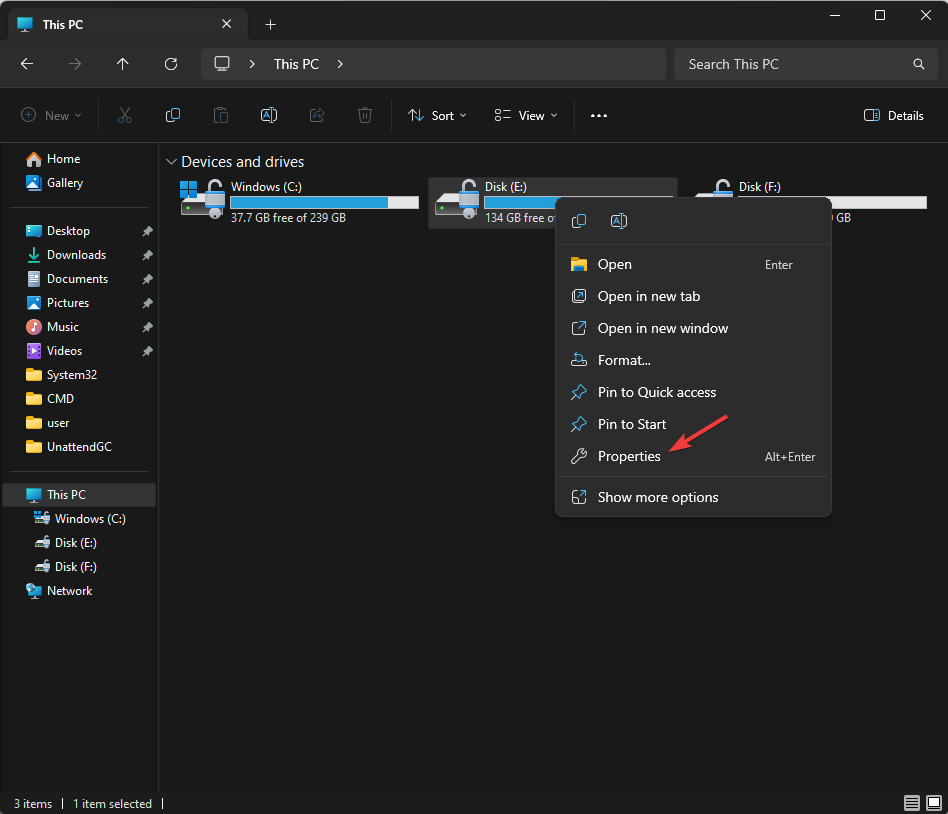
- Click This PC, right-click the USB drive you want to change the name for, and select Properties from the context menu.
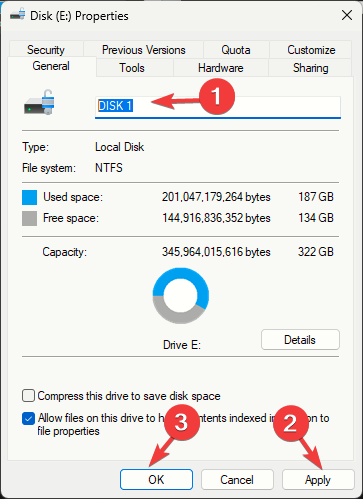
- On the Properties window, select the existing name and press Delete. Type the new name and click OK to confirm.
- Click Continue to complete.
4. Using the Settings app
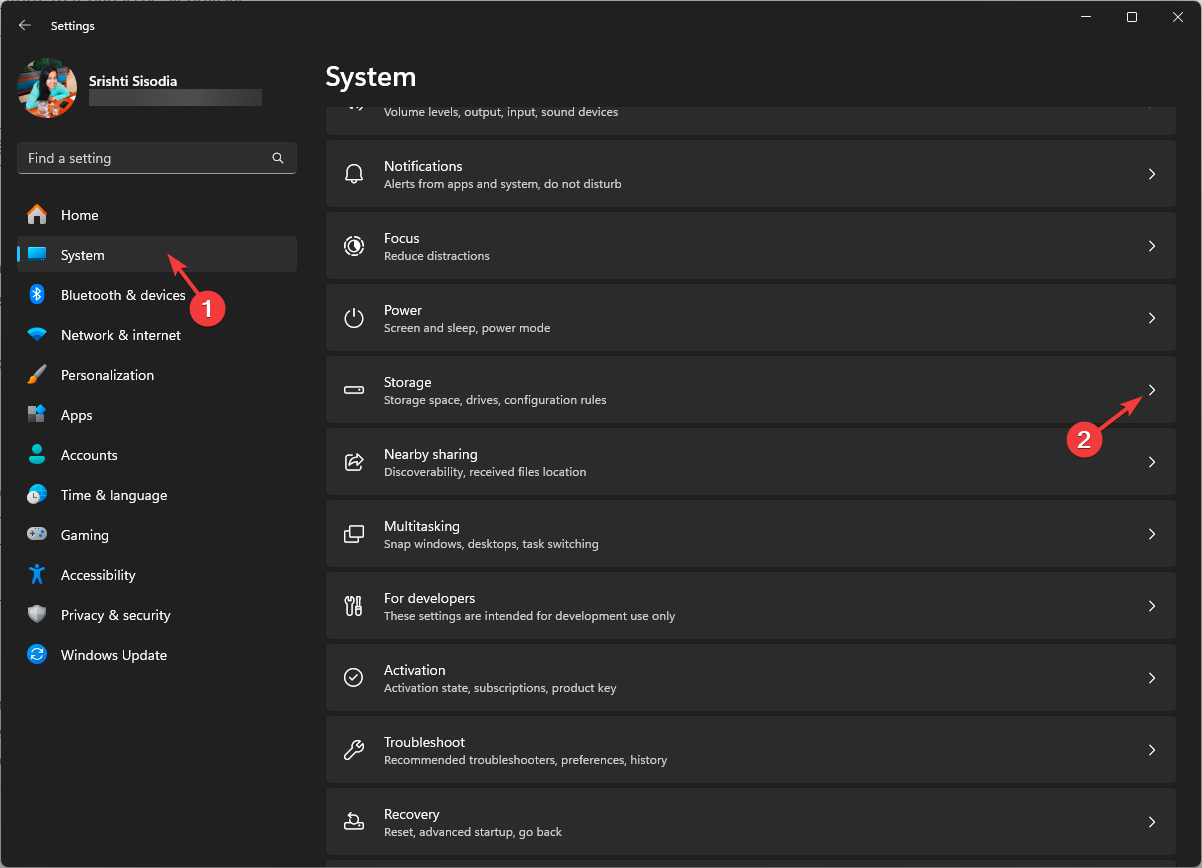
- Press Windows + I to open the Settings app.
- Go to System, then click Storage.
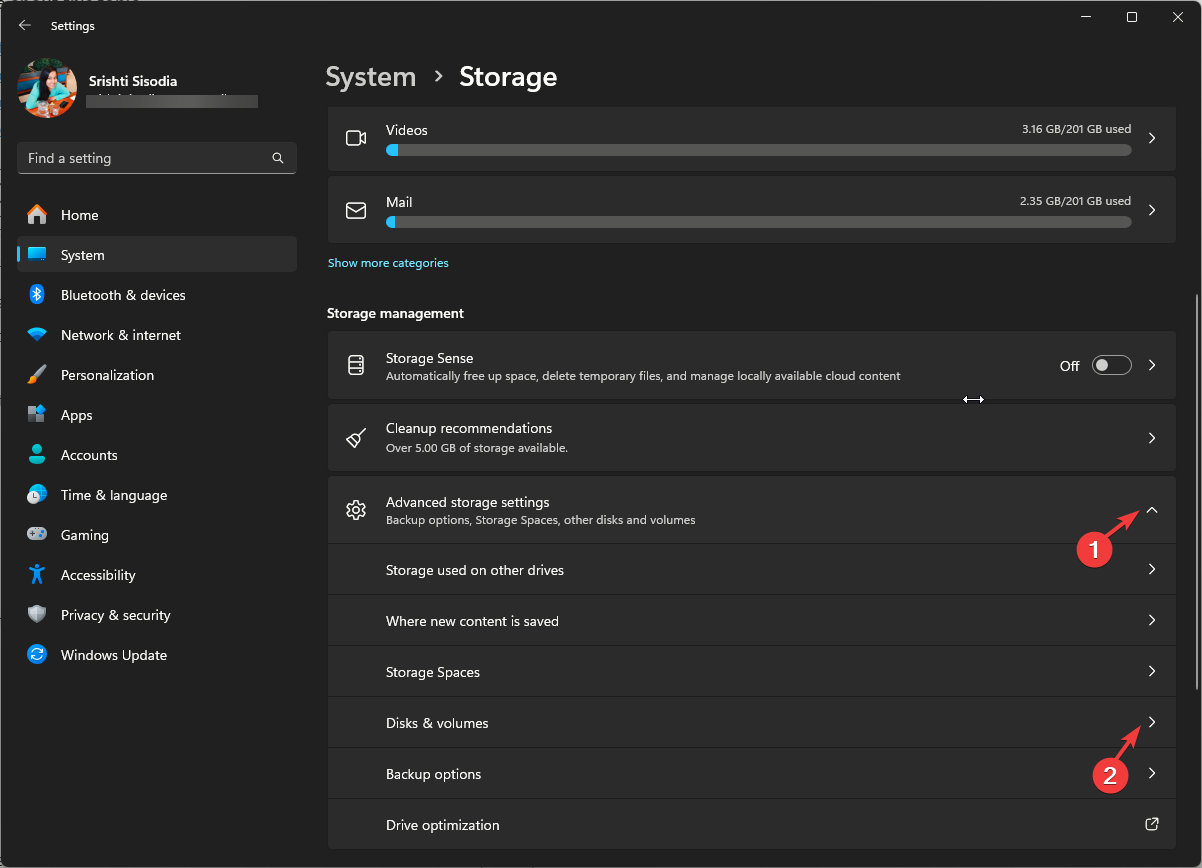
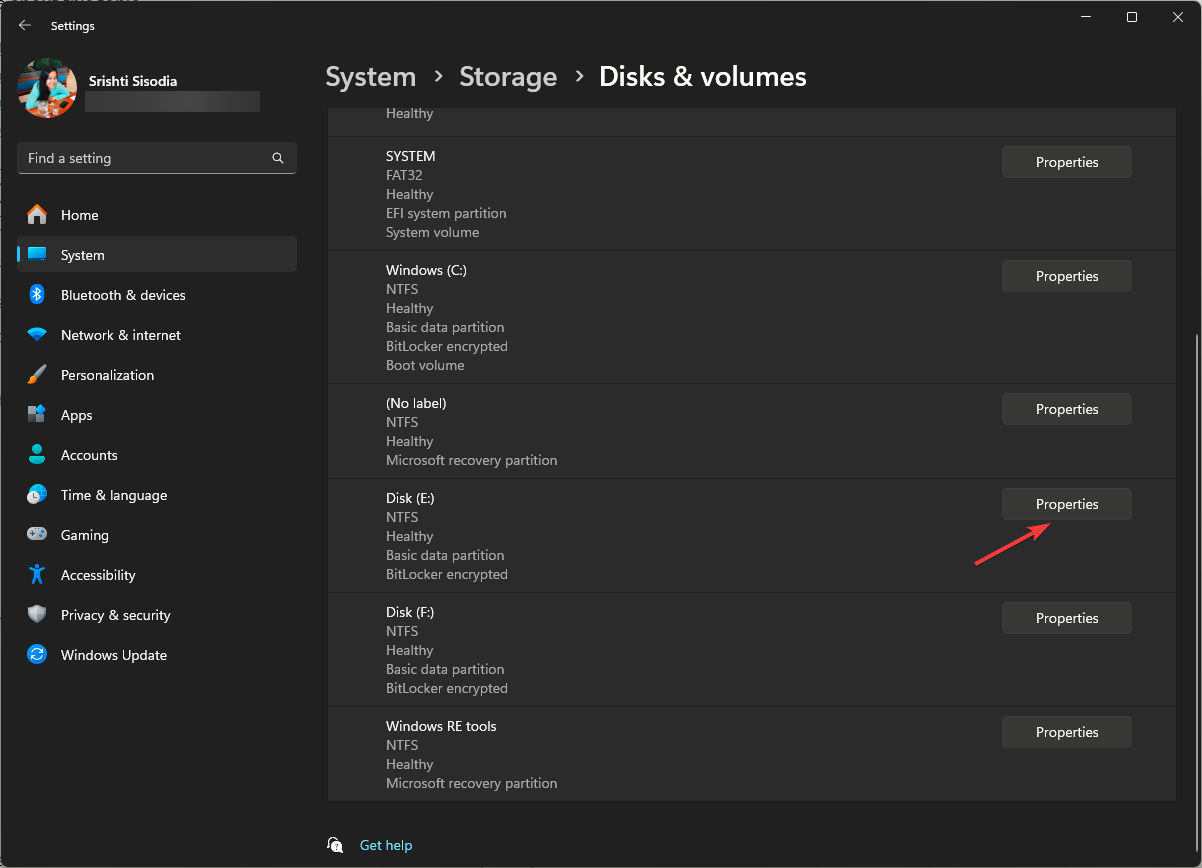
- Click Advanced storage settings to expand and select Disks & volumes.
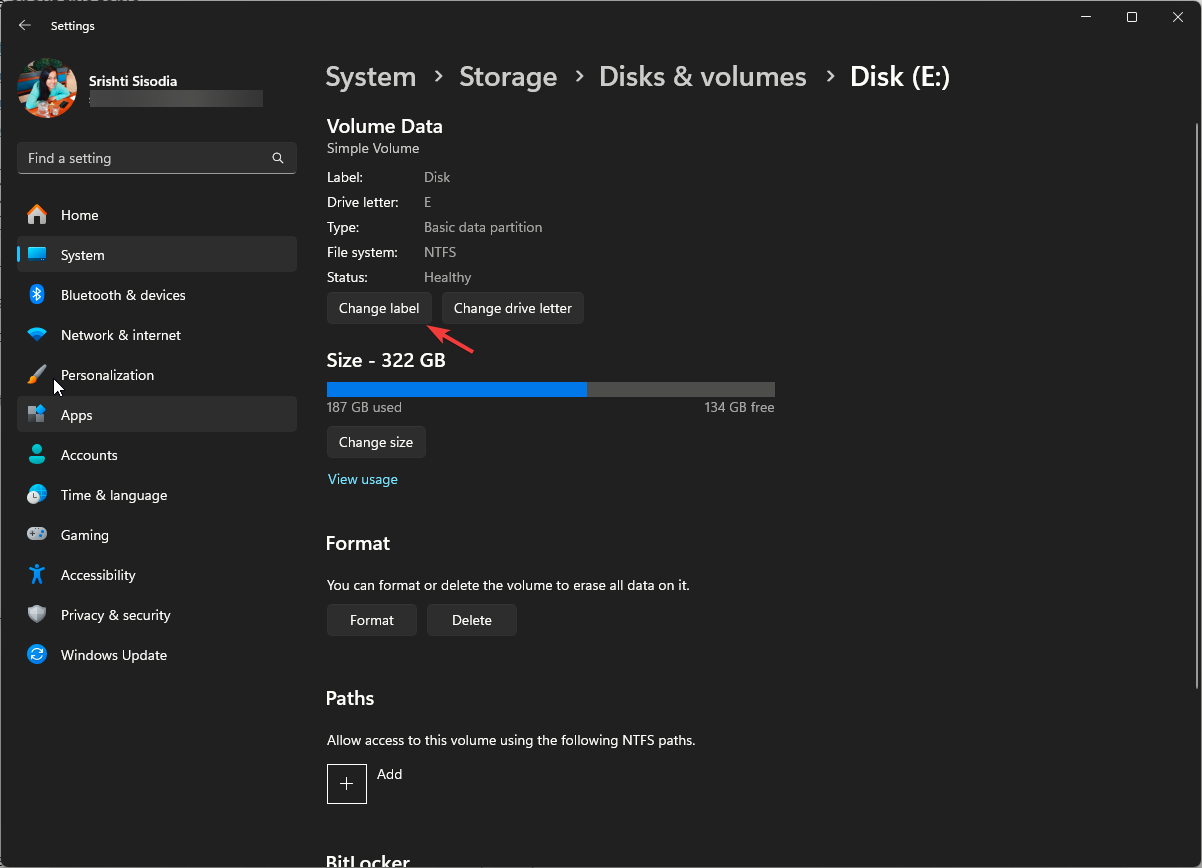
- Locate the external drive and select Properties.
- Click the Change label button.
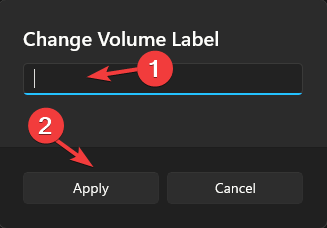
- Type in the new volume label on the Change Volume label window and click Apply.
5. Using Command Prompt
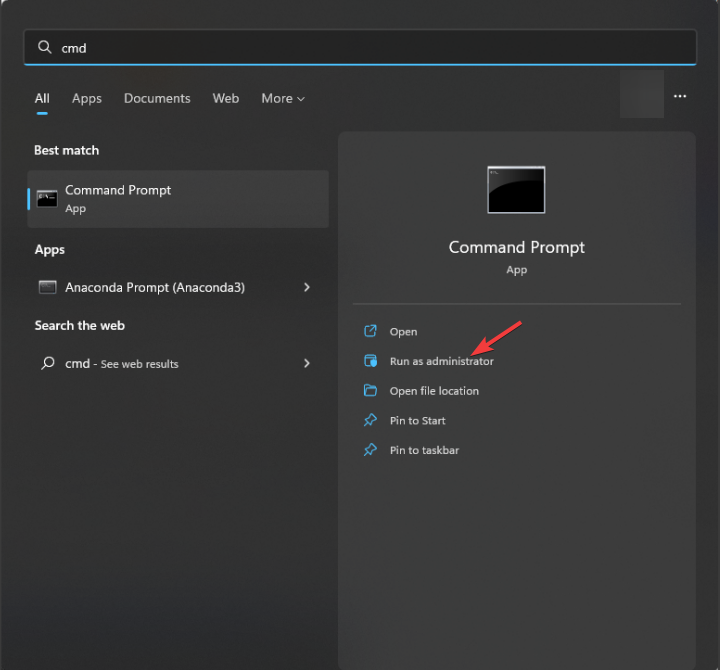
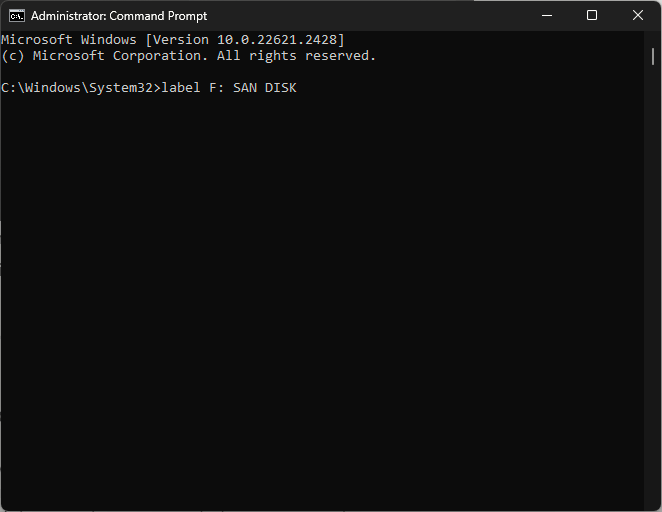
- Press the Windows key, type cmd, and click Run as administrator.
- Type the following command after replacing the <DriveLetter> with the external hard drive name or letter & New name with the name you want to choose and hit Enter:
label <DriveLetter>: New name - Close the Command Prompt window when done.
6. Using the Windows PowerShell
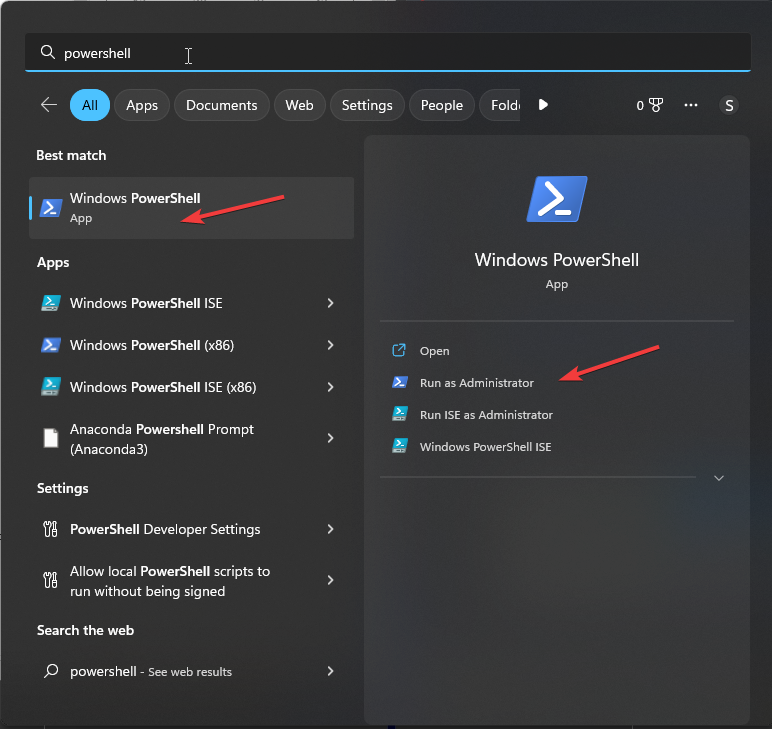
- Press the Windows key, type powershell, and click Run as administrator.
- Copy & paste the following command after replacing the <Current drive name> with the existing name of the USB flash drive and the <New drive name> with the new name, then press Enter:
Set-Volume -FileSystemLabel "<Current drive name>" -NewFileSystemLabel "<New drive name>
7. Using the Disk Management
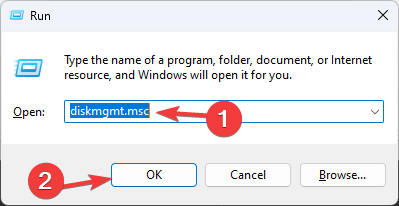
- Press Windows + R to open the Run dialog box.
- Type diskmgmt.msc and click OK to open Disk Management.
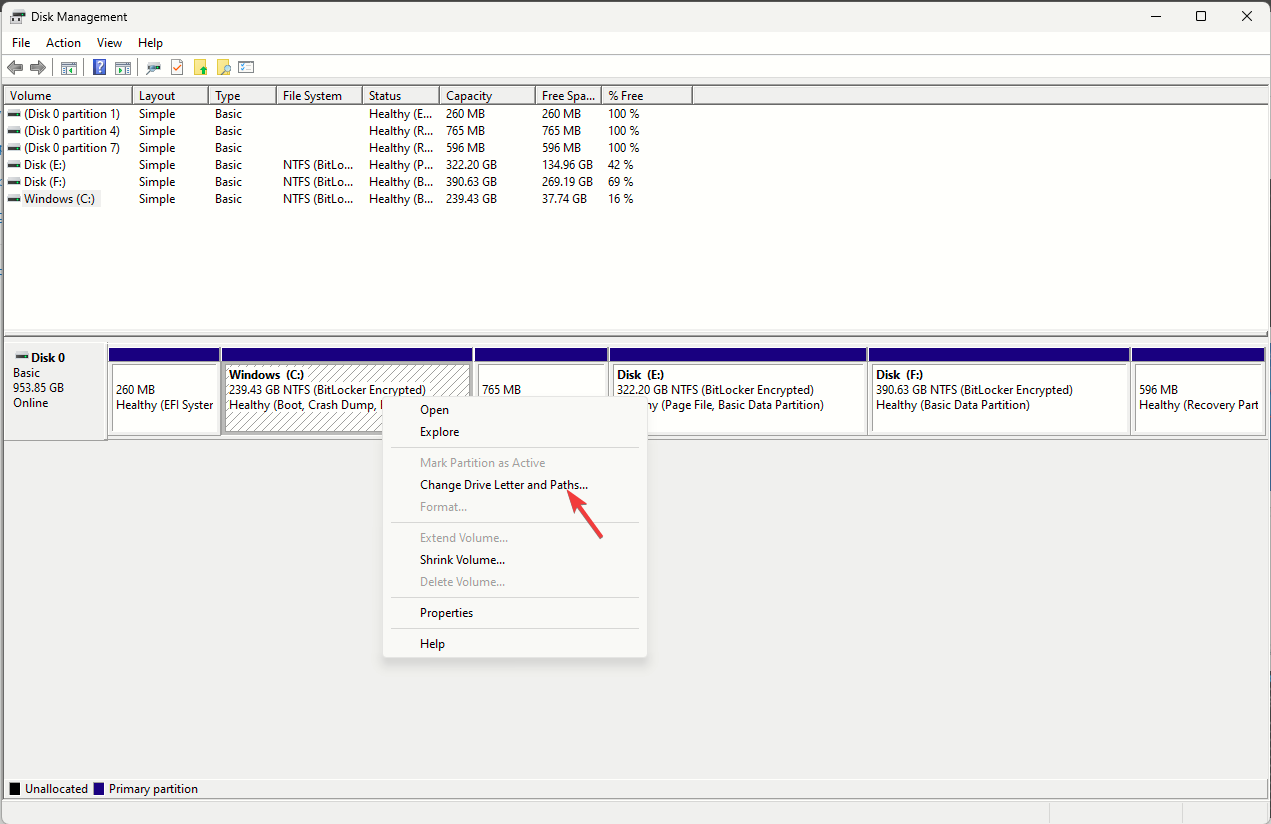
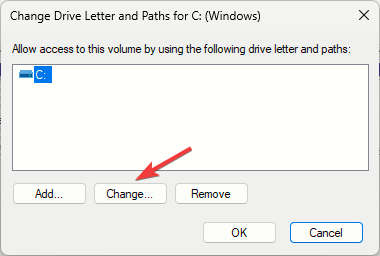
- Right-click the external drive and select Change Driver Letter and Paths.
- On the following window, click Change.
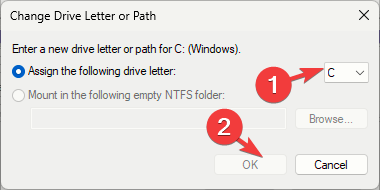
- Select the new drive letter from the drop-down menu; next to the Assign the following driver letter option, click OK.
- Close the Disk Management app.
Why can’t I rename my external hard drive on Windows 11?
- You can’t change the name if you are not logged in using an administrative user account. Double-check the user profile for admin privileges.
- Don’t have sufficient permissions to perform the task. Go to the drive’s Properties, then check the Security Permissions to ensure you have ownership.
- If the drive is in use, you can’t alter the name. Close the files in it, then try again.
- File system error might cause this issue. To fix it, run the chkdsk command for the drive.
- The drive letter is already assigned, that’s why it is not available; check the availability before making changes.
If you want to set drive letters to appear before names to avoid confusion, read this guide to know the steps!
Renaming the external hard drive is a great way to distinguish them, primarily if you use multiple devices. However, choosing the method to do it is entirely at your discretion.
Which method do you like to use to change the drive label on Windows 11? Tell us in the comments section below.


User forum
0 messages