Drive Letter is Not Available in Windows 11: How to Fix It
Commonly caused by either corruption or faulty hardware
Key notes
- Having a missing drive letter seems like a pretty innocuous problem, but it should be seen as a sign of something more grave.
- Drive letters disappearing means you either have malware infecting your computer or some faulty hardware.
- You can try to replace computer parts or use an antivirus app to clean it up.
On the surface, a missing drive letter may not be a big deal, but it indicates a much bigger problem. It could mean that your computer is not detecting your hard drive.
This can happen if you recently installed a brand new hard drive or something is failing. Either way, you must address this issue so you can continue using your computer without a problem.
What is causing the drive letter to disappear?
It’s important to point out what is causing this problem. If it ever reappears, having that knowledge in your back pocket can go a long way in addressing this issue.
There are many different reasons why your drive’s letter may disappear. The following list is not extensive, but it should give you a pretty good idea of why it happens.
- Malware has infected your computer – It is strongly recommended that you download some antivirus software like Bitdefender to clear out the malware.
- Parts of your computer are corrupted – To clean up the corruption, you will need to run an SFC scan via the Command Prompt on your computer.
- Your motherboard is beginning to fail – This can happen as the motherboard gets old. It will start failing. Before replacing it, you should check the motherboard’s serial number and model.
- The CMOS battery is failing – The CMOS battery powers the motherboard so that it can retain its settings. You’ll need to get a battery report to see if it needs to be replaced.
- The power supply is faulty – A malfunctioning power supply can cause multiple hardware problems and failure across the board. You’ll have to update the computer’s BIOS to fix this.
How can I restore the drive letter on Windows 11?
There are many different ways to fix the drive letter problem. Most of it is pretty easy to do and can be done quickly, while other solutions will take more time:
- Contact your computer’s or laptop’s manufacturer and see if they can repair the device. If this fails, you may be better off buying a new device.
- Install a partition assistant app like Acronis Disk Director to allow you to rename the hard drive, among other things.
- Replace the CMOS battery on your motherboard so your hard drive can function properly and without issue. A CMOS battery should be replaced every five years or so.
- Double-check your laptop’s power supply on your laptop and make sure all the cables are inserted correctly.
1. Check system errors
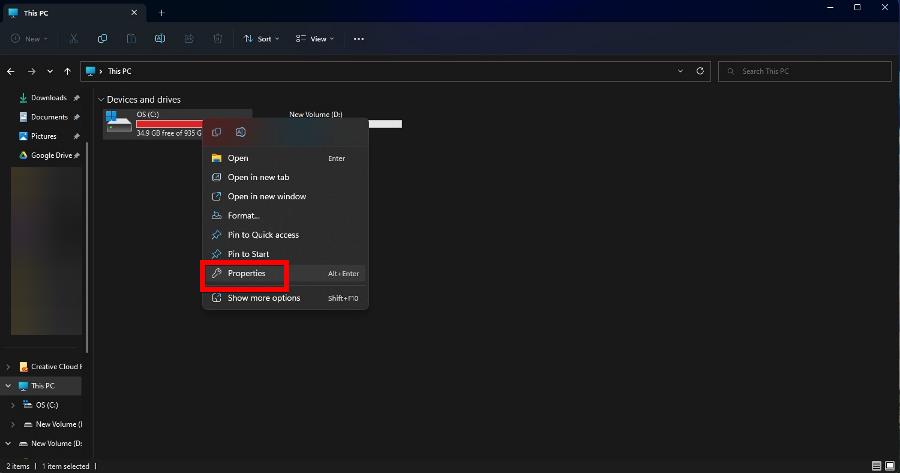
- Open File Explorer, then locate your drive. Right-click the problematic drive and select Properties.
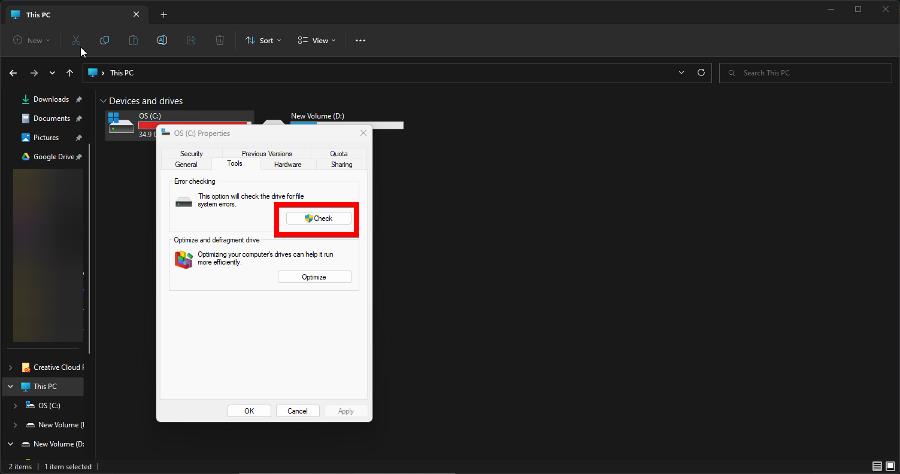
- Go to the Tools tab and click the Check button.
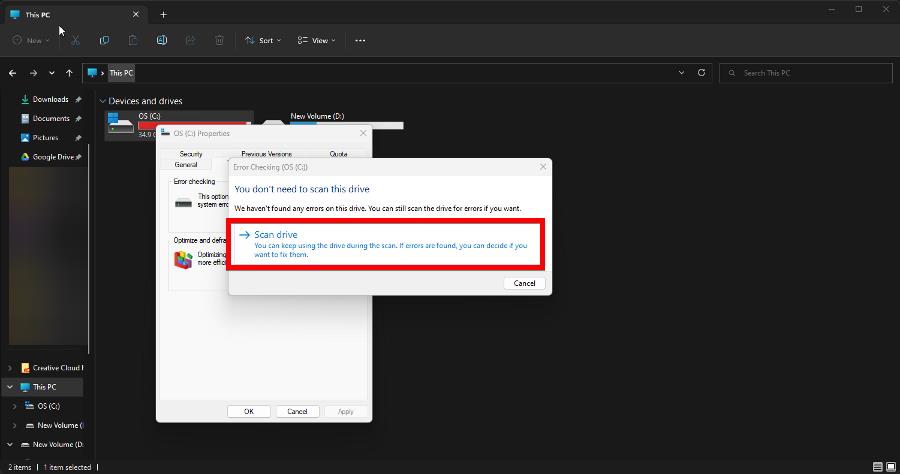
- Select Scan drive. The tool will look for any system errors in the drive, and if it discovers anything, the software will offer the opportunity to repair it.
2. Run CHKDSK command
- Bring up the Command Prompt in the Windows 11 search bar and select Run as administrator.
- Enter the following command and hit Enter on your keyboard:
chkdsk /f C: - If you have other drives on your computer, replace the last letter with the one from the other drive like D:, for example.
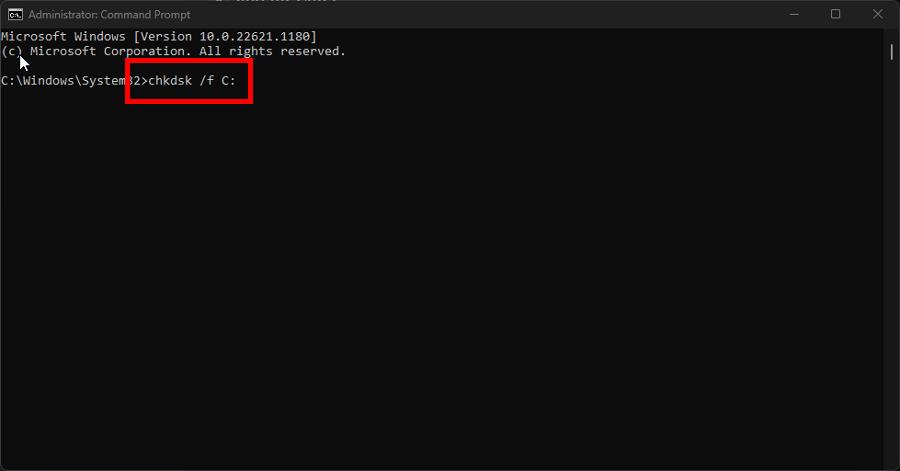
- Restart your computer after the Command Prompt finishes. Be aware it may take some time before it reboots.
You should perform this solution if checking system errors doesn’t work via the drive’s properties menu.
Also, whenever your computer checks for system errors, it will create a log file telling you what it found. This can be located in the Windows Event Viewer.
3. Show drive letters in File Explorer
- Open File Explorer and select the three dots at the bottom of the window.
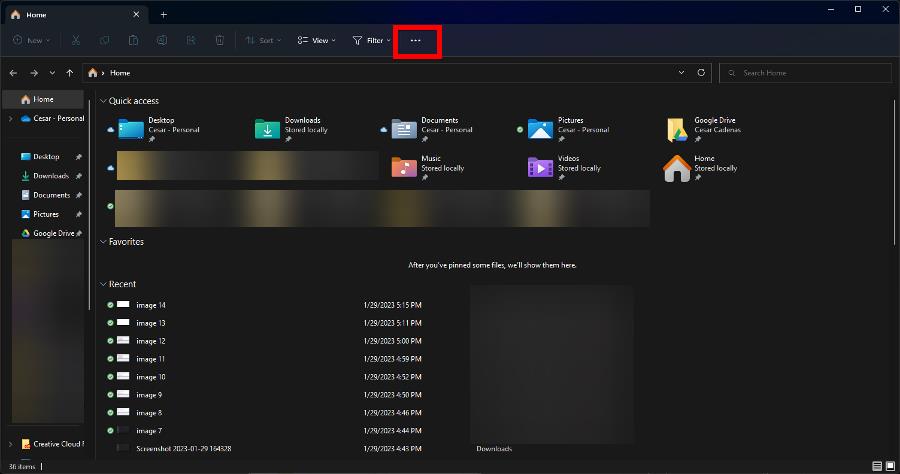
- In the drop-down menu that appears, select Options.
- Go to the View tab. Scroll down in the Advanced Settings section until you locate Show drive letters ON.
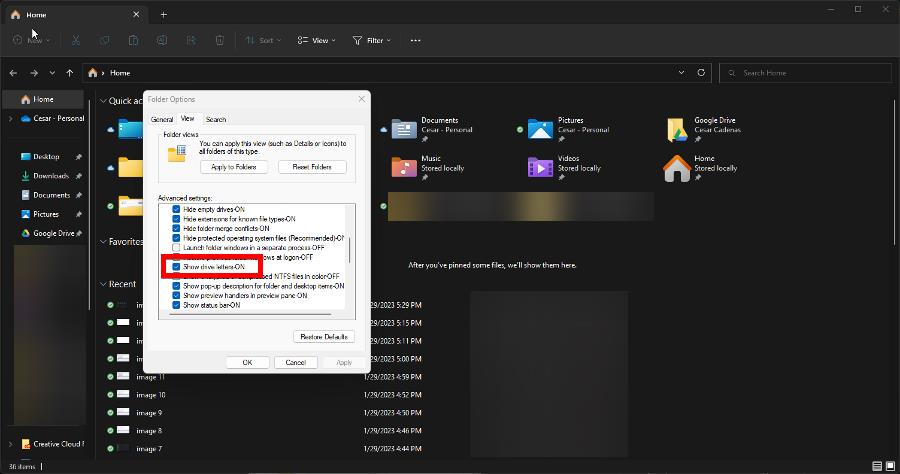
- Click the entry to enable it. Select Apply, then OK.
4. Update disk drivers
- Launch the Device Manager from the Windows search bar.
- Expand the Disk Drive entry, right-click the hard drive, and select Update driver.
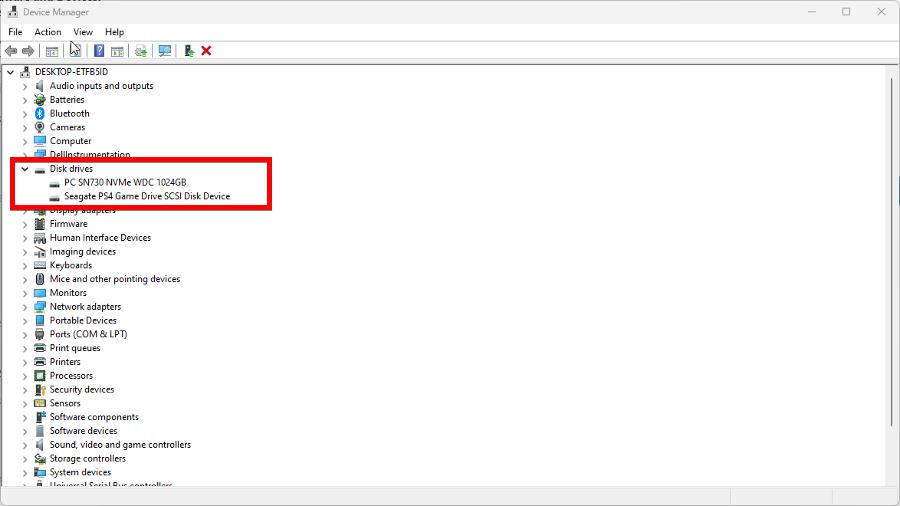
- Select Search automatically for drivers to have your computer quickly install any new drivers.
If this process seems like it may take you some time, you can try using a third-party tool to automatically update your drivers.
5. Uninstall hidden devices
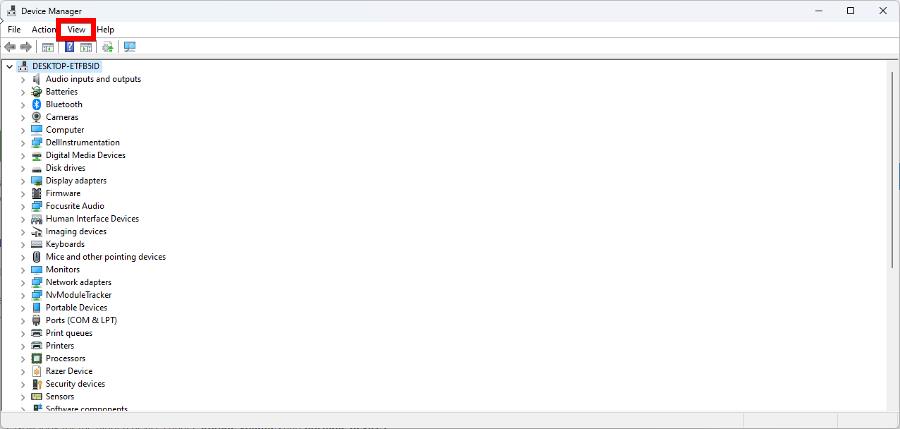
- In the Device Manager, click the View tab at the top of the window and select Show hidden devices.
- Expand both Storage volumes and Portable Devices to see if there are any hidden devices.
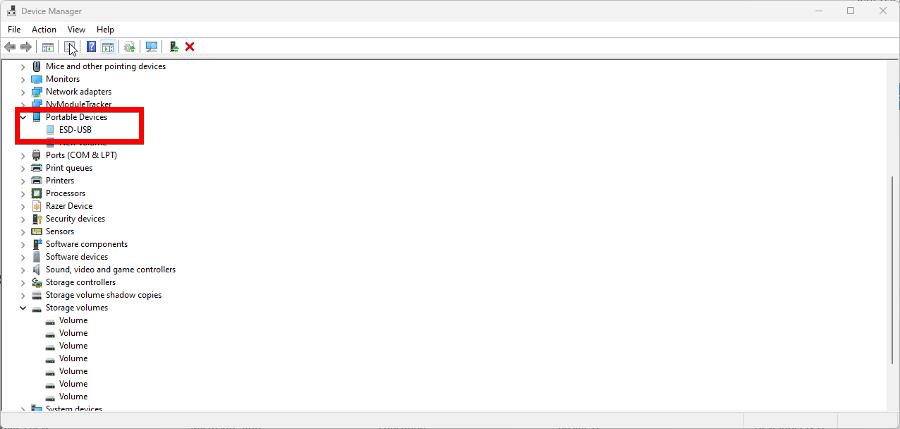
- Right-click on the hidden device and collect Uninstall devices.
- After uninstalling, restart your PC to finish up.
Once this solution is complete, it’s recommended that you assign a new drive letter to your hard drive, which you can do in the following solution.
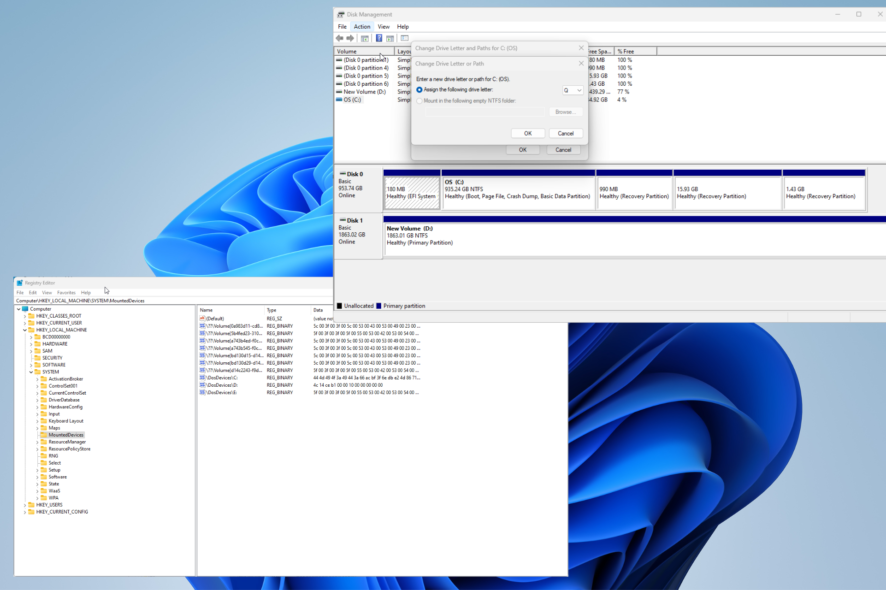
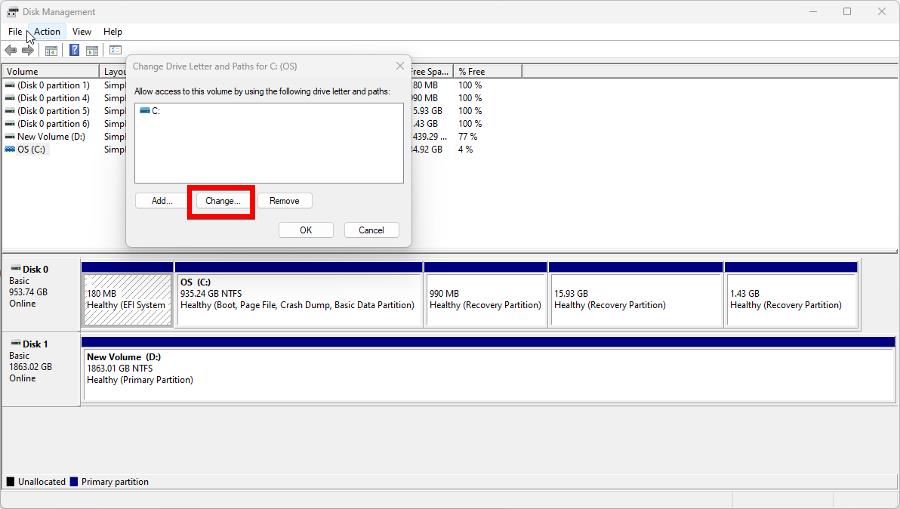
6. Assign a new letter
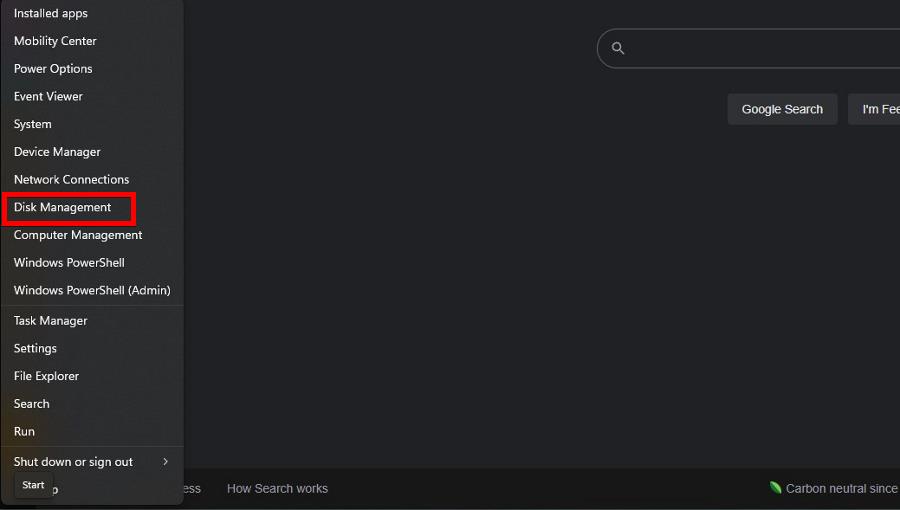
- Right-click the Windows logo in the bottom left corner and select Disk Management.
- Right-click your drive, then choose Change Drive Letter and Paths.
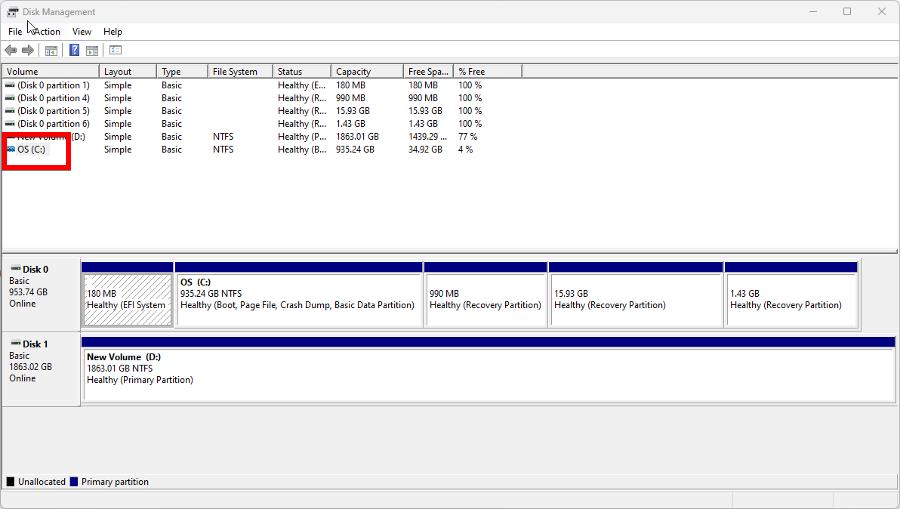
- In the new window that appears, click the Change button.
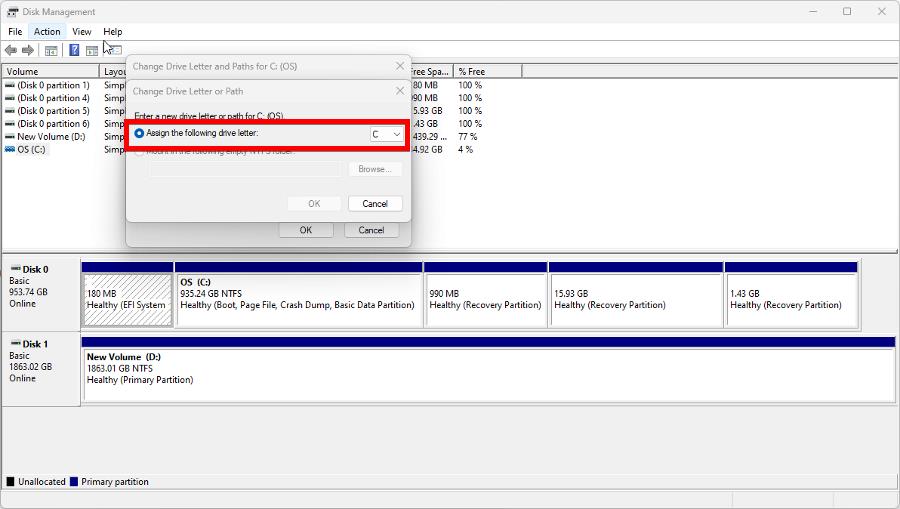
- Make sure Assign the following driver letter is selected and choose another letter from the drop-down menu.
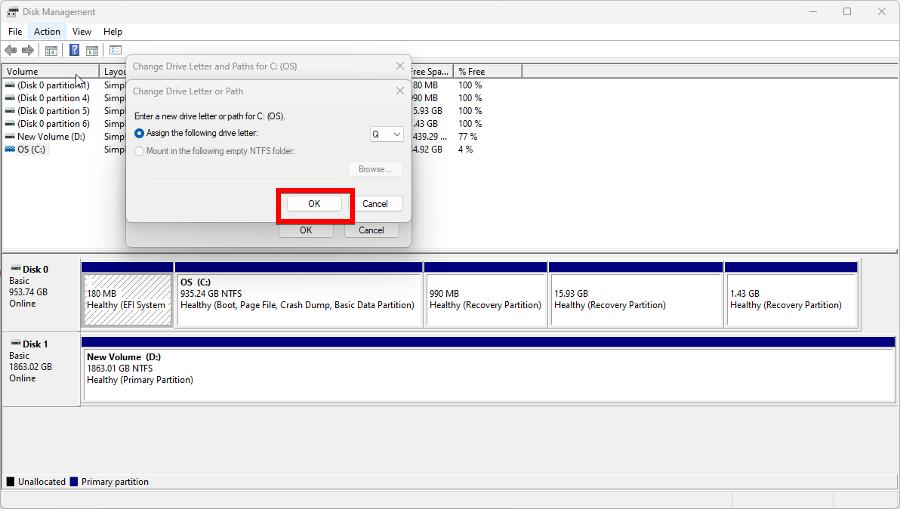
- Click OK, then select OK again in the following small window.
7. Rename the drive via the Registry Editor
- Launch the Registry Editor from the Windows Search bar.
- Enter the following key into the address bar at the top:
HKEY_LOCAL_MACHINE\SYSTEM\MountedDevices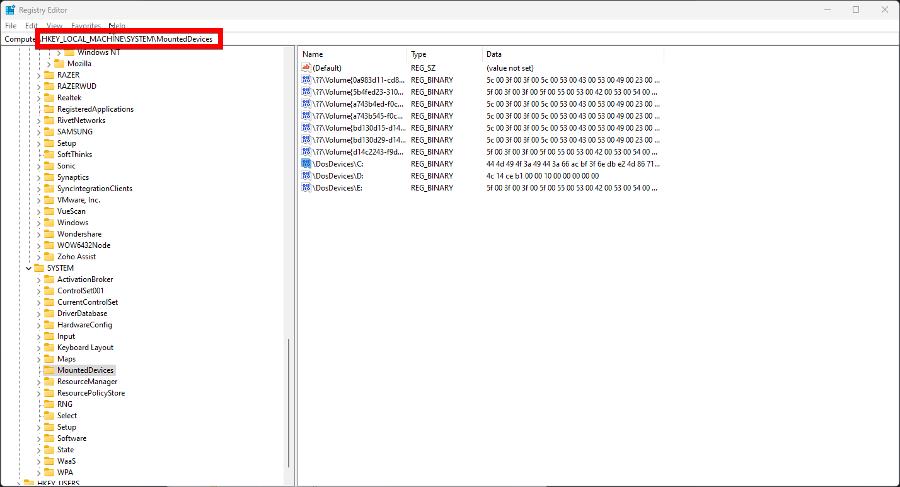
- Right-click your hard drive’s letter and select Rename in the menu that appears.
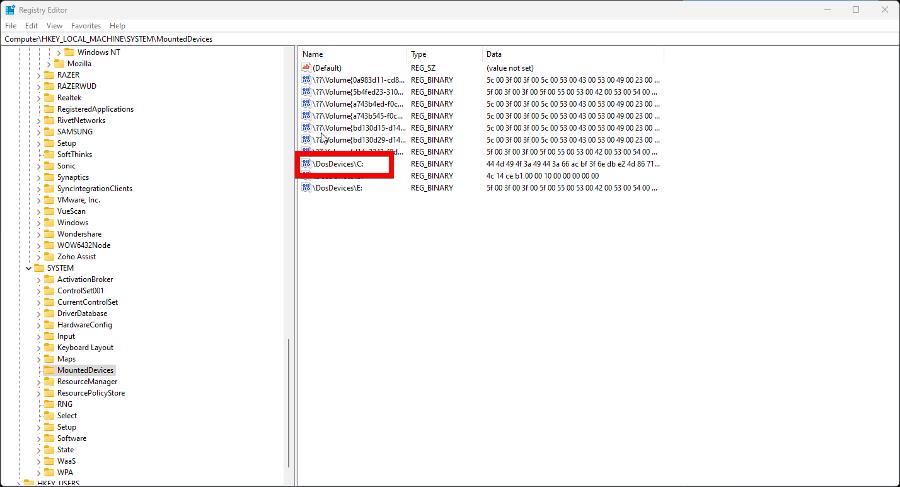
- Change the letter to one that is not currently in use. Restart your computer to finish assigning the new letter to the drive.
Why does my hard drive keep crashing?
Since missing drive letters is a symptom of hardware failure, you should learn how to fix other problems that come from system failure.
For example, having a hard drive that constantly crashes is a particularly awful problem. Before you do anything, it’s recommended that you first use a backup tool to save your files.
Some users have reported instances of Windows 10 thinking their hard drive is removable when it isn’t. This is a configuration issue and can be solved by modifying the disk drive in the Device Manager.
You may also find helpful information in our guide on what to do if the D drive is missing in Windows 11.
Feel free to comment below if you have questions about other hardware problems. And please tell us if there’s a specific guide for any Windows 11 error you’d like to see.
Read our disclosure page to find out how can you help Windows Report sustain the editorial team. Read more


Improve this guide
User forum
0 messages