Reserved Storage on Windows 11: How to Enable or Disable It
CMD can ease the process of enabling/disabling Reserved Storage
![]() 3 min. read
3 min. read
![]() Updated on
Updated on
Share this article

Improve this guide
Read our disclosure page to find out how can you help Windows Report sustain the editorial team Read more
Key notes
- The reserved storage is a portion of the internal hard disk that stores system files, temporary files, and cache.
- Note that it ensures that Windows 11 can be updated and perform its functionalities optimally.
- The reserved storage can be enabled or disabled using the Windows Command Prompt.
The Reserved storage ensures that Windows 11 can be updated and performed optimally without running out of disk space for essential tasks. You can enable or disable reserved storage by using the command line utility.
Also, you can find out how to disable Activity history and protect your privacy on Windows.
What is reserved storage on Windows 11?
Reserved storage is a feature in Windows 11 that sets aside a portion of the storage capacity on a device for system and app updates, system caches, and temporary files.
The amount of reserved storage varies based on the device configuration and can range from several gigabytes to over 7GB, depending on the size of the Hard Disk.
Furthermore, the Reserved Storage is automatically managed by Windows 11, so users don’t need to worry about freeing up space or managing the storage manually. The reserved storage ensures that the system and apps have enough space to operate correctly, even when the device is low on storage.
How do I enable or disable reserved storage on Windows 11?
1. How to view reserved storage on your device
 Tip
Tip
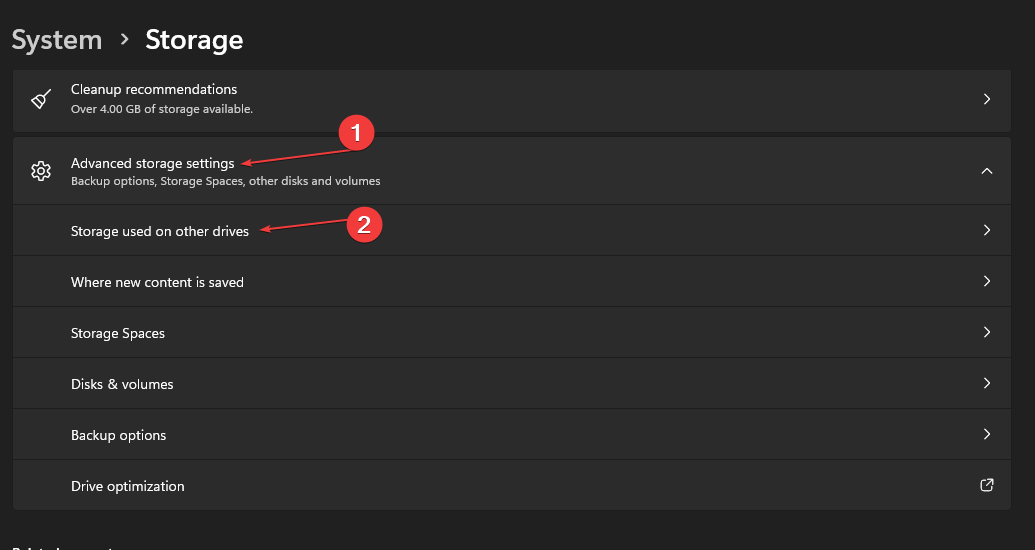
- Press the Windows + I key to open Windows Settings app.
- Select the System tab from the settings and click on Storage from the right sidebar.

- Scroll through and select the Advanced storage settings. Click on the Storage used on other drives to view the storage drives on your PC.

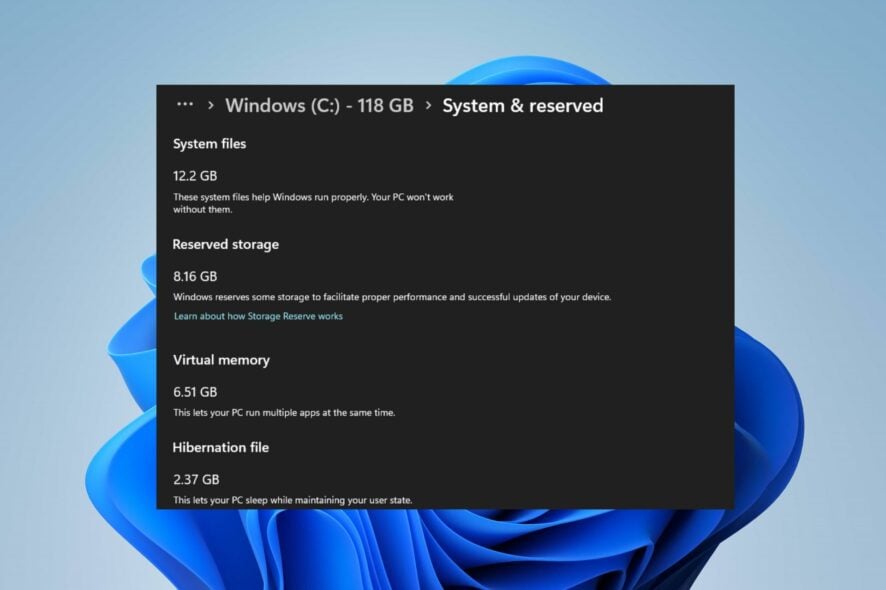
- Select the C drive from the list.
- Select the System & reserved to see your reserved storage capacity.


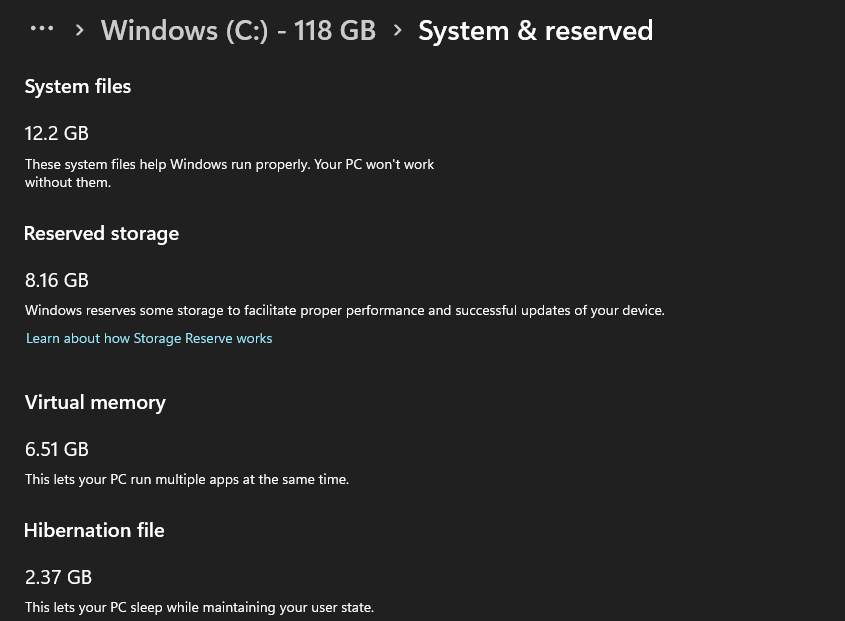
The reserved storage capacity varies on each device based on the size of the Hard Disk. If the reserved storage is intact, proceed with the steps below to enable or disable it.
2. How to disable and enable reserved storage
- Left-click the Start button, type Command Prompt, and click the Run as administrator option.
- Click Yes on the User Account Control (UAC) prompt.
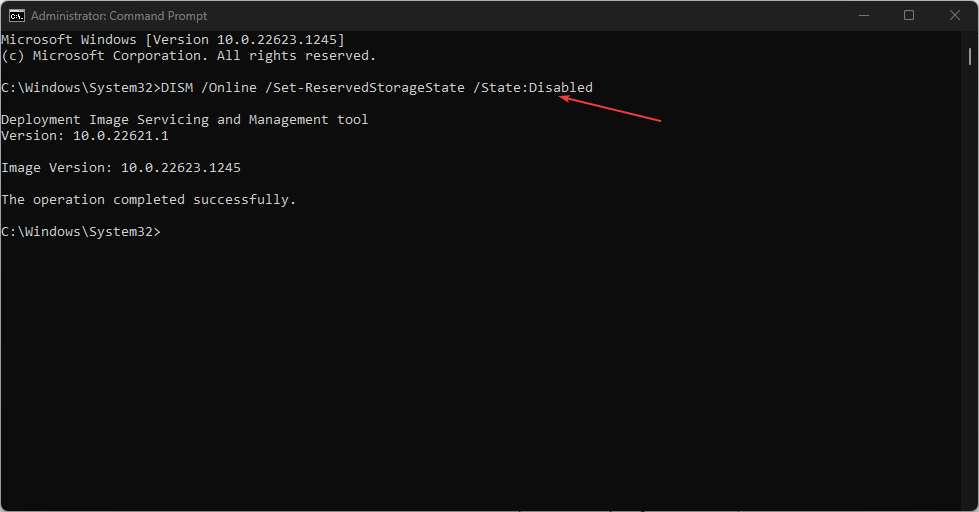
- Type the following lines of commands and press Enter to run them:
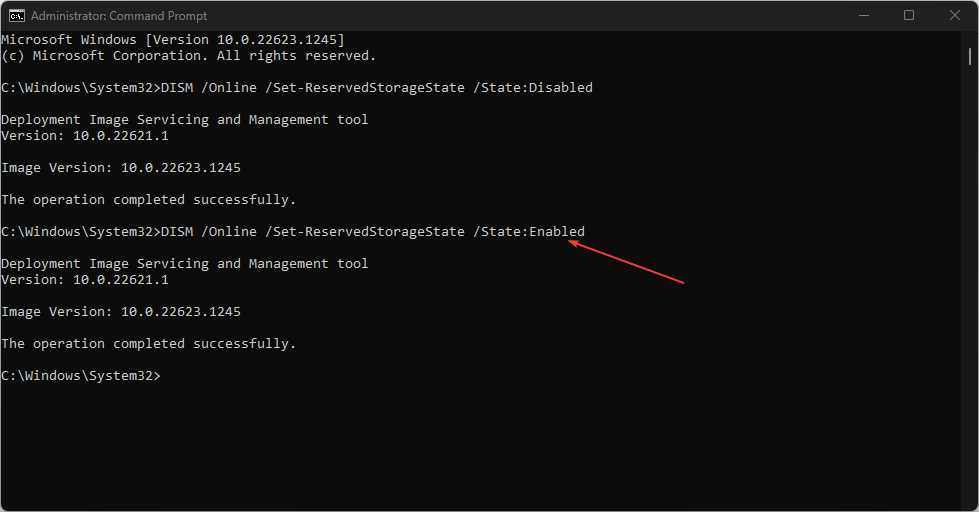
DISM /Online /Set-ReservedStorageState /State:Disabled
- Follow the steps listed above to check if reserved storage is disabled.
- To enable reserve storage, type the following lines of commands and press Enter to run them:
DISM /Online /Set-ReservedStorageState /State:Enabled
The Windows Command Prompt can enable and disable reserved storage effectively without affecting other storage capacities on your PC.
You can read how to fix CMD not run as administrators if you have difficulty using Command Prompt.
Alternatively, you can read how to enable reserved storage on Windows and how to fix Windows storage that doesn’t add up to your PC.
If you have further questions or suggestions about this guide, kindly drop them in the comments section below.