2 Ways to Quickly Reset File History in Windows 10 & 11
Quick ways to restore File History to default settings
3 min. read
Updated on
Read our disclosure page to find out how can you help Windows Report sustain the editorial team. Read more
Key notes
- You may want to clear up space on your system by deleting old files, and resetting your File History is one way to achieve that.
- As an in-built backup system, you can reclaim your storage space or discard unneeded files so here's how to go about it.
Need to empty the File History on your Windows PC quickly? You may want to keep your recently visited locations private, especially if you share the computer with others, so resetting it is an option.
If so, this tutorial will take you through the steps to reset your File History and start off with a clean slate.
Can file history be deleted?
File History is a built-in backup tool that you can use to protect your personal files and folders on your computer.
It creates a copy of the files in your Libraries, Desktop, and Favorites folders and any other files you choose to include. Since this information is kept in a folder on your PC, you can easily locate and delete it.
What happens if I turn off file history?
When file history is turned off, the automatic backup of your personal files stops because the file history service has been disabled. If you have alternative backup solutions, this should not be a problem.
However, if you decide to turn off File History, we recommend that you first create a manual backup of your important files. This will ensure that your files will be safe if something happens to your computer.
Now, let’s look into how you can reset your file history.
How can I reset my file history in Windows 11?
1. Use the Control Panel
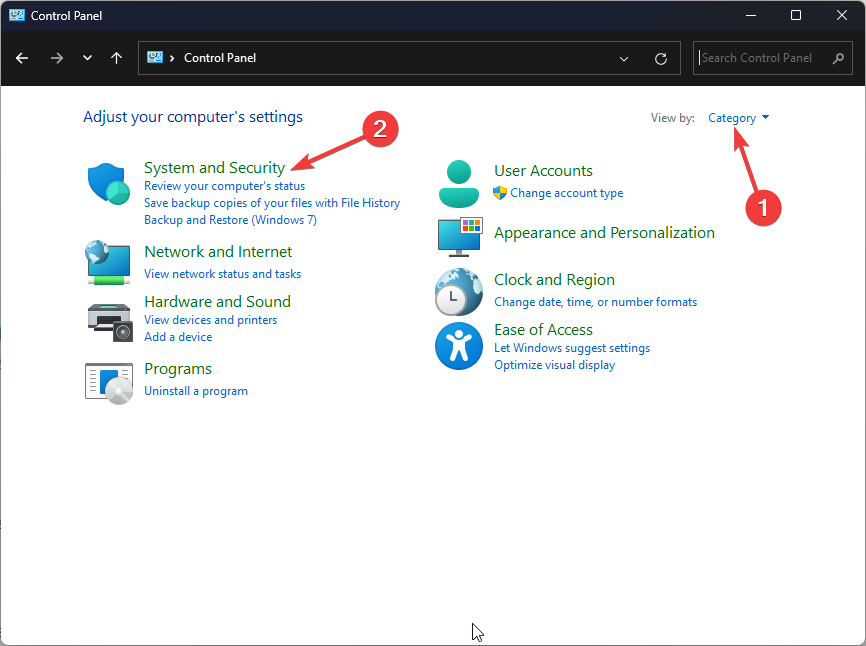
- Hit the Windows key, type in Control Panel in the search bar, and click Open.
- Select System and Security.
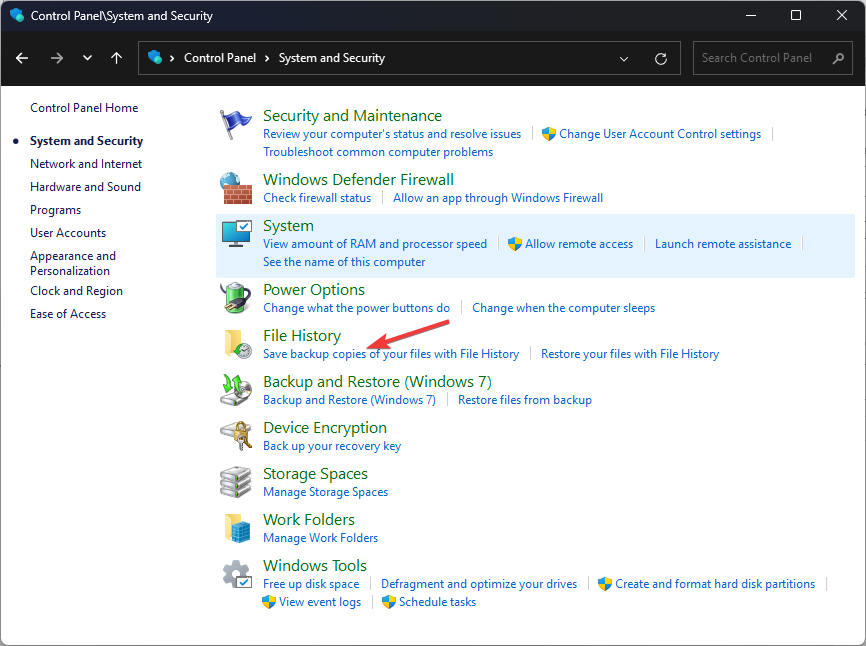
- Search for File History and click on the corresponding result.
- Click Turn off to disable the feature.
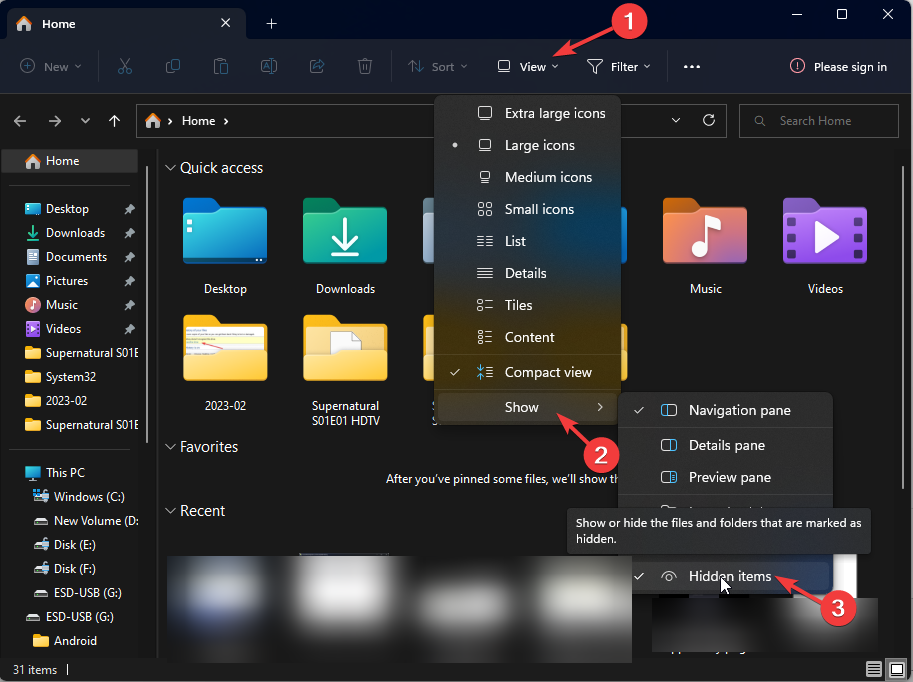
- Hit the Windows + E keys to open File Explorer.
- Click View and select Hidden items.
- Navigate to the following location. Note that File History targets external storage, so ensure you insert your flash drive prior:
%UserProfile%\AppData\Local\Microsoft\Windows\File History - Select all items in the folder and hit the Del key.
- Alternatively, you can rename the Configuration file to Configuration.old, and your File History will be reset.
2. Use the Command Prompt
- Click on the Start Menu icon, type cmd in the search bar, and click Run as administrator.
- Type the following command and hit Enter:
if exist "%UserProfile%\AppData\Local\Microsoft\Windows\FileHistory" RD /S /Q "%UserProfile%\AppData\Local\Microsoft\Windows\FileHistory"
How can I reset file history in Windows 10?
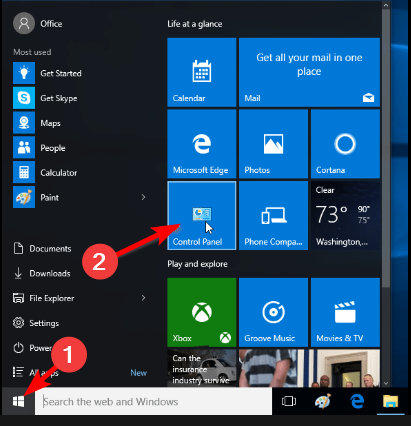
- Click on the Start Menu icon and select Control Panel.
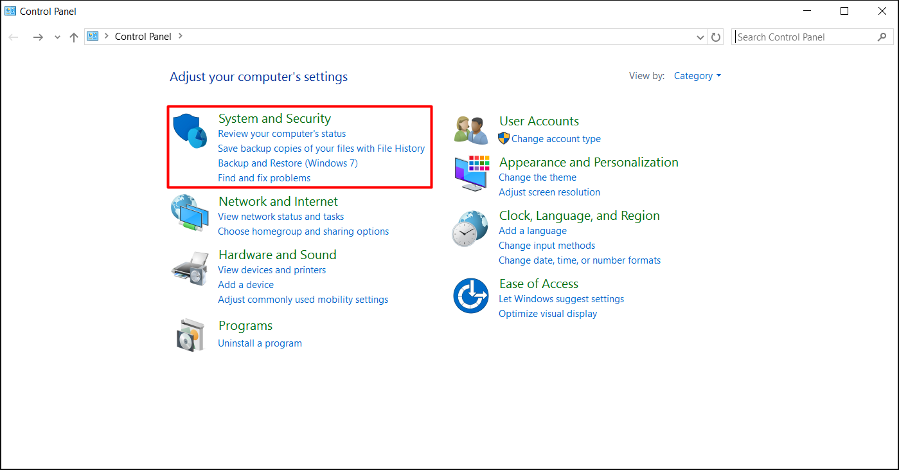
- Navigate to System and Security and click to open.
- Click on File History and ensure it is turned off.
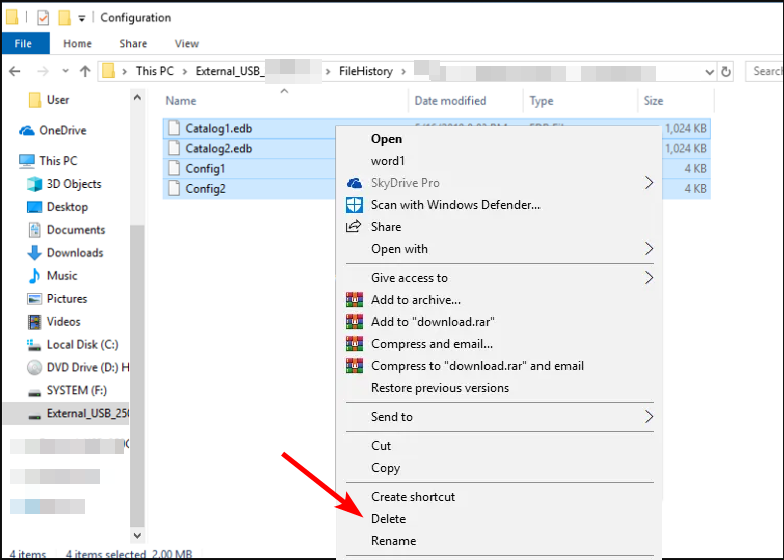
- Insert your external flash drive containing the backed up data and go to the following location:
%UserProfile%\AppData\Local\Microsoft\Windows\File History - Select all files in the folder, right-click, and select Delete.
When you reset file history in Windows, all of your previous versions of a file will be deleted. If you have any files backed up in the cloud, such as OneDrive or Dropbox, this process will not affect those files.
You can now reconfigure your settings or change the backup location. The File History feature works with both local drives and network shares, so you can switch to a different drive or use a network location in cases where File History does not recognize your drive or no usable drives were found.
So that’s how to reset your File History in Windows 10 and 11. We also have an interesting side-by-side comparison of File History vs Windows Backup so check that out to spot the differences.
We’d love your feedback on this issue, so leave us a comment below.






User forum
0 messages