Rockstar Launcher Not Working? 8 Ways to Quickly Fix it
Clear DNS cache, reinstall the launcher, or clean booting your system
Key notes
- The Rockstar Games Launcher is free to use and offers features like automatic game updates, cloud saves, and other benefits.
- You have to be a member of the Rockstar Social Club to use the Rockstar Games Launcher.
- A few users have reported to Rockstar Games support that when they try to install Social Club, it freezes and gets stuck on the loading R Logo animation.
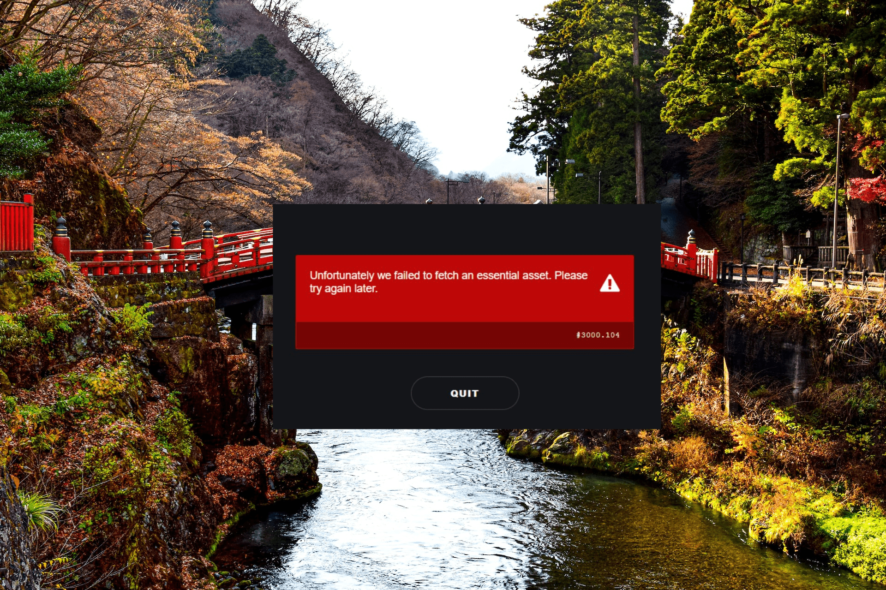
To play games like Grand Theft Auto and Red Dead Redemption on your PC, you will need the Rockstar Games launcher. Unfortunately, the Rockstar launcher hasn’t been functioning properly recently.
If the Rockstar Games Launcher is not working, you can try several troubleshooting steps to resolve the problem.
Why is my Rockstar Game Launcher not working?
The Rockstar Games Launcher is a desktop application developed by Rockstar Games that serves as a central hub for managing and launching Rockstar Games titles on PC.
It offers features like a game library, automatic updates, cloud saves, integration with the Rockstar Games Social Club, and exclusive offers.
The Rockstar Games Launcher might encounter issues due to various reasons. Here are a few possibilities:
- Server or maintenance problems: Rockstar Games may be experiencing server problems or conducting system maintenance.
- Internet connectivity issues: If your Internet is slow, keeps cutting off, or has problems, it can make the launcher not work properly.
- Firewall or antivirus software interference: Sometimes, firewall or antivirus programs can block the Rockstar Games Launcher from accessing the internet or specific system resources.
- Compatibility problems: The launcher may have compatibility problems with your operating system or other software on your computer.
- Corrupted launcher files: It’s possible that the installation files or data related to the launcher have become corrupted.
- Conflicts with third-party software: Certain third-party software or background processes running on your computer can interfere with the launcher.
How do I fix Rockstar Game Launcher not working?
- Check Rockstar Games Servers: Visit the Rockstar Games Service Status page to check if the server is down or undergoing maintenance. If the service is not working, just wait until it becomes operational again.
- Restart your computer: Sometimes, all it takes is a quick restart to fix temporary software issues. Close the Rockstar Games Launcher and any related game processes, then restart your computer. Afterward, try launching the launcher again.
- Check your Internet connection: Make sure you have a stable Internet connection. The launcher relies on a solid connection to work correctly. Try restarting your modem or router, or connecting to a different network to see if that resolves the issue.
1. Run the launcher in compatibility mode with administrator privileges
- Right-click on the Rockstar Games Launcher shortcut icon on your desktop and select Properties.

- Go to the Compatibility tab in the Properties window.
- Then, check the option Run this program in compatibility mode for: and Run this program as an administrator.

- After that, click Apply and then OK.

- Once you have made the changes, open the launcher, and it should load without any issues.
2. Update Windows
- Press Windows + I to open Windows Settings and go to Windows Update.

- Then, click the Check for updates button to download and install any pending updates.

- After installing the updates, restart your computer and check if the Rockstar Launcher is still not working.
3. Update your display drivers
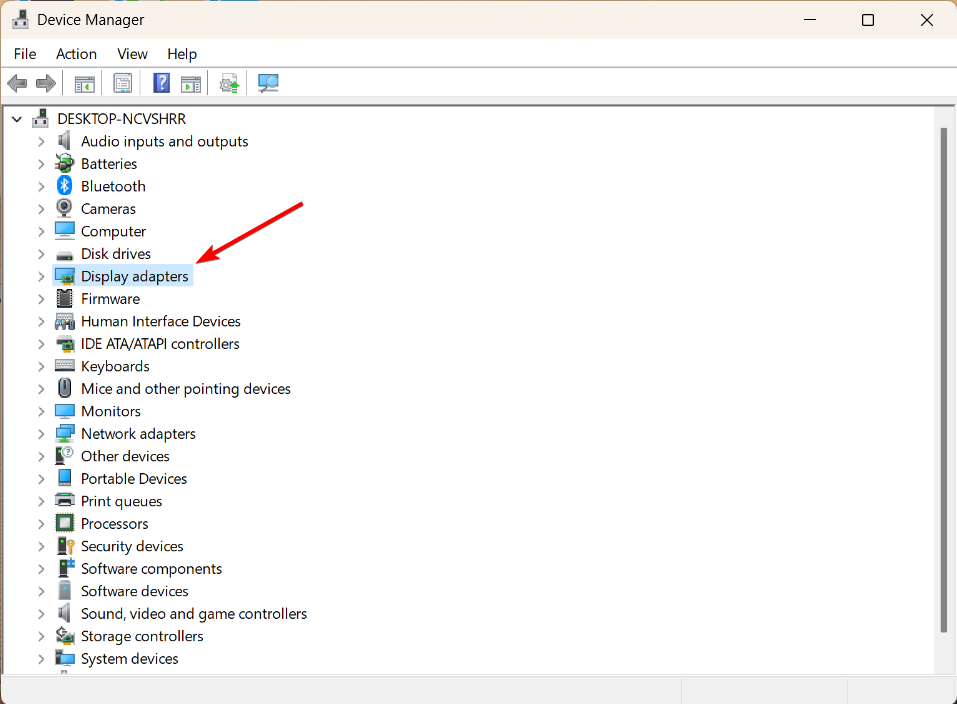
- Press the Windows + X keys and select Device Manager to open it.

- Next, expand the Display adapters section and find your graphics card.
- Right-click on the video card and select Update driver.

- Then, select Search automatically for drivers.

- Follow the instructions to complete the update process.
If it doesn’t work, you can manually update the graphics driver for NVIDIA and AMD by visiting their official websites.
You can prevent these problems by using an automatic tool that will search and install the correct drivers on your computer with just a few clicks. That's why we recommend you use Outbyte Driver Updater. Here's how to do it:
- Download and install the Outbyte Driver Updater app.
- Launch the software.
- Wait for the app to detect all incompatible drivers.

- Afterward, it will show you a list of the drivers found to select the ones to Update or Ignore.
- Click on Update & Apply Selected to download and install the newest versions.
- Restart your PC to ensure the applied changes.

Outbyte Driver Updater
Use this software and solve all driver-related issues from your PC.4. Flush your DNS cache
- Press the Windows key, type cmd in the search bar, and select Run as an administrator.

- Enter the following command and press Enter to flush the DNS cache.
ipconfig /flushdns
- Once the Command Prompt successfully flushes the DNS Resolver Cache, restart your PC.
5. Disable Firewall and antivirus software
- Press Windows + R keys to type firewall.cpl in the box and then press Enter.

- Click on the Turn Windows Defender Firewall on or off hyperlink from the left sidebar.

- Choose the Turn off Windows Defender Firewall (not recommended) options under Public and Private network settings, then click OK.

Also, if you have antivirus software on your computer, make sure to disable or close the application.
6. Clear Launcher and Social Club cache
- Open File Explorer and go to the Documents folder.
- Find the folder named Rockstar Games and open it.

- Then select the Launcher and Social Club folders, and delete them.

- After that, navigate to the following folder, but make sure to Username with your username.
C:\Users\Username\AppData\Local\Rockstar Games\Launcher
- Select all its content and delete them.
The launcher may accumulate temporary files or cache data that can cause issues. Clearing the cache will remove the broken temporary files and fix the Rockstar Launcher not working issue.
Besides, when you relaunch the app, it will automatically regenerate these folders and files.
7. Reinstall the Rockstar Games Launcher and Social Club applications
- Press Windows + I to open Windows Settings app.
- Go to Apps and select Installed apps on the right pane.

- From the list of programs, find the Rockstar Games Launcher app, and click the three dots next to it. Then, select Uninstall.

- Click Uninstall again to remove the app.

- Likewise, uninstall the Rockstar Games Social Club too.

- After uninstalling both apps, restart your computer.
- Then, download and reinstall the Rockstar Games Launcher app again from the official website.
8. Clean Boot your system
- Press the Windows + R keys together, type msconfig in the Run box, and click OK to launch the System Configuration console.

- Go to the Services tab and check the box that says Hide all Microsoft services to prevent disabling essential system processes.

- Then, click on the Disable all button to disable all the non-Microsoft services.

- Next, navigate to the Startup tab and click on the Open Task Manager link.

- Go to the Startup apps tab in the Task Manager window.
- Disable all the startup items by right-clicking on each item and selecting Disable.

- Close the Task Manager window.
- Go back to the System Configuration window and click Apply, then the OK button.

- You will be prompted to restart your computer. Click on the Restart button to proceed.

- After your computer restarts, it will be in a clean boot state, with only essential Microsoft services running.
- Check whether the issue is fixed.
- If the problem is resolved, you can gradually enable the disabled services and startup items a few at a time by checking them, allowing you to identify the specific cause.

- Click on Apply and OK and restart your computer.
- To fully restore your computer to its normal startup state, click the Enable all button in the Services tab.

- Then, go to the Task Manager and enable the desired startup items.
- Click on Apply and OK and reboot your computer.
A clean boot can help diagnose and troubleshoot software conflicts or issues on your computer.
GTA V is the most popular Rockstar game, yet it is not without errors and bugs. Also, find out what to do when you are experiencing crashes in GTA V on your Windows 11 computer.
If you managed to fix the issue with another solution, please let us know in the comments.
Read our disclosure page to find out how can you help Windows Report sustain the editorial team. Read more


Improve this guide


User forum
0 messages