Screen Saver Settings is Greyed Out: 4 Ways to Fix It
Changing the Screen Saver registry value is effective for most users
3 min. read
Updated on
Read our disclosure page to find out how can you help Windows Report sustain the editorial team. Read more
Key notes
- The screen saver is a nice way to customize or personalize your computer use but may bug on some occasions.
- A corrupt user profile may trigger the error, and as a last resort, you may have to reset the OS.
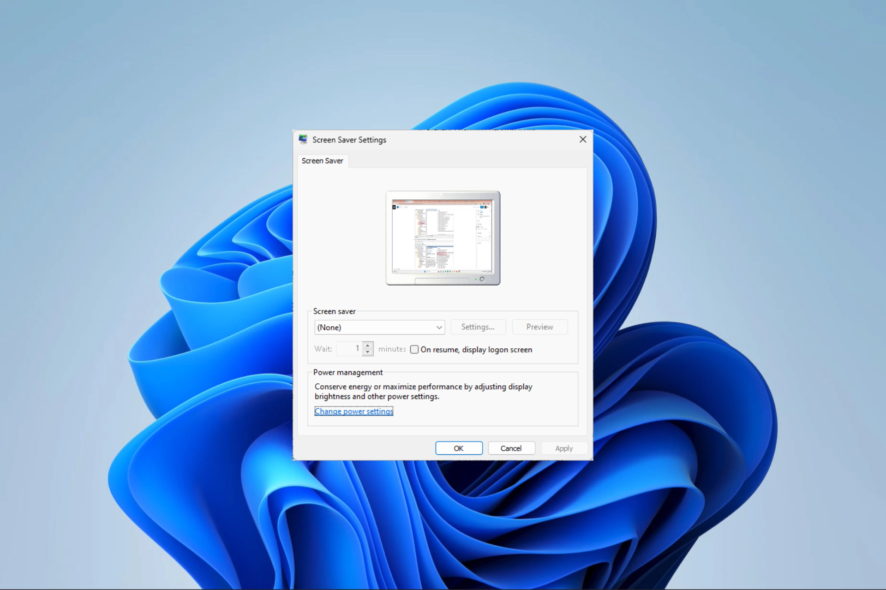
Customizing your computer helps improve the user experience. However, there are times when you cannot make the required personalization. For instance, when the Screen Saver settings is greyed out.
A few readers complained about this, so we will show you the best steps to rectify the problem on your devices.
Why is my Screen Saver settings greyed out?
- Group Policy issue – On computers managed by group policy, you may be unable to make certain customization changes, which may be why the setting is greyed out.
- Disabled registry values – A value in the registry can also disable the Screen Saver settings, and an admin may have enabled it.
- Corrupted screen saver file – Occasionally, users may get this issue if they have installed a corrupted screen saver file or if there is a problem with a corrupted user profile.
- Driver issue: If you are using a third-party screen saver, there may be an issue with the driver for your graphics card.
How do I change my screensaver settings when greyed out?
First, we recommend you try these workarounds:
- Ensure your computer is not in sleep mode, which disables the screen saver.
- Ensure the screen saver is enabled when your computer is on battery power.
- If you use a third-party screen saver, try a different one.
- Update driver, especially for third-party applications.
However, if you still have no success, proceed to the detailed fixes below.
1. Update registry values
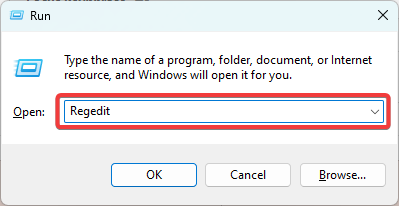
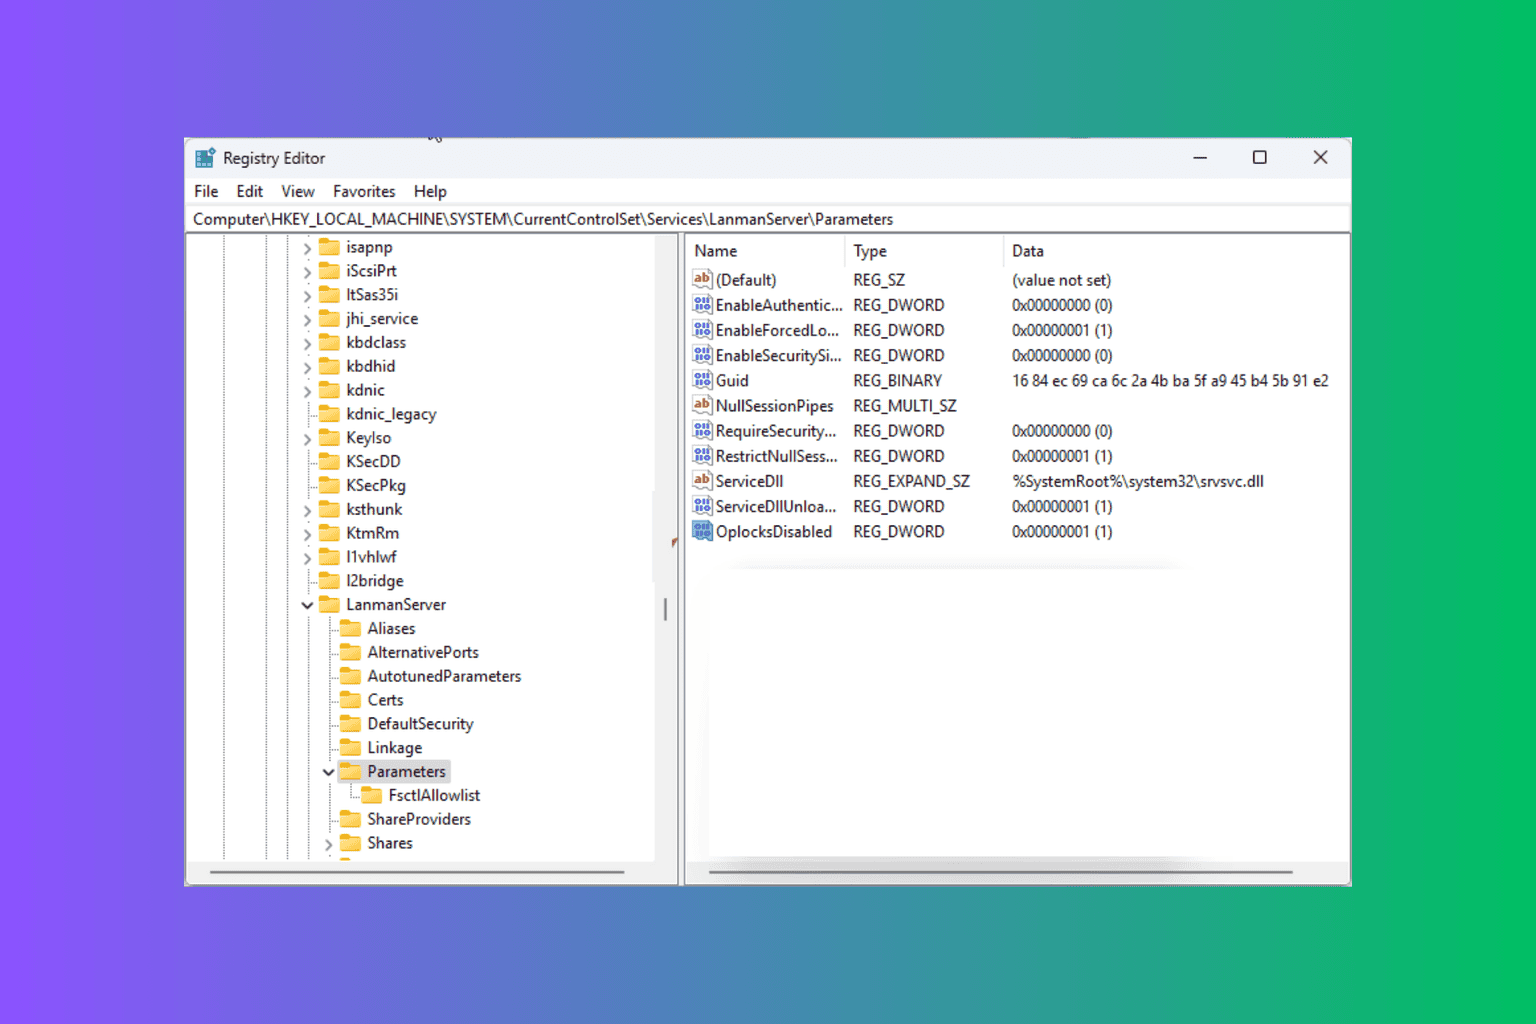
- Press Windows + R to open Run.
- Type regedit and hit Enter.
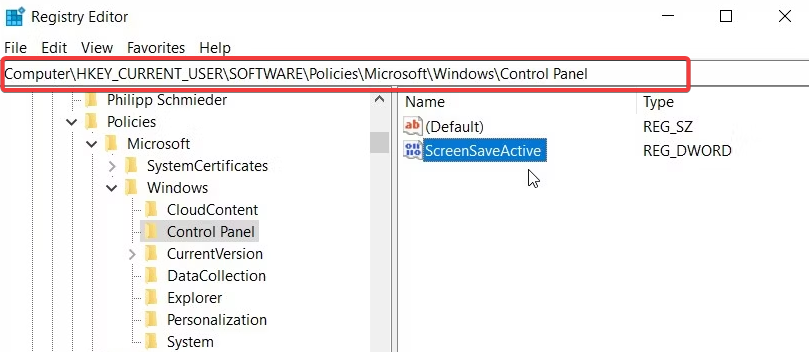
- Navigate to the path below:
HKEY_CURRENT_USER\Software\Policies\Microsoft\Windows\Control Panel - If you do not locate Control Panel, right-click on Windows and select New, then Key, and name it Control Panel.
- Click on ScreenSaveActive (you may create the Dword key for Control Panel if it is absent) and change the value to 1.
2. Update Group Policy settings
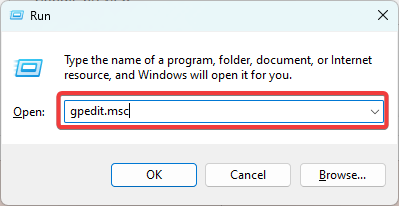
- Press Windows + R to open Run.
- Type gpedit.msc and hit Enter.
- Navigate User Configuration, Administrative Templates, Control Panel, and Personalization.
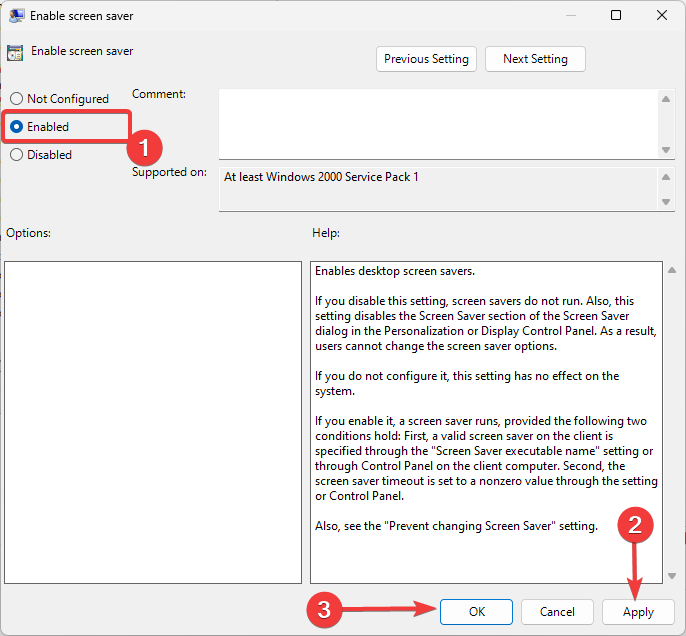
- On the right pane, double-click Enable screen saver.
- Select Enable, then hit Apply and OK buttons.
- Lastly, verify if it fixes the greyed out Screen Saver settings.
3. Run the System File Checker (SFC) scan
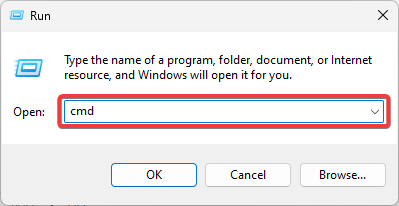
- Press Windows + R to open Run.
- Type cmd and hit Ctrl + Shift + Enter to open an elevated Command Prompt.
- Input the script below and hit Enter.
- Finally, verify it fixes the problem after the scan has completely run. You may need to reboot the computer first.
4. Create a new user account
- Press Windows + I to open the Settings app.
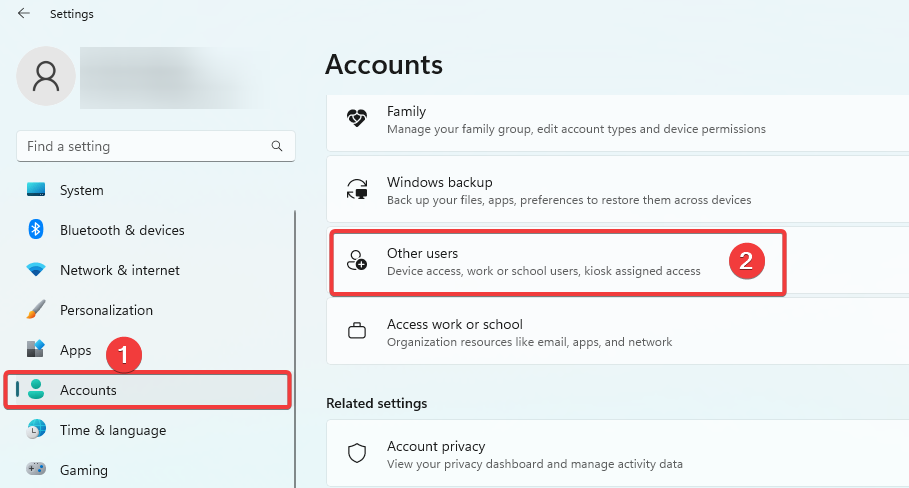
- On the left pane, click Accounts and then select Other users on the right.
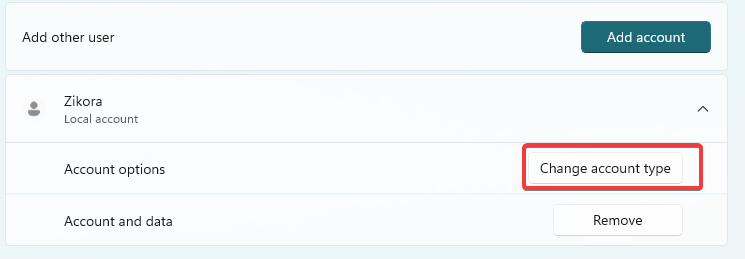
- Click the Add account button.
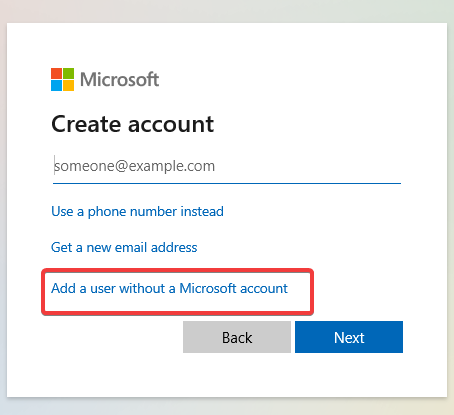
- Pick I don’t have this person’s sign-in information, then select Add a user without a Microsoft account on the next page.
- Complete the form and hit Next.
- Expand the newly created user by clicking the tiny arrow at the right corner, and select Change account type.
- Select Administrator from the dropdown and click OK.
- Finally, verify if the Screen Saver settings is still greyed out.
If you have followed the steps in this guide, you should have some success fixing your Screen Saver settings if it is greyed out.
If you think we omitted any fix, don’t hesitate to contact us using the comments section below. We’d love to hear from you.









User forum
0 messages