Fix: Snip and Sketch is Not Working on Windows 11
Quick and easy solutions to a rather tricky problem
Key notes
- Snip and Sketch, now Snipping Tool, throws an unusual error where it doesn't cover the entire screen when capturing screenshots in Windows 11.
- The problem is experienced by users who have configured a multi-monitor setup.
- To fix things, users can change the Scale settings, the display configuration, or repair the app, amongst other solutions.

Snip and Sketch and Snipping Tool, two handy built-in options to capture screenshots, were integrated and released with the latter’s name in Windows 11. Yet, the tool remains prone to errors. One of the most common is Snip and Sketch not working in Windows 11.
While many reported that Snipping Tools was missing, others had quite a peculiar problem where Snip and Sketch wouldn’t cover the whole screen when capturing screenshots on a multi-monitor display setup. So, let’s find out all about it.
Why is my Snip and Sketch not working?
The particular problem where the Snip and Sketch tool does not cover the whole screen is due to a different scaling set for the various monitors. And as a result, users can’t capture screenshots in Windows 11.
For instance, if your primary display is set to 125% while the second one is at 100%, Snip and Sketch will have trouble functioning optimally. It is, undoubtedly, a software problem, but until this get’s resolved, there are a few workarounds that will do the job.
What can I do if Snip and Sketch is not working in Windows 11?
Before we head to the slightly complex solutions, try these quick tricks first:
- When capturing a screenshot on the secondary display with a different scaling, try covering the monitor’s width first and then move along the length.
- The bug has been reported to Microsoft, and in all likelihood, they are working on a fix which should soon be available. So, make sure you install all the updates for Windows 11.
- A few users reported that the Snip and Sketch tool, when opened manually from the Search menu, usually works fine on the first attempt. Though a slight hassle, you can manually launch it when capturing a screenshot.
If these don’t work, the solutions listed below surely would.
1. Set scaling on all monitors to 100%
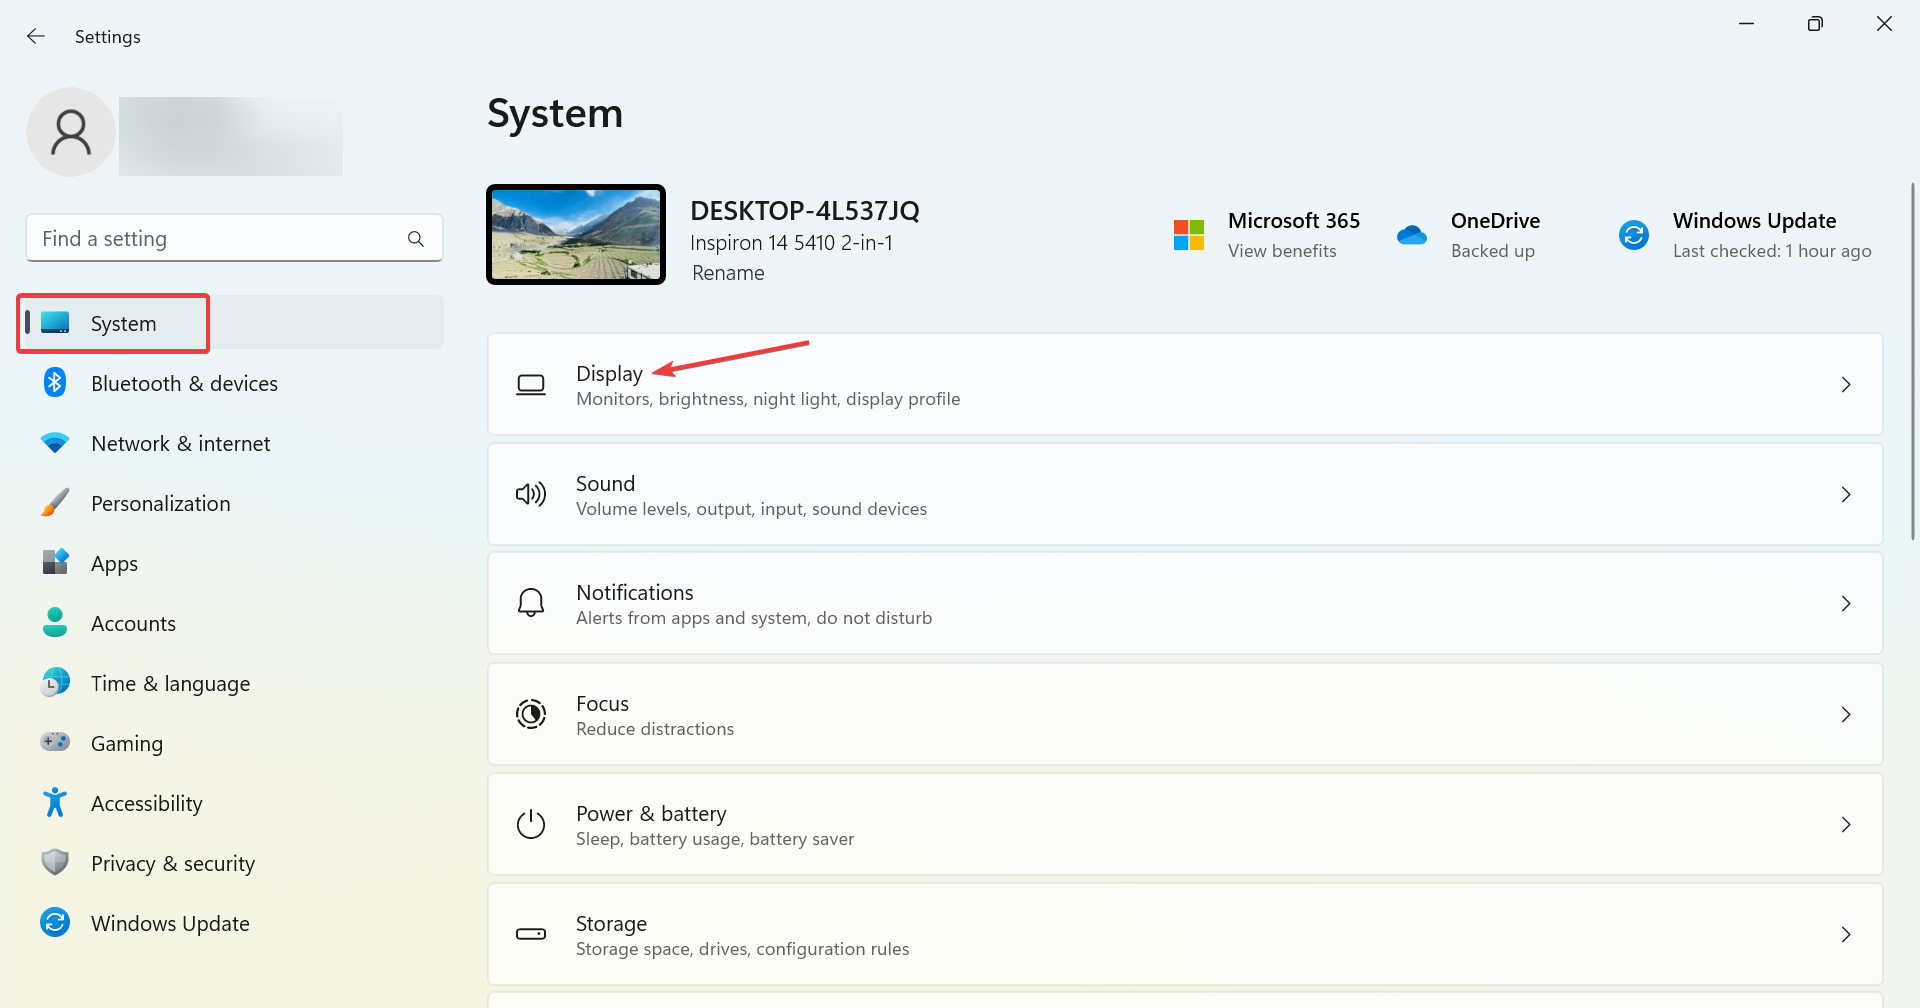
- Press Windows + I to open Settings, and choose Display on the right in the System tab.
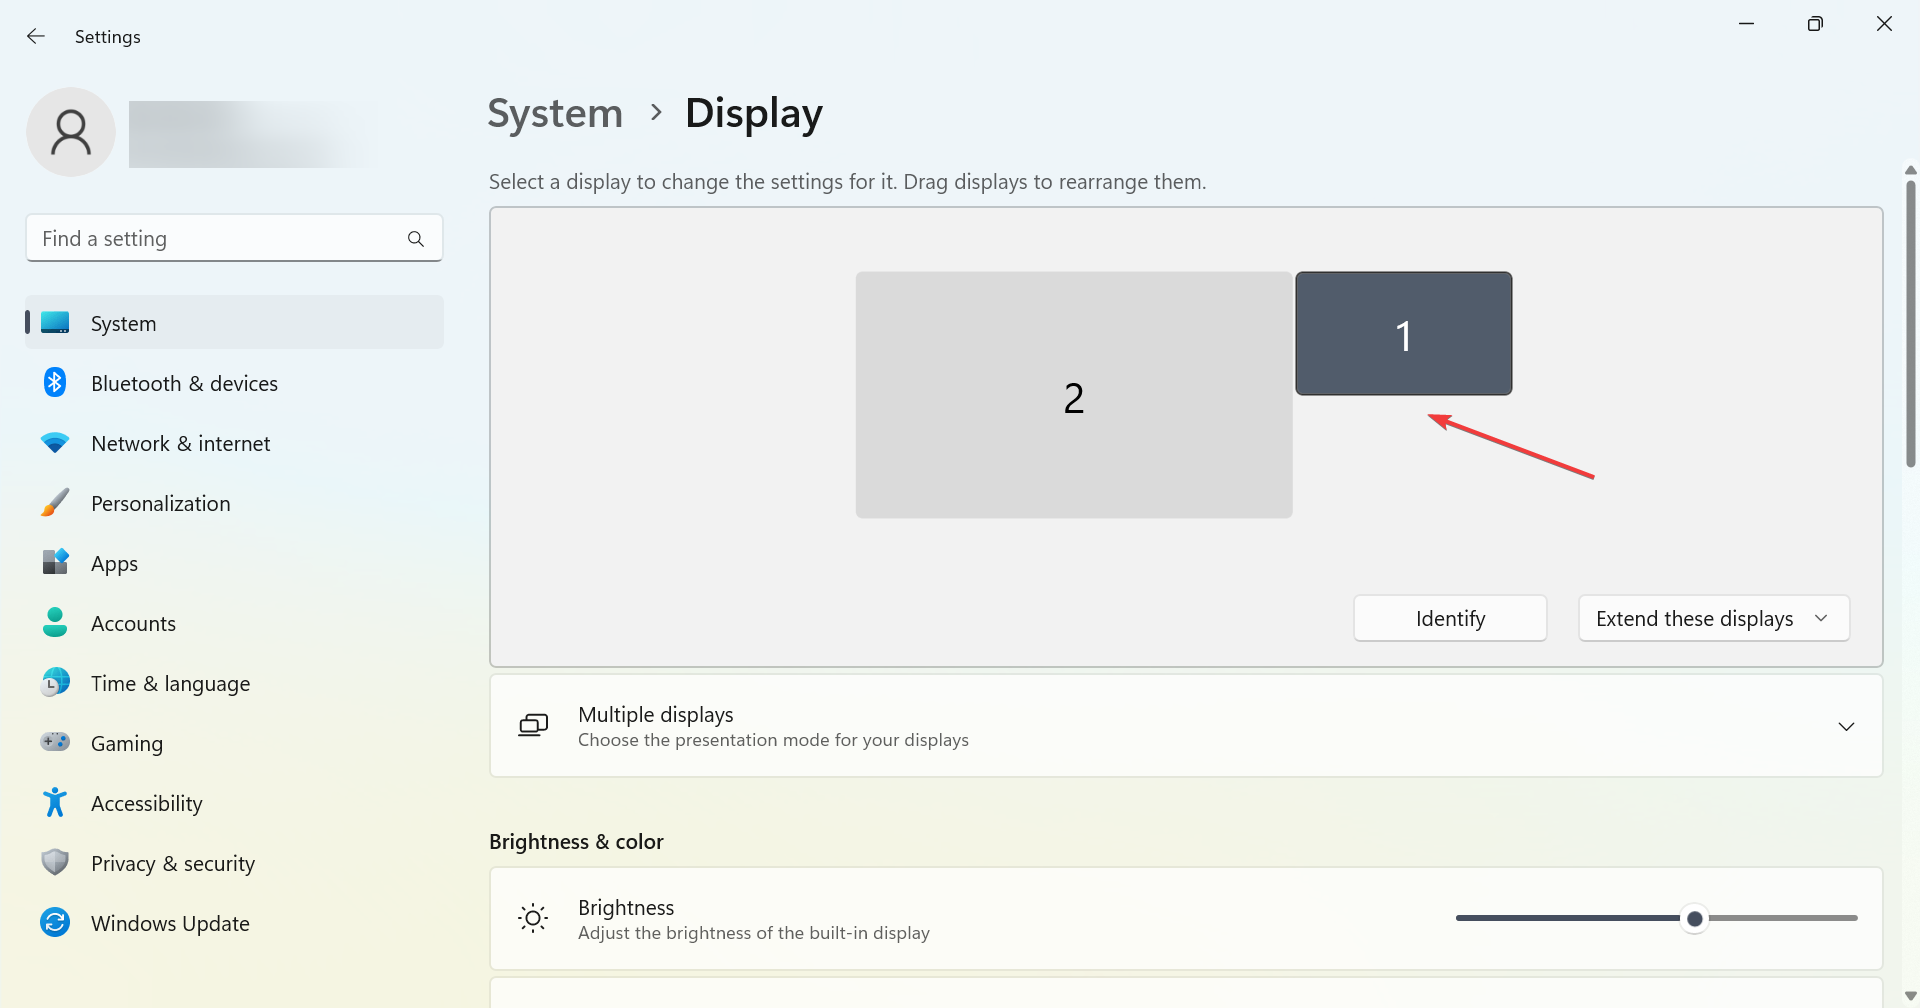
- Now, select the primary display from the two.
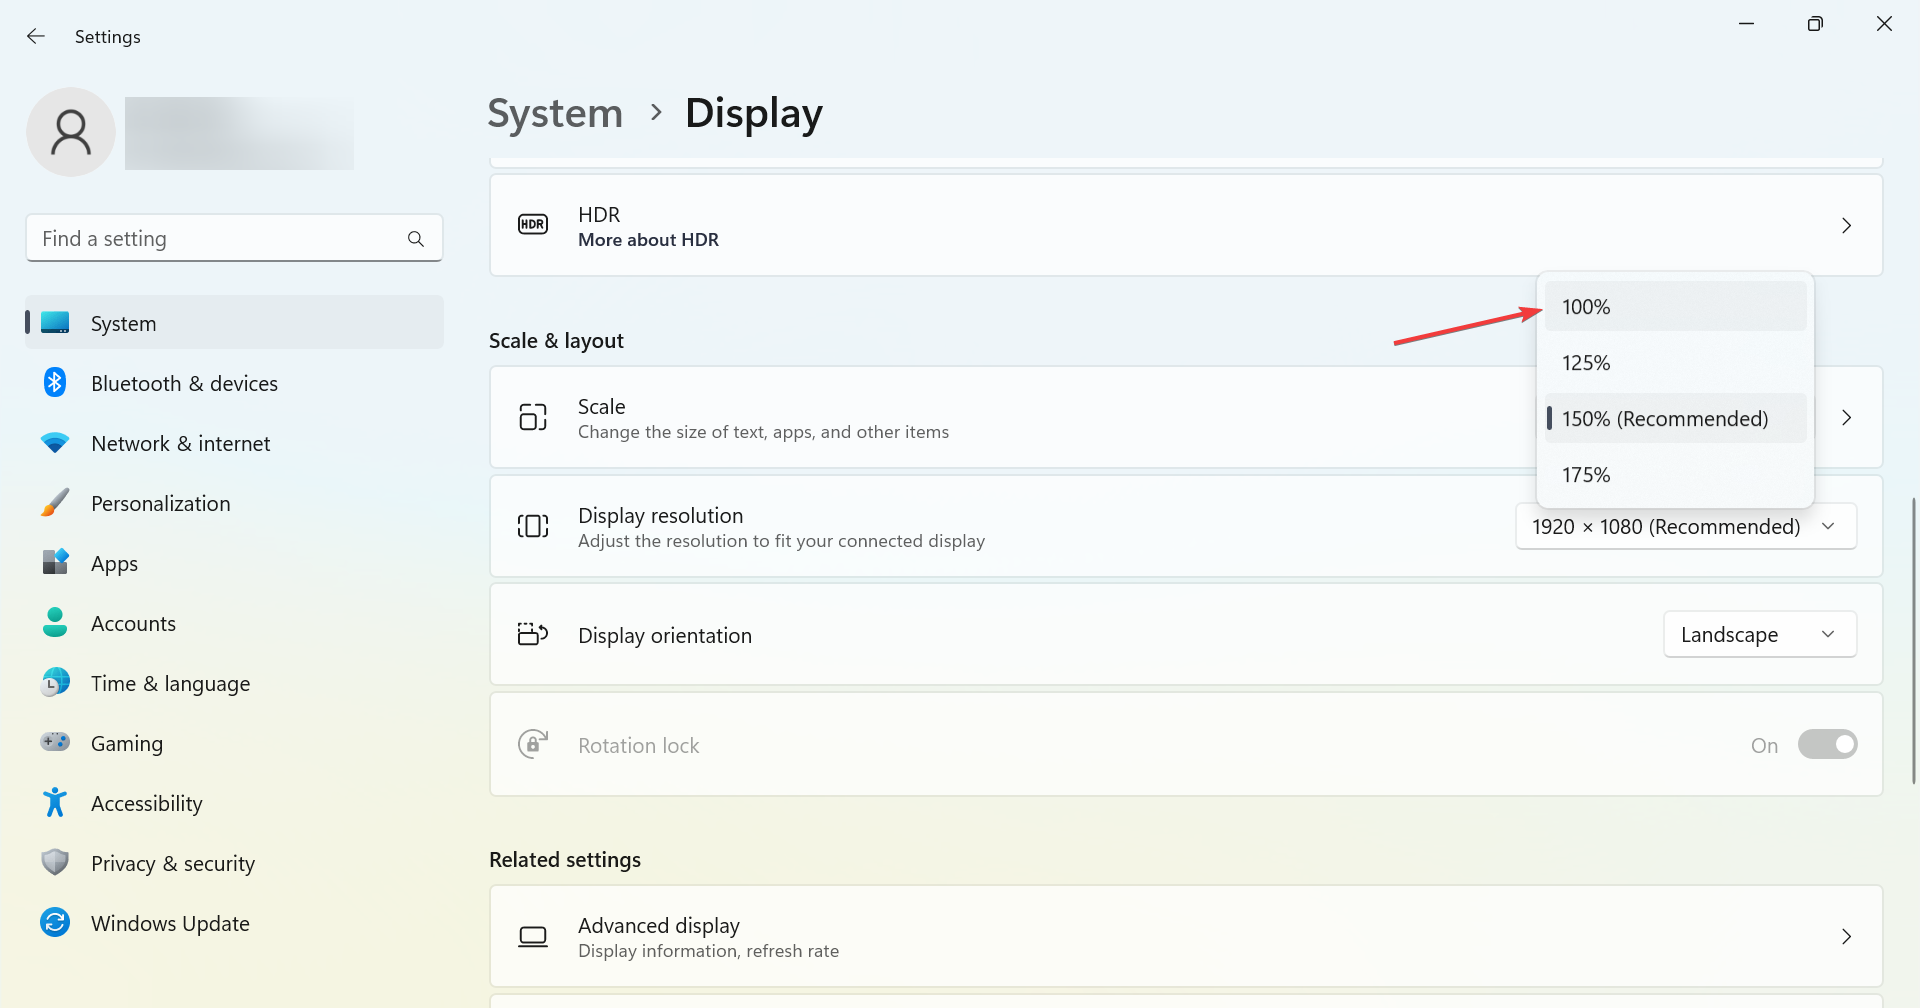
- Scroll down and select 100% from the Scale dropdown menu.
- Again, head back to the top and select the other display.

- Similarly, choose 100% as the scaling for it as well.
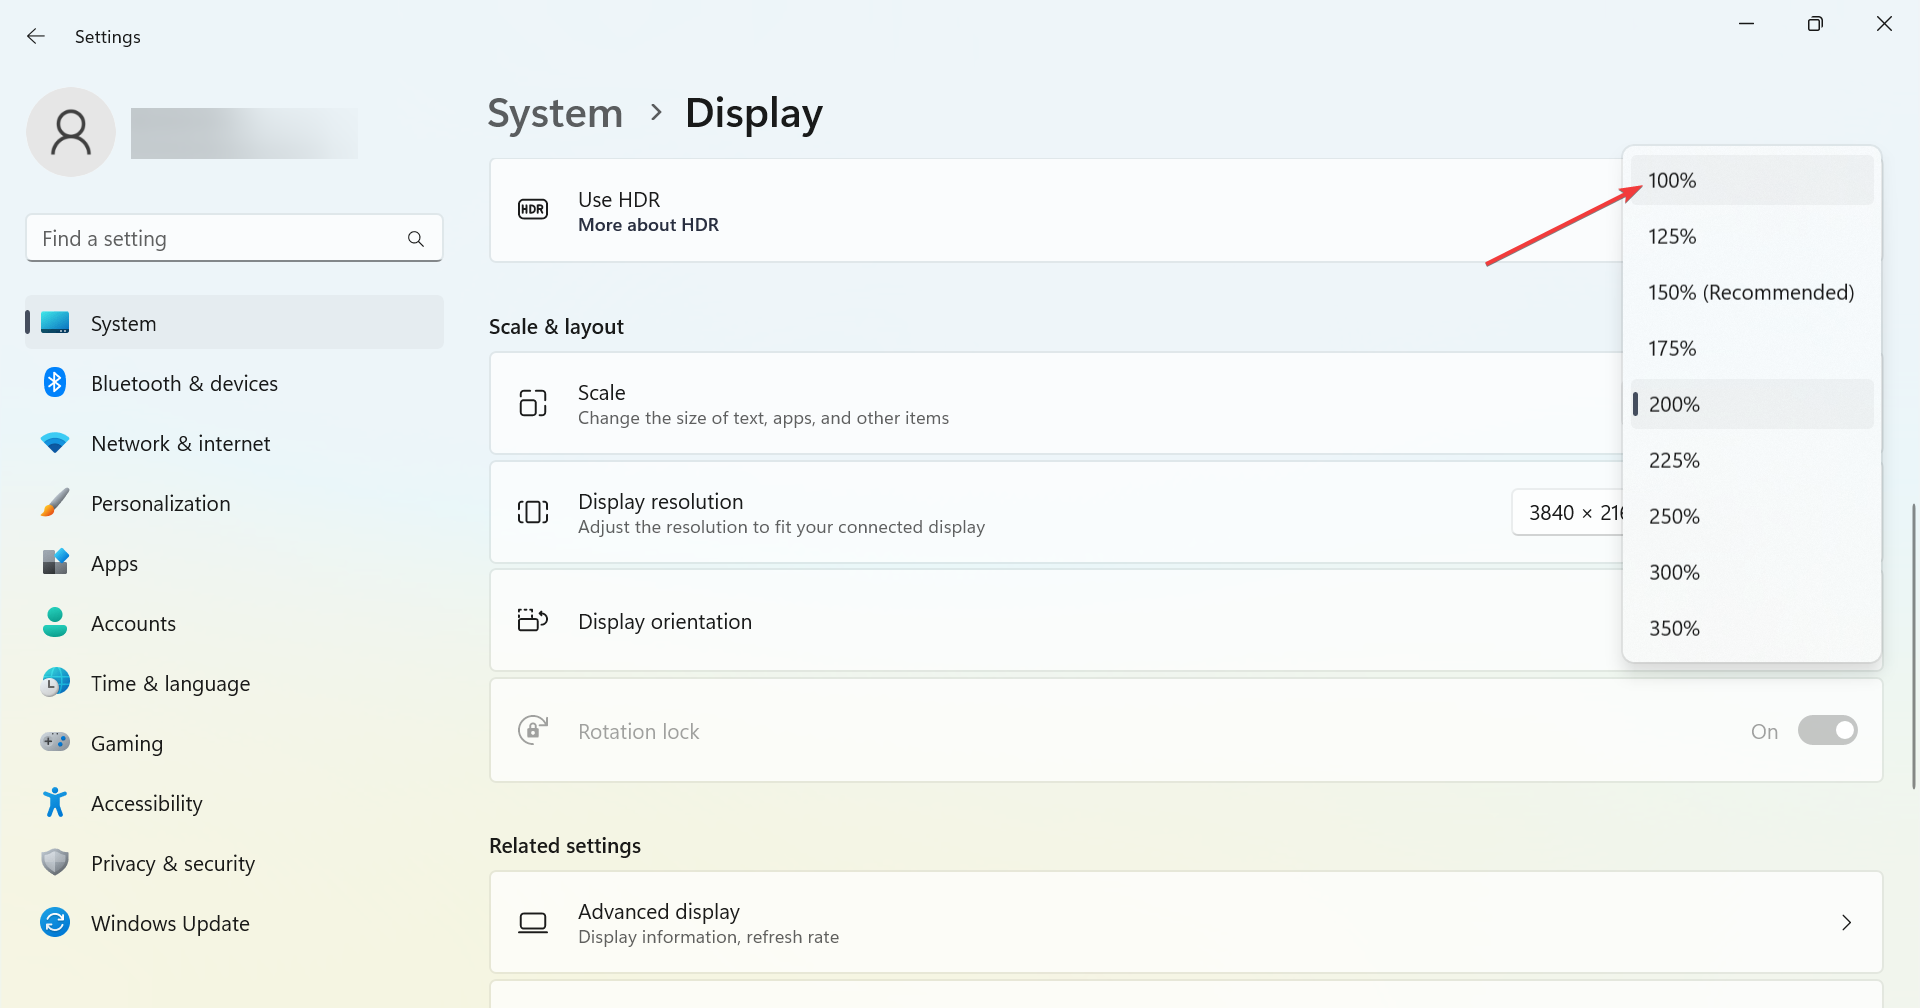
- If you have any other monitors as a part of the setup, choose the same scaling for them.
- Now, reboot the computer for the changes to come into effect.
That’s it! One of the easiest ways to fix things when Snip and Sketch or Snipping Tools is not working in Windows 11 is to set the Scale as 100% for all the monitors. Though it will affect the display, this seems to be the most viable workaround until a patch is released.
2. Configure the laptop as your main display
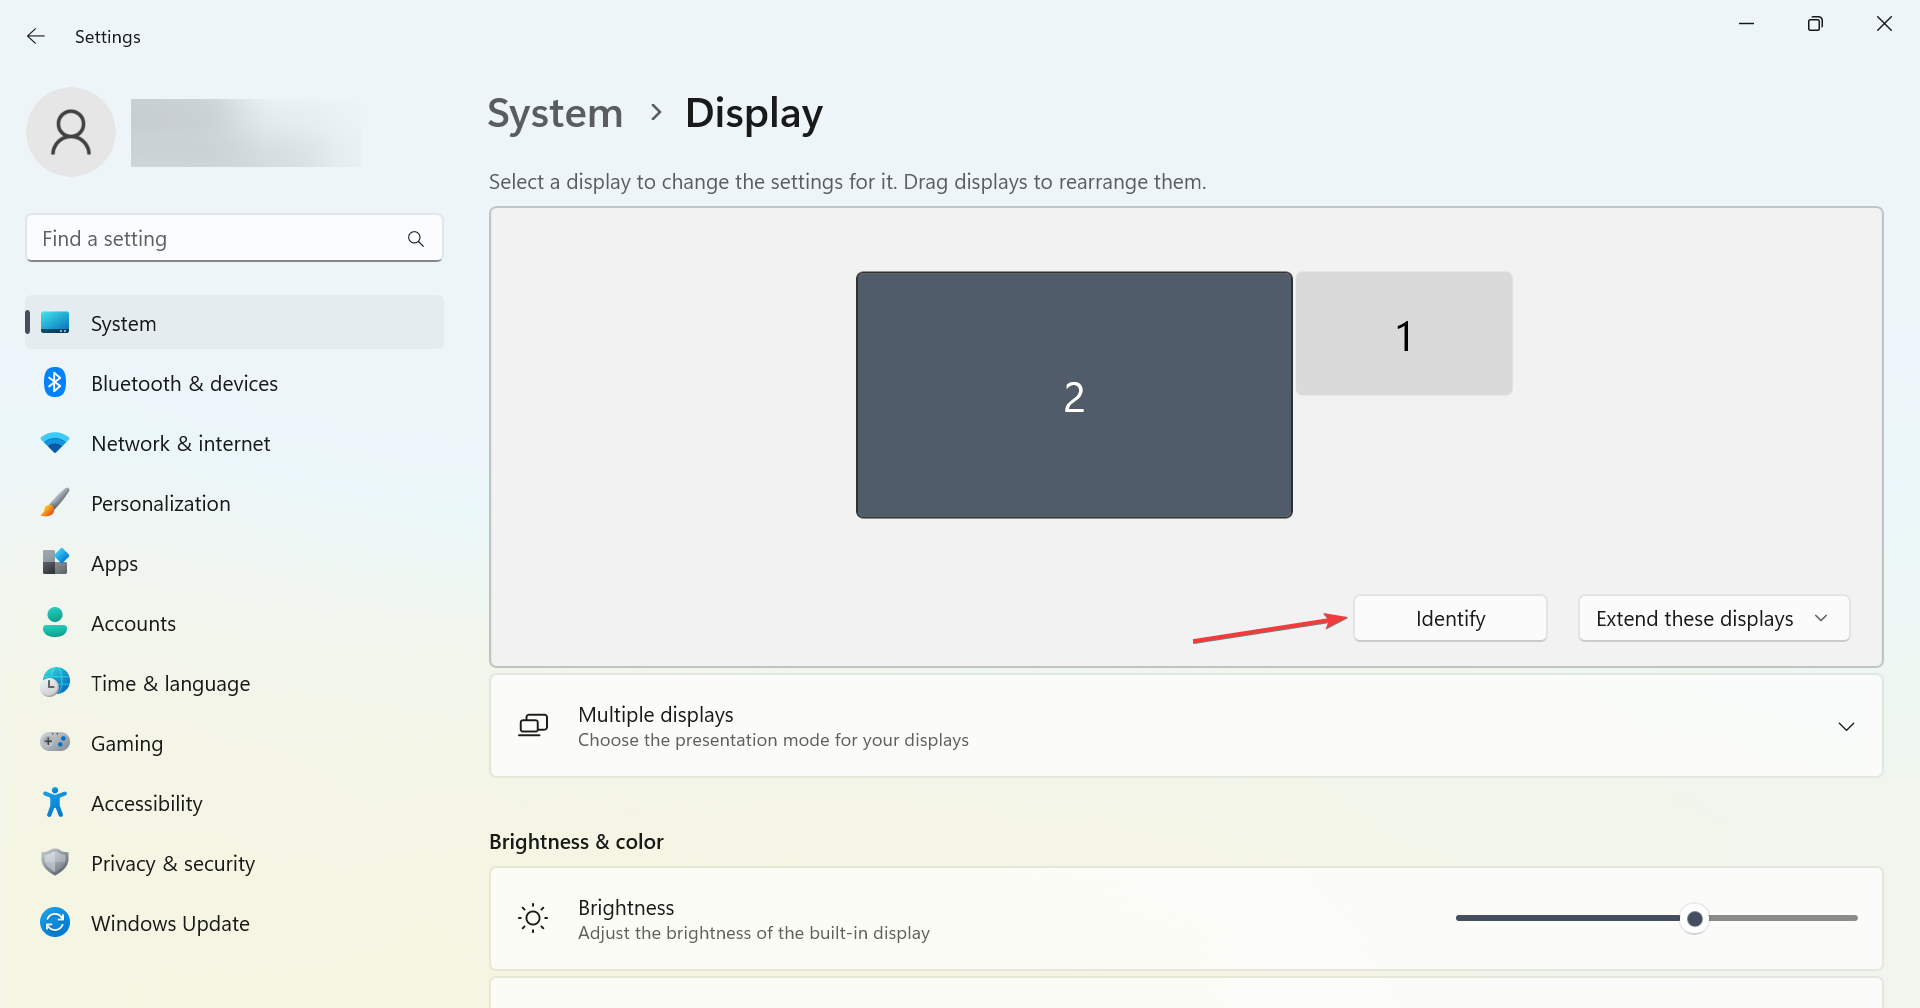
- Press Windows + I to open Settings, and click on Display on the right.

- Now, click on the Identify button to check how the various displays are positioned and identify the laptop.
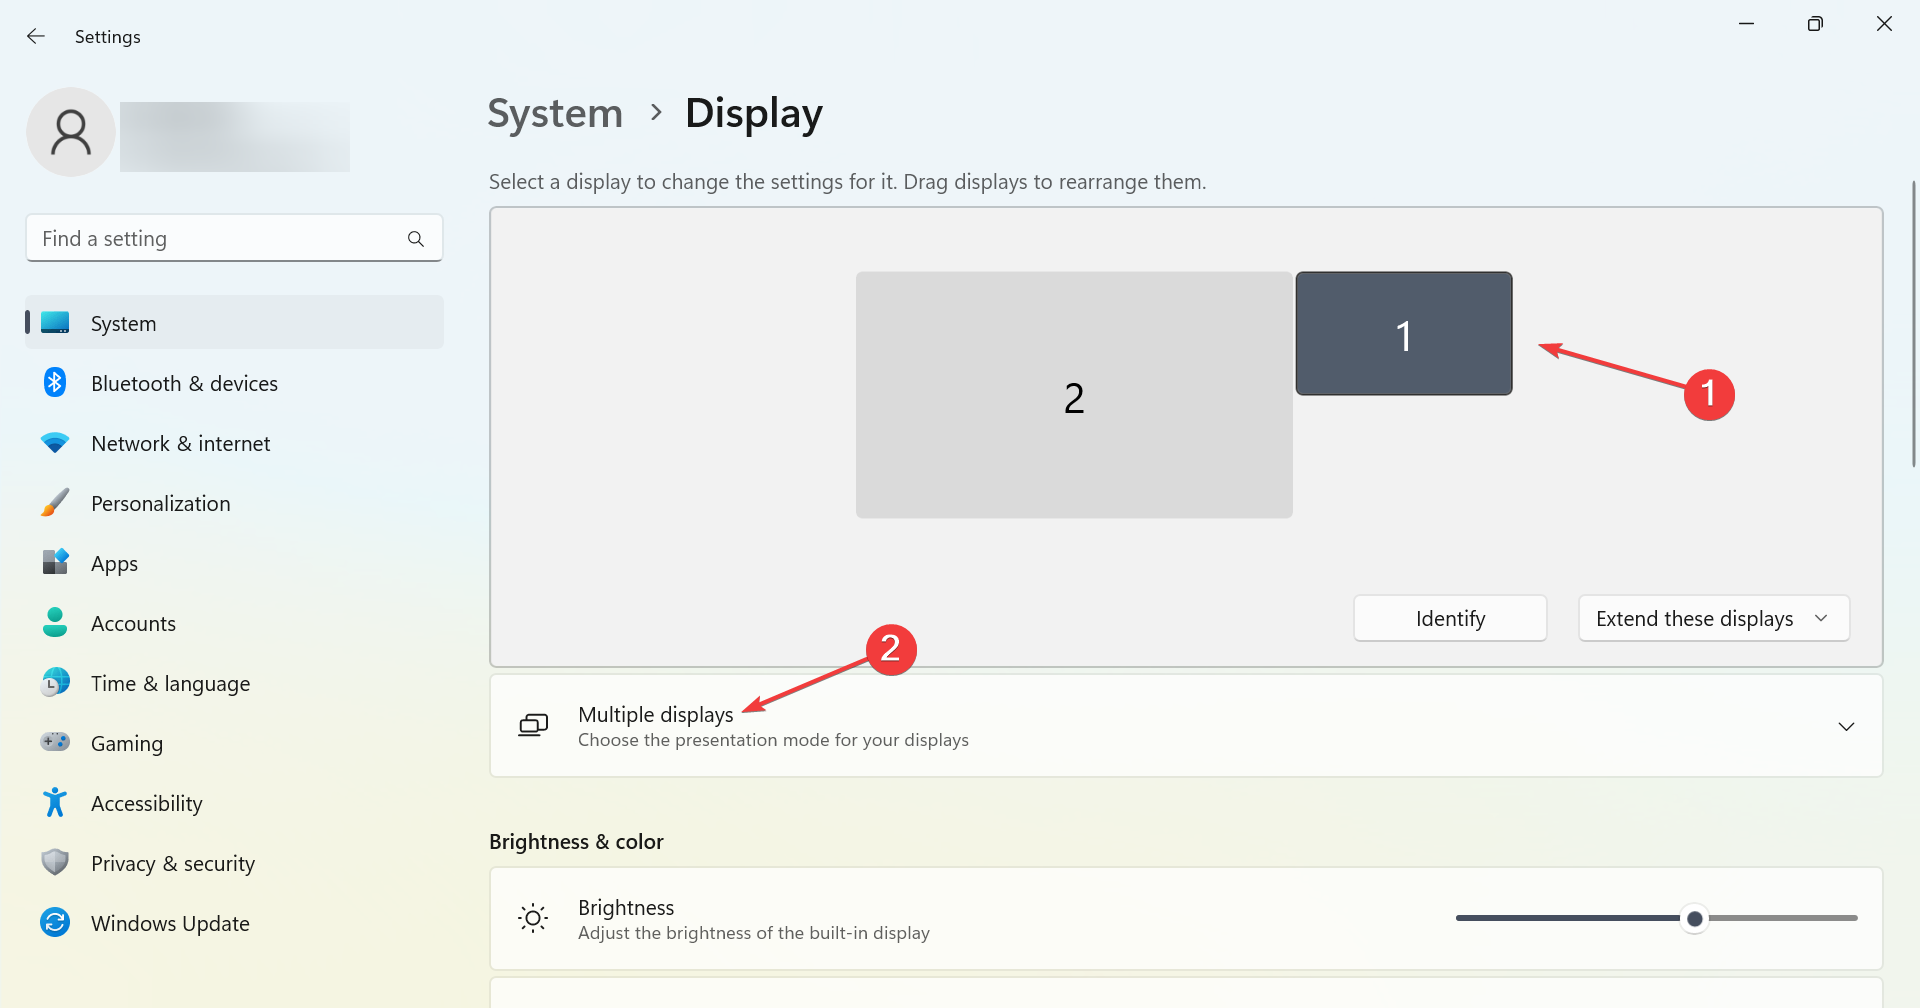
- Next, select your laptop, and then click on Multiple displays to expand the options under it.
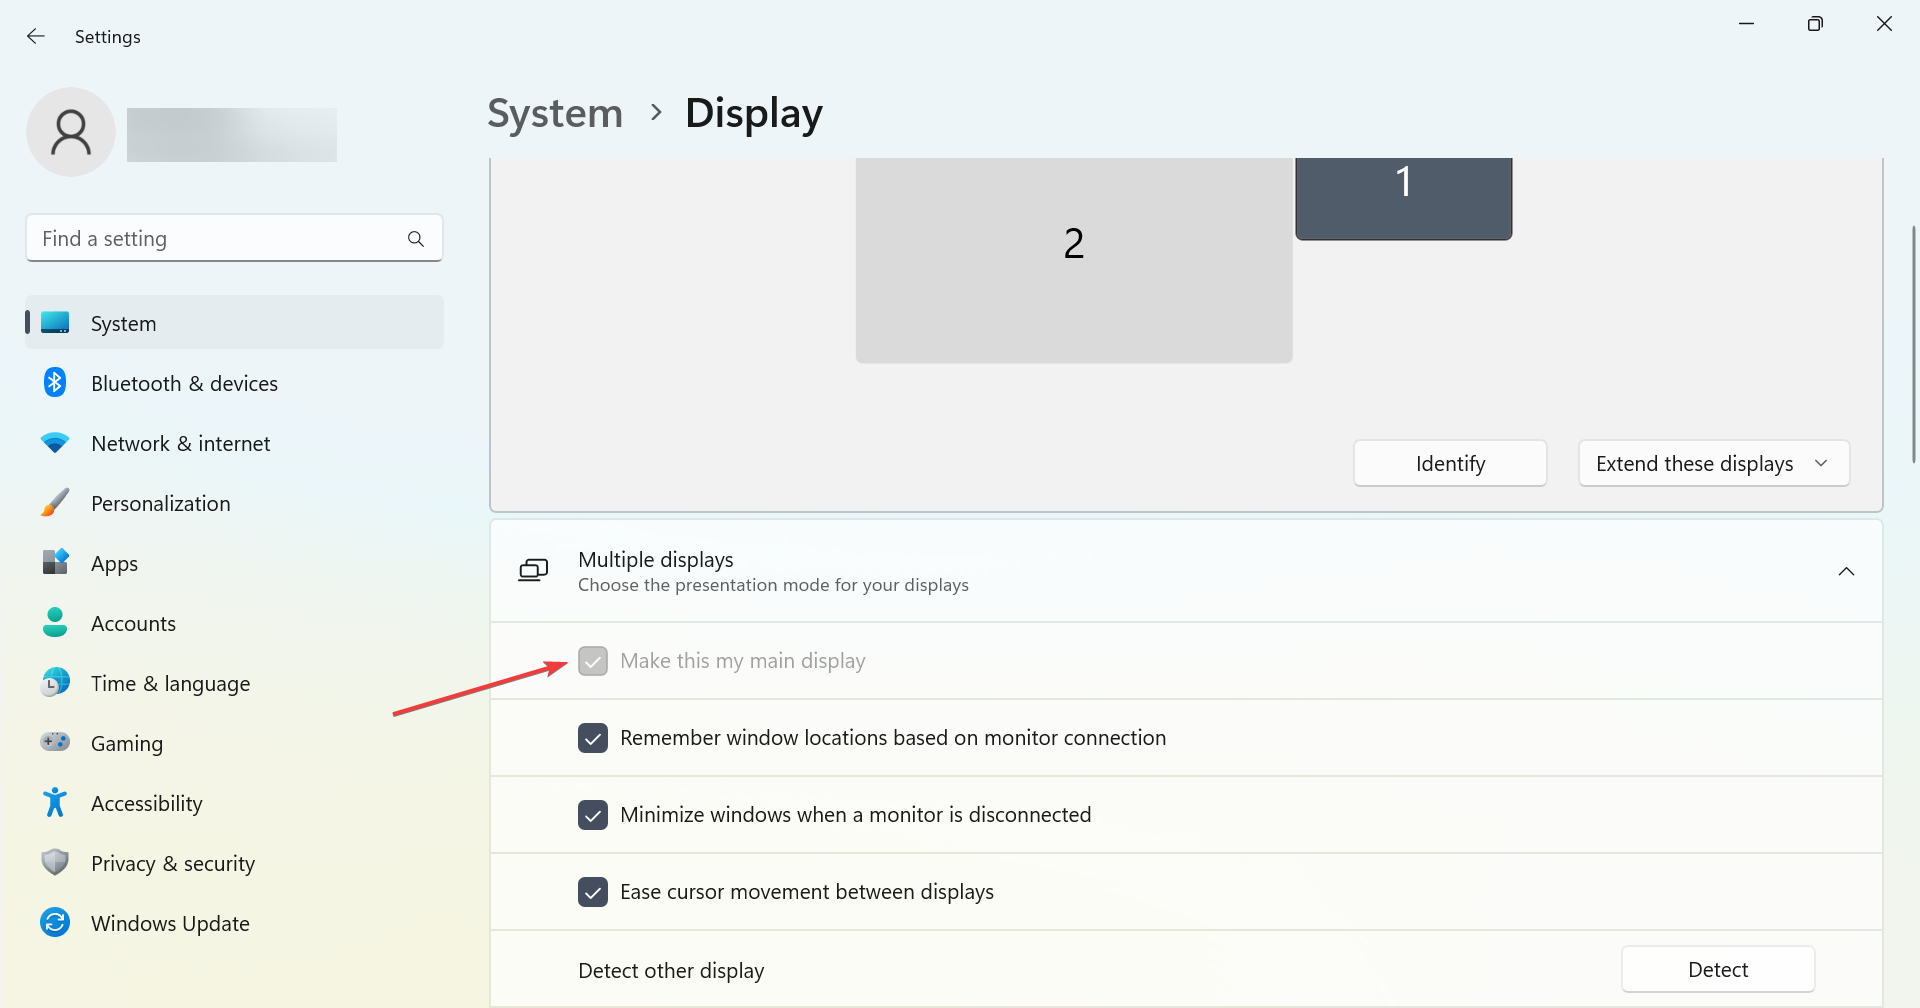
- Finally, tick the checkbox for Make this my main display.
3. Position the primary display to the right
Another workaround that fixed things when Snip and Sketch was not working in Windows 11 was to position the primary (main) display to the right. All you have to do is head to the Display settings and drag the main display to the right.
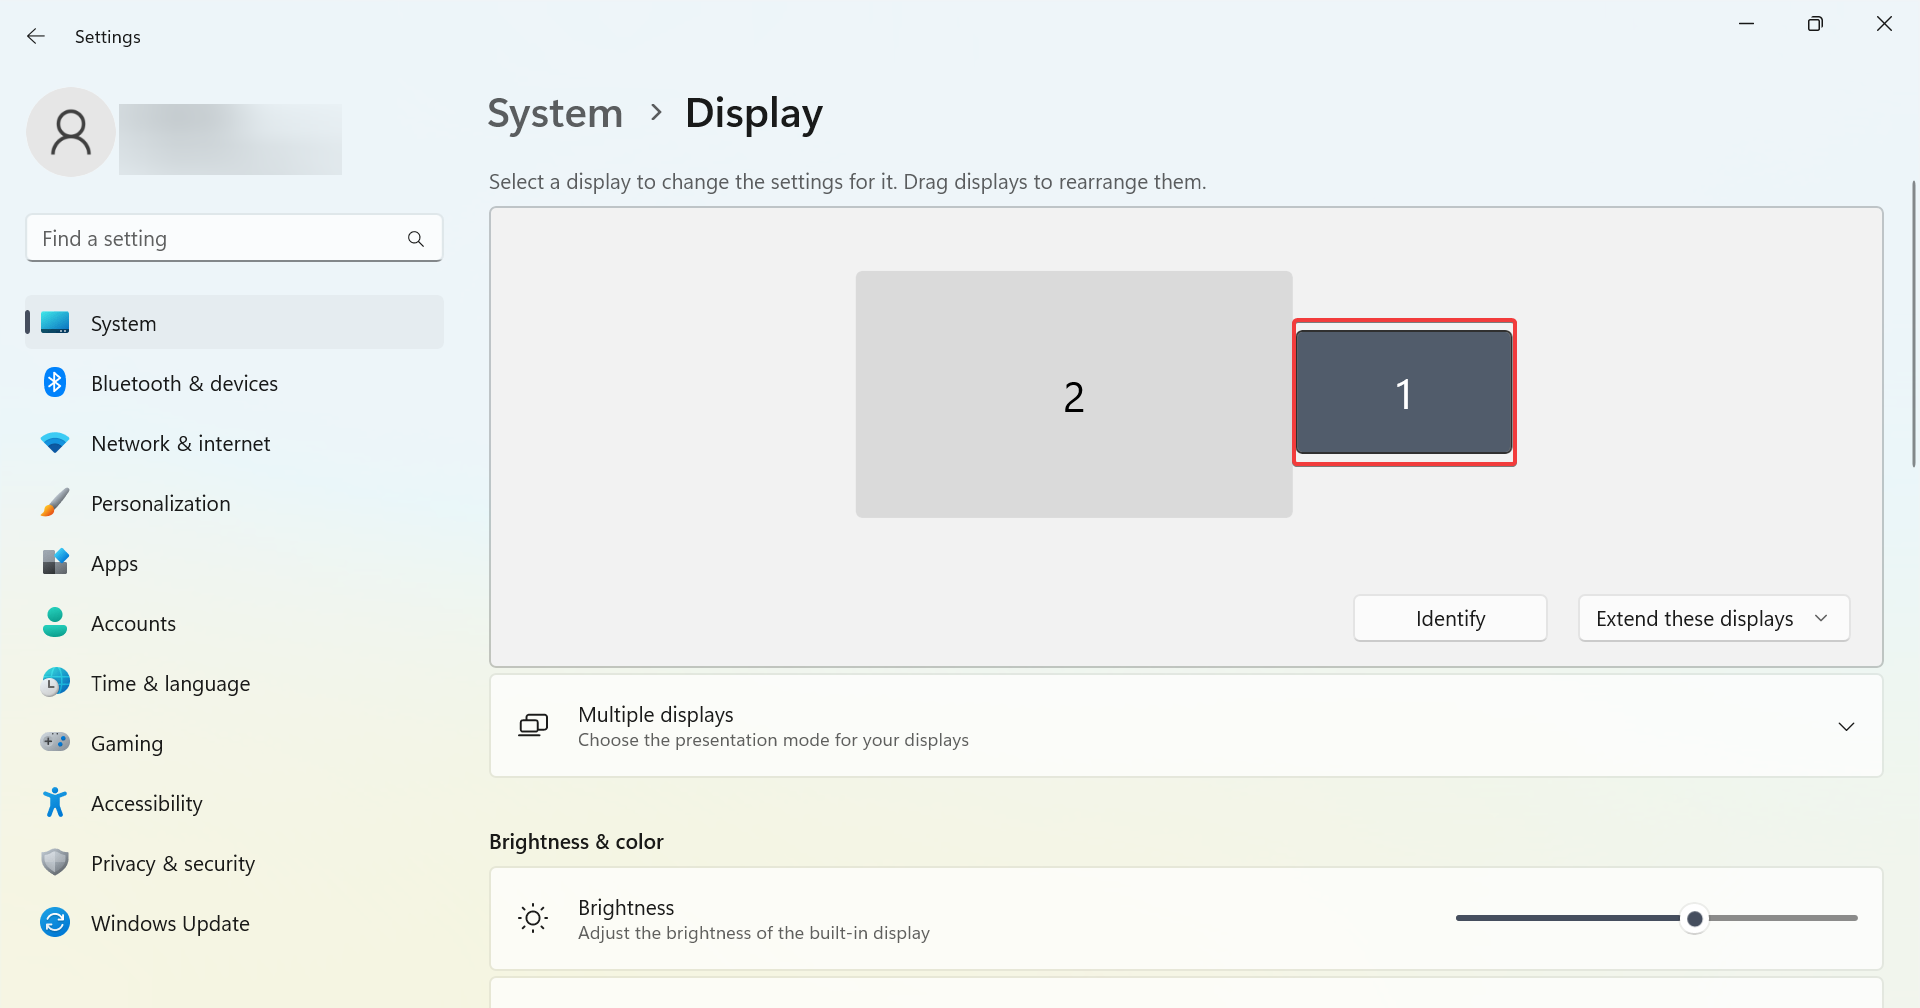
Position all the other monitors to the left of the main display, which could be your laptop, and it should do the trick.
4. Repair and reset Snip and Sketch
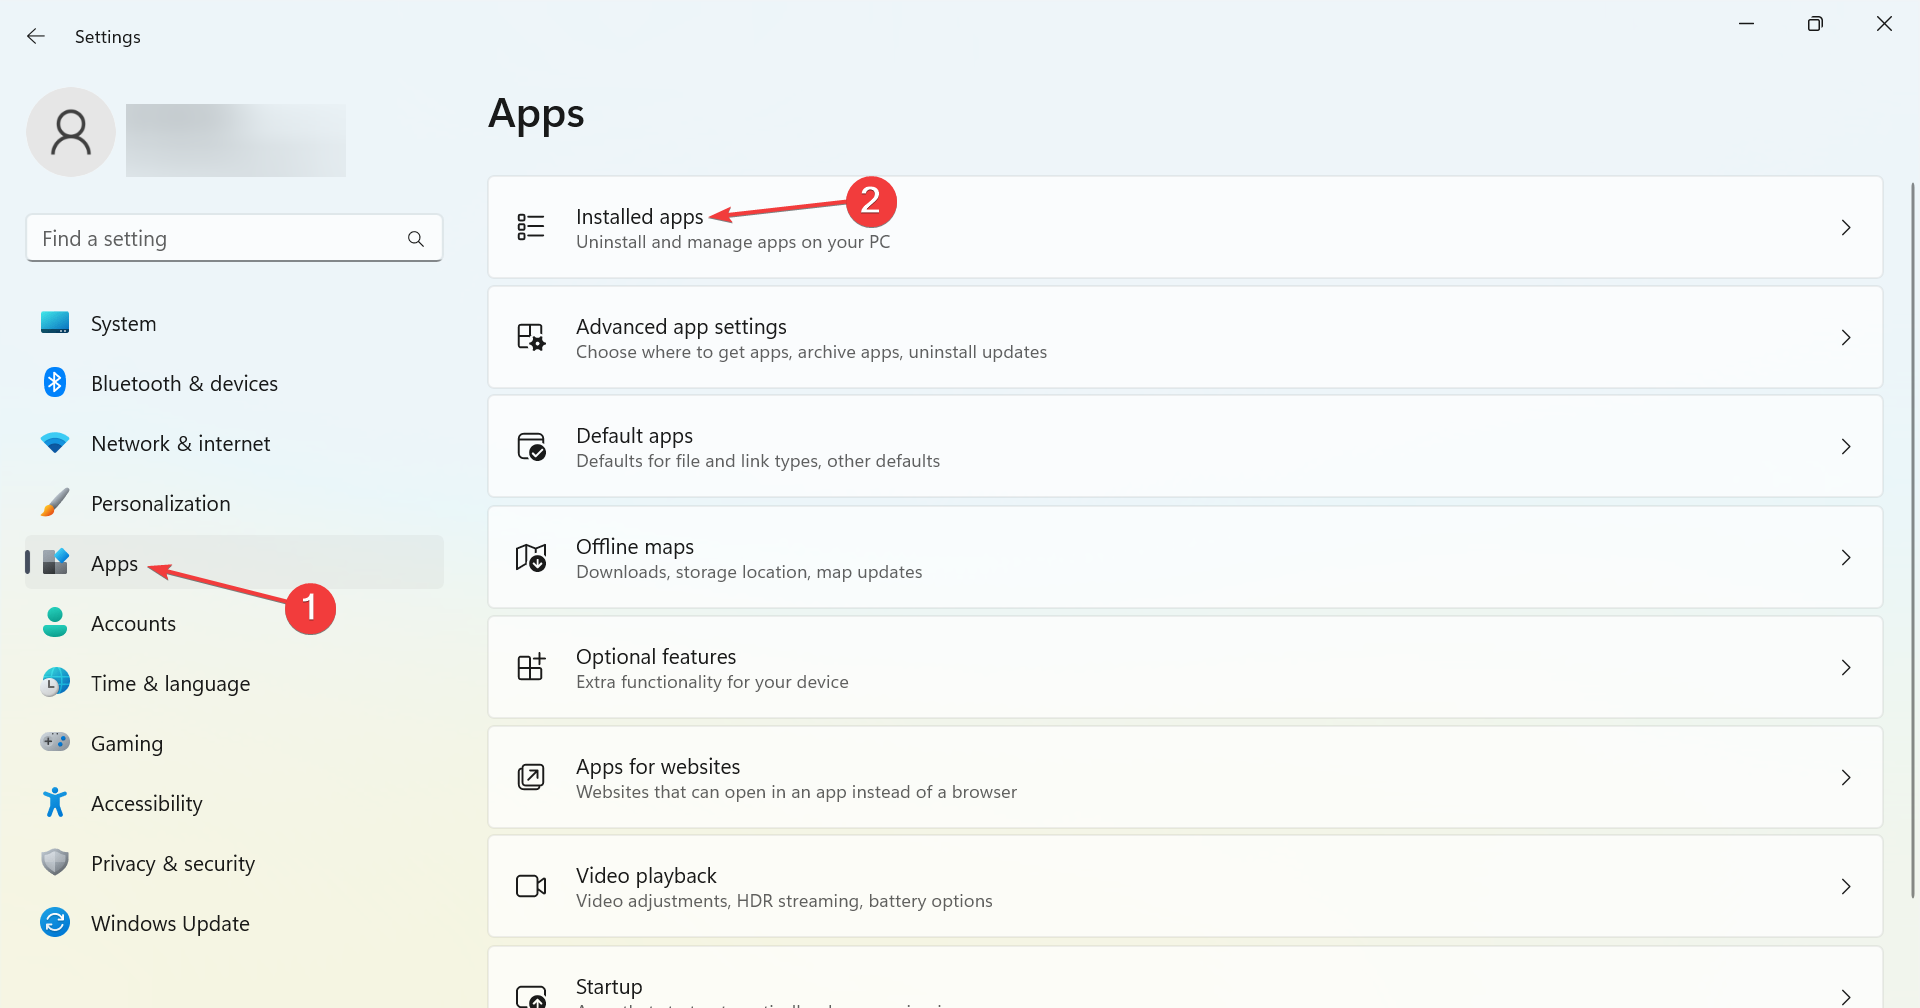
- Press Windows + I to open Settings, head to the Apps tab from the navigation pane, and then click on Installed apps.
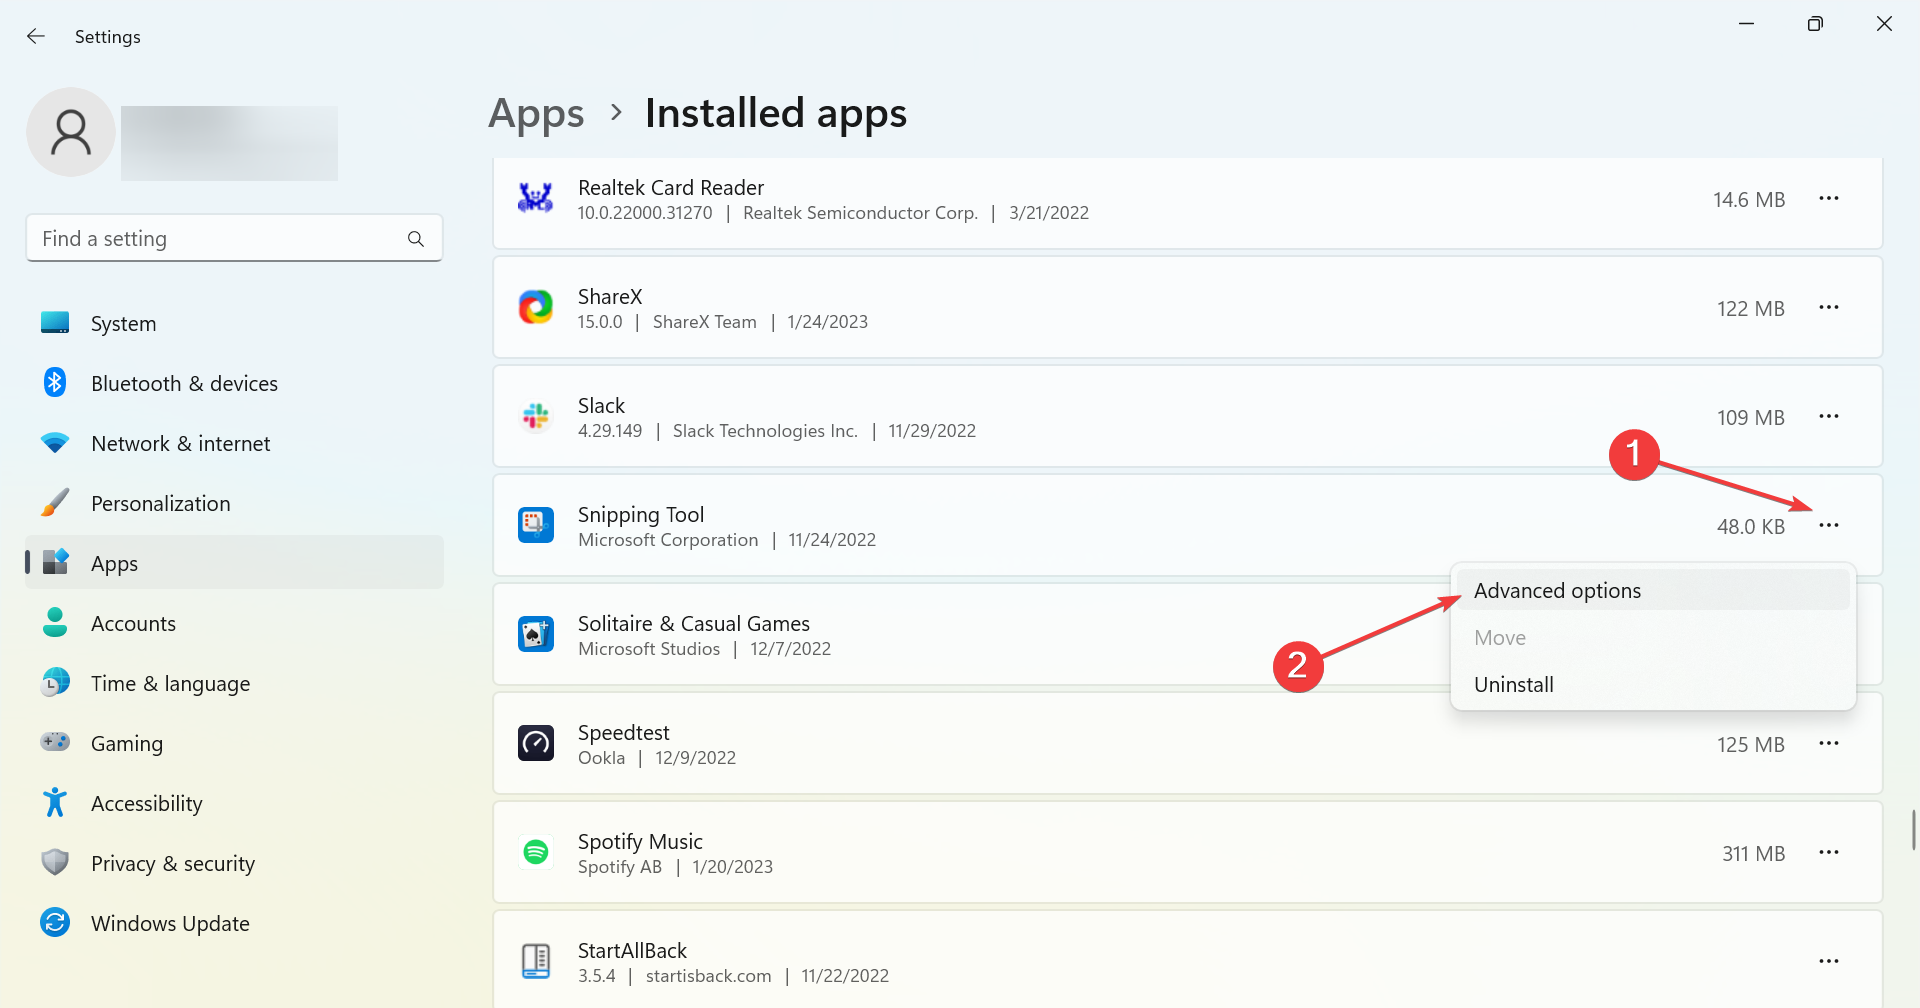
- Locate or search for Snipping Tool, click on the ellipsis next to it, and choose Advanced options.
- Scroll down and click on Repair.
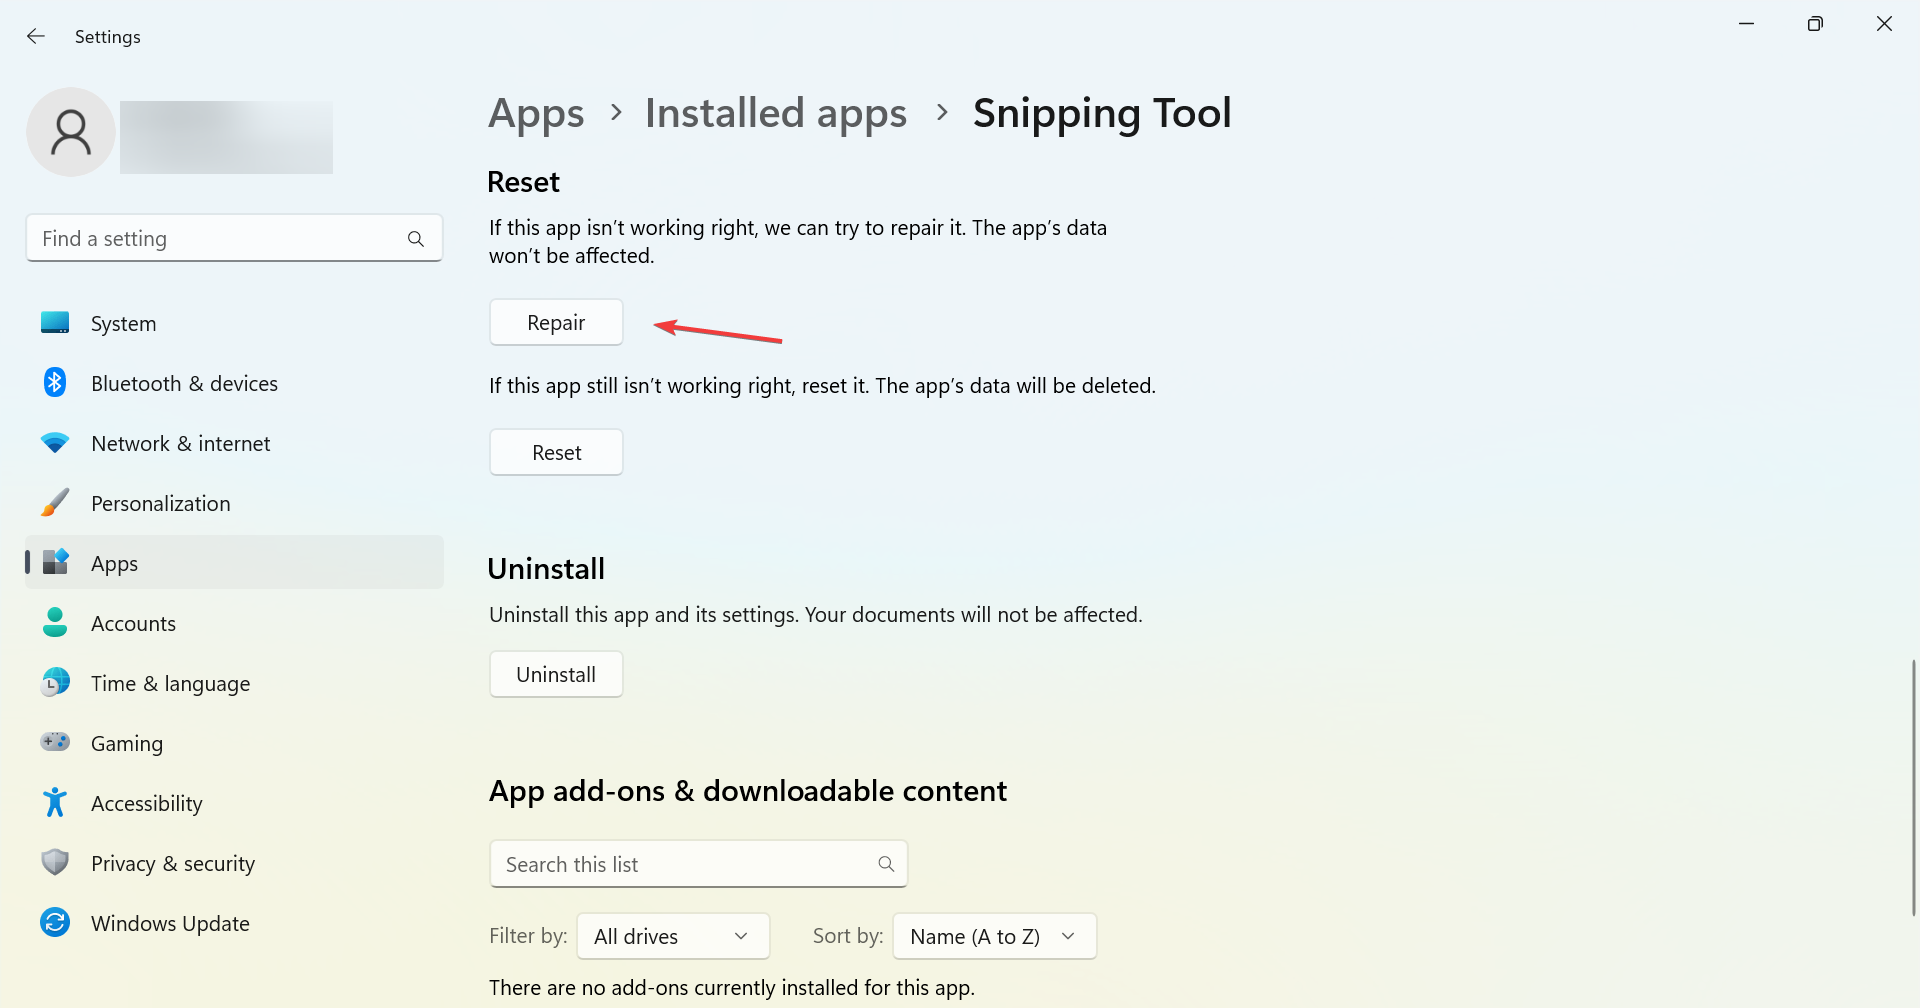
- Wait for the process to complete and verify if Snip and Sketch starts working. In case it doesn’t, click on Reset.

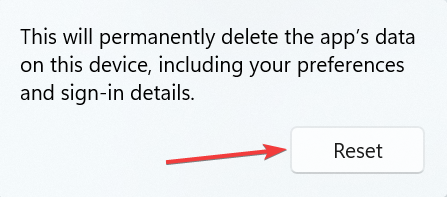
- Again, click Reset in the confirmation prompt.
In a few cases, it was a problem with the Snip and Sketch tool itself that led to it not working in Windows 11. And a simple fix is to Repair or Reset the app.
5. Use a third-party tool
When nothing else works, you can always use a reliable third-party snipping tool to capture screenshots in Windows.
These usually offer more options than the built-in Snipping Tool (Snip and Sketch) and serve as a great alternative. So, try one until Microsoft releases a patch for the bug leading to Snip and Sketch not working in Windows 11.
Also, find out all the ways you can capture a screenshot in Windows 11.
Do not forget to tell us which fix worked for you in the comments section below.
Read our disclosure page to find out how can you help Windows Report sustain the editorial team. Read more


Improve this guide


User forum
0 messages