Error 651: Connection Failed on Windows 10 [Full Fix]
6 min. read
Updated on
Read our disclosure page to find out how can you help Windows Report sustain the editorial team Read more
Key notes
- When getting Connection Failed error 651, you can suspect a Registry issue preventing the tool from recognizing your router or hub device.
- Rather than imagining the worst scenario, take immediate action. Disabling all startup services and running the Network Troubleshooter are some of the most common ways to fix the issue.
- There are several ways to fix this, see how to disable all startup services, enter safe boot, and more.
- It is also a good idea to run the network troubleshooter and make sure that your drivers are up-to-date.
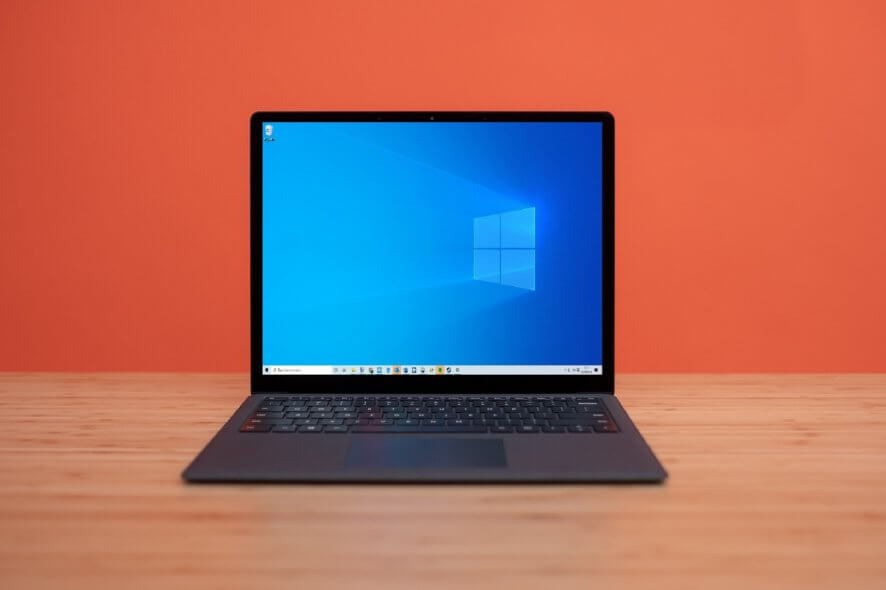
If you are using a wireless connection or a cable Internet connection and you upgraded to Windows 10, you might experience some issues regarding the Connection Failed error 651 that prevents you from using your Internet connection as you should.
What is error 651 in Windows 10? This is an error usually caused by a Registry issue and will prevent the tool from recognizing your router or hub device.
If you are using other devices to connect to your wireless Internet connection, they will work. This is mainly an issue affecting your Windows 10 system.
You don’t have to worry anymore – in this guide, we will list the steps to follow in order to fix error code 651. This will only take you a couple of minutes of your time, so don’t hesitate to follow the instructions listed below.
How do I fix Connection Failed error 651?
1. Enter Safe Boot
- You will need to restart your Windows 10 and log in to your Safe Mode with the networking features in order to apply the following changes.
- While in Safe mode you need press and hold the Windows key + R keyboard shortcut.
- A Run window will appear.
- Write in the Run window the following command MSCONFIG.
- Press the Enter button on the keyboard.
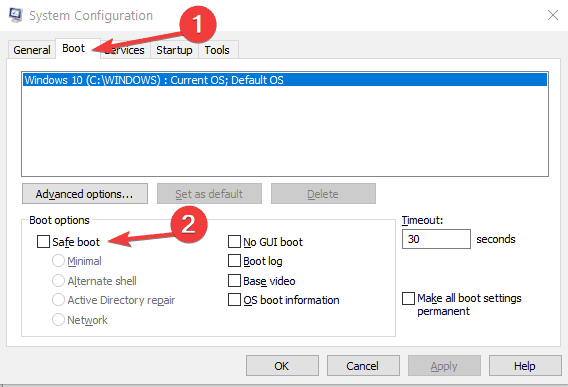
- Now another window will show and you will need to left-click on the Boot tab situated in the upper side of that window.
- In the topic Boot options, you need to left-click on Safe boot.
- Check the box next to Network under the Options section of the page.
- Reboot your Windows 10 device and check if you still have the Connection Failed error 651 appearing in your system.
2. Disable all startup services
- Press and hold the Windows button and the R button.
- In the Run window that appeared write MSCONFIG.
- Press the Enter button on the keyboard.
- Left-click on the Boot tab.
- Uncheck the box next to Safe mode.
- Left-click on the General tab.
- From the features, you have there you need to go to Selective Startup.
- Uncheck the features to clear the selections.
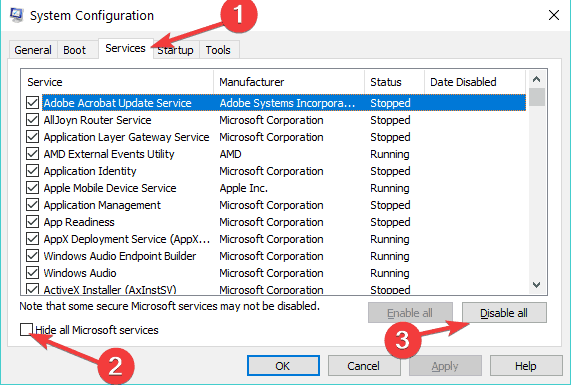
- Left-click on the Services feature and left-click again on the Disable all button.
- Left-click on the Startup tab and disable each item you have on that list.
- Reboot your Windows 10 device.
- After the device reboots go again to the MSCONFIG window as you did above.
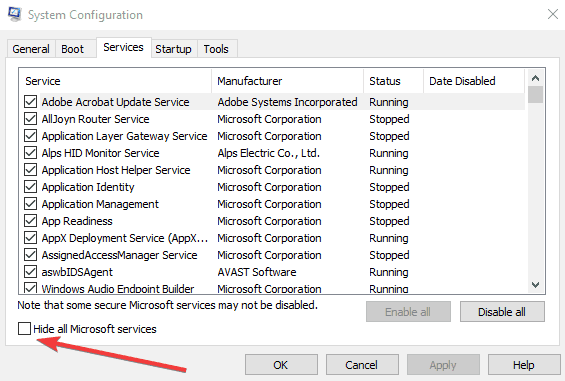
- Left-click on the Services tab.
- Left-click on the Hide all Microsoft services feature.
- Left-click on the OK button you have on that window.
- Reboot your PC again.
- Check to see if you still have this issue.
- If you don’t have this error anymore it means that one of your startup apps is causing the issue.
- If you still have these issues go back to the MSCONFIG window.
- Left-click on the General tab.
- Left-click on the Normal Startup feature.
- Choose to Reboot the Windows 10 device.
3. Rename the rasppoe.sys file
- When your Windows 10 powers up on the start screen, you need to left-click on the Desktop icon.
- While in your desktop you need to double click on the My Computer icon to open it.
- Double click on the C:/ drive to open it.
- In the C:/ drive double click on the Windows folder to open it.
- In the Windows folder find the System 32 folder and double click on it to open.
- In the System 32 folder double click on the Drivers folder to open it.
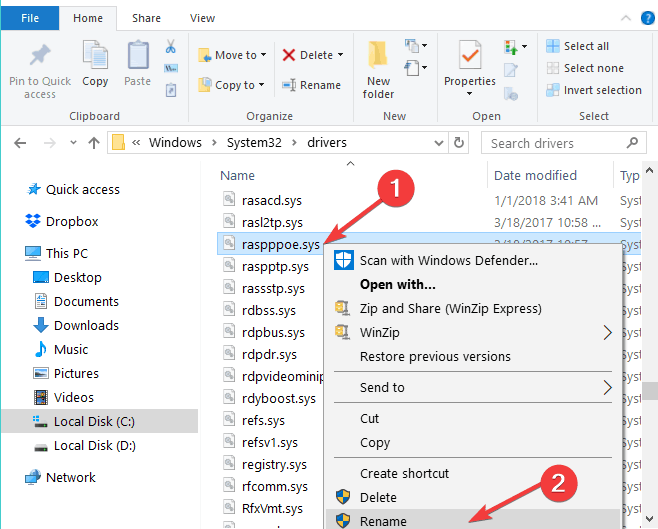
- In the Drivers folder, you will need to search for the rasppoe.sys file.
- Rename that file rasppoe.sys.
Note: You can rename the file rasppoe.sys_backup so that you will still have it when you are done. - Download a new rasppoe.sys file from the Internet and copy it in that specific folder where you had the old one.
- After you download this file you should unzip the contents and then copy it to your Drivers folder.
- Reboot the Windows 10 device and see if you still have this issue.
Note: If you want to put the old rasppoe.sys file in the Drivers folder you can delete the one you downloaded and rename the old one you saved above. Rename the rasppoe.sys_backup file to rasppoe.sys and reboot the device.
4. Run the Network Troubleshooter
- Go to Start > type control panel > open Control Panel.
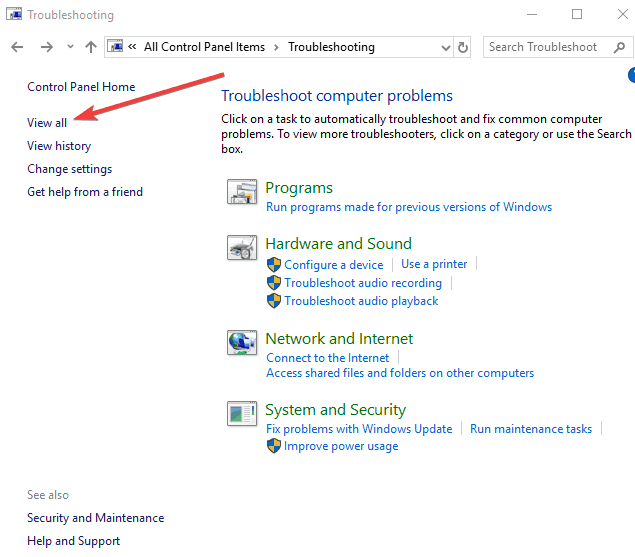
- In the search box, type troubleshoot > select Troubleshooting > click on View All to list all the troubleshooting tools.
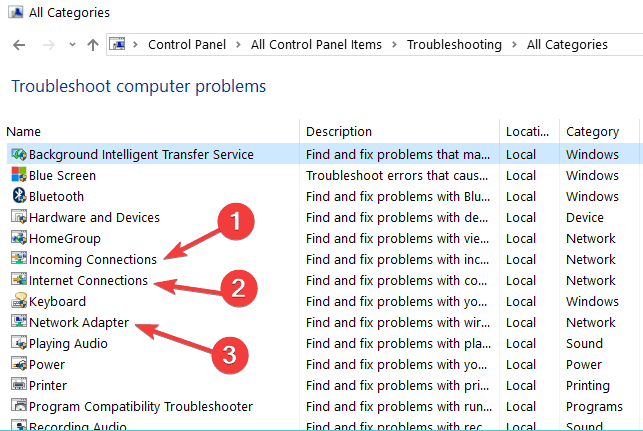
- Select and run the following troubleshooters: Incoming connections, Internet Connections, and Network Adapter.
- Restart your computer and check your Internet connection.
If your Internet connection remains unavailable, try running the built-in Network troubleshooter. You can launch it from the Control Panel or the Settings page.
To run the Internet Troubleshooter, you may also go to Settings > Update & Security > Troubleshooter and select Internet Connections.
5. Reset TCP/IP
- Type cmd in the search box > right-click on Command Prompt > select Run as administrator.
- Enter the netsh int ip reset reset.log command > wait for the scanning process to complete.
- Restart your computer and check your Internet connection.
If the problem persists, try resetting your TCP/IP. Here are the steps to follow.
If you’re having trouble accessing Command Prompt as an admin, then you better take a closer look at this detailed guide.
6. Update your network drivers
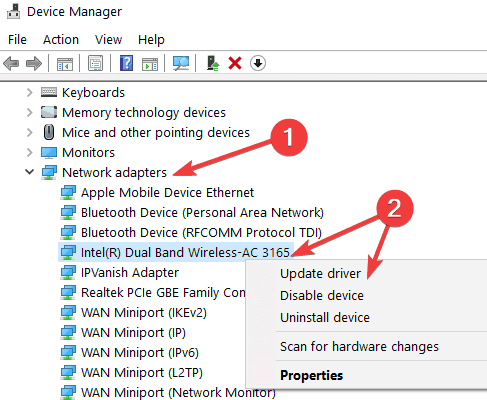
- Launch Device Manager > locate your network adapter driver > right-click on it.
- Select the option Update driver.
- Restart your computer and check your Internet connection.
Outdated network drivers may also trigger error 651. To fix the problem, make sure that you’ve installed the latest network drivers on your machine.
7. Disable autotuning
- Launch Command Prompt as Administrator.
- Enter the Netsh interface tcp set global autotuning=disabled command > hit Enter > test your connection.
AutoTuning is a feature that’s meant to improve the performance of apps and programs relying on TCP. However, in some cases, this tool may do more harm than good, and disabling it may help you fix error code 651.
So you now know how to fix your Windows 10 error 651. Please write us below if this article was helpful and if it fixed the Connection Failed error in Windows 10.
Be sure that there are several procedures that can help you solve the Internet connection errors you might be facing these days.
Take a closer look at our Windows 10 errors hub as well as it is filled with more useful guides.

