How to Fix SSD Freezing on Windows 11: A Step-by-Step Guide
Make sure you have Windows 11 KB5007262 installed
4 min. read
Updated on
Read our disclosure page to find out how can you help Windows Report sustain the editorial team. Read more
Key notes
- There could be various reasons for your SSD to freeze; it could be the wrong port or the bad sectors on the SSD.
- To fix it, you need to ensure AHCI is enabled, change the port, or repair the hard disk.
SSD works faster than HDD and allows smoother operation on Windows. However, it is not free from issues. For example, some users have complained that their SSD keeps freezing on Windows 11 for no reason. It can be frustrating but don’t worry; it is fixable.
Here, in this guide, we will talk about all the expert-recommended fixes to resolve the problem right after discussing the causes of its occurrence.
What causes the SSD keeps freezing on Windows 11 issue?
There could be various possible reasons for SSD freezes issue; some of the popular ones are:
- SSD connected to the wrong port – If the SSD port to which you have connected is SATA2 instead of SATA 3. This means your SSD might not be working to its full potential. Hence the issue.
- AHCI disabled – If Advanced Host Controller Interface (AHCI) is not enabled, your SSD might be able to work correctly and use SATA advantages.
- Bad sector on hard disk – If any sector on your SSD is corrupt or damaged, you might experience slow performance while using SSD.
- Bugs in Windows update – If the issue started just after updating your Windows, then the update might have bugs. This could cause slow computer issues and SSD performance issues.
What can I do if the SSD keeps freezing on Windows 11?
Before diving into troubleshooting methods, make sure you go through these preliminary checks:
- Check if the SSD is connected to the SATA 3 port.
- Replug the SSD.
- Check if the BIOS is up to date.
- Make sure you have KB5007262 and KB5008353 updates installed
1. Enable AHCI
1.1 Confirm if it is disabled
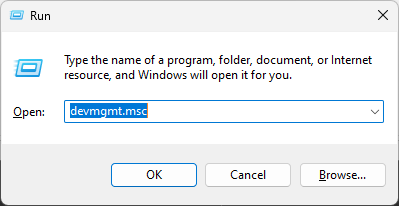
- Press Windows + R to open the Run window.
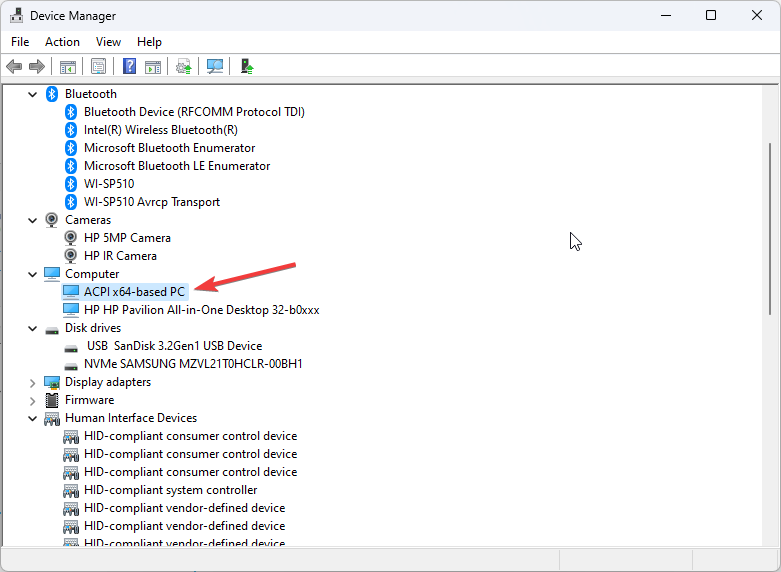
- Type devmgmt.msc and press Enter to open Device Manager.
- Go to IDE ATA/ATAPI controllers section, and check for AHCI. If present, then you don’t need to proceed. If not, move ahead.
1.2 Make changes in Registry Editor
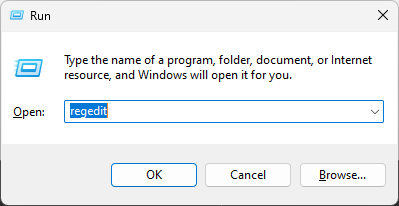
- Press Windows + R to open the Run console
- Type Regedit and press. Enter to open Registry Editor.
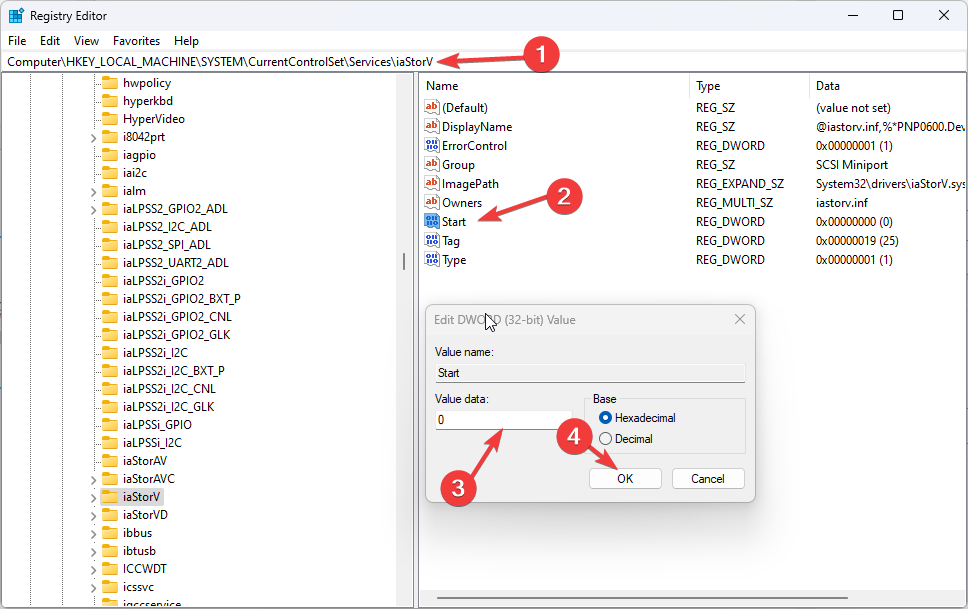
- Follow this path:
Computer\HKEY_LOCAL_MACHINE\SYSTEM\CurrentControlSet\Services\iaStorV - Locate, double-click DWORD Start, and change the Value data to 0. Click OK.
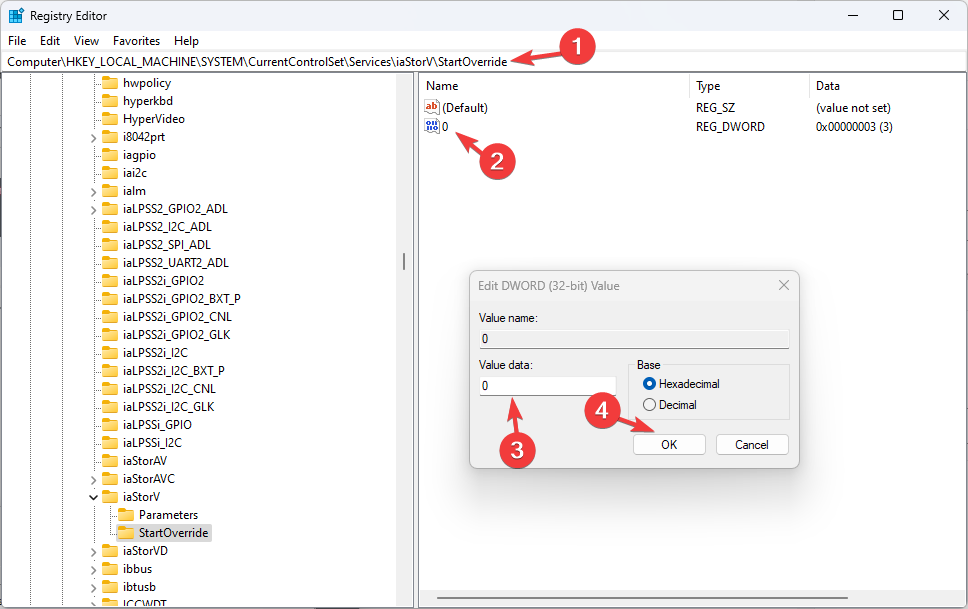
- Follow this path:
Computer\HKEY_LOCAL_MACHINE\SYSTEM\CurrentControlSet\Services\iaStorV\StartOverride - Double-click the DWord 0, modify the Value data to 0 and click OK.
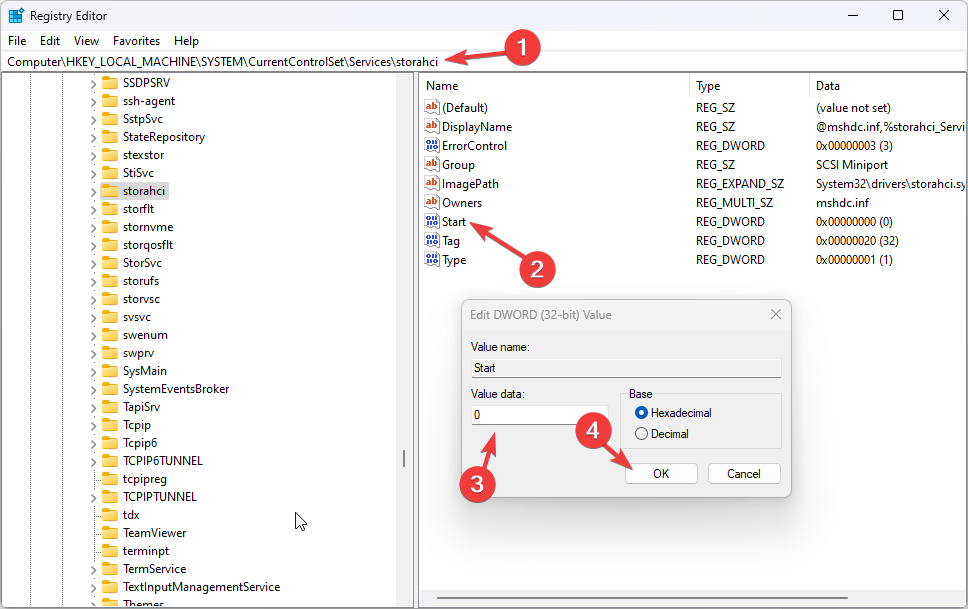
- Now navigate to this path: Computer\HKEY_LOCAL_MACHINE\SYSTEM\CurrentControlSet\Services\storahci
- First, Double-click the DWORD Start, change the Value data to 0 and click OK.
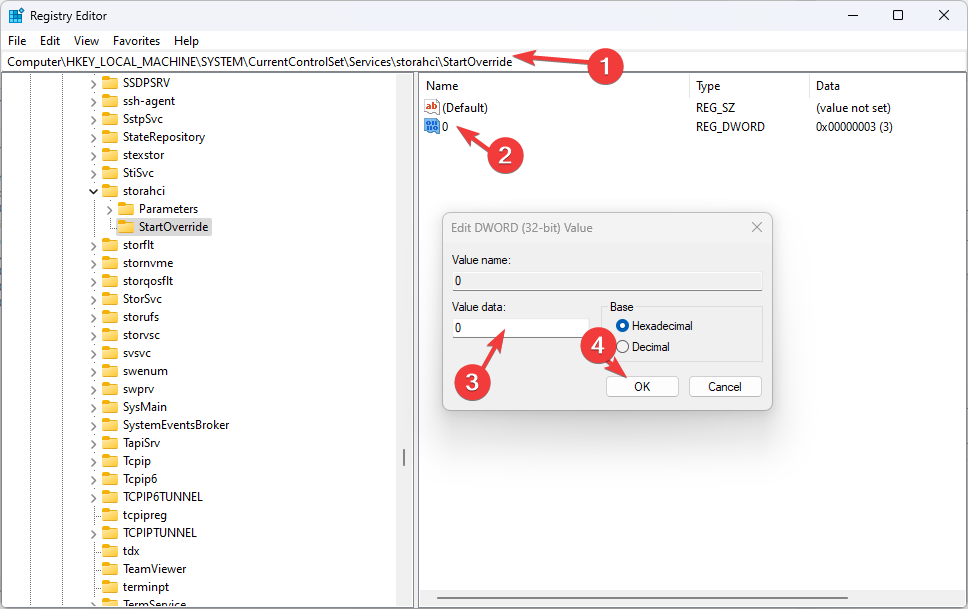
- Now go to the StartOverride key, double click DWORD 0 to modify its Value data to 0, and click OK.
1.3 Makes changes in BIOS
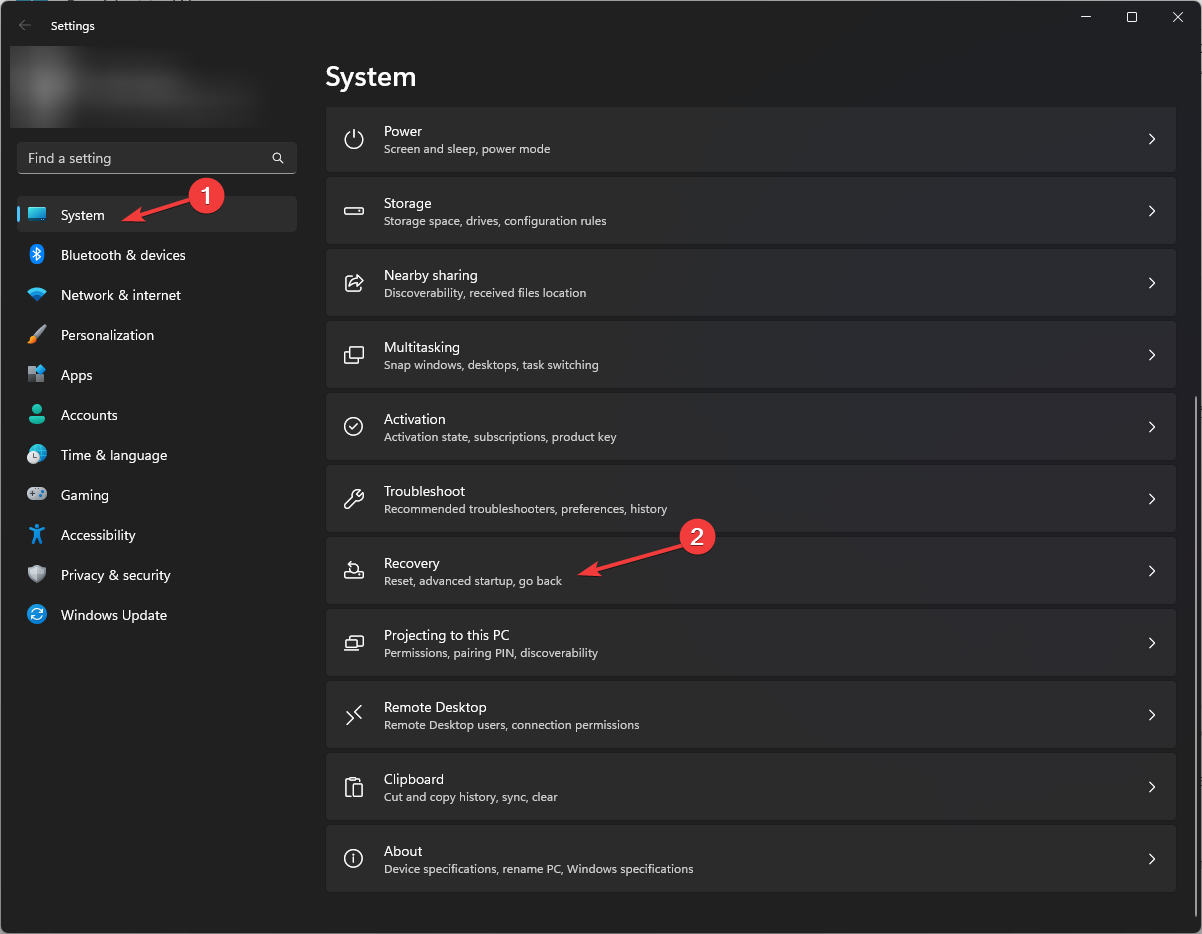
- Press Windows + I to open Settings.
- Go to System, then click Recovery.
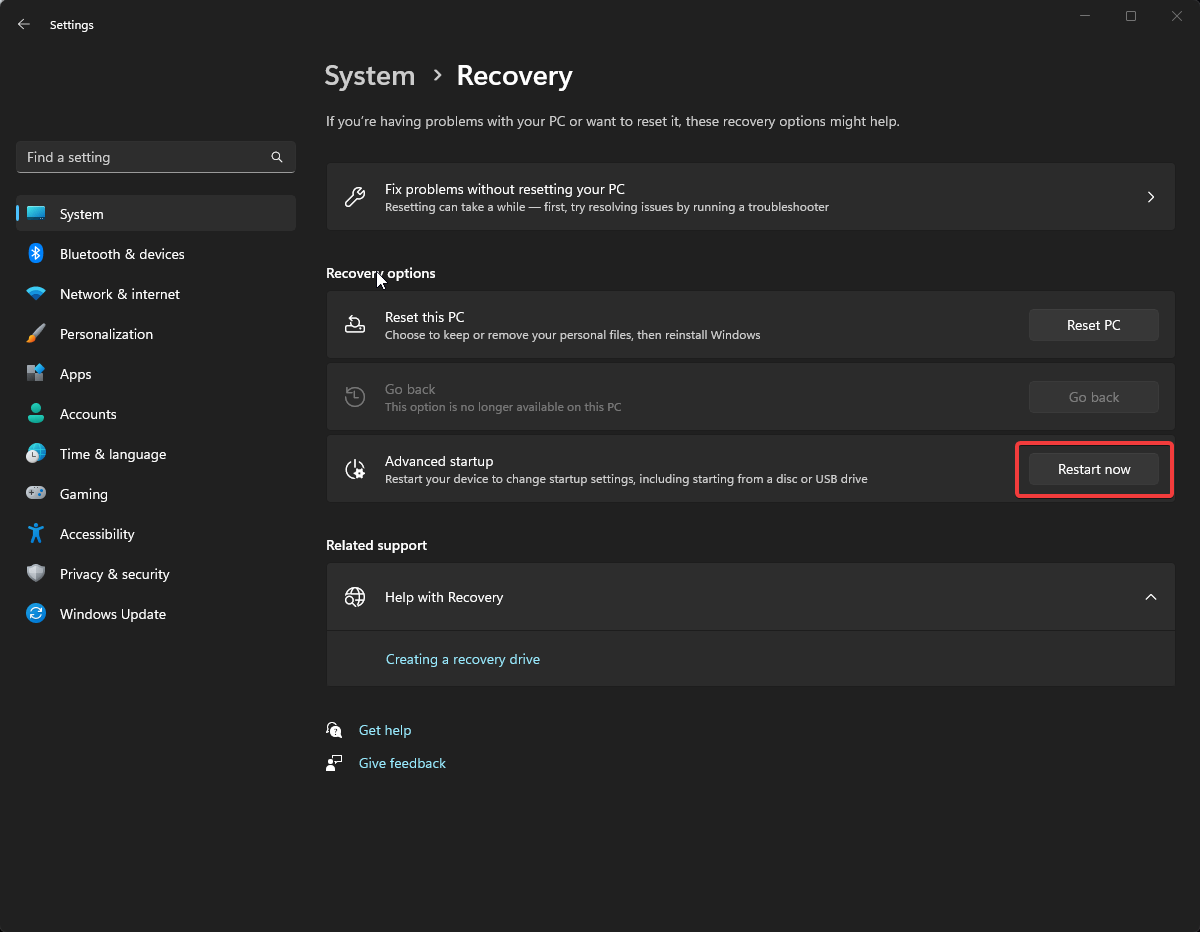
- Now next to Advanced startup, click Restart now.
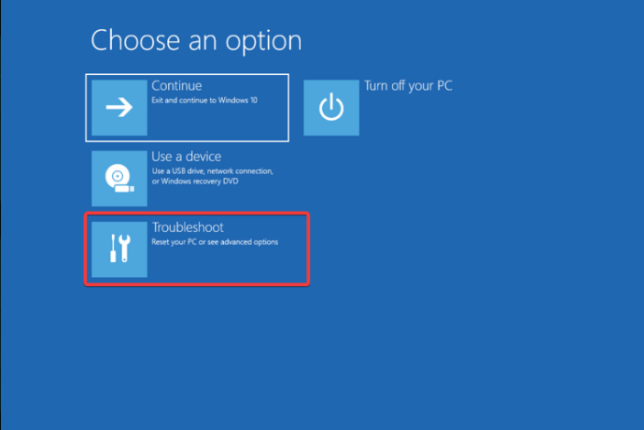
- From the Choose an option, click Troubleshoot
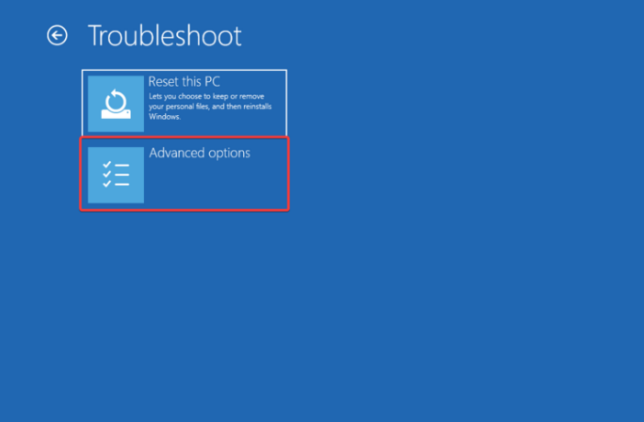
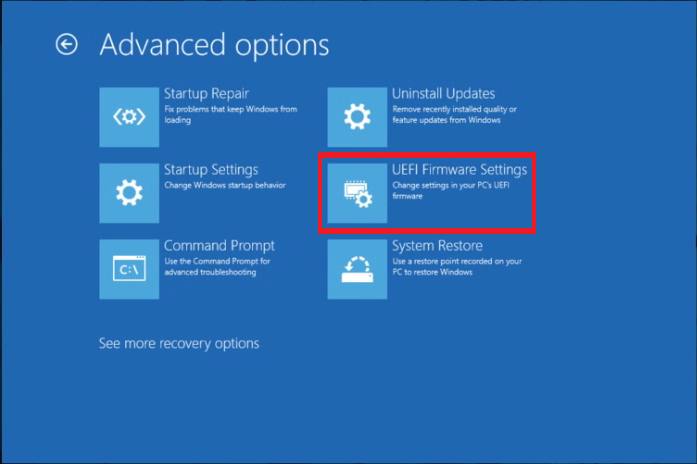
- Select Advanced Options.
- Now choose UEFI firmware settings and click Restart.
- The computer will restart, and you will get options to choose from. First, select the appropriate option to enter BIOS.
- Locate Storage Confirguration.
- Select Configure SATA as AHCI.
- Go to Exit, and select the Save and exit option.
2. Check if your SSD is 4K aligned
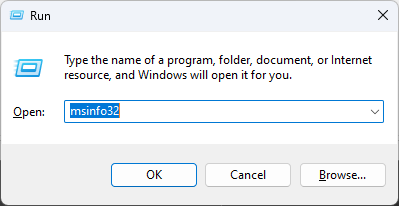
- Press Windows + R to open the Run console.
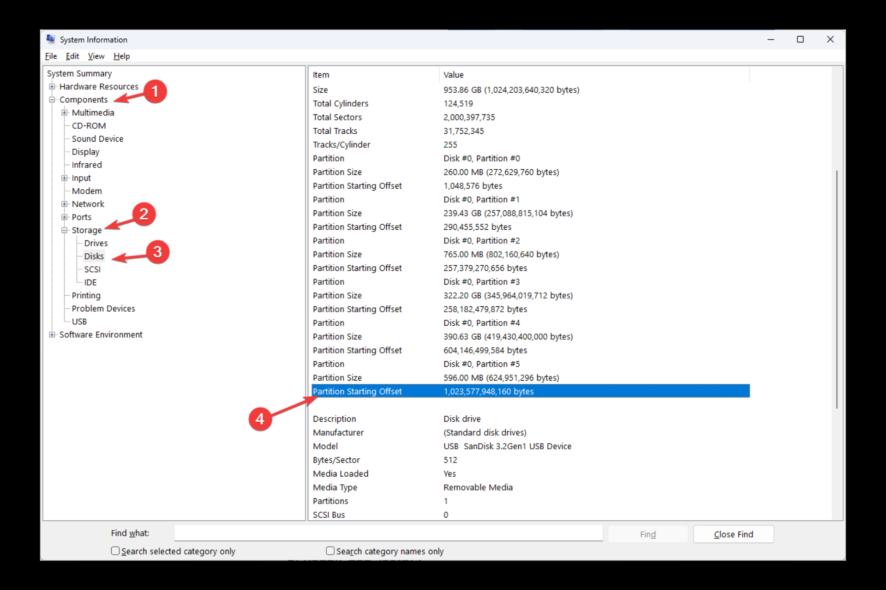
- Type msinfo32 and press Enter to open the System information.
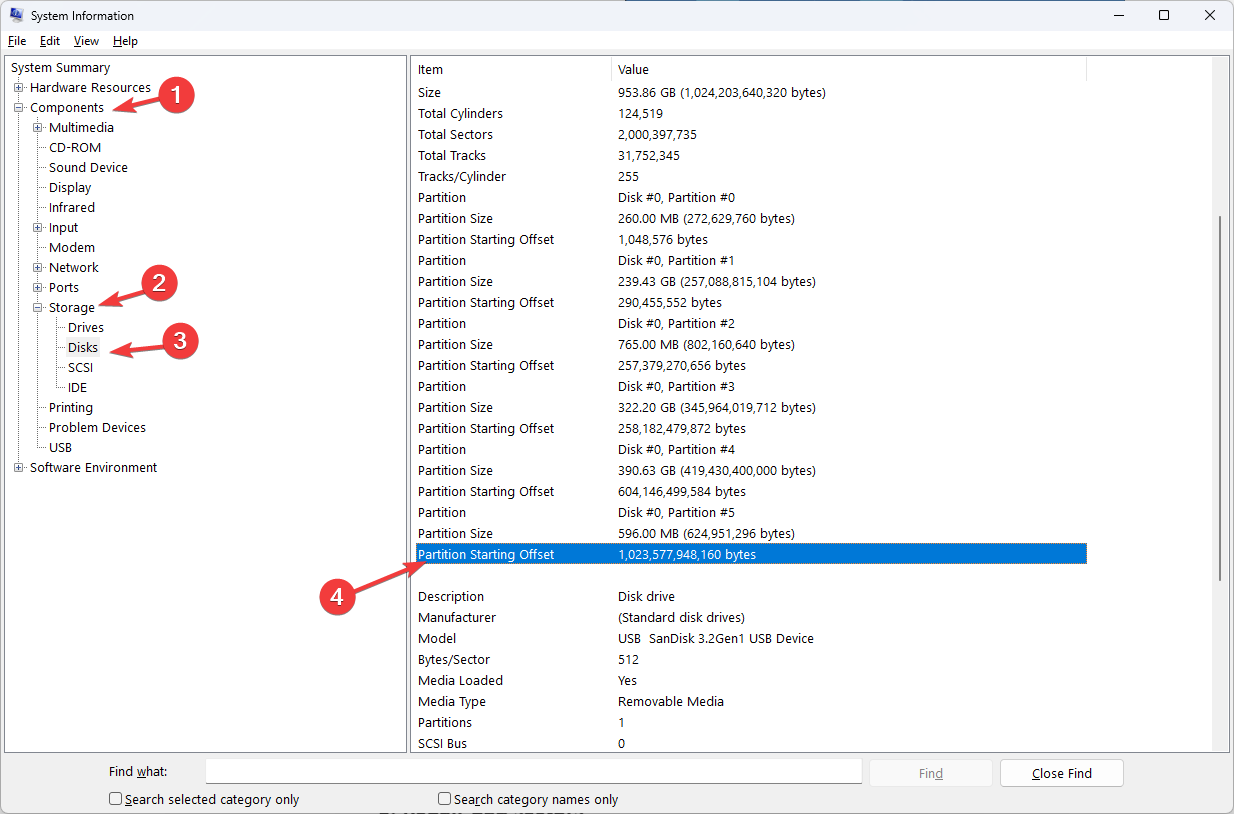
- Go to System Summary, locate, and double-click Components.
- Choose Storage, then click Disks.
- From the right pane, locate Partition Starting Offset and check its Value. The value should be divisible by 4096 to be 4K aligned.
- If not, then you need to align it manually. For example, you might have to format and reassign partitions, or you can use a third-party tool to help you with that.
3. Repair bad sectors
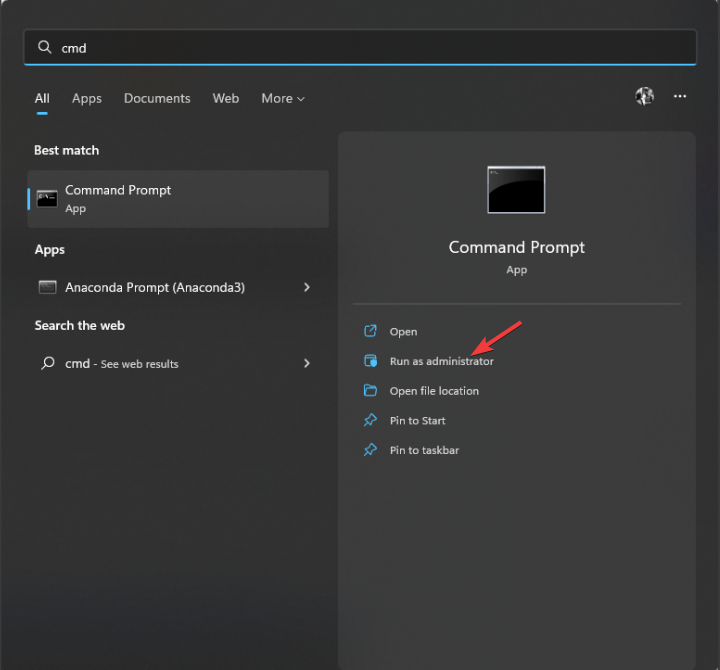
- Press the Windows key, type CMD, and click Run as administrator.
- Copy and paste the following commands and replace E with the drive letter you want to scan, and press Enter after every command:
chkdsk /f Echkdsk /r E - Repeat this for all the drives to fix the bad sectors.
Is the Windows 11 SSD freezing issue resolved?
Microsoft released a few updates to address the Windows 11 SSD freezing issue. The tech giant first released KB5007262 in 2021 to resolve the SSD performance issues.
However, some of the problems after were still left unaddressed, which later were resolved with KB5008353. This update also fixed 30 more topics related to performance and other reported cases.
So, these are some methods you can use to fix the SSD freezing issue on Windows 11. If nothing has worked for you, it is advised to take a backup of your drive, format it and reinstall Windows 11 to fix the issue.
Please let us know in the comments section below if you have any questions or concerns related to the SSD freezing up.


User forum
0 messages