Windows 10/11 Cannot Be Installed to This Disk: 33 Easy Tips
Key notes
- Windows cannot be installed to this disk error usually appears if there’s a problem with your BIOS settings.
- Other storage devices can sometimes interfere with the setup process, so you should disable them.
- Creating installation media with third-party tools will help you circumvent this problem on your PC.

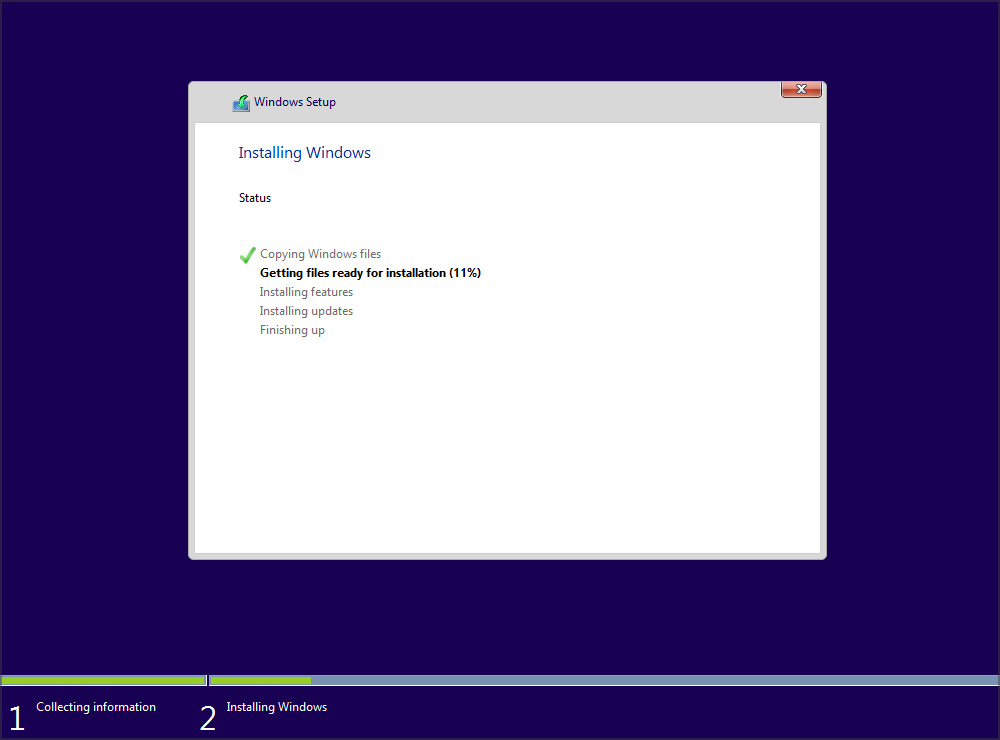
Installing Windows isn’t always simple, and sometimes certain issues can occur. One of the most problematic issues is Windows cannot be installed to this disk error, so let’s see how to fix it.
This isn’t the only installation error, and many have reported Installation failed in the safe_os phase, so the problem can appear during any parts of the setup.
In most cases, the error is caused by hardware incompatibility. After that, check your SATA device or use the diskpart tool.
For full instructions, check the guide below.
What can I do if Windows 10/11 cannot be installed to this disk?
- Windows 10 can’t install to this disk
- Can’t install on GPT partitions Windows 10
- Windows 10 can’t install on MBR partitions
- The computer hardware may not support booting
- Windows cannot be installed to this disk SSD
- The partition contains one or more dynamic volumes
Windows 10 can’t install to this disk
1. Make sure that no additional hard drives are connected
Sometimes additional hard drive or storage devices can cause this error to appear, therefore you need to disconnect all hard drives except the one that you’re going to use to install Windows 10.
Users also reported that sometimes USB flash drives or SD cards can interfere with Windows 10 installation, so be sure to remove them all. If needs be, try to install Windows 10 from a DVD.
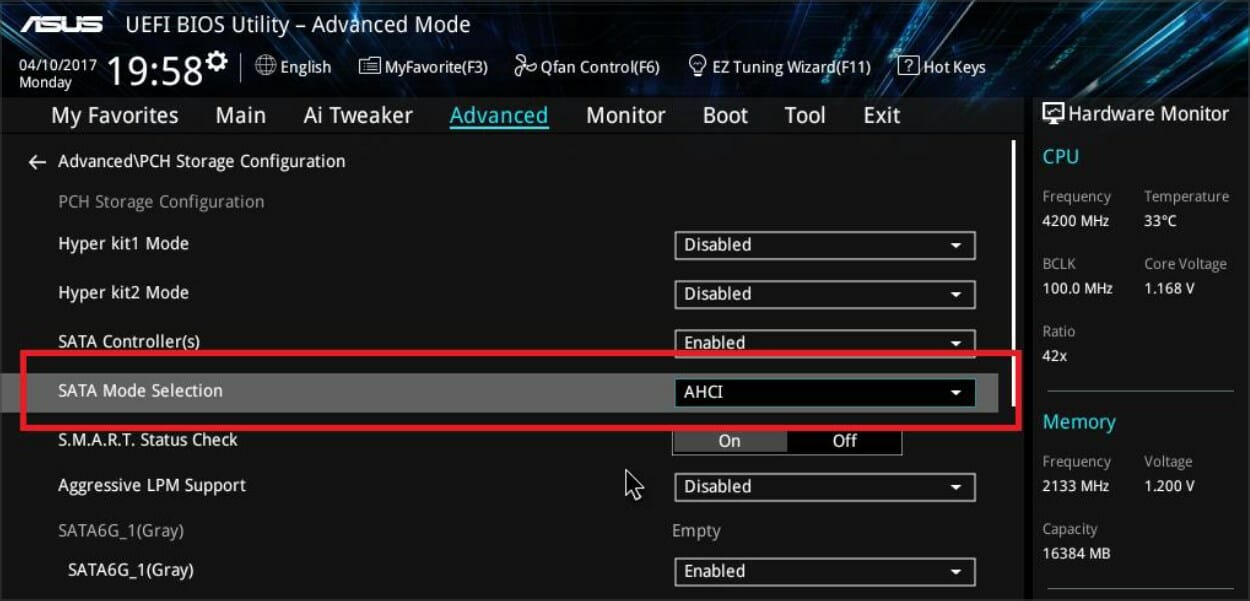
2. Check your SATA device
According to users, this error can appear if your primary hard drive is attached to eSATA port, so be sure to connect it to a different port. In addition, be sure that your SATA controller is set to AHCI or RAID mode.
If you have CD, DVD or Blu-ray drive attached to eSATA or SATA 3 port, be sure to disconnect them and attach them to SATA 2 controller.
Also, do not use an enclosure casing with a SATA 3 HDD that is connected to a SATA 3 controller.
Keep in mind that a faulty drive will cause you to get Windows cannot be installed to this disk the disk may fail soon error, so be prepared to replace your drive.
Windows 10 can’t install on GPT partitions
1. Use diskpart tool
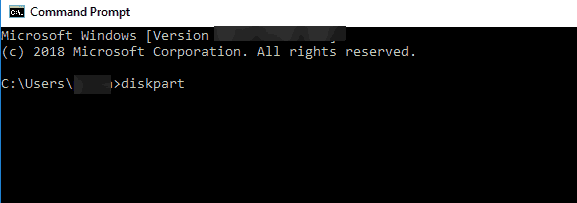
- During the Windows 10 setup, press Shift + F10 keyboard shortcut to open Command Prompt.
- When Command Prompt opens, enter diskpart and press Enter.
- Now enter list disk and press Enter.
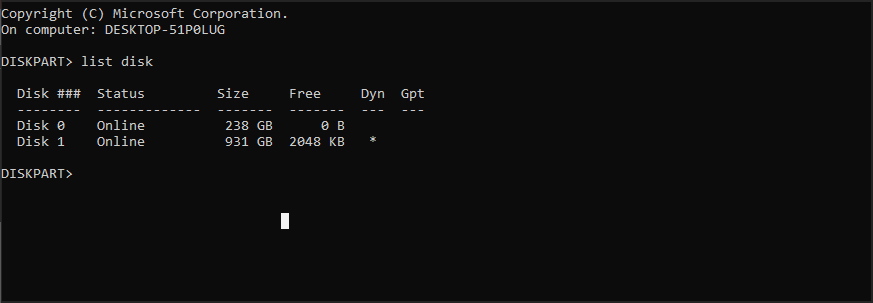
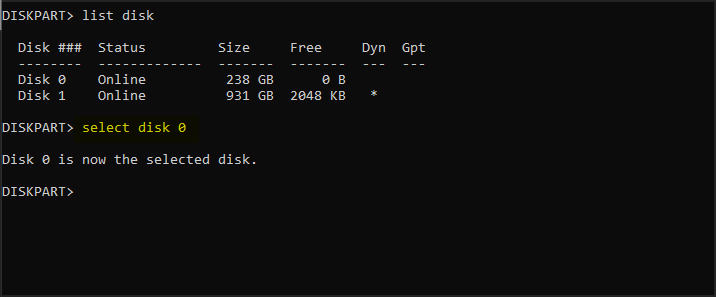
- List of all available hard drives will appear. Typeselect disk 0 and press Enter.
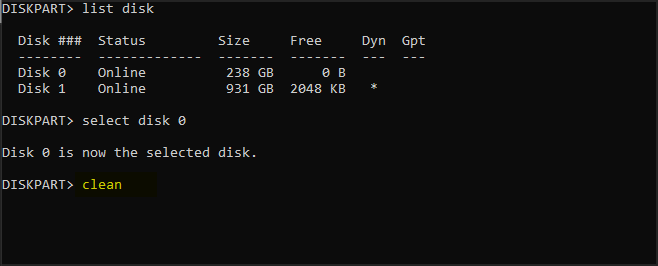
- Enter clean and press Enter.
- Optional: Use convert gtp or convert mbr command to convert your drive to the desired type.
- Enter exit and press Enter.
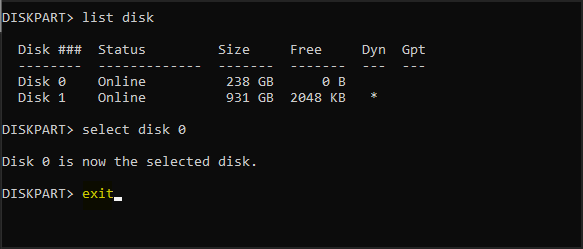
- Close Command Prompt and try to install Windows 10 again.
Once again we have to mention that the clean command will delete all files and partitions from a selected hard drive.
Therefore be sure to back up important files or use this solution if you have a new computer that doesn’t have any important files on it.
2. Use legacy BIOS mode
- While your computer boots press the appropriate key to open Boot Menu. Usually that key is set to Esc, F2, F9 or F12, but it can be different depending on your motherboard.
- Once the Boot Menu opens, select BIOS USB Drive option and press Enter and you’ll boot from that flash drive using the BIOS Legacy mode.
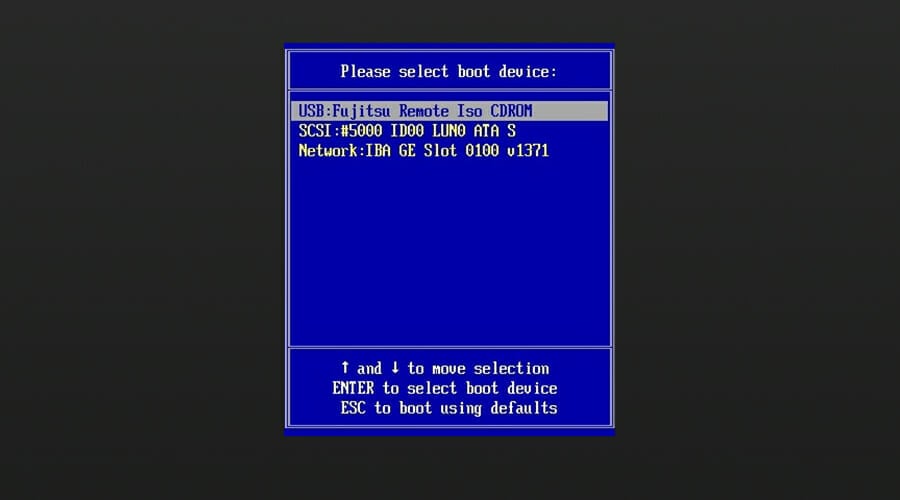
- Proceed with installation and install Windows 10.
3. Use Rufus to create a bootable USB flash drive
- Get a 8GB or 16GB flash drive and connect it to your PC.
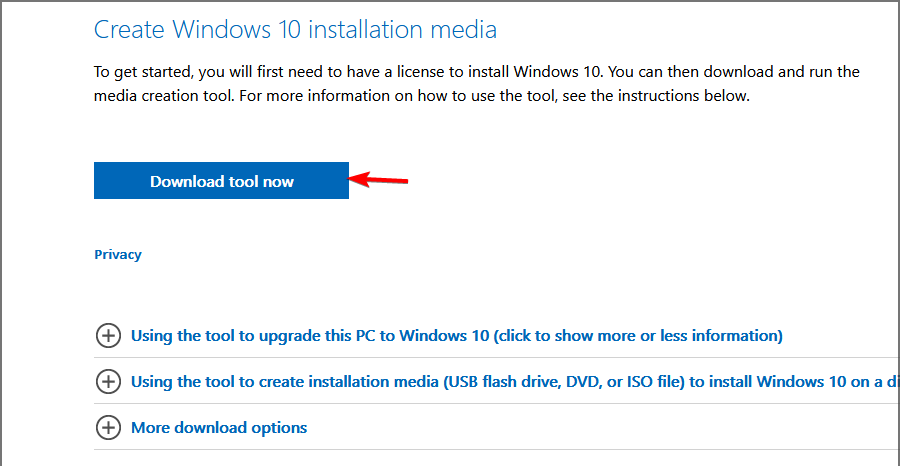
- Download Windows Media Creation tool.
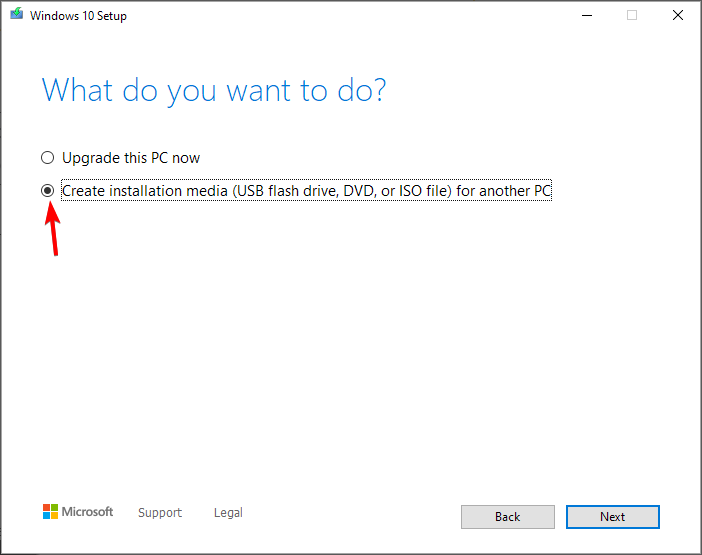
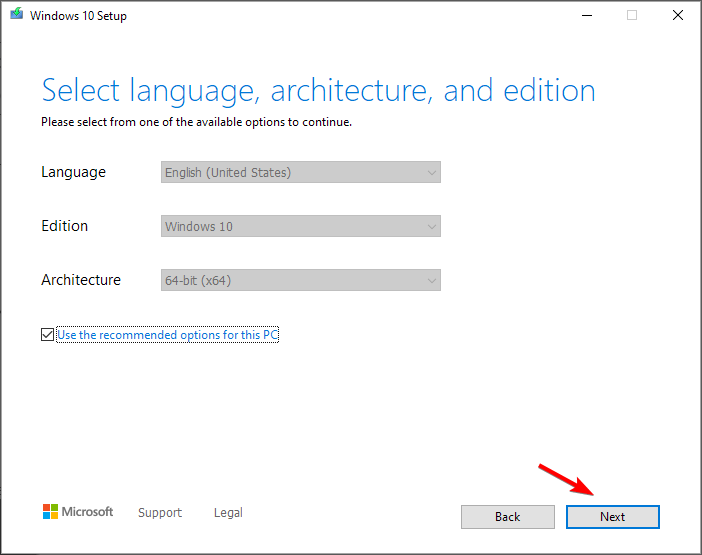
- Run the software and choose Create installation media (USB flash drive, DVD, or ISO file) for another PC and click on Next.
- Check your PC settings. If they aren’t correct, uncheck Use the recommended options for this PC and change the settings accordingly.
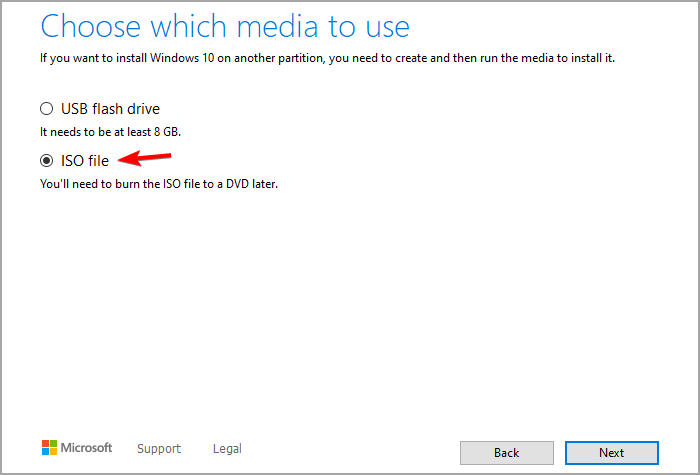
- Select USB flash drive and click Next.
- Wait for the process to finish. This could take a while depending on your download speed, so be patient.
After the download is finished, you need to use Rufus to create a bootable media. You can do that by following these steps:
- Visit Rufus page and download it.
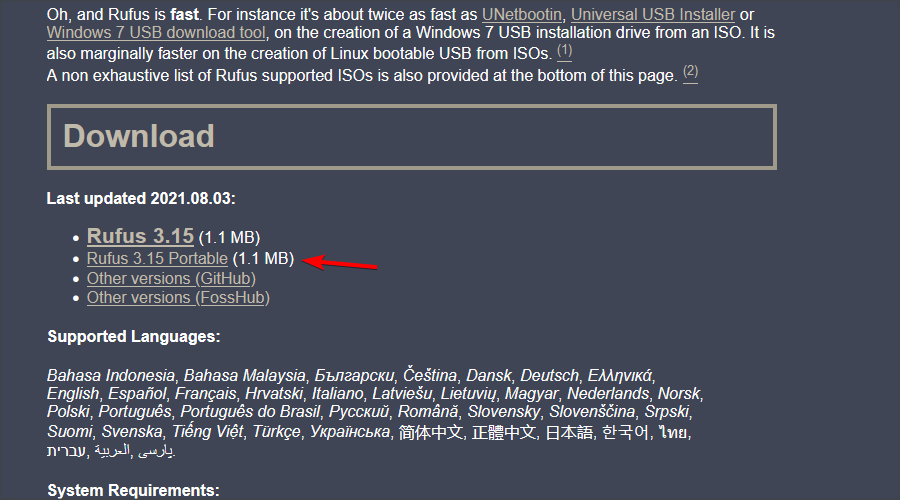
- Once the software is downloaded, run it.
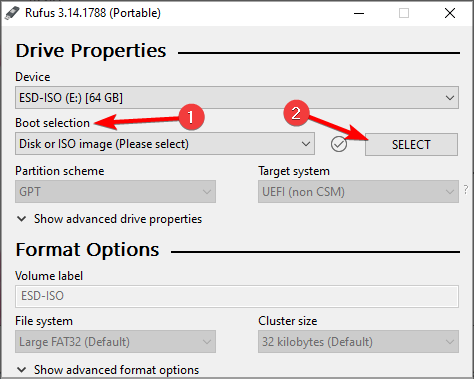
- Select your flash drive on the list of devices.
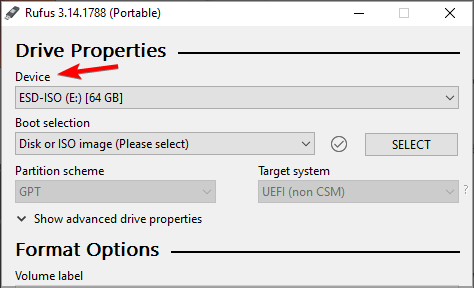
- Set Boot selection to Disk or ISO image. Click on Select button and choose your Windows ISO file.
- Click Start to start the process.

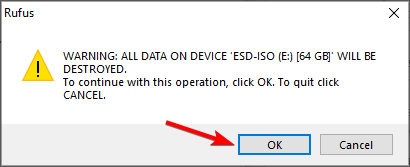
- You’ll be asked to format the drive, so click on OK to proceed.
- Wait for the process to finish.
Windows 10 can’t install on MBR partitions
1. Disable EFI boot sources
- While your computer boots press the appropriate key to enter BIOS. Usually that’s Del or F2, but it can be different on your PC.
- Once you enter BIOS, you need to locate Boot Order section and disable EFI Boot Sources.
- Save changes and restart.
After disabling EFI Boot Sources you should be able to install Windows without any issues. If the installation is successful, you need to go back to BIOS and enable EFI Boot Sources.
2. Delete the partition and format it again
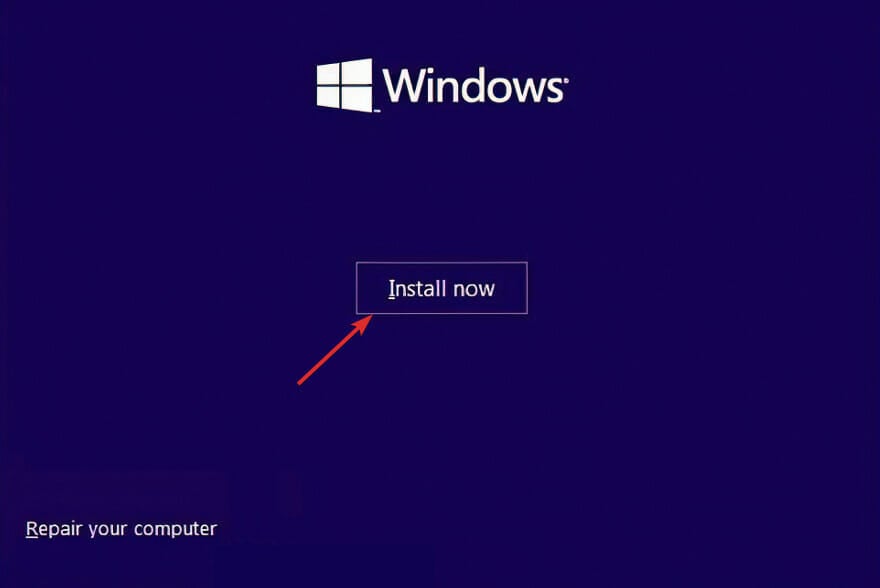
- Boot your device from installation USB.
- Click on Install now.
- Select Custom: Install Windows only (Advanced).

- Choose the drive on which you want to install Windows and click on Delete.
- Now click on New to create a new drive.
- Select the new drive and follow the instructions on the screen.
If you’re getting Windows 10 cannot be installed to this disk MBR partition table on EFI system, then your only option might be to format your drive.
3. Use a DVD drive
If you’re having this problem you should be able to circumvent it by using a DVD drive to install Windows 10. When installing the operating system from a DVD users are suggesting to use ODD option instead of EFI.
In addition, you can also try to use an external DVD drive to fix this problem.
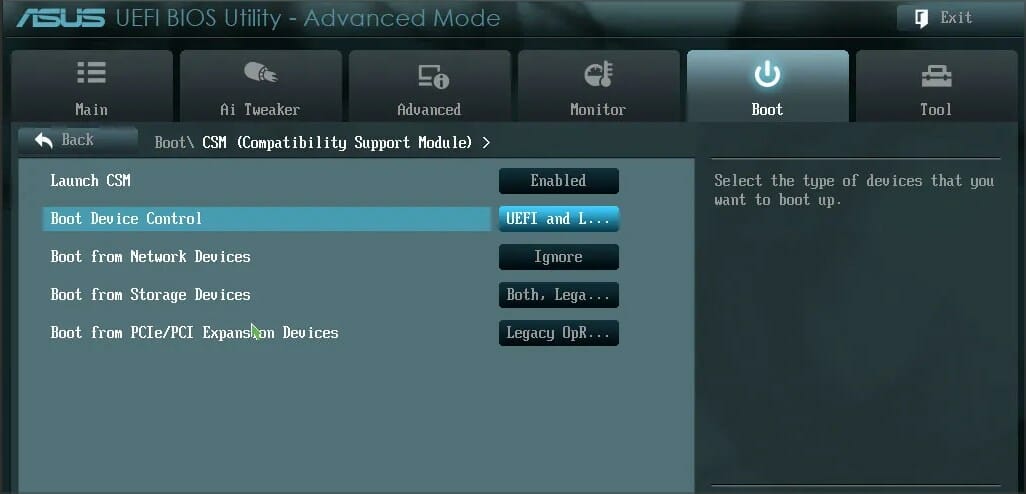
4. Disable UEFI boot
Newer motherboards support UEFI boot option, but sometimes UEFI boot can give you Windows cannot be installed to this disk error. To fix it, you need to enter BIOS and enable Legacy Boot option.
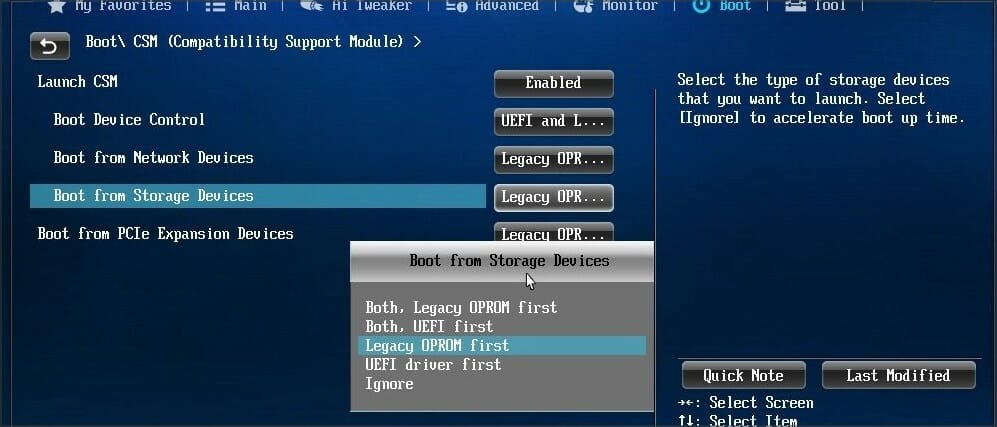
For more information on how to enter BIOS and how to use Legacy Boot, we strongly advise you to check your motherboard manual.
Some motherboards support both UEFI and Legacy boot so you can use both modes without having to disable anything. In some situations, you can even fix this problem by disabling Legacy boot and using UEFI instead.
5. Use diskpart to delete the problematic partition
 NOTE
NOTE
- Open Command Prompt. If you’re trying to install Windows 10 you can use Shift + F10 shortcut to start Command Prompt.
- Enter diskpart.
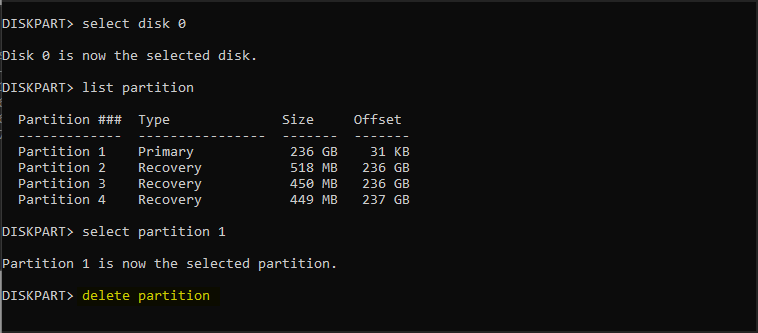
- Now enter list disk.
- Select the disk that you want to use. Enter select disk #. Replace # with the appropriate number that represents a certain disk. We used disk 0, but it might be different on your PC.
- Enter list partition.
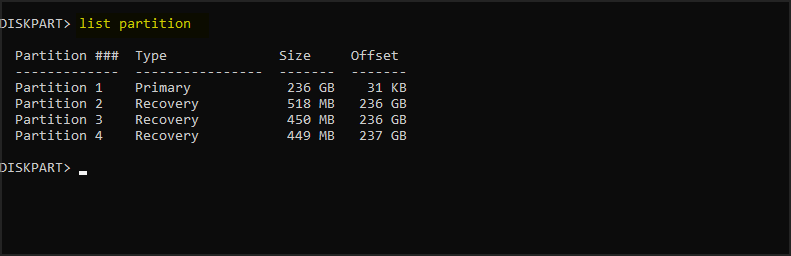
- Locate the partition that you want to delete and enter select partition #. Replace # with the appropriate number that represents the partition.

- Lastly, enter delete partition.
- After that, try to install Windows 10 again.
If this process seems complicated to you, you can always use third-party tools that come with graphical interface, such as AOMEI Partition Assistant.
With such tools you can easily delete partitions, format them or perform any other disk-managing actions easily and in a matter of seconds.
⇒ Get AOMEI Partition Assistant
6. Wait until Press any key to boot from disk message appears again
Many motherboards support both UEFI and Legacy boot, and some motherboards will start UEFI boot first. If you see Press any key to boot from disk message, do not press anything.

If your motherboard has UEFI and Legacy boot enabled the same message will appear again. When Press any key to boot from disk message appears for the second time press any key to boot from a designated device.
7. Use a USB 2.0 flash drive
Users reported that USB 3.0 flash drives don’t give them the option to choose MBR or Legacy boot while choosing a boot device, but you can fix this problem by using a USB 2.0 flash drive instead.
Alternatively, you can use USB 2.0 port on your PC if you have one.
The computer hardware may not support booting
1. Delete all partitions and convert your hard drive to GPT
To fix Windows 10 cannot be installed to this disk GPT without losing data error you might have to delete all your partitions. This procedure will delete all your files, therefore we urge you to create a backup before you start.
If your hard drive is larger than 2TB, you must convert it to GPT. To do that, use diskpart tool to clean your hard drive and then convert it to GPT.
For more instructions on how to do that be sure to check our guide on how to convert MBR to GPT disk.
2. Format your hard drive from Linux
If you don’t want to use command line to fix this problem, you can start your PC from a Live Linux CD. After Linux starts, locate the appropriate disk management tool and format it to FAT32 drive.

Be sure to use the slow method to completely clean your hard drive. This procedure will delete all files from your hard drive, so be sure to back them up.
After your hard drive is formatted, try to install Windows 10 again.
3. Disable unnecessary boot devices in BIOS
- While your system boots, press F2 or Del to enter BIOS.
- Now navigate to the Boot section.
- Disable all unnecessary boot devices.
For more information on how to disable boot devices be sure to check your motherboard manual.
4. Connect your hard drive to Intel SATA 3 port instead of Marvell port
- Restart your PC.
- While it boots, press F2 or Del. This should take you to BIOS.
- Now locate settings for Intel SATA 3 controller and set it to run in AHCI Mode.
- Turn on SMART option for Intel SATA 3.
These types of problems can sometimes appear if your hard drive is not connected to Intel SATA 3 port, so be sure to connect it to Intel SATA 3 port on your PC.
5. Connect your hard drive and optical drive to correct SATA ports
Some motherboards require that you connect your hard drive and optical drive to appropriate ports. Users reported that after connecting the hard drive and optical drive to SATA 5 and SATA 6 ports on their motherboard the issue was resolved.
For more information on which SATA ports you should use, we strongly suggest checking your motherboard manual.
6. Remove your USB installation media after the first restart
Few users reported that you can avoid this issue simply by removing your USB installation media. According to users, you need to remove your installation media before your computer restarts during the setup process.
After the USB media is removed, the installation should continue without any issues. In addition, be sure that you don’t have any additional USB drives or devices attached to your PC.
We don’t know if this solution works, but a couple of users reported that it fixed the issue for them, so feel free to give it a try.
7. Check if your hard drive is on the list of boot devices
- Restart your PC and keep pressing F2 or Del to enter BIOS.
- Navigate to the Boot section.
- Make sure that your hardware is added as a boot device.
Few users reported that their hard drive had an exclamation mark before it in Boot options menu, meaning that the hard drive is disabled.
According to them, you can enable your hard drive again simply by using Ctrl + 1 shortcut. Keep in mind that different versions of BIOS might use different shortcuts, so check your motherboard manual for detailed explanation.
8. Disable External Device Boot
- Open BIOS settings. You should be able to do that by pressing the Assist button on your laptop.
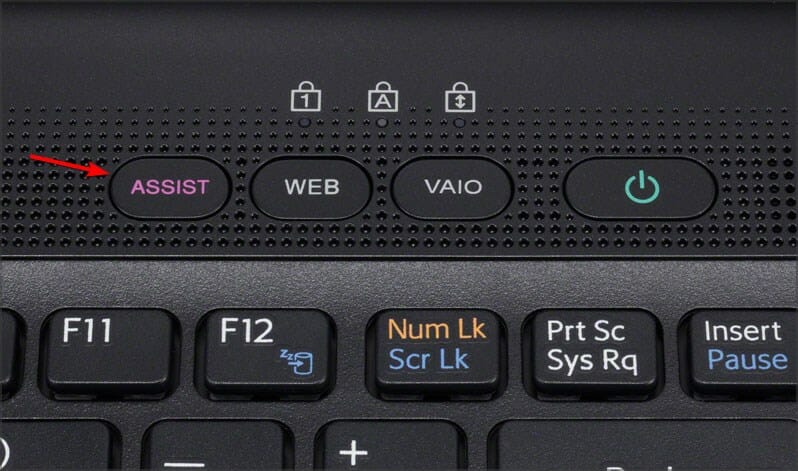
- Go to External Device Boot settings and disable this option.
- Save changes and try to install Windows 10 again.
Few users reported that you can fix this issue on Sony Vaio devices by disabling External Device Boot. According to them, the device finds more than one boot option from BIOS, but you can fix that by following these steps:
9. Disable Intel Boot Security
- While your PC boots, press F2 to access BIOS. Note, your PC might use a different key.
- Navigate to Secure Boot section.
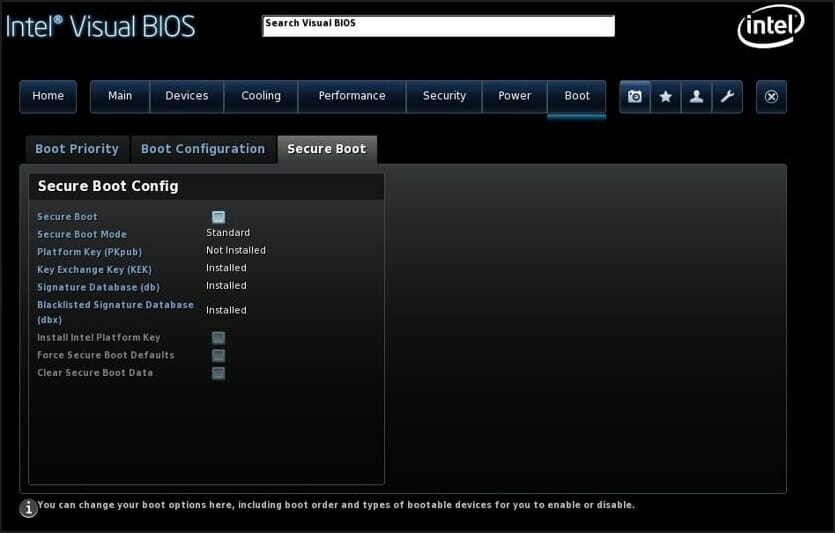
- Now disable Intel Boot Security.
If your device supports Intel Boot Security feature you should disable it from BIOS. Users reported that Intel Boot Security feature can interfere with Windows 10 installation, therefore be sure to disable this option in BIOS.
After disabling Boot Security Windows 10 should be installed without problems.
10. Disable the AHCI mode
- Restart your PC and enter BIOS. You can do that by pressing F2 during boot.
- Now look for storage settings.
- Locate the AHCI mode for your drive and disable it.

After using this solutions, the Windows cannot be installed to this disk ensure disk controller is enabled in BIOS message will be gone.
11. Unplug your Ethernet cable
Many users reported that they fixed this issue simply by unplugging the Ethernet cable.
We don’t know why Ethernet cable caused this problem, but if you’re getting The computer hardware may not support booting error be sure to try this solution.
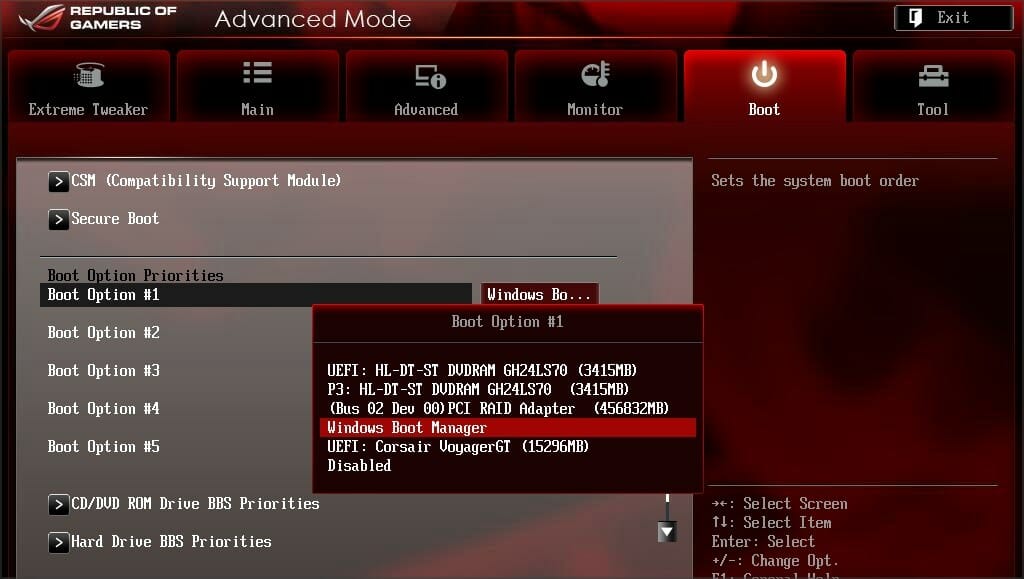
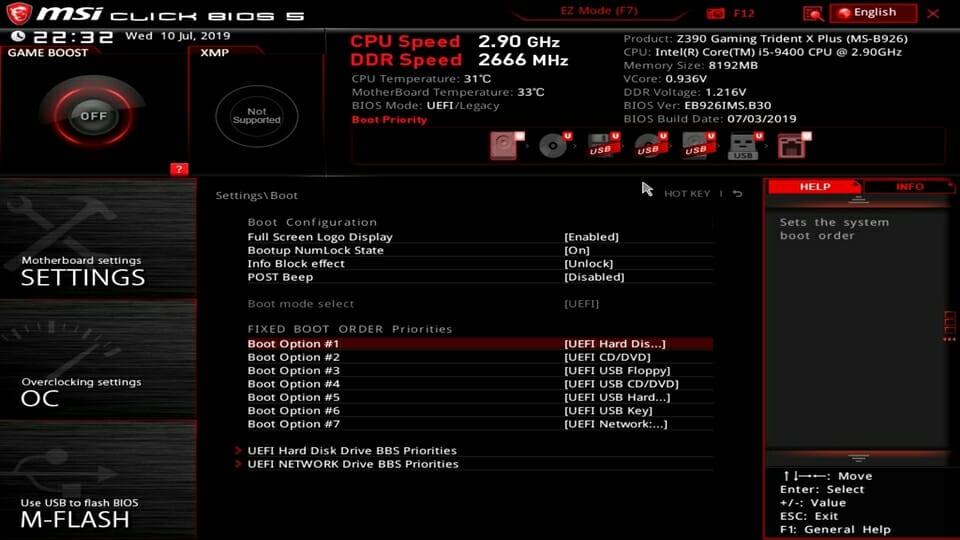
12. Set the boot order properly
- Restart your PC.
- While the PC boots, keep pressing F2 or Del to access BIOS.
- Navigate to Boot section.
- Now make sure your flash drive is set as first boot device.
Few users reported this error while selecting their USB drive as the boot device. According to them, the only way to fix this issue was to enter BIOS and set the USB flash drive as the first boot device.
For some strange reason the quick boot menu option wouldn’t work for them, but after changing the boot order in BIOS the issue was resolved.
13. Set the partition to active
NOTE
- Start Command Prompt. If you’re trying to install Windows 10 you can start Command Prompt by pressing Shift + F10.
- After Command Prompt opens, enter diskpart and press Enter.
- If you have two or more hard drives, enter list disk command. Locate your the hard drive that you want to use to install Windows 10.
- Enter select disk #. Replace the # with the appropriate number. If you have only one hard drive use disk 0.
- Now enter list partition.
- Locate your desired partition and enter select partition #. Replace the # with the appropriate number.
- Enter active.
- Close Command Prompt and try to install Windows 10 again.
Sometimes you might get Windows 10 cannot be installed to this disk the selected disk is of the GPT partition style error, but that can be fixed with diskpart.
Windows cannot be installed to this disk SSD
1. Be sure that your SSD is clean
According to users, installation problems with Windows 10 can occur if your SSD drive isn’t clean. To fix this problem be sure to remove all partitions and files from your SSD and try to install Windows 10 again.
In addition, be sure that AHCI is enabled.
2. Try non-UEFI boot
- Restart your PC.
- While the PC boots, press F2 or Del.
- Now go to the boot section and disable UEFI boot.
Few users reported that you can fix this problem simply by using non-UEFI boot, so you might want to try it.
3. Disconnect other SSD
If you have two or more SSDs on your PC you might experience this error. One of the simplest solutions is to disconnect all other SSD drives and check if that fixes the problem.
In addition, be sure to disconnect any storage devices from your PC.
4. Use SATA 2 port
Users reported that this issue can occur if the SATA 3 expansion board is faulty, so you might want to try using SATA 2 port instead.
According to users, they were able to install Windows 10 after connecting their SSD to SATA 2 port, so be sure to try that.
5. Connect your DVD drive to the motherboard
It seems that this issue appears when you connect both your SSD and DVD to the controller.
One of the simplest solutions is to disconnect your DVD drive and connect it to the motherboard while keeping the SSD connected to the controller.
After doing that, Windows cannot be installed to this disk setup does not support USB message will be gone.
6. Remove RAID configuration
- Restart your PC.
- During the boot, keep pressing F2 to access BIOS.
- Navigate to Storage settings.
- Set the SATA Mode to anything else then RAID.
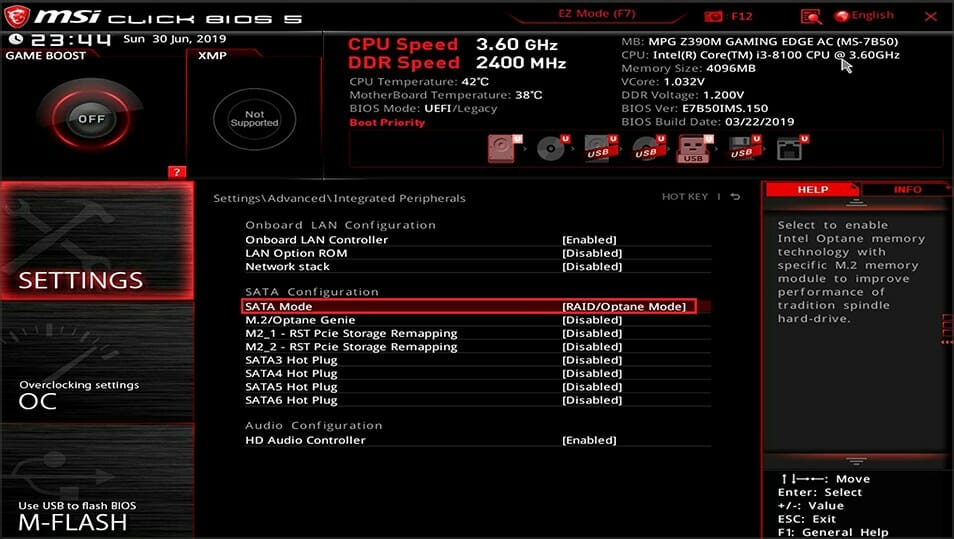
Users reported this problem while using RAID, and according to them, removing RAID configuration from BIOS fixed this issue.
After removing RAID, create it again, make it bootable and you should be able to install Windows 10.
7. Make sure that your USB flash drive and SSD don’t match
This is a very unlikely issue, but users reported that Windows 10 installation can fail if you’re trying to install it with USB flash drive.
Users reported that they had problems with Corsair USB flash drive and SSD, but after replacing the Corsair flash drive with a different brand the issue was fixed.
The partition contains one or more dynamic volumes
Convert your dynamic disk to a basic disk
- During Windows setup, press Shift + F10 to open Command Prompt.
- Now type diskpart.
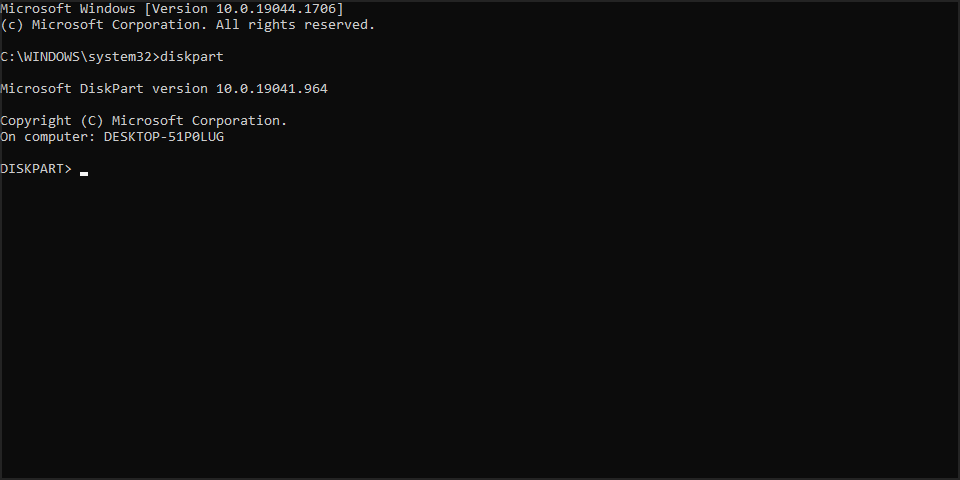
- Enter list disk. Locate the disk that you want to convert.
- Enter select disk #. Replace # with the appropriate number.
- Enter clear.

- Now enter convert basic.
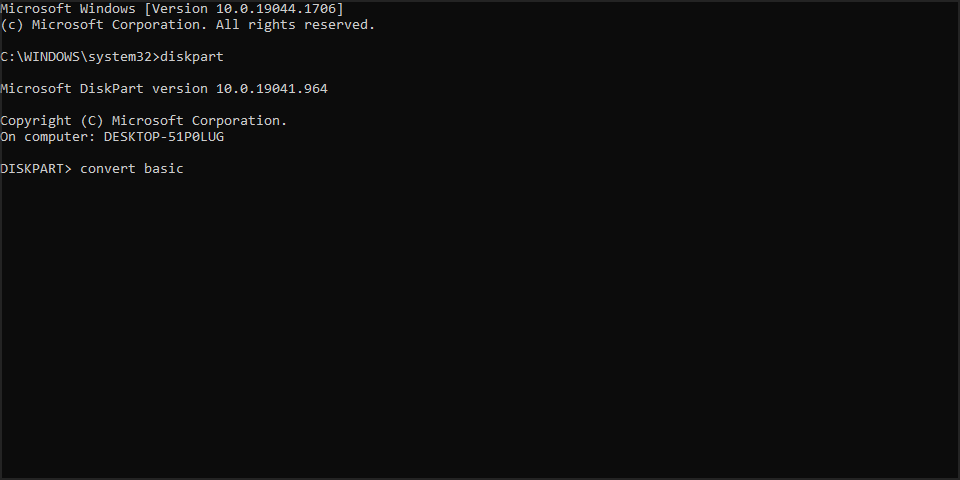
- Close Command Prompt and try to install Windows 10 again.
After your disk is converted to basic, try to install Windows 10 again.
What can I do if Windows 11 cannot be installed to this disk?
This issue affects all versions of Windows, and in most cases it’s caused by your configuration, so adjusting the BIOS settings will fix the problem.
Since this is such a common issue and caused by BIOS, fixing it on Windows 11 is exactly the same like on the older versions.
Windows cannot be installed to this disk error can be a big problem and prevent you from installing Windows 10, but you should be able to fix this issue by using one of our solutions.
In case the problem is still there, read our Windows cannot install required files article for more easy-to-follow solutions.
Before you leave, don’t miss our We couldn’t create a new partition error guide, since it can provide you with more solutions.
We also have a guide on what to do if Windows cannot install required files error appears during the setup.
If you found another way to solve this error or you have any other questions, feel free to share in the comments section below.
Read our disclosure page to find out how can you help Windows Report sustain the editorial team. Read more


Improve this guide


User forum
2 messages