Kingston SSD not Detected: 6 Working Fixes
Wrong BIOS settings or outdated driver can cause this issue

The Kingston SSD is one of the most used drivers, but some complain it is not detected by their PC. The Drive may not show in Disk Management or it is not detected in BIOS.
If you’re facing something of the sort, we got you covered. In this guide, we’ll explain step by step how to make your PC recognize your Kingston SSD. Let’s get right to it.
How can I fix the Kingston SSD not detected?
Before proceeding to the solutions in this section:
- Test the Kingston SSD drive that is not showing up on another computer. The problem might be with the drive if it does not work.
- You can also test with another cable on different ports. If it passes these hardware tests, you can explore the solutions below:
1. Change onboard SATA mode
 NOTE
NOTE
- Press the Windows key, click the Power icon, and select the Restart option.

- Power on your PC and press the appropriate key (F1, F2, F10, or F12, depending on your PC) to enter BIOS.
- Select the System or Hardware Configuration option.
- Then, navigate to the AHCI or SATA Mode.
- Choose Enable AHCI if you find it there. If not, set the SATA Mode to AHCI.
If your Kingston SSD is not detected on BIOS, it might be because your PC’s SATA mode is still set to the old IDE configuration. You must change the settings to the modern AHCI mode to fix it.
2. Initialize the drive
- Press the Windows key + R, type diskmgmt.msc, and press Enter.

- Right-click your SSD drive and select Initialize Disk.

- Select all the partition style and click OK.

- Right-click the newly allocated space and choose New Simple Volume.

- Select the proper size and drive letter and that’s it.
3. Set disk drive letter
- Press the Windows key + R, type diskmgmt.msc, and hit Enter.
- Right-click on the SSD drive and choose Change drive letter and path…

- If it does not have a drive letter, click the Add… button. If it has, choose the Change… button instead.

- Choose the drive letter you want and click the OK button to save the changes.

- Finally, restart your PC.
The drive letter is essential for your PC to access the SSD. So, if your Kingston SSD is not detected, changing or adding a drive letter might help fix the issue.
4. Update drivers
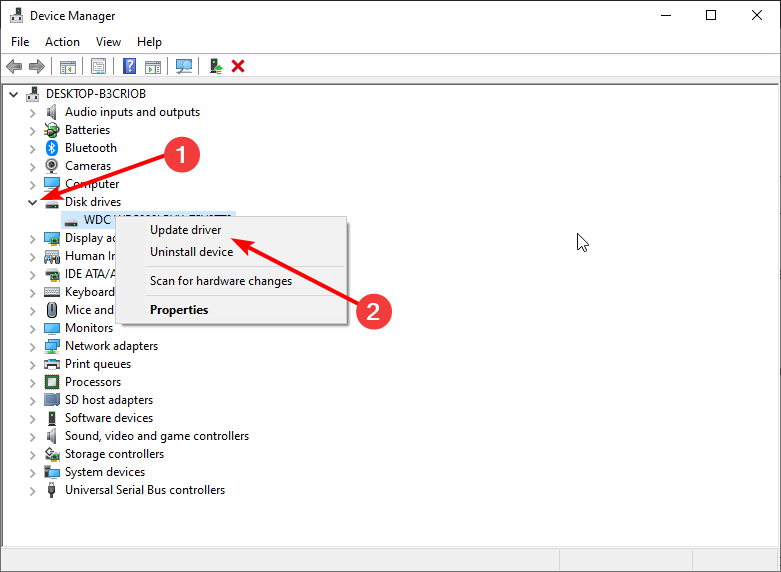
- Press the Windows key + X and select Device Manager.

- Click the arrow next to the Disk drives option to expand it and right-click the driver there.
- Choose the Update driver option.
- Now, select Search automatically for drivers and install any available update.

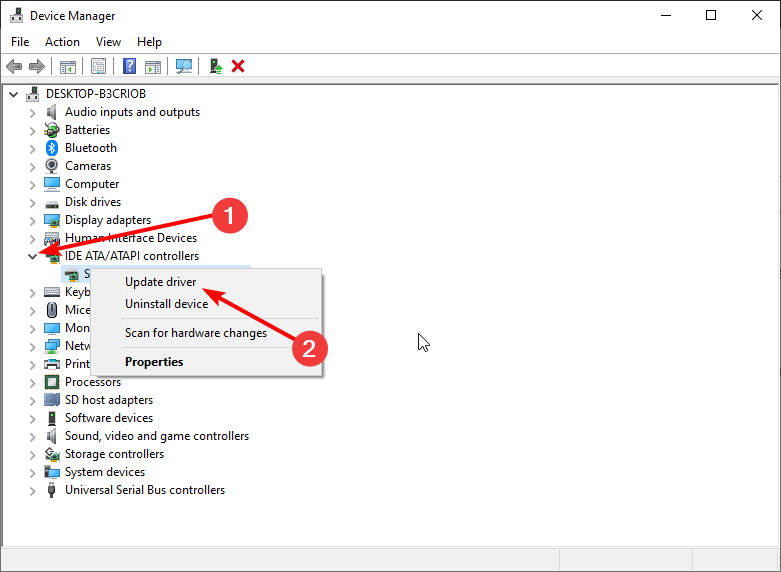
- Go back to the Device Manager window and expand the IDE ATA/ATAPI controllers option.
- Right-click the driver there and select Update driver.
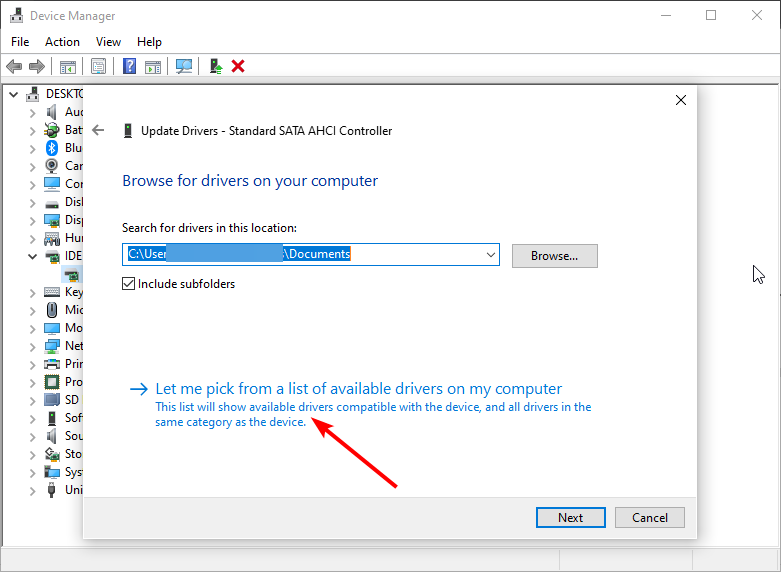
- Choose Browse my computer for drivers.

- Now, select Let me pick from a list of available drivers on my computer.
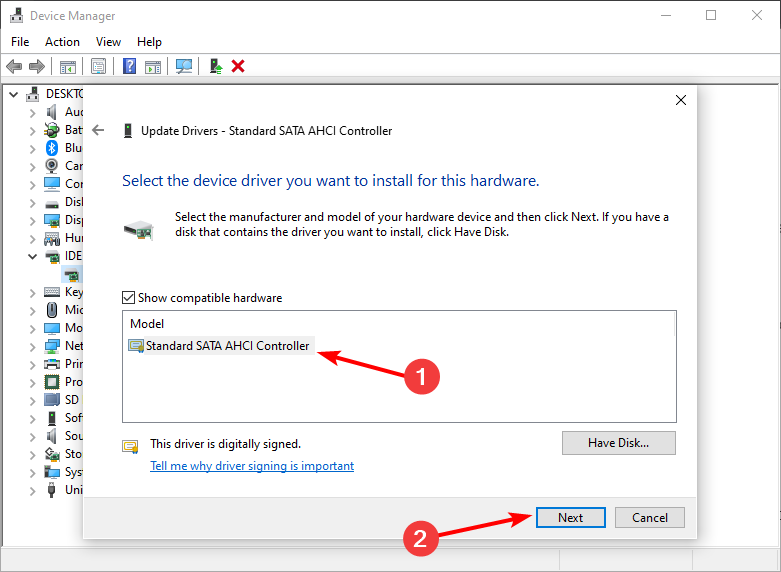
- Finally, select the Standard SATA AHCI Controller option and click the Next button.
To avoid these kinds of errors and performance issues as much as possible, try keeping your device drivers up to date.
To make this easier, you can use a driver updater tool like PC Helpsoft Driver Updater. It’s designed to scan and update your drivers automatically, so you won’t run into errors caused by drivers in the future.
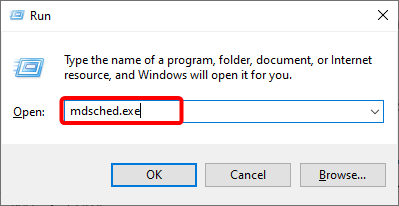
5. Run the Memory Diagnostic tool
- Press the Windows key + R, type mdshed.exe, and hit Enter.
- Select Restart now and check for problems (recommended) option.

- Now, wait for the diagnosis to be complete and follow the recommendations.
If your Kingston SSD is not showing up in Disk Management on Windows 10, it might be due to some issues with the drive. The Memory Diagnostic tool should help detect these issues and recommend possible solutions.
6. Download the Kingston SSD Manager
- Head to the Kingston SSD Manager page and pick the app version you want. We recommend the up-to-date one unless your drive is very old.
- Hit the download button to get the exe file.

- Install the app on your PC.

- Go to the Health tab to run a quick troubleshooting test on your SSD. The app will tell you how to fix any issues found.

Another option is to download and install the Kingston SSD Manager. This app will show you if there is a problem with your drive.
The reason why your Kingston M.2 SSD might not be detected could be incorrect BIOS settings, a defective drive, outdated drivers, or a missing drive letter.
Following the steps outlined above should help you fix it. Good maintenance practice can also help with slow SSDs and overall better performance.
Feel free to let us know if the solutions in this guide helped you get past the issue in the comments below.
Read our disclosure page to find out how can you help Windows Report sustain the editorial team. Read more


Improve this guide


User forum
0 messages