How to Boot Your Surface Pro from USB: 3 Tested Ways
First, make sure you have a working bootable USB drive
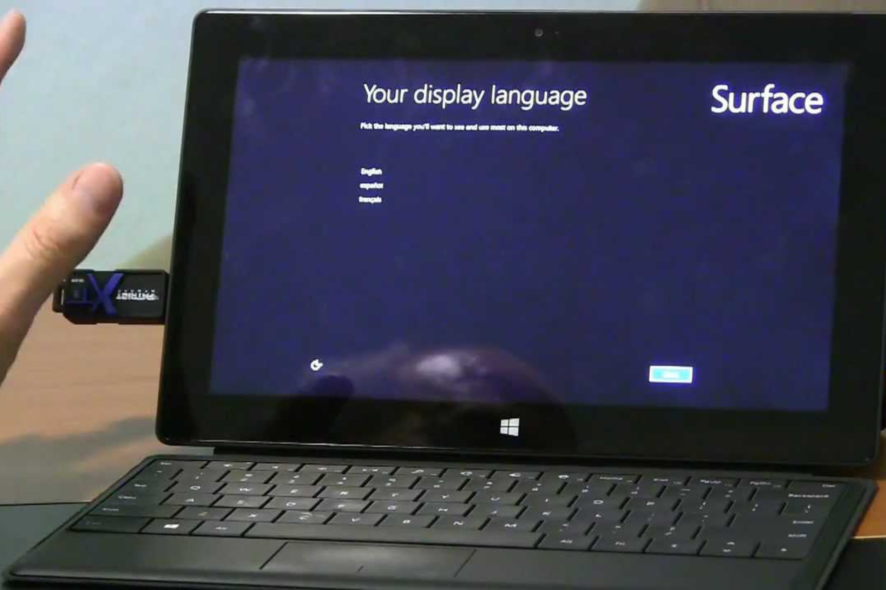
Booting your Surface Pro using a USB flash drive is a bit complicated but we’ve got you covered. Before diving into the solutions, back up any important data if possible.
Table of contents
How do I boot Surface Pro using a USB flash drive?
Before trying any steps, create a working bootable USB drive, make sure that the device is charged, and unplug any other USB devices except for the keyboard and mouse. If your Surface Pro is frozen or can’t boot up Windows, press and hold the power button till the Microsoft logo appears. Then, press the Windows logo, followed by the Ctrl + Shift + Win + B key combination.
1. Boot Surface Pro using a USB drive
➡ For Windows 11
- Insert a bootable USB flash drive into the USB port.
- Press Windows + I to get Settings.
- Go to System and choose Recovery.
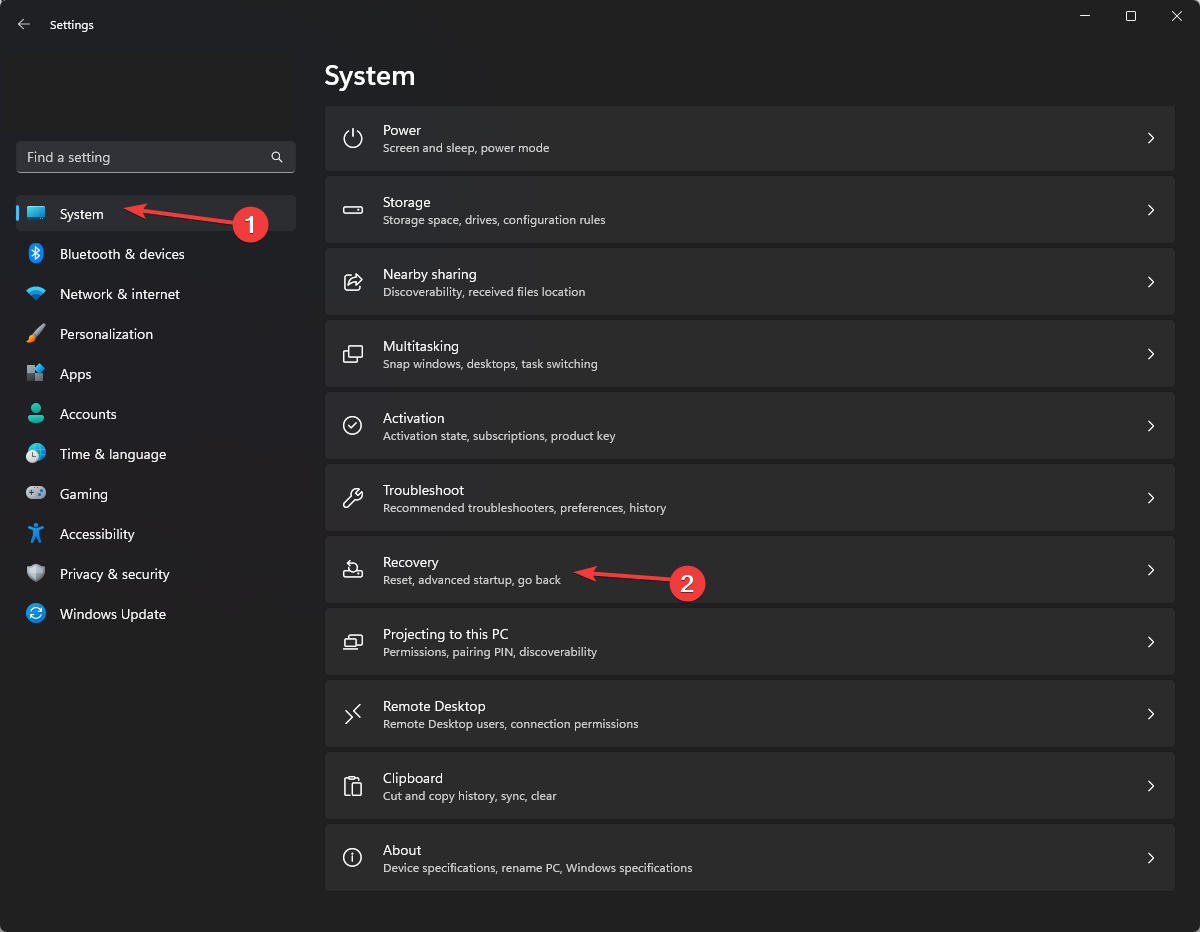
4. Navigate to Advanced startup and click Restart Now.
5. You will see Choose an option screen; click Use a device>USB storage. 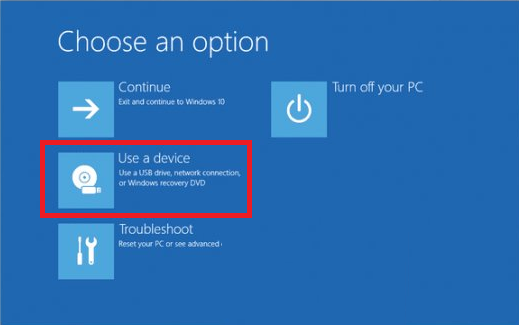
 Tip
Tip
➡ For Windows 10
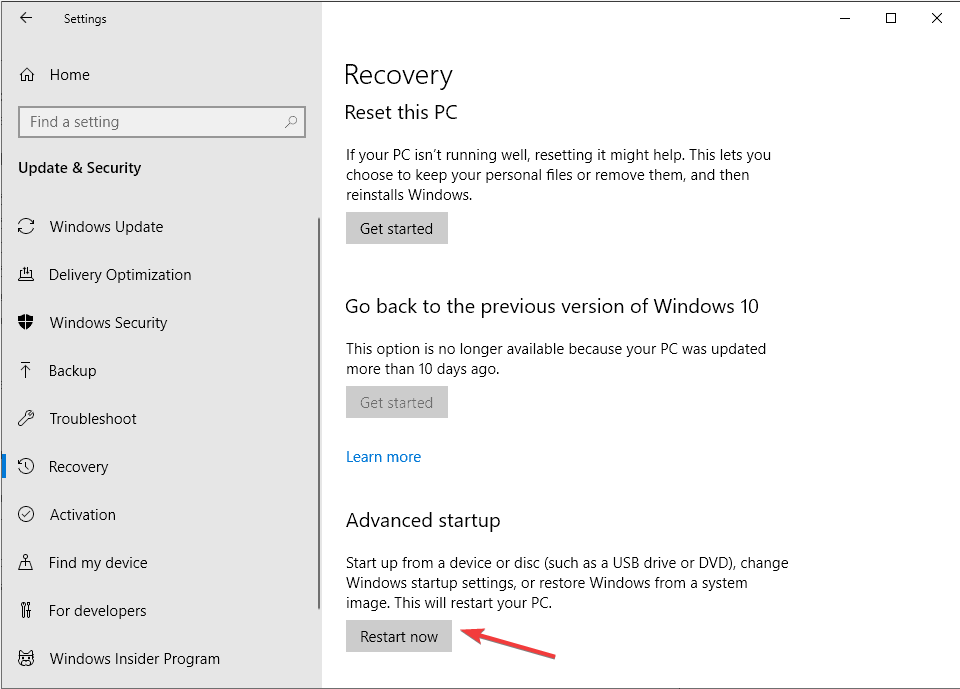
- Press Windows + I to get Settings.
- Go to Update & Security.
- From the left pane, click Recovery.
- Under Recovery, navigate to Advanced startup and select Restart Now.
5. You will see Choose an option screen; click Use a device>USB storage.
Tip
2. Configure the boot device order
- Turn off your Surface.
- Press and hold the Volume Up button
- With the Volume Up button pressed, press & release the Power button.
- Keep holding the Volume Up button till you get the Microsoft logo, or the Windows logo disappears.
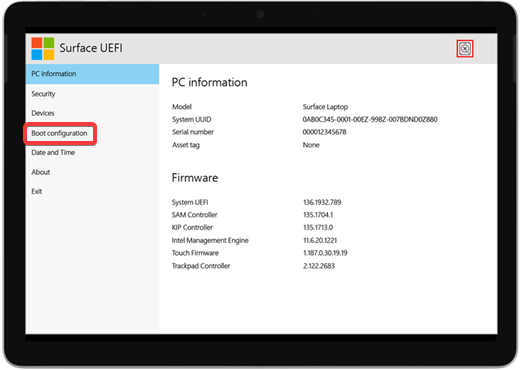
- You will get Surface UEFI.
- On Surface Pro UEFI from the left pane, click Boot configuration.
- Select USB Storage, drag it, and place it on top of the list.
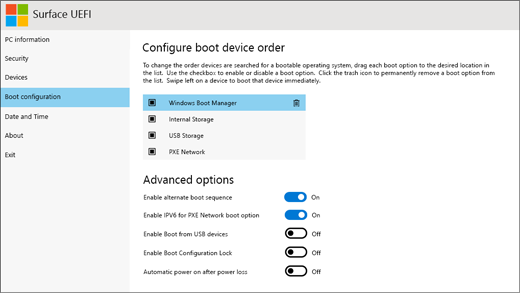
- Click Exit, then Restart Now.
While adjusting UEFI boot settings, it is useful to confirm your exact device model. Here is a quick guide on how to tell what version of Surface Pro you have so that boot configuration steps match correctly.
You can access more startup options on your device by following this guide on how to get to the Surface Pro boot menu for clear steps.
3. Format USB as a bootable drive
- Take a USB drive (at least 16 GB) and plug it into your Surface Pro’s USB slot.
- Press the Windows key and type CMD and click Run as Administrator.
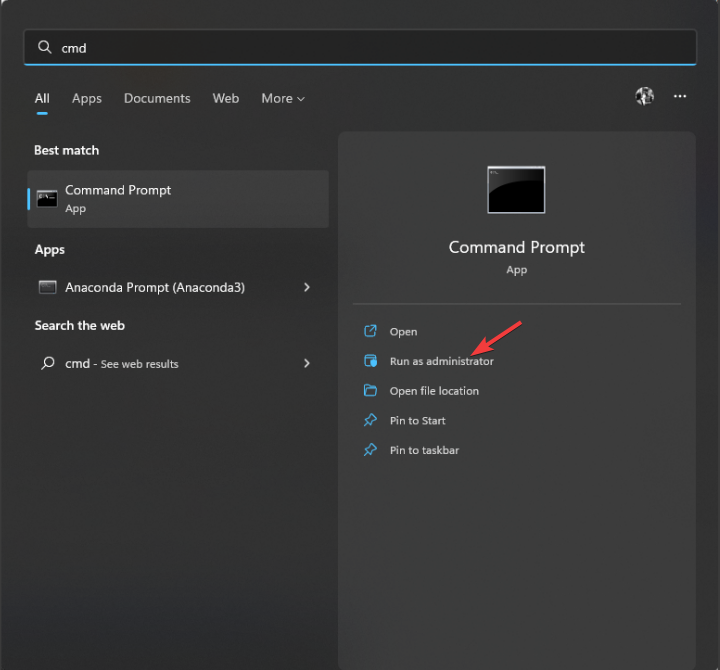
- On the Command Prompt, type the command mentioned below and hit Enter :
diskpart - Next, paste the command mentioned below and hit Enter. This will show you all the disks on the computer.
list disk - Type the following command and hit Enter (where X is the drive letter or number assigned to the USB drive).
select disk X - Type the following commands and press Enter after each of them:
cleancreate part priselect part 1format fs = fat32 quickactive
FAQ
Shut down the Surface, press and hold Volume Down, tap Power, and keep holding Volume Down until the Surface logo appears.
Create the USB using FAT32, use a properly made bootable image, and plug it into the Surface’s USB port before powering on.
Hold Volume Up, tap Power, and keep holding Volume Up to open UEFI. You can change boot order or enable USB boot here.
Secure Boot blocks unsigned images. Open UEFI, go to Security, and turn off Secure Boot so the Surface can load external boot media.
That’s it. This is how you can make your Surface Pro boot from a USB drive. Try these steps and let us know in the comments section below if the methods worked for you.
Once Windows loads again, learn how to use Surface Pen to write text for faster input and note taking.
Read our disclosure page to find out how can you help Windows Report sustain the editorial team. Read more


Improve this guide


User forum
0 messages