How to Stop Windows 11 From Using So Much Data
Goodbye to inflated data bills and hello to data savings!
Key notes
- Windows 11 has a lot of features that are designed to use data, such as automatic Windows updates.
- If you're not on an unlimited data plan, the bill can be extremely high, so we found ways to limit excess usage.
- Keep reading to find out what is eating up your data and how to stop it.
Like an overzealous vacuum cleaner, your Windows 11 system seems to be gulping a lot of data for no good reason. You realize you can’t put up with it silently. Granted, the OS came with new features, so it can not consume the same amount of data as its predecessors.
Still, you shouldn’t be a slave to data purchases as frequently. To help you out, we’ve come up with a few ways to stretch over your data to serve you a little bit longer.
Why is Windows 11 system using so much data? It’s no secret that the OS is a data hog. From automatic app updates to background programs, you’ll be lucky to have any data left if you’re on a limited plan.
Another reason is the various Windows 11 customizations you’ve made. Sure, the themes and wallpapers make an aesthetically pleasing UI, but they come at a cost.
How do I stop Windows 11 from consuming so much data?
1. Enforce data limits
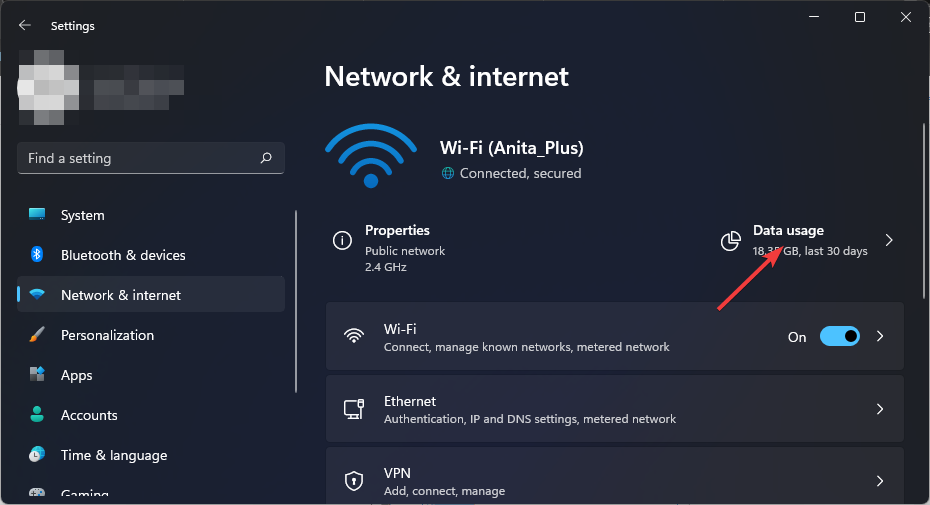
- Hit the Windows key and select Settings.

- Click on Network & internet on the left pane.
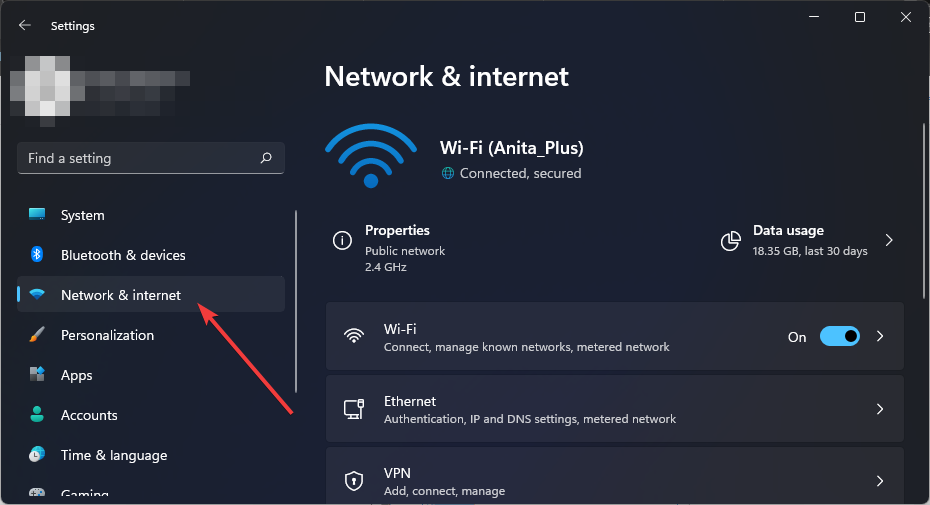
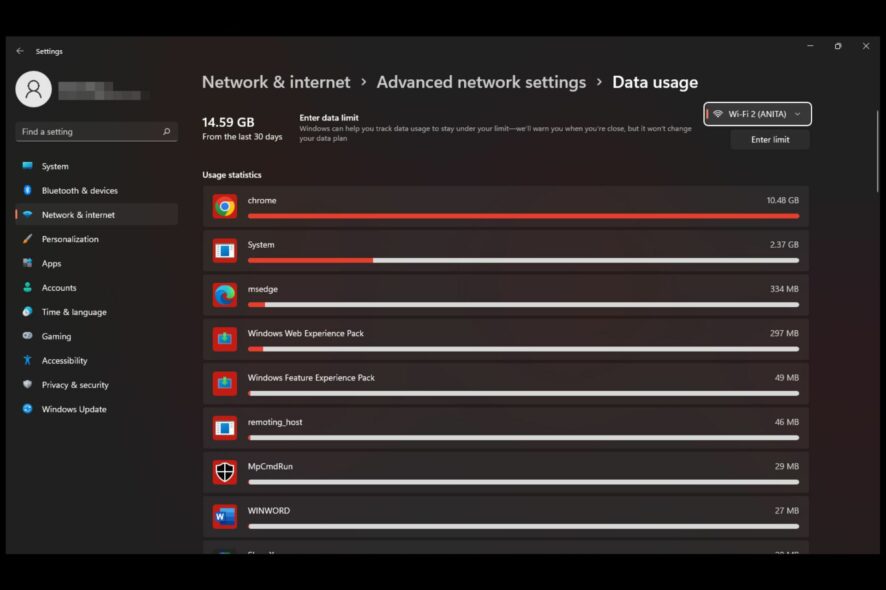
- On your current Wi-Fi connection, click on Data usage.
- Select Enter limit.
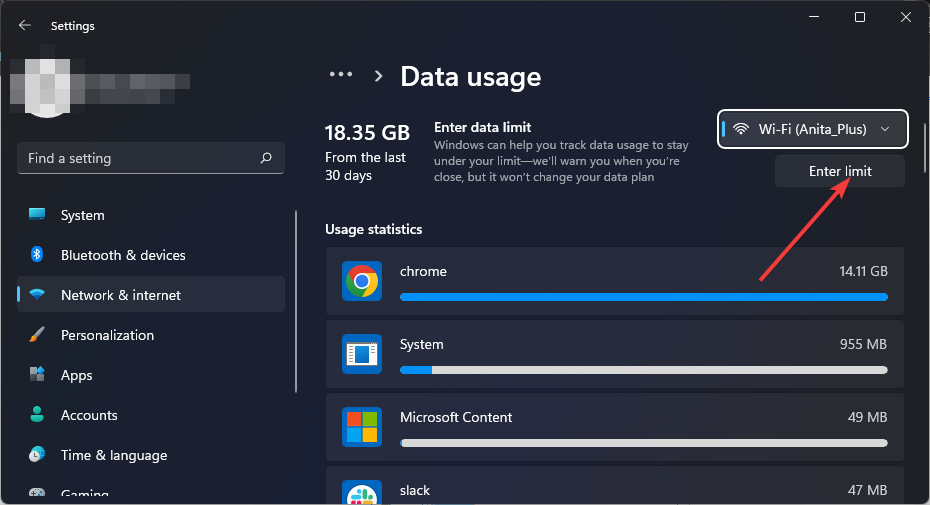
- Set the limit type, from the choices ranging from Monthly to unlimited.
- Choose the date for the data to be reset every month from the drop-down menu under Monthly reset date.
- Now input the data limit and choose whether to limit in MB or GB and finally, click on Save.
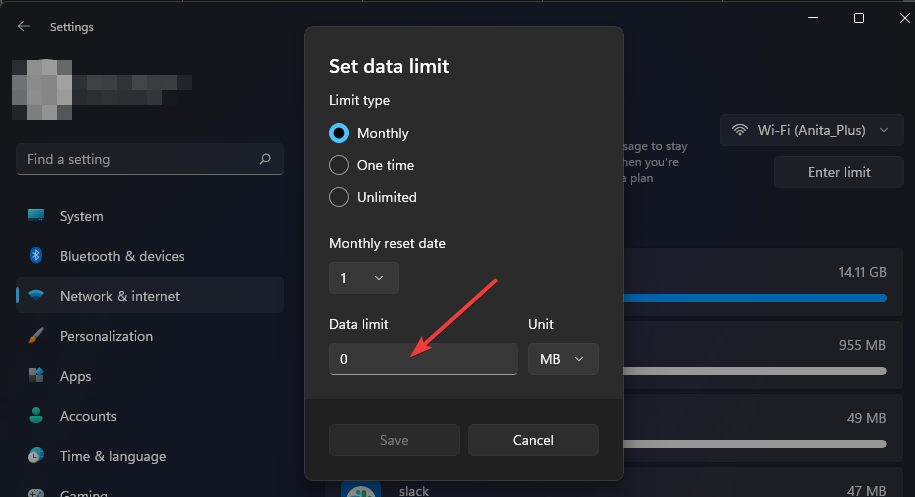
Be careful not to set this limit too low, as this may interfere with how certain apps work. For instance, users who set data usage limits on their Teams app disabled incoming videos.
For more ways to limit your bandwidth in Windows 11, check out our comprehensive article.
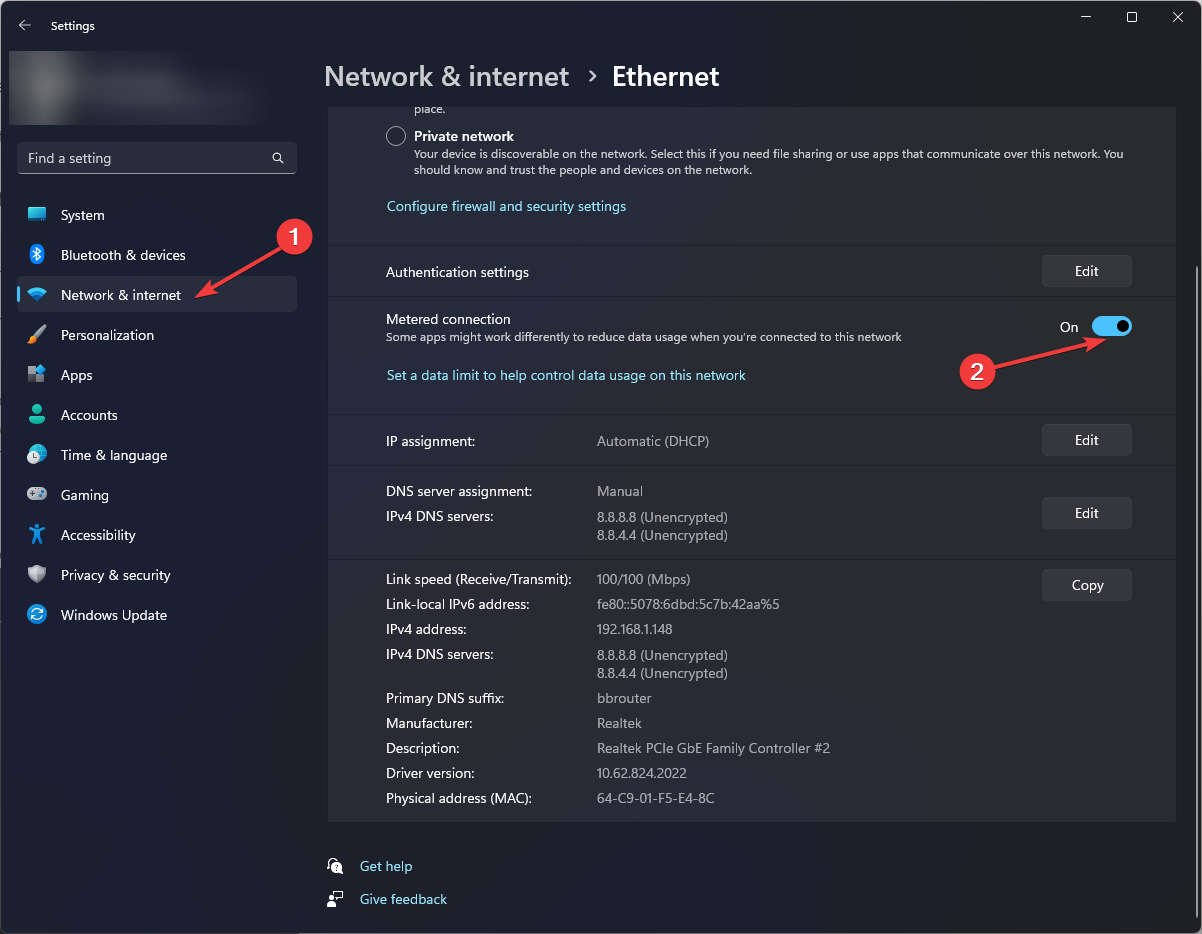
2. Set up a metered connection
- Hit the Windows key and select Settings.
- Go to Network & Internet.
- Select the WiFi or Ethernet, depending on the connection you want to set as metered.
- Click the network and toggle on the switch for Metered connection.
3. Pause Windows updates
- Hit the Windows key and select Settings.
- Navigate to Windows Update.
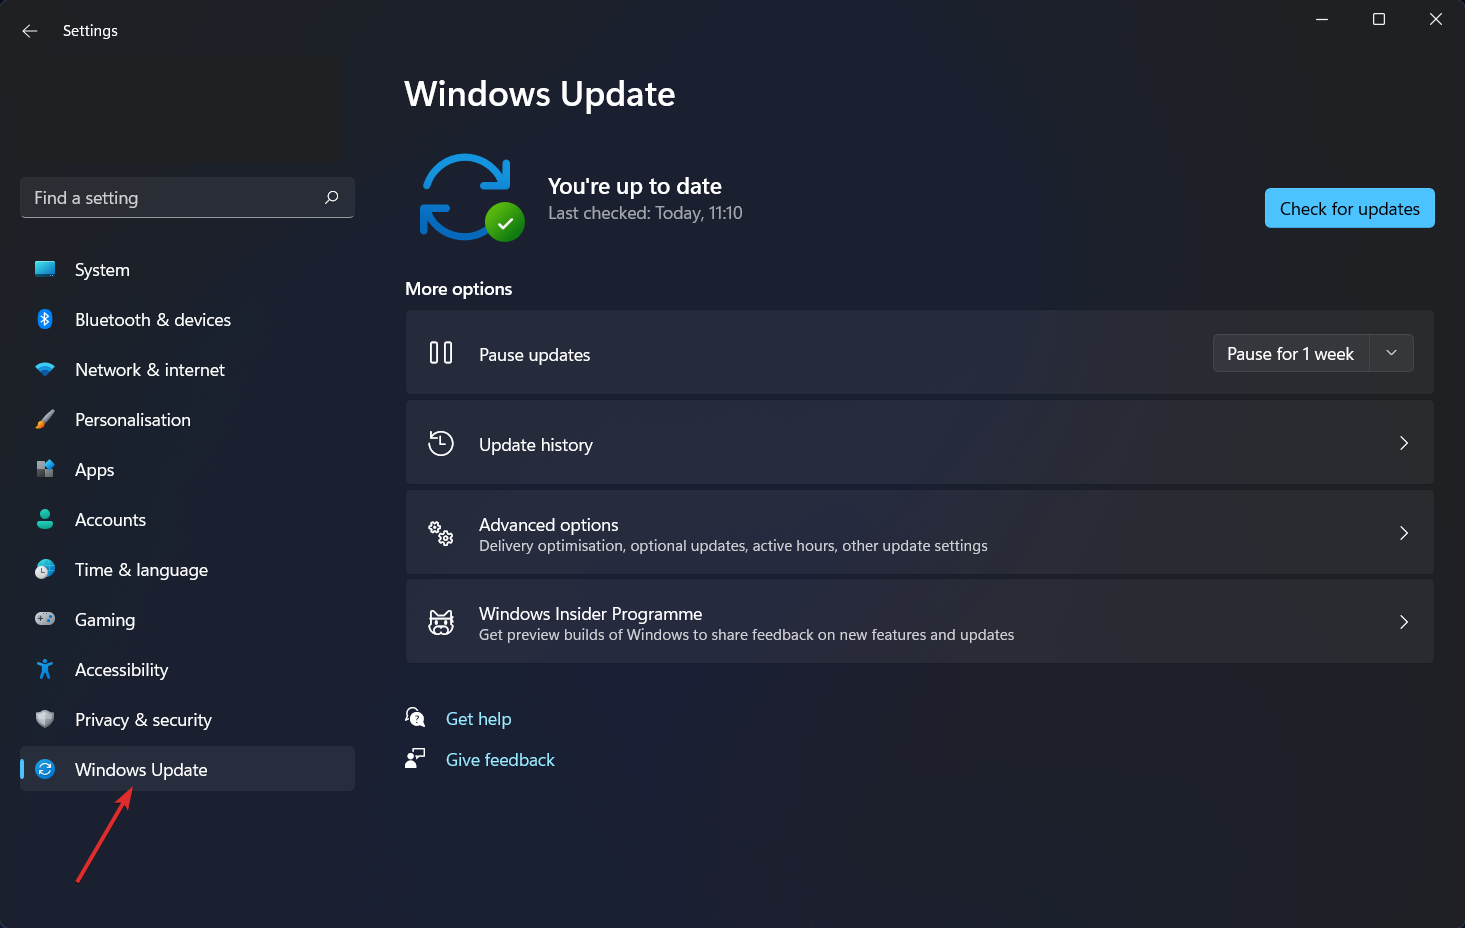
- Click on the drop-down arrow next to Pause updates and select a desired period during which your OS won’t update itself.
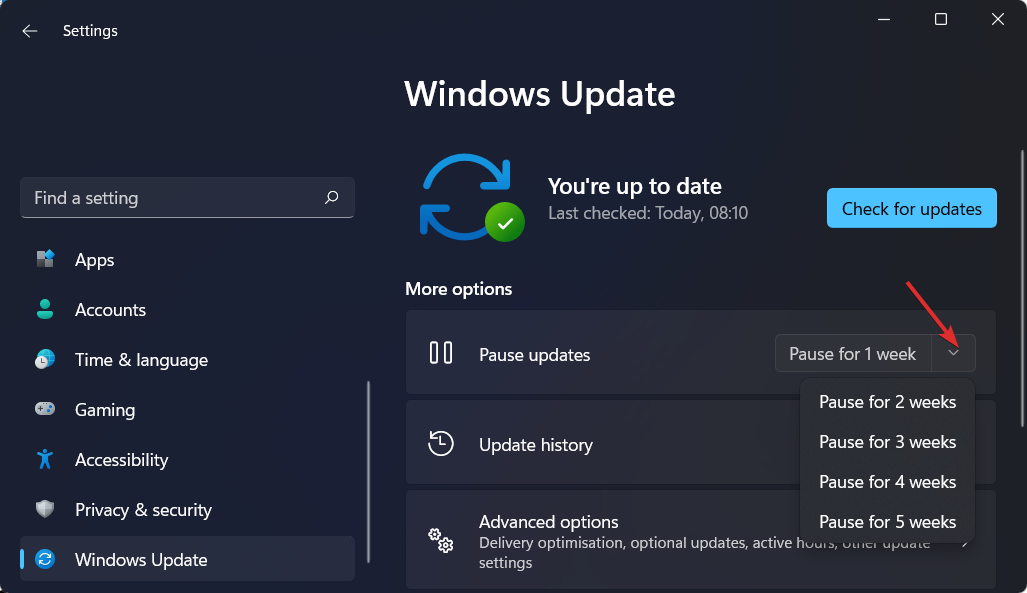
Remember that there are risks associated with not updating your OS regularly, so ensure you manually check for updates to keep your system safe.
4. Disable startup apps
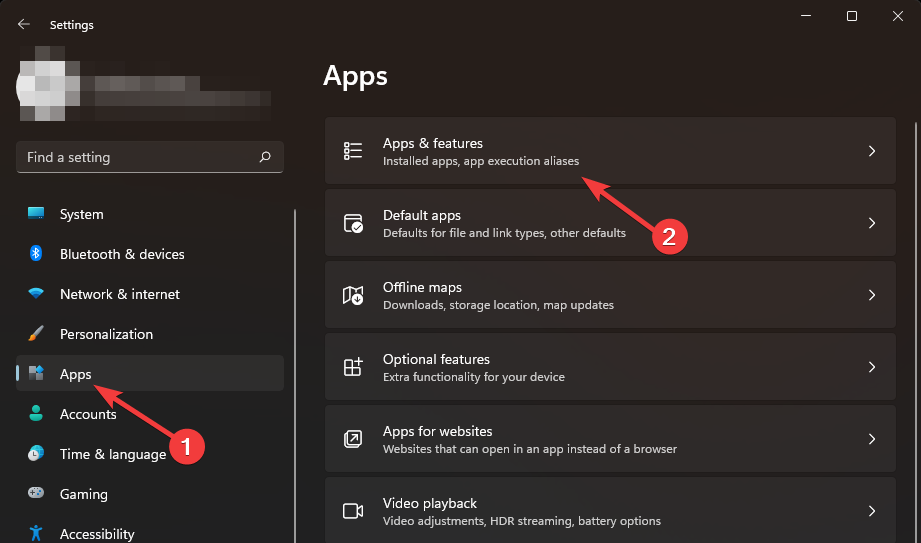
- Hit the Windows key and click on Settings.
- Click on Apps on the left pane then select Apps & features.
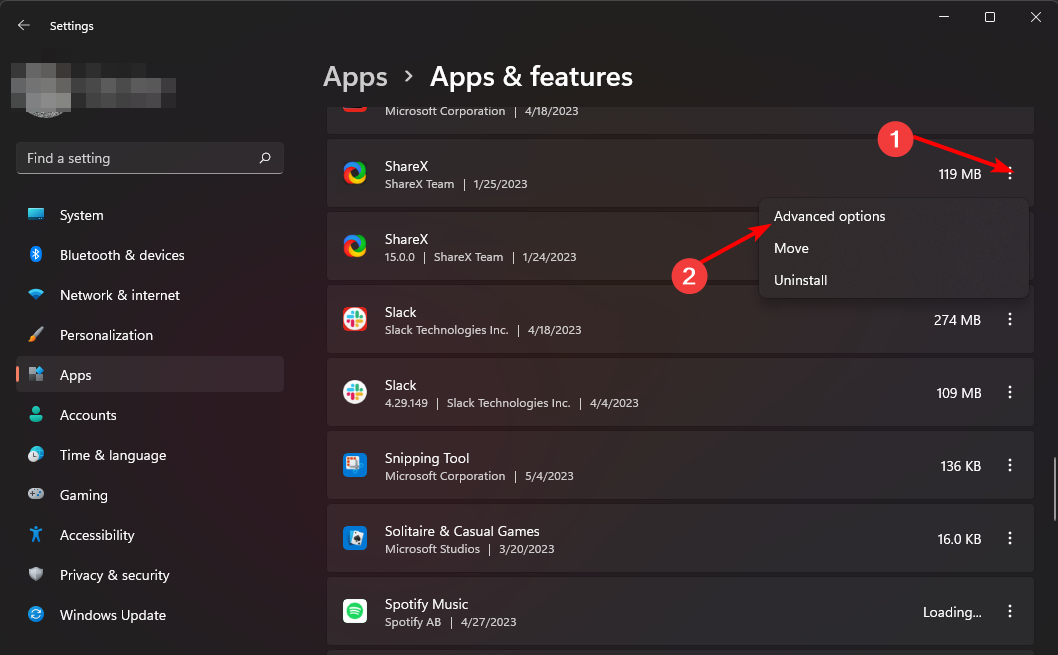
- Examine the list and find the apps you want to disable on Startup.
- Click on the three ellipses of the select app and click on Advanced options.
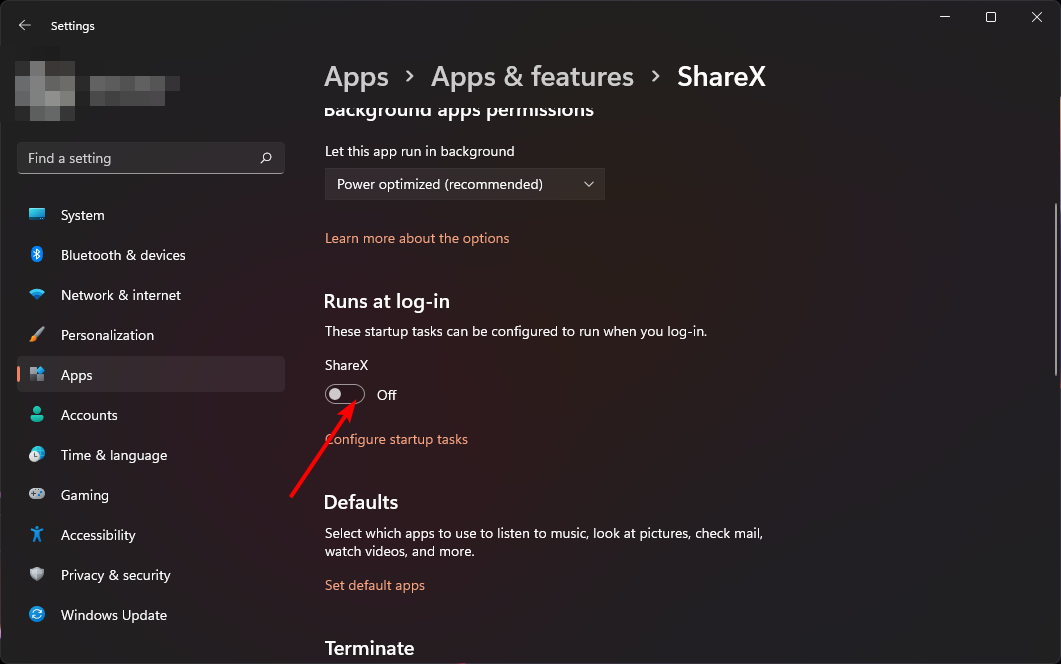
- Under Runs at log-in option, toggle the Off button to disable and back on to enable.
5. Turn off background apps
- Hit the Windows key and click on Settings.
- Click on Apps on the left pane then select Apps & features.
- Search for the app you want to disable, click on the three ellipses next to the app, and select Advanced options.
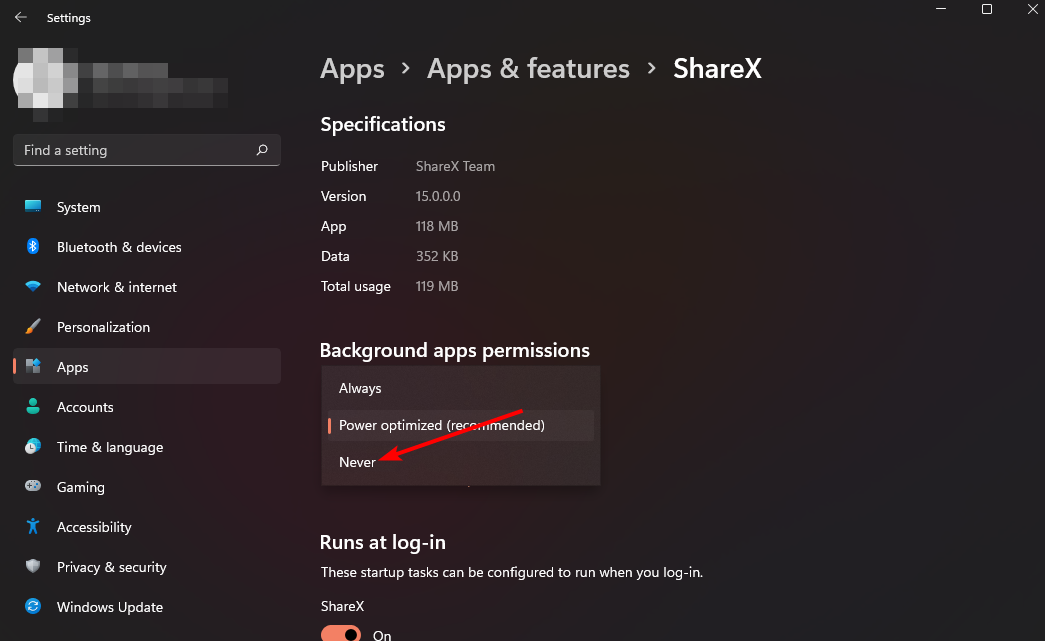
- Navigate to the Background apps permissions section.
- Under Let this app run in the background, choose the Never option.
- Repeat the same steps for each background app you need to disable.
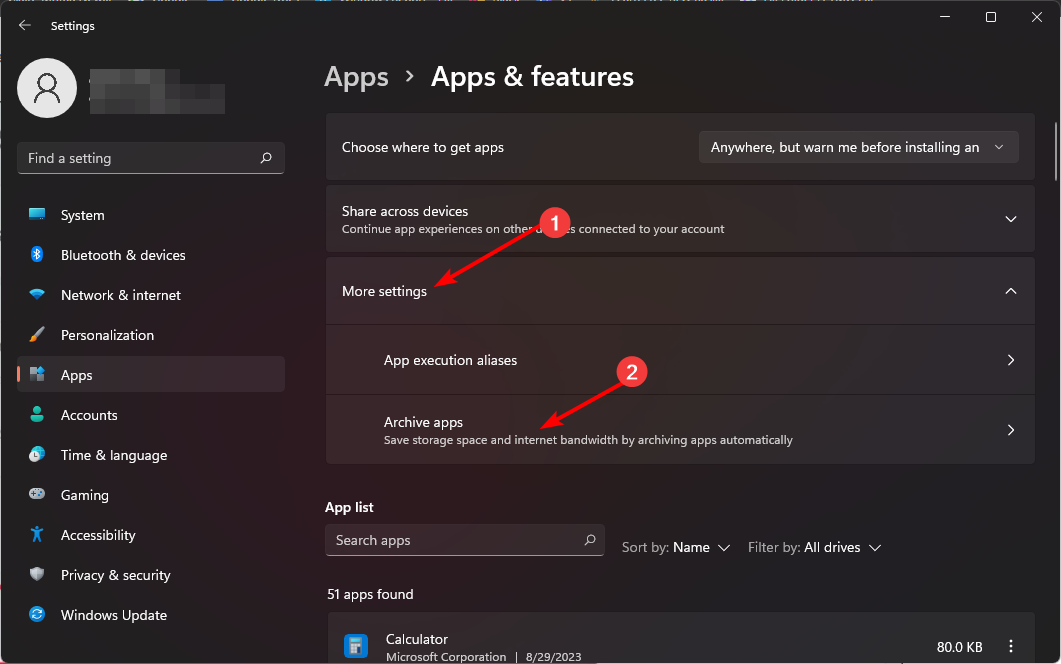
6. Archive non-essential programs
- Hit the Windows key and click on Settings.
- Click on Apps on the left pane, then select Apps & features.
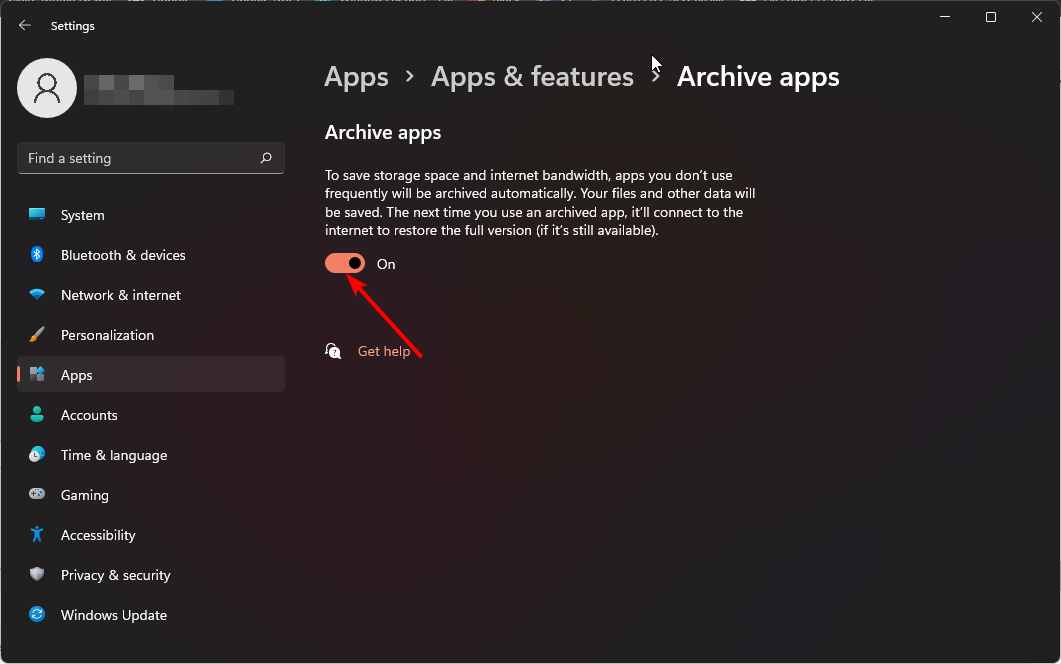
- Select More settings then click on Archive apps.
- Toggle on the Archive apps button.
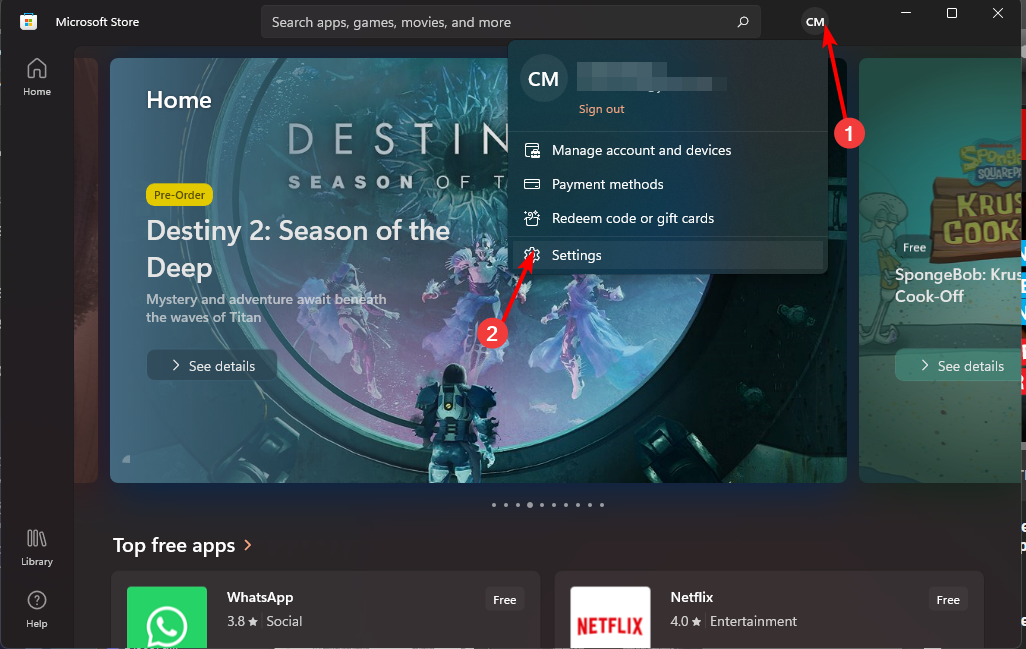
7. Turn off automatic app updates
- Launch the Microsoft Store from your taskbar or from Search.
- Click on your Profile picture and select Settings.
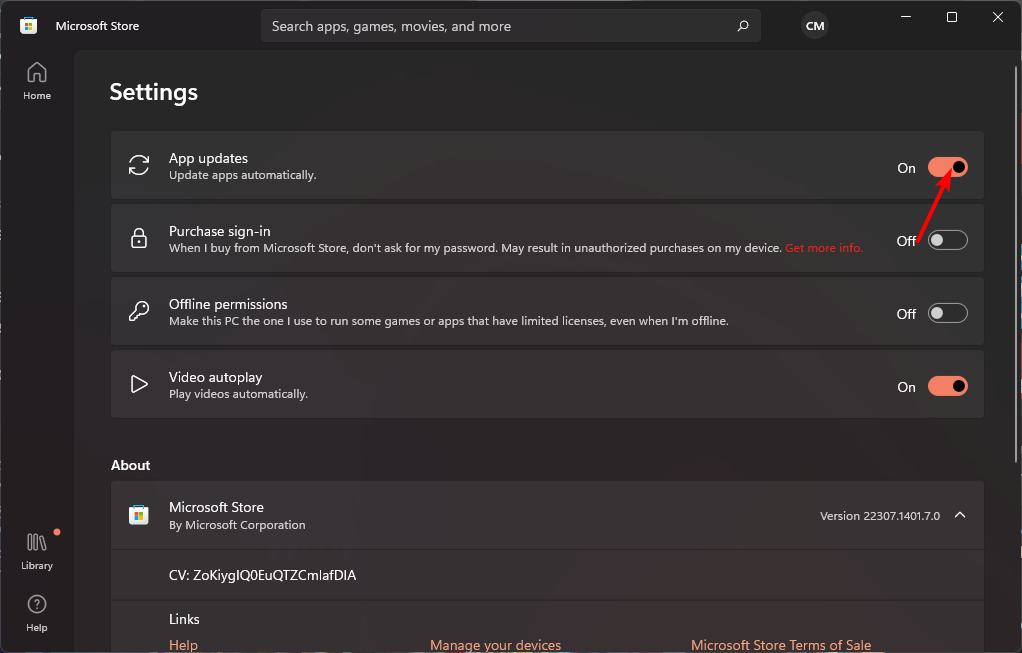
- Toggle off Automatic app updates.
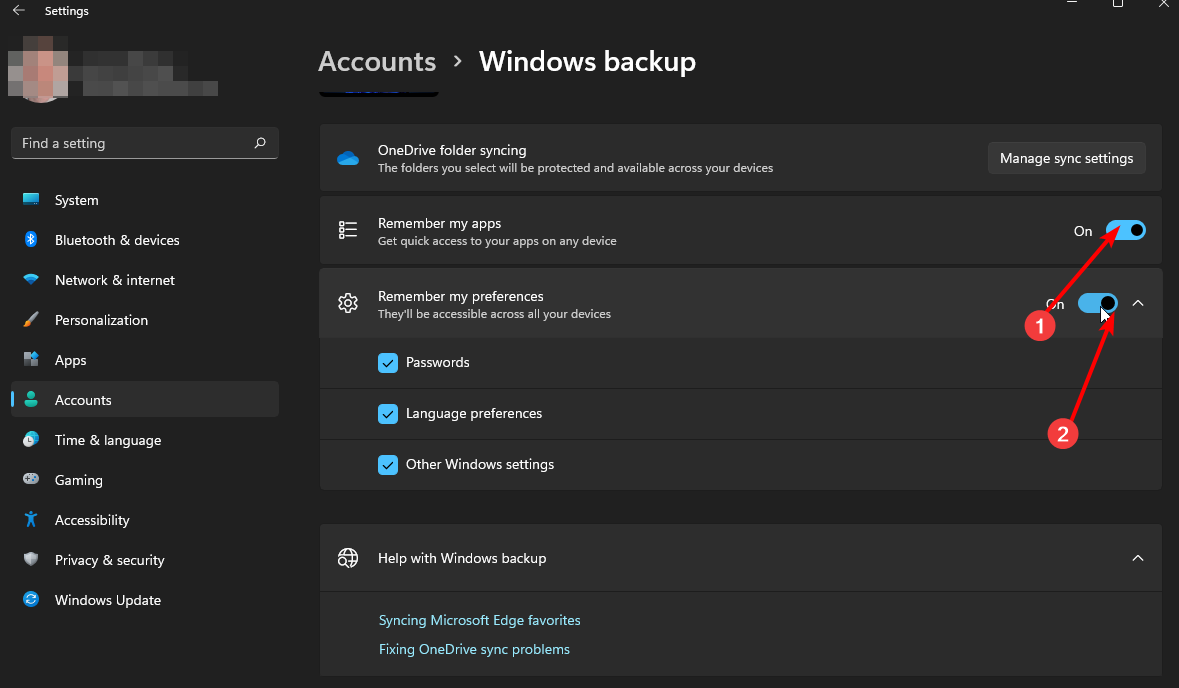
8. Disable automatic syncing
- Hit the Windows key and click on Settings.
- Click on Accounts, then select Windows backup.
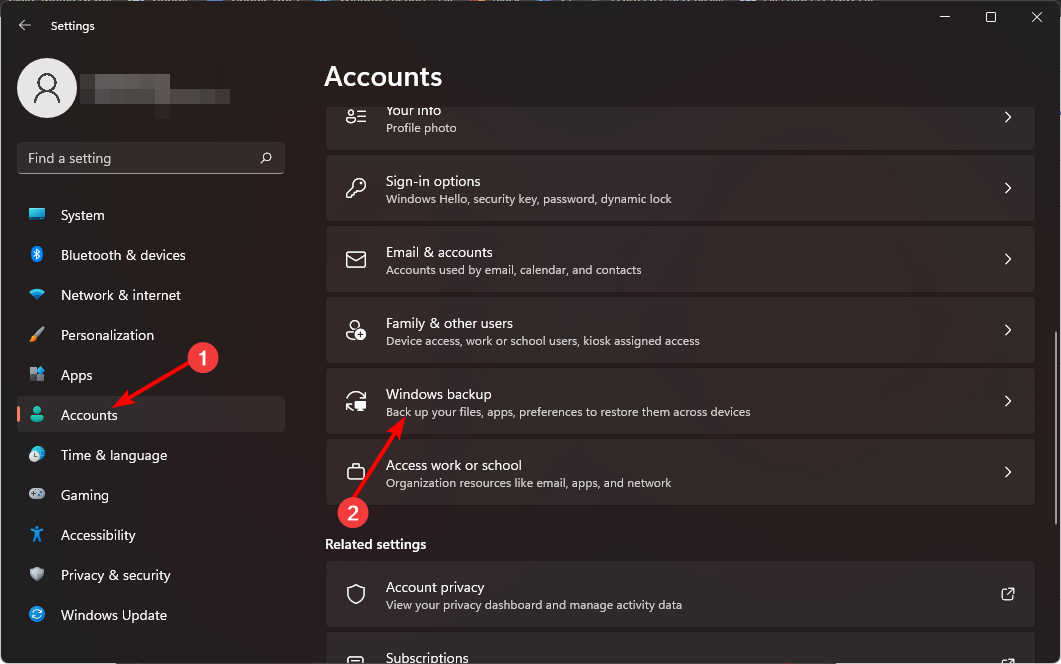
- Toggle off Remember my apps and Remember my preferences options to disable automatic sync.
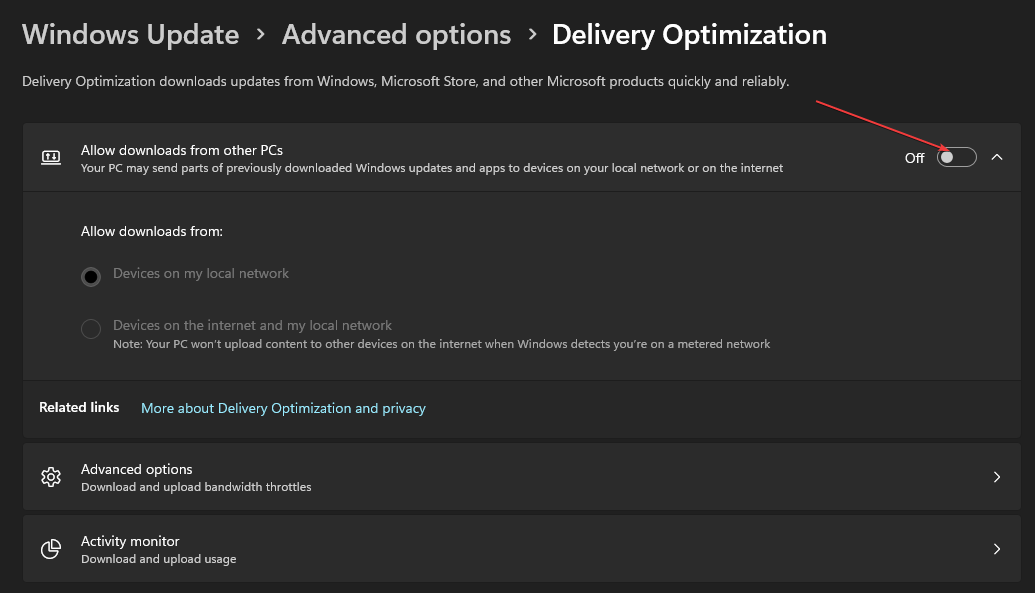
9. Disable the Delivery Optimization service
- Press the Windows + I key to open the Settings app.
- Select the Windows Update option from the left pane of the screen, and click the Advanced Options button.
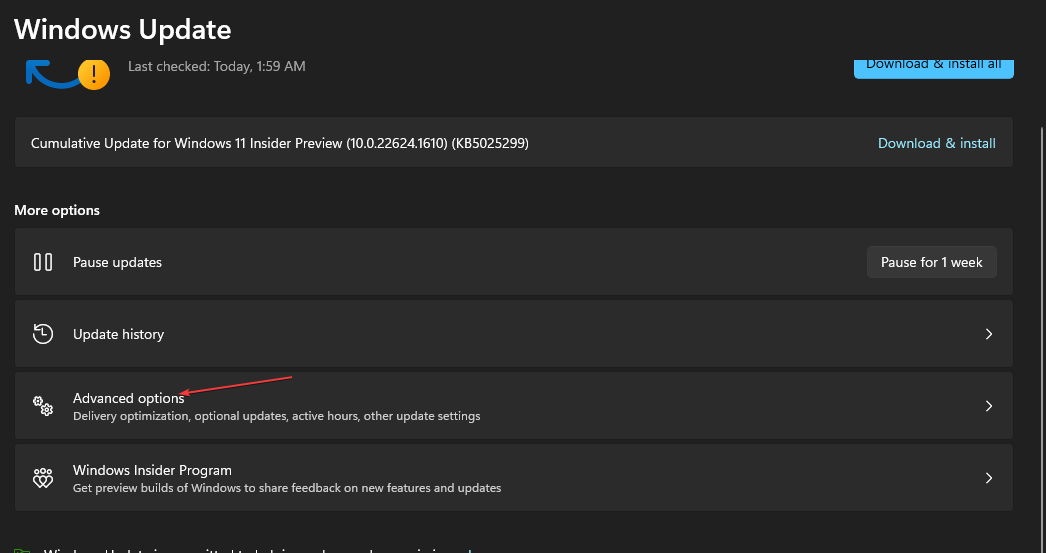
- Scroll down to the Addition options section, and click the Delivery Optimization button.
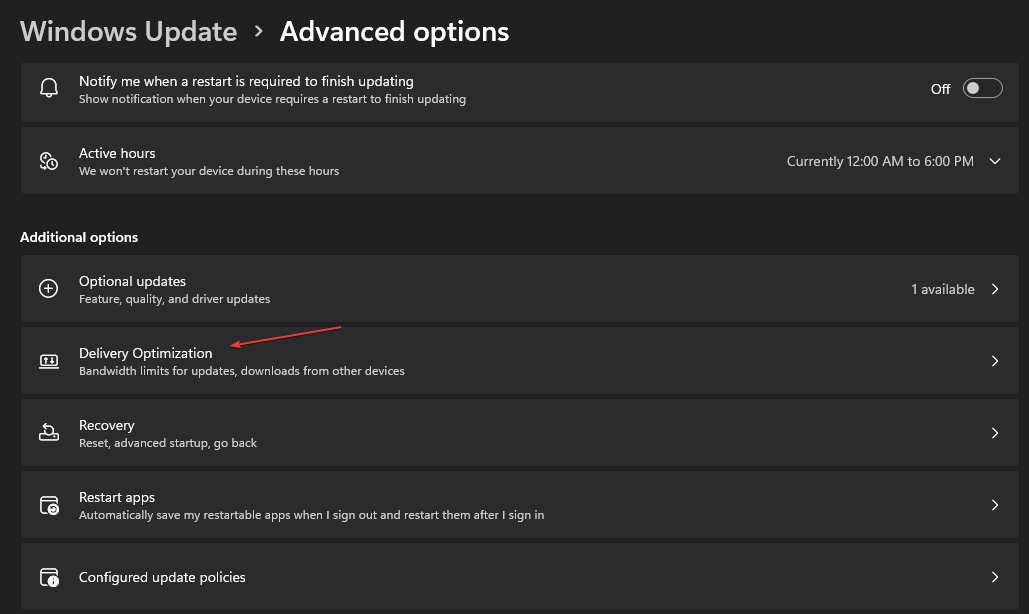
- Go to the Allow downloads from other PCs option and toggle off the switch.
What are some tips for optimizing data usage on Windows 11?
- Limit your background processes to a minimum. Check out how many processes you should have at any given time.
- Switch to data-efficient browsers and download updates only when connected to Wi-Fi.
- Uninstall apps you don’t use anymore.
- Turn off auto-play videos on streaming sites.
- Download bandwidth limiter tools to enforce usage limits, monitor your network traffic, and automatically restrict it when you exceed the set limits.
The problem of your system using too much data can be detrimental to your overall browsing experience. You may encounter a slow internet connection because too many apps and services are competing for limited bandwidth.
As you can see, with some quick configuration changes on your Windows computer and frequent data usage monitoring, you should be able to handle any potential bandwidth issues that may come up.
If you’ve been worried about data usage being notably higher after upgrading to Windows 11, things should return to normalcy with these adjustments.
How are you managing your system’s data needs? Are there any additional tips you have up your sleeve? We’d love to hear about them, so leave us a comment down below.
Read our disclosure page to find out how can you help Windows Report sustain the editorial team. Read more


Improve this guide


User forum
0 messages