FIX: This Theme cannot be applied to the desktop
2 min. read
Updated on
Read our disclosure page to find out how can you help Windows Report sustain the editorial team Read more
Those of you that are fans of customizing your desktop are probably used to frequently changing your themes, wallpapers etc.
However, at some point you may be greeted with an error that prevents you from doing so.
This error is usually labeled: This Theme cannot be applied to the desktop Windows 10.
While not a system breaker at all, it can be quite annoying.
What prevents you from applying desktop themes?
These are the most common reasons why you may be encountering this error:
- Syncing themes across multiple accounts
- Themes or Desktop Window Manager services may not be running properly
- The Remove background images (where available) option.
What to do if you can’t apply desktop themes
1. Disable Theme Syncing across your accounts
- Press Windows Key + I
- Locate and click on Accounts
- Go to Sync your Settings tab
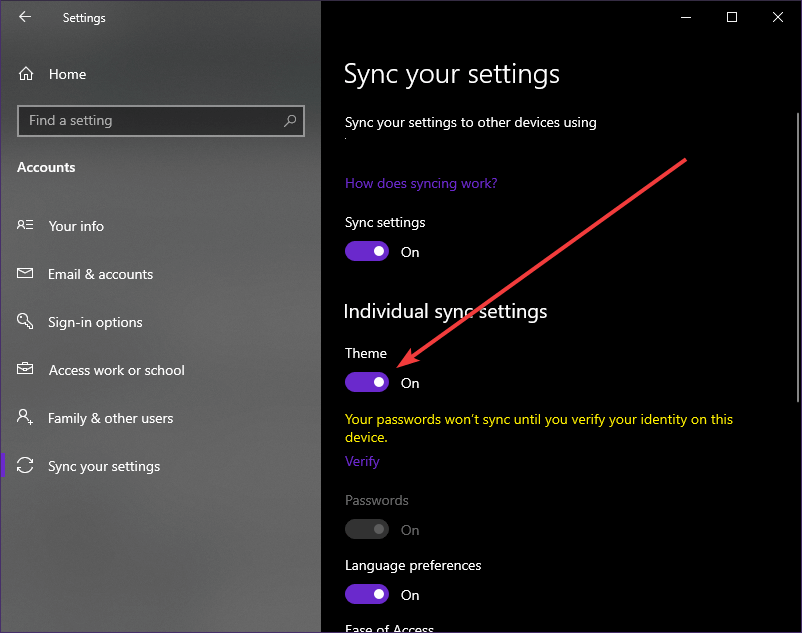
- Check under the individual sync settings section for the entry called Theme
- Drag the slider so that you can disable automatic theme syncing across your accounts
- Restart your PC
2. Be sure that Themes and Desktop Window Manager Services are running
- Press Windows Key + R
- Type control.exe
- Once the Control Panel window opens, click on View by
- Select Large Icons
- Find the Administrative Tools entry
- Find the Themes or the Desktop Window Manager service on the list
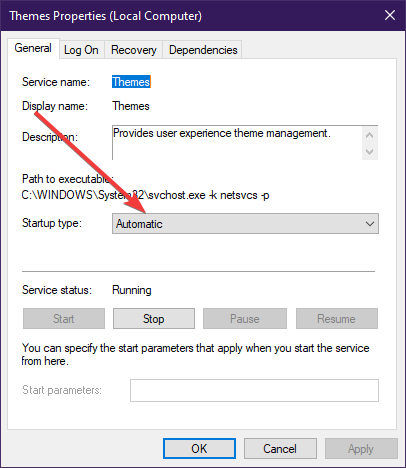
- Right-click it and select Properties
- Set Startup type to Automatic
There is a chance you may receive an error message labeled:
Windows could not start the service on Local Computer. Error 1079: The account specified for this service differs from the account specified for other services running in the same process.
If that is the case:
- Re-do steps 1 to 7 from above
- Go to the Log On tab
- Click on the Browse button
- Type in your account’s name under the Enter the object name to select entry box
- Click OK
- Type in your account’s password into the Password box
3. Uncheck the Remove background images (where available) option
- Press Windows Key + R
- Type control.exe
- Once the Control Panel window opens, click on View by
- Select Category
- Click Ease of Access
- Select Optimize visual display
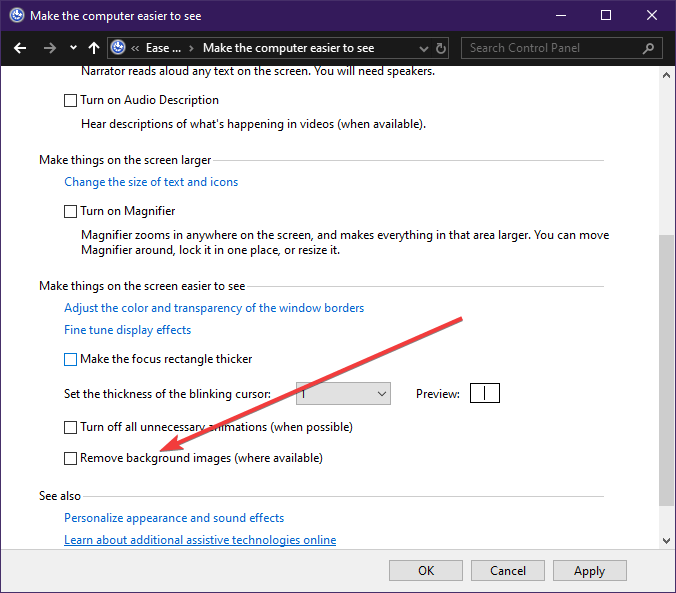
- Uncheck the box next to the Remove background images
- Apply the changes you have made
Follow these steps, you will be able to once again change your PC’s theme, and make it suit your ever-changing taste.

