How to Fix the TTM_FATAL_ERROR on Windows 11?
Make sure the graphics drivers are up to date
5 min. read
Updated on
Read our disclosure page to find out how can you help Windows Report sustain the editorial team. Read more
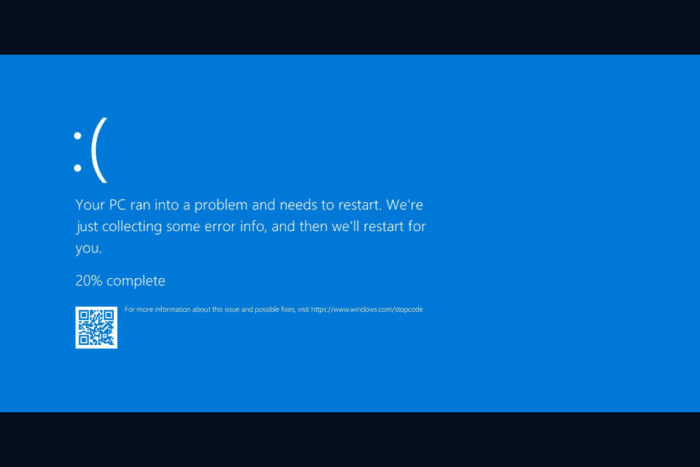
The TTM_FATAL_ERROR bug check with a value of 0x0000019B indicates that the Terminal Topology Manager, which is responsible for managing display and graphics resources in a system, has encountered a fatal error. This error appears when there are issues with the graphics card or graphics driver or if there is a conflict within the display system configuration.
First, check for Windows updates and ensure no updates are pending. Also, make sure your system is not overheating; if it does, clean the dust from your system and check the cooling system. Next, if you have a dedicated graphics card, test it on another device.
How can I fix the TTM_FATAL_ERROR on Windows 11?
1. Update the graphics driver
- Press Windows + R to open the Run console.
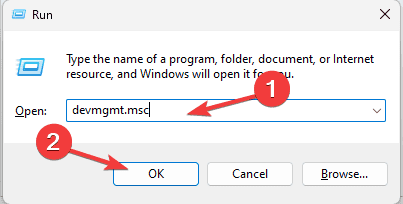
- Type devmgmt.msc and click OK to open the Device Manager app.
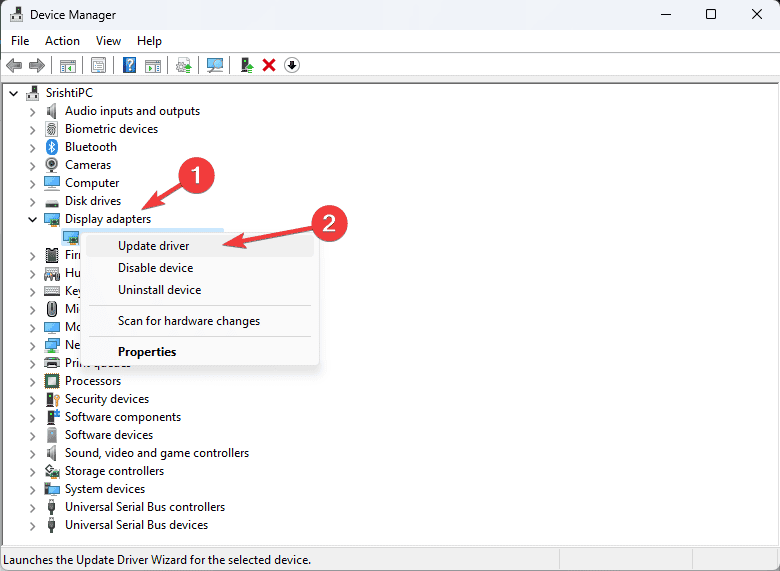
- From the list of system components, look for Display adapters and click it to expand.
- Right-click the graphics driver and select Update driver from the context menu.
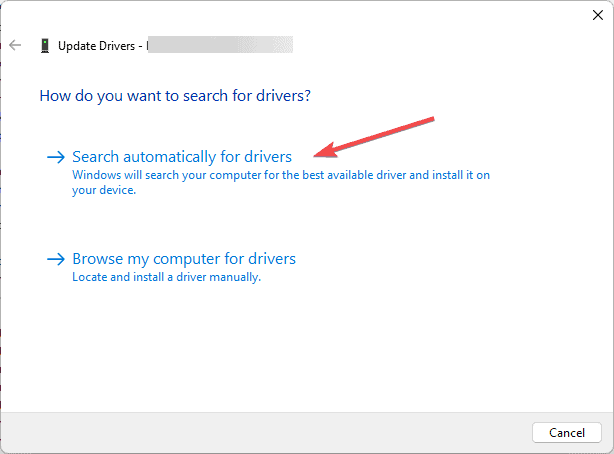
- Click Search automatically for drivers and follow the on-screen instructions to complete.
- Restart your computer once done.
If Windows fails to find the correct driver version, you can head to the manufacturer’s website and install the latest version. Alternatively, you can download and install a reliable driver updater tool to ensure that all the system device drivers are up to date.
In case this doesn’t help and you already have the latest version of the driver installed, follow these steps to reinstall the driver:
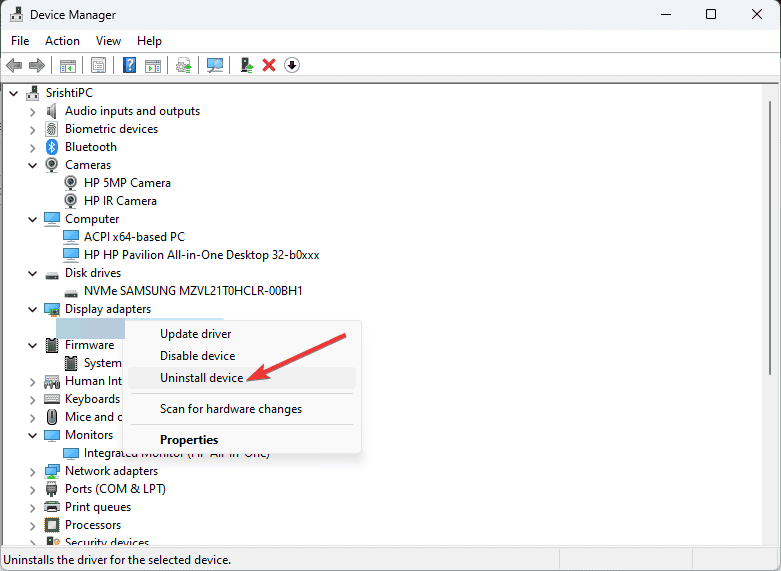
- Relaunch the device manager, click Display adapters to expand, right-click the graphics driver, and select Uninstall device from the context menu.
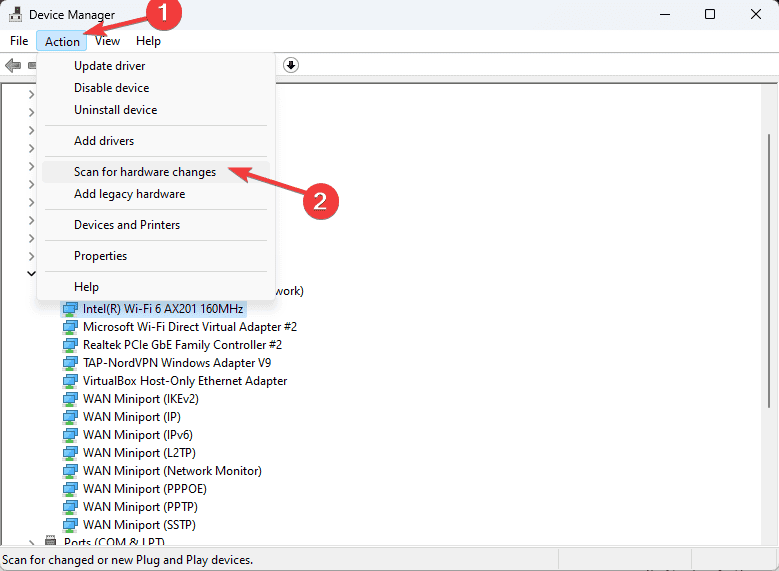
- Once uninstalled, go to Action, then select Scan for hardware changes to reinstall the driver.
2. Run SFC & DISM scans
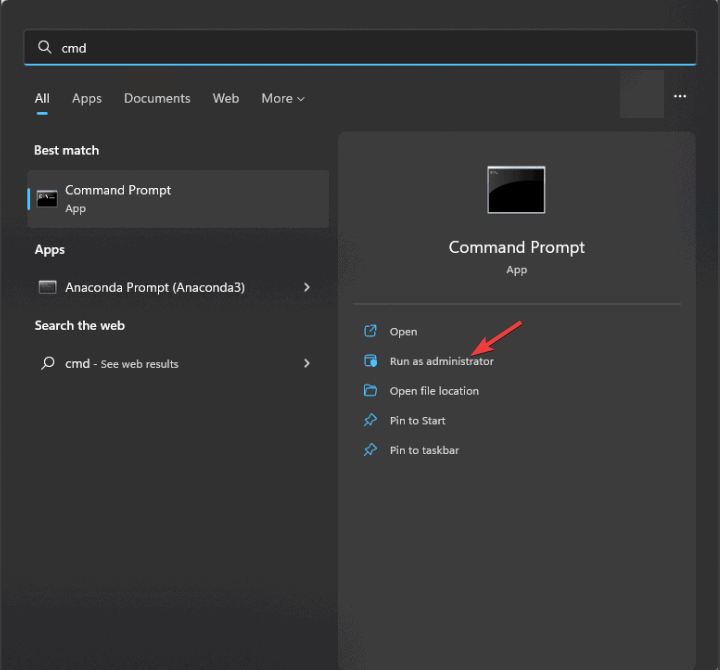
- Press the Windows key, type cmd in the search box, and click Run as administrator to launch the Command Prompt with administrator rights.
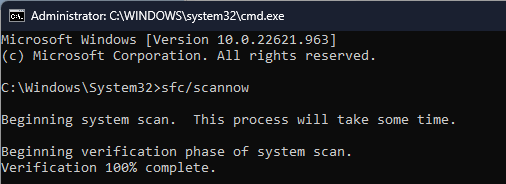
- To scan and repair the damaged system files, copy & paste the following command and hit Enter:
sfc /scannow - Wait for the scan to complete, type the following command to restore the Windows system image via Windows Update, and press Enter:
Dism /Online /Cleanup-Image /RestoreHealth - The scan will take some time; once it is successfully complete, restart your computer to let the changes take effect.
3. Disable the Fast startup option
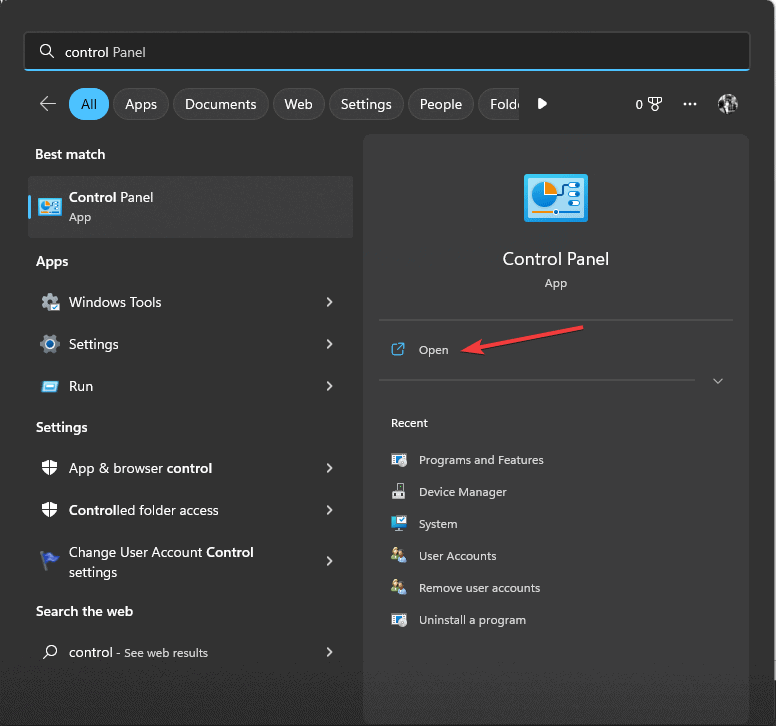
- Press the Windows key, type control panel in the search box, and click Open from the list of options.
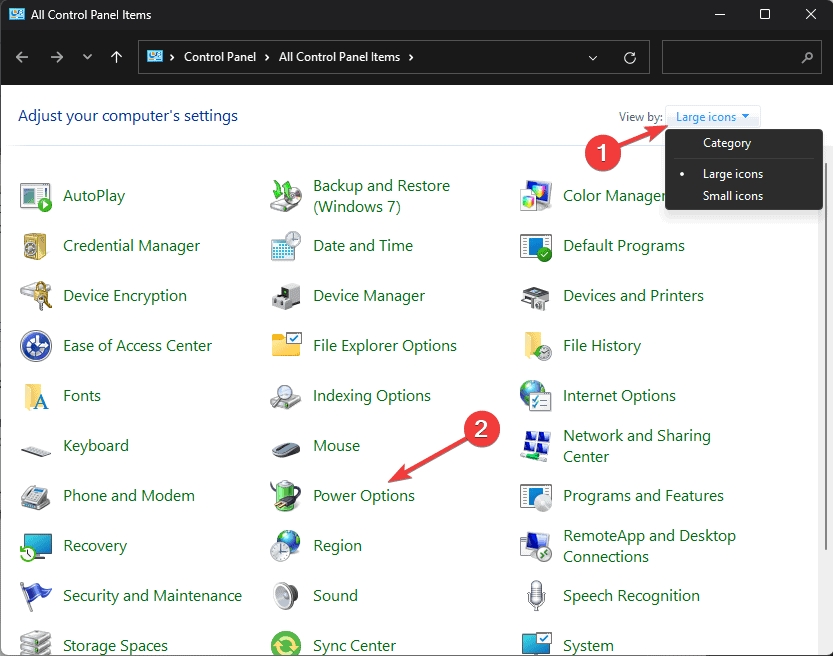
- Select Category for View by and click Power Options.
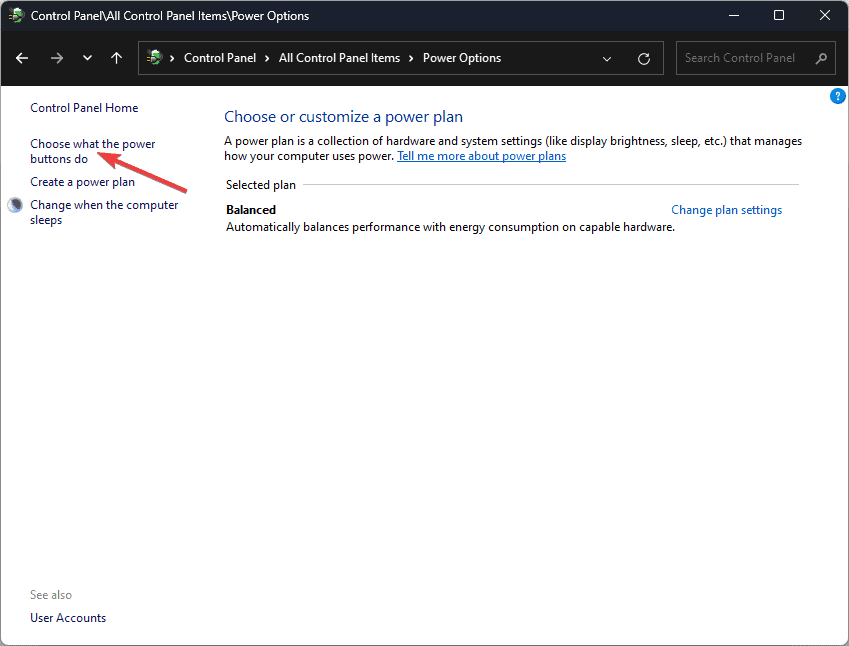
- Click the Choose what the power button does option from the left pane.
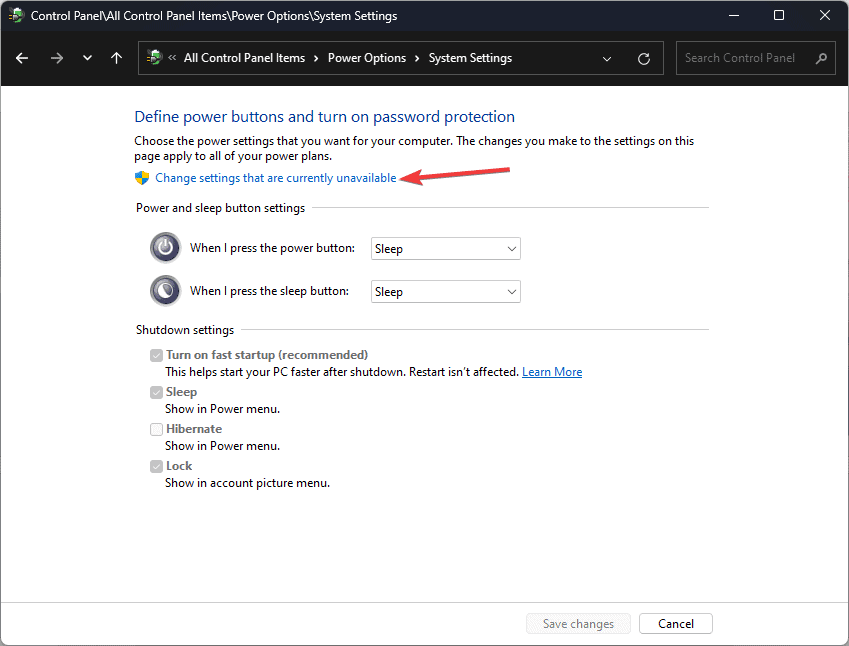
- Click the Change settings that are currently unavailable link.
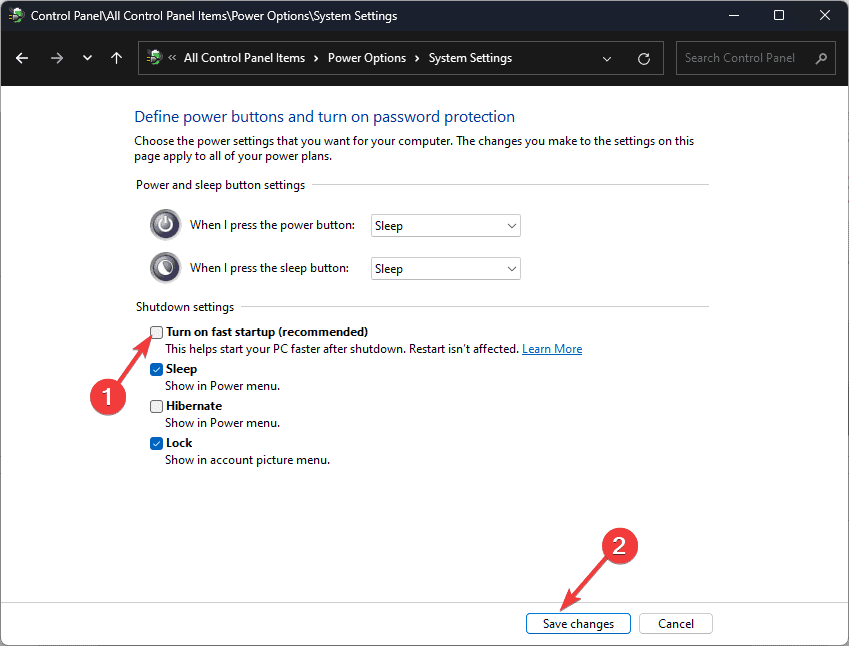
- Now, under Shutdown settings, remove the checkmark next to Turn on fast startup (recommended).
- Click Save changes to confirm the changes.
4. Modify the power settings
- Press Windows + I to open the Settings app.
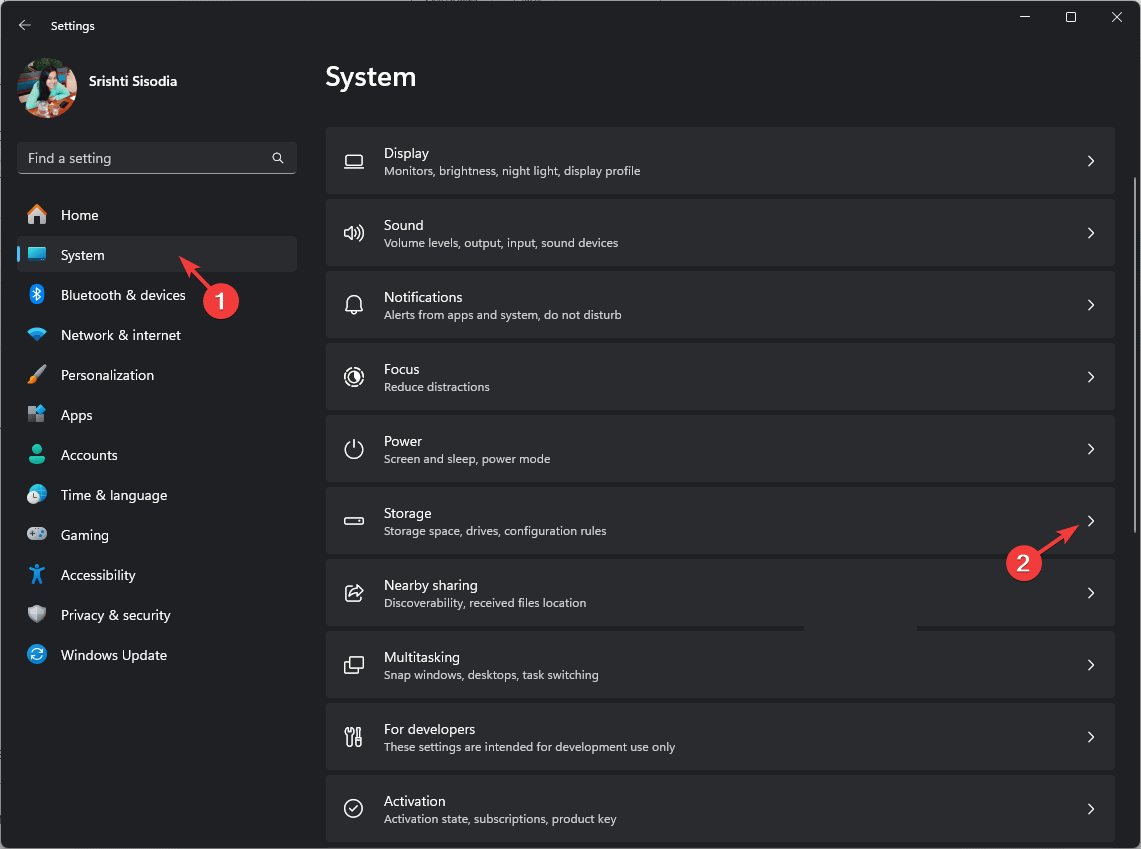
- Go to System, then click Power & battery. (on laptop), or Power (on PC).
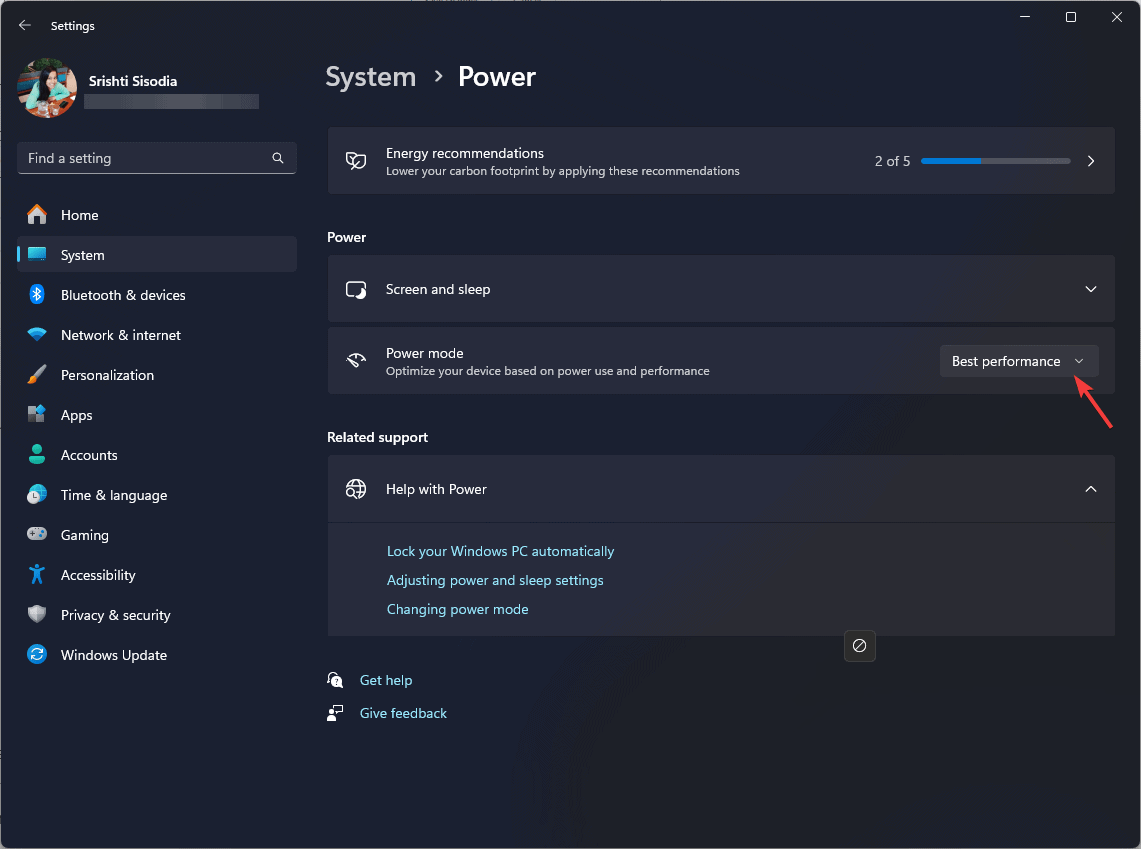
- Under the Power section, look for Power mode, then click the dropdown menu next to it to choose a different power plan.
- Select Best Performance from the dropdown menu for the Plugged-in and On battery options.
5. Restart your computer in a clean boot environment
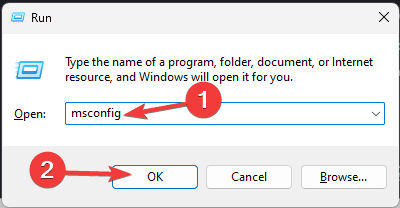
- Press Windows + R to open the Run console.
- Type msconfig and click OK to open the System Configuration window.
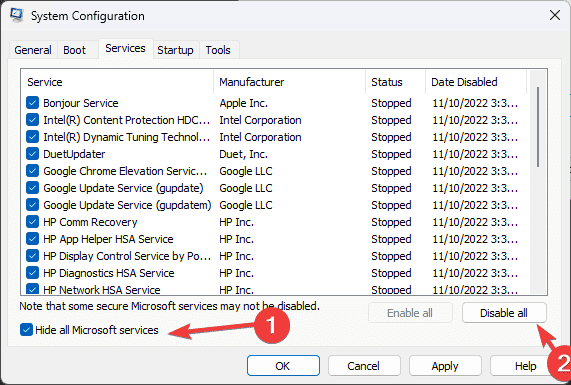
- Go to the Services tab, place a checkmark next to Hide all Microsoft services, and click the Disable all button.
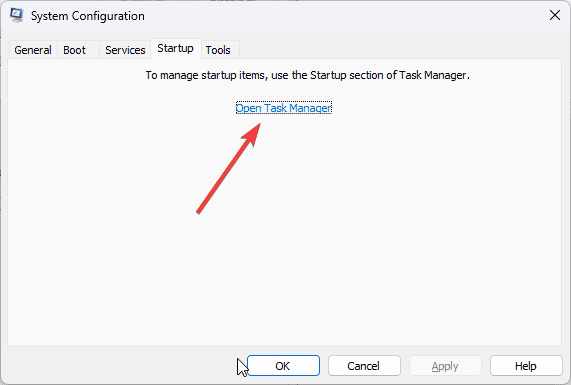
- Switch to the Startup tab, and click the Open the Task Manager link.
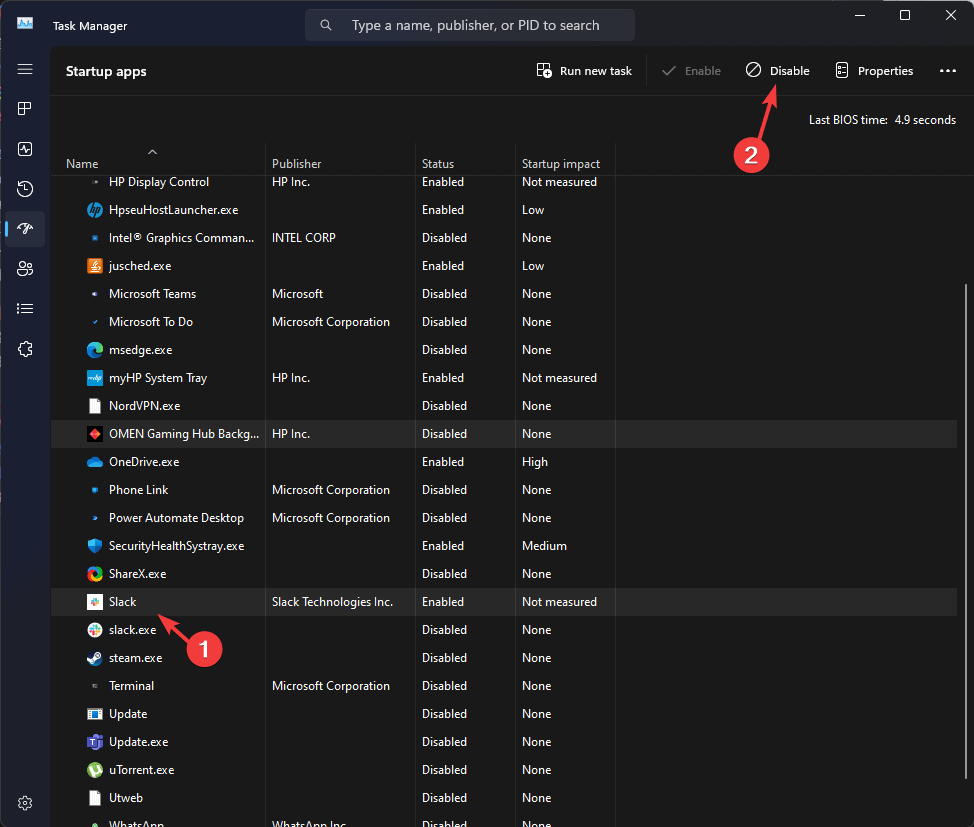
- On the Task Manager window, click each Enabled item one by one and select Disable, then close the window.
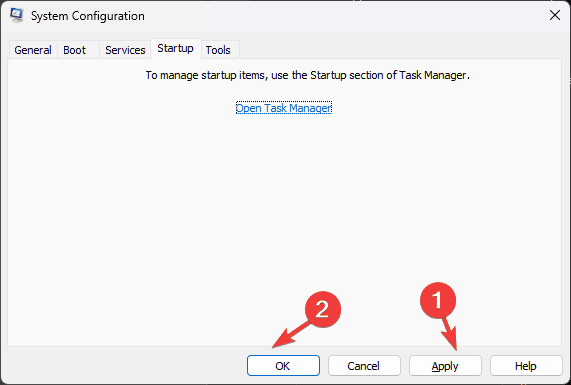
- Back on the System Configuration window, click Apply, then OK.
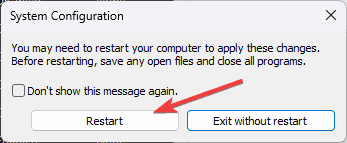
- Click Restart to save the changes.
Once your computer is in clean boot, try enabling these services and startups one by one to narrow down the reason for the TTM_FATAL_ERROR message. If nothing seems to have been causing the issue, reverse engineer the steps to reboot your PC in normal mode.
6. Restore your PC to an older version
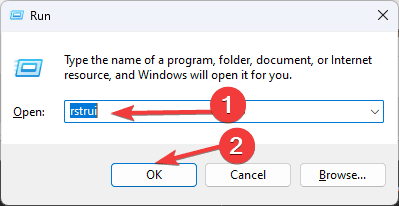
- Press Windows + R to open the Run window.
- Type rstrui and click OK to open the System Restore window.
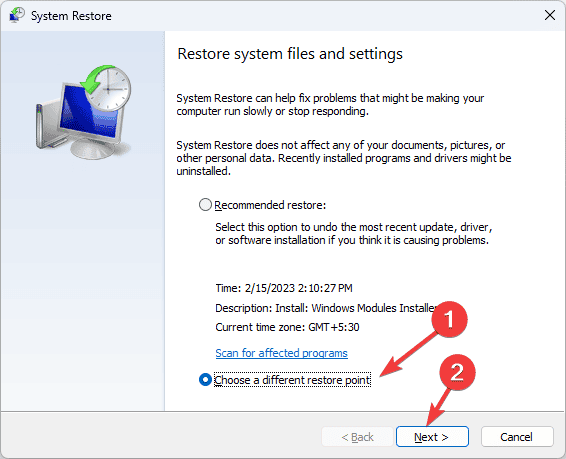
- Select Choose a different restore point and click Next.
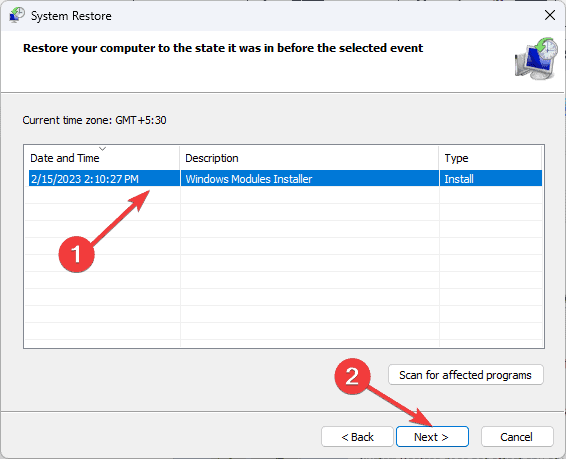
- Choose the oldest restore point from the list or the one created before you encountered the TTM_FATAL_ERROR BSoD error, then click Next.
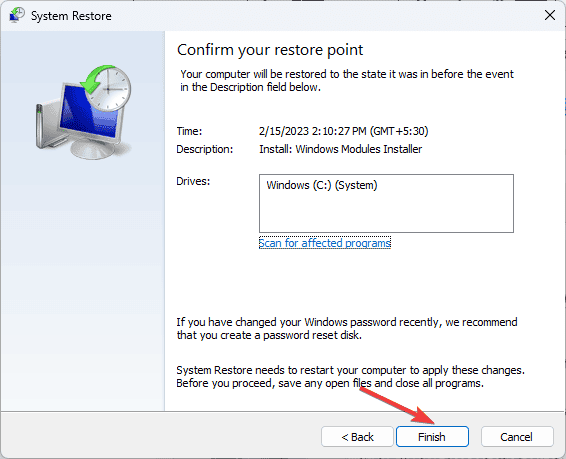
- Click Finish to initiate the process.
Windows will restart and restore your computer to the selected version. If System Restore is not complete, and you see the System Restore is not working message, don’t forget to check out this detailed guide for solutions.
If you don’t have restore points or have disabled the system restore point creation process, you can try resetting your PC. The process will take longer and mostly removes your apps and data from the device, so first, take a backup and proceed.
In conclusion, to fix the TTM_FATAL_ERROR, you need to update or reinstall the graphics driver, run the SFC & DISM scan to repair the corrupted system files, restart your PC in a clean boot environment, disable the fast startup option, or restore your PC to a previous version.
If you encounter BSoD errors way too often, you must know the reasons for their occurrence. Check out this guide for more information. Another error that users have encountered is ERROR_FATAL_APP_EXIT, but we tackled this in another guide.
Did we miss a step that helped you fix this BSoD error? Share it with our readers in the comments section below, and we will add it to the list.



User forum
0 messages