5 Ways to Unlock Your HP Laptop Without the Password
Reset your HP passwords with these simple methods
5 min. read
Updated on
Read our disclosure page to find out how can you help Windows Report sustain the editorial team. Read more
Key notes
- If you have a Windows Password Reset Disk, you can easily reset your HP laptop from the log-in screen.
- To keep your computer from unauthorized access, it is always advised to set a complex password and secure password for your computer.
If you don’t frequently use your laptop or have recently changed your password to a complex one, it’s easy to forget your password. And that’s why you need to know how to unlock an HP laptop without a password.
Forgetting your laptop account password means you won’t be able to log in to your laptop. This presents a significant problem. Keep reading to find out how to regain access to the HP laptop without a password.
Can I unlock an HP laptop without a password?
You can easily unlock your HP laptop if you have forgotten your password with a Windows password reset disk. It is sometimes possible to open a computer without a password, but certain methods might involve resetting the PC completely. This would result in the deletion of apps, settings, and more.
However, there are ways to open your computer even if you’ve forgotten the password without deleting any important files using the Windows installation disk.
How do I unlock my HP laptop if I forgot my password?
1. Reset the password from another admin account
 NOTE
NOTE
- When you are on the login screen, select a different user account with administrator privileges from the list of users, and log in using that account.
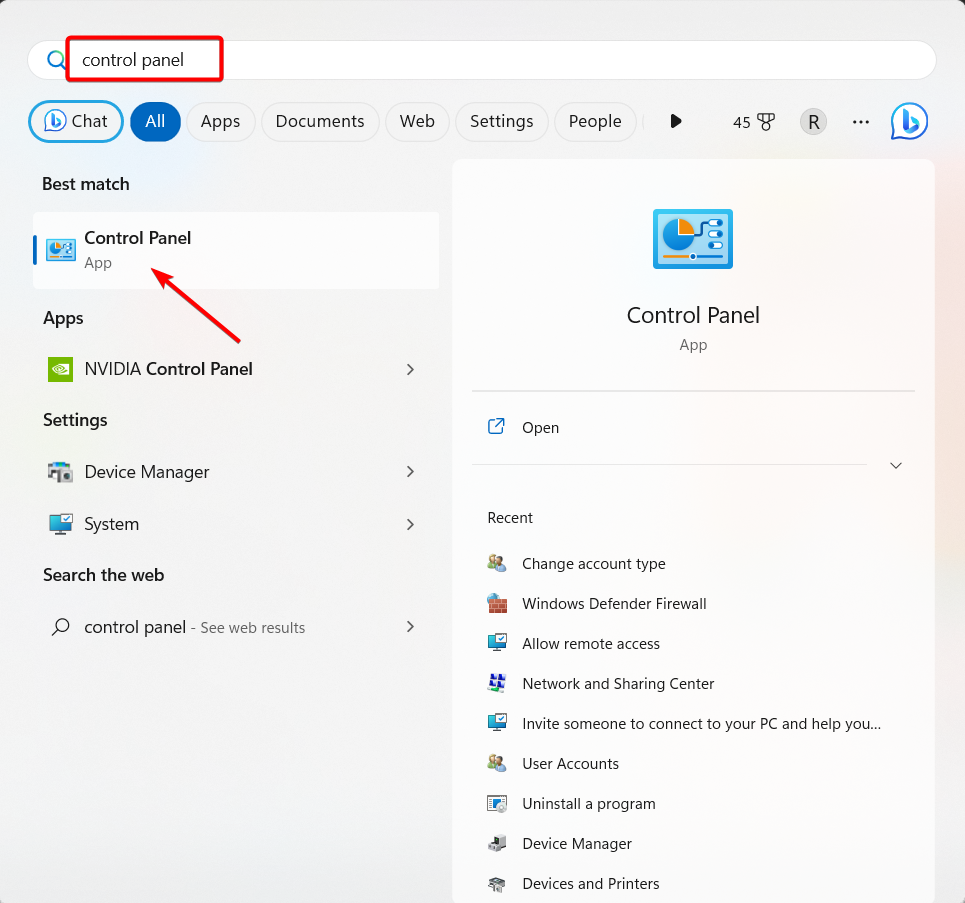
- Press the Windows key, type control panel, and select Control Panel app.
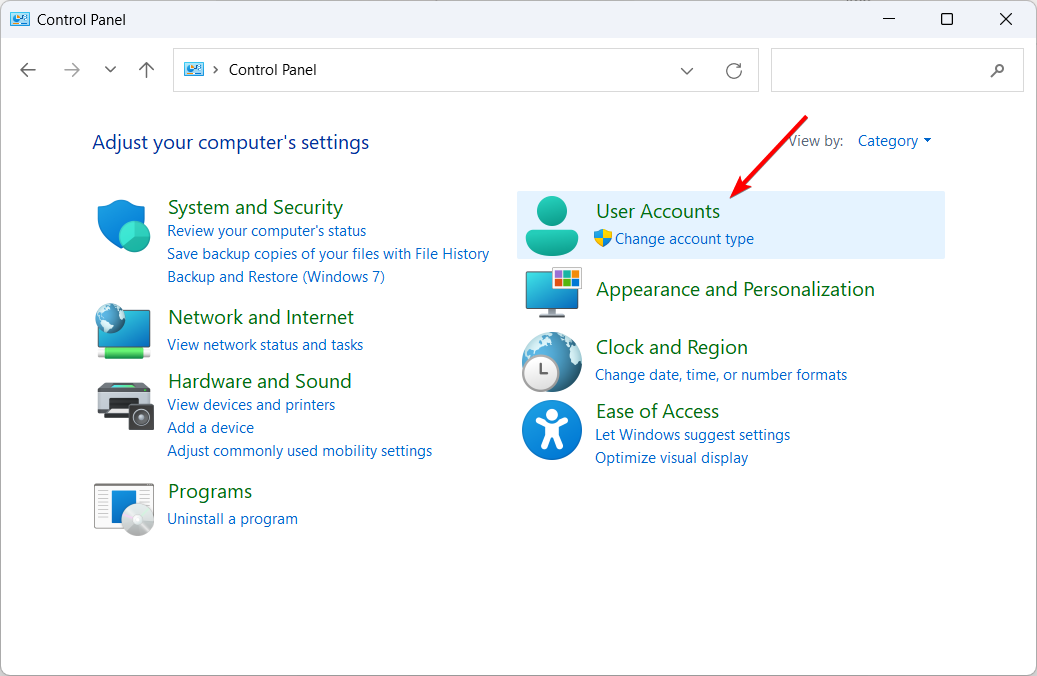
- Select User Accounts.
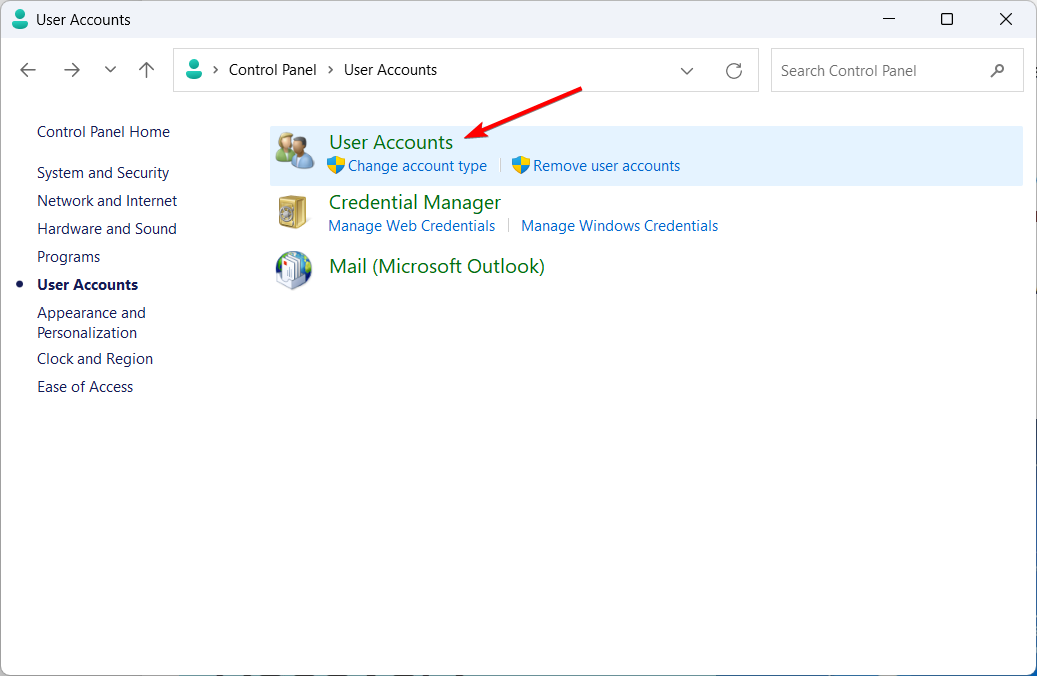
- Then, select User Accounts again.
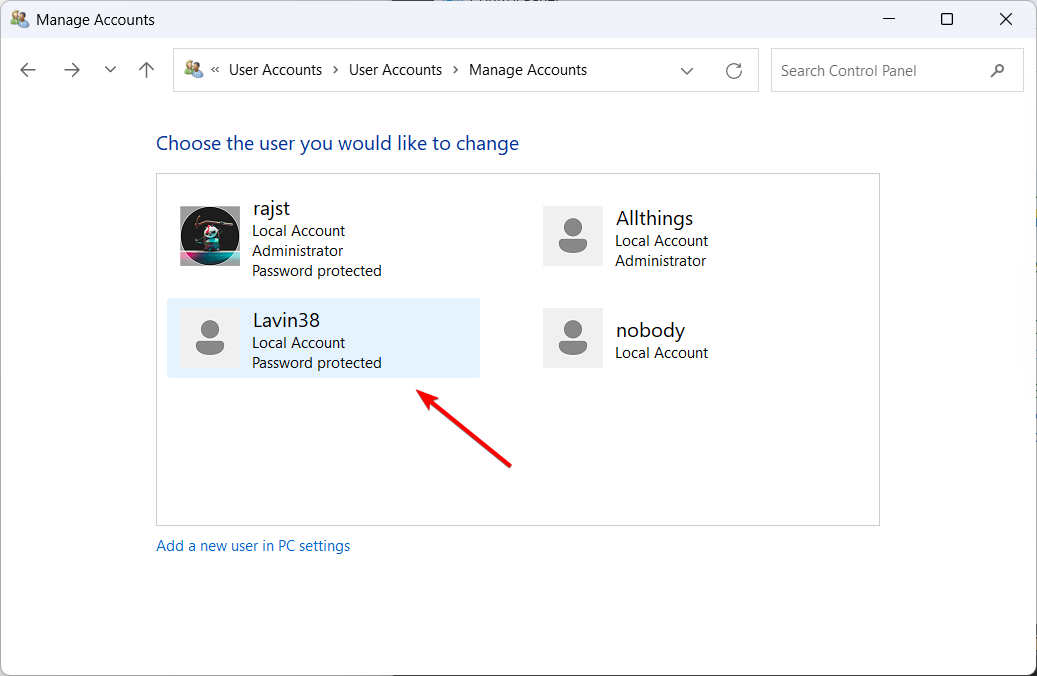
- Click the Manage another account link.
- From the list of accounts, select your locked user account.
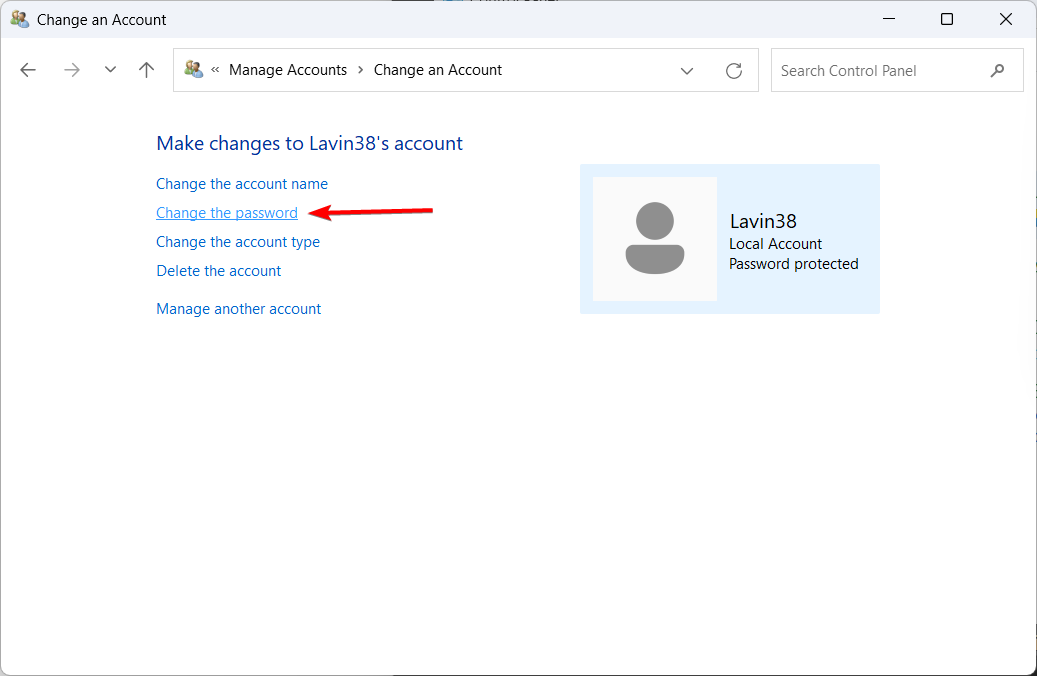
- Next, click on Change the password.
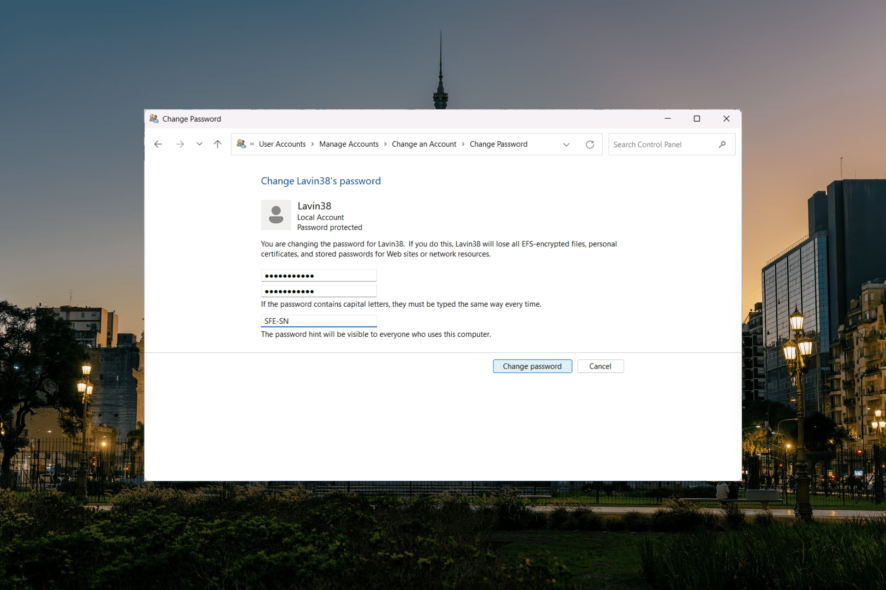
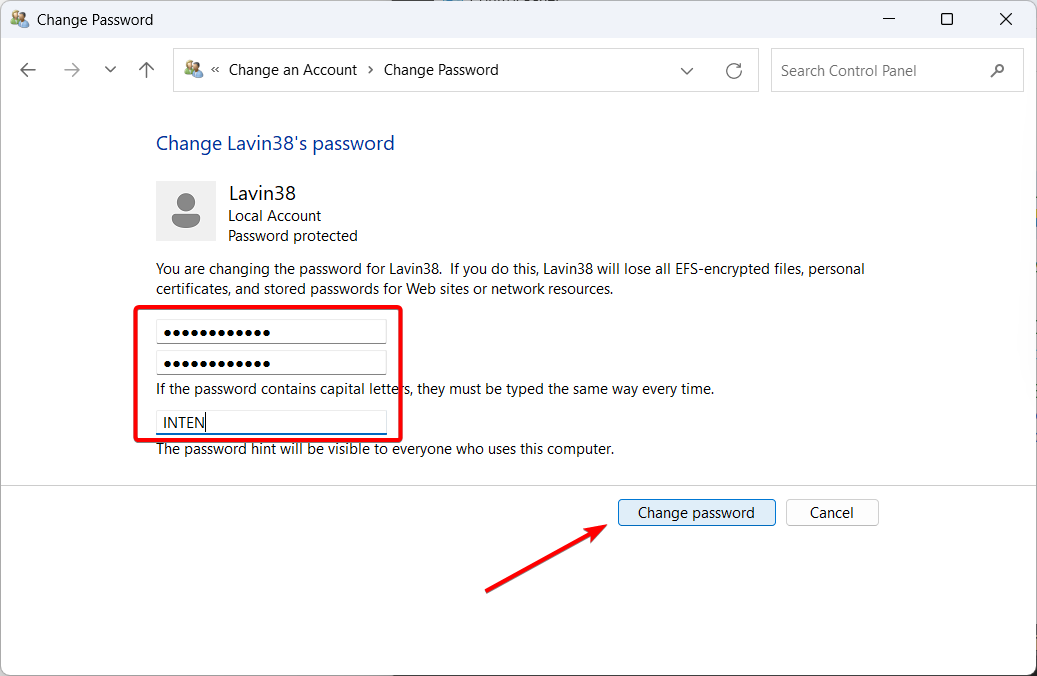
- Enter your new password and password hint and click the Change password button.
2. Reset the password with a password reset disk
 NOTE
NOTE
- Insert the password reset disk/USB drive that you already created.
- When the login screen appears, enter any incorrect password and press Enter. An error message box will appear on the screen. Click OK to display an additional sign-in option.
- Now, click on Reset password.
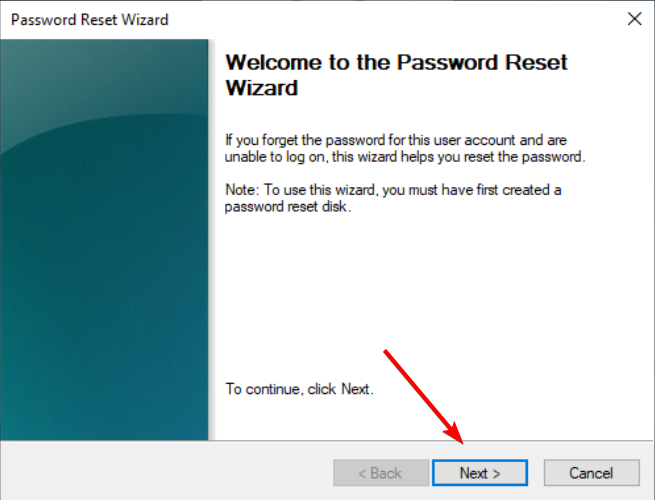
- Click on Next.
- Select the password reset disk from the drop-down menu and click on Next.
- Type in your new password and new password hint, and click Next.
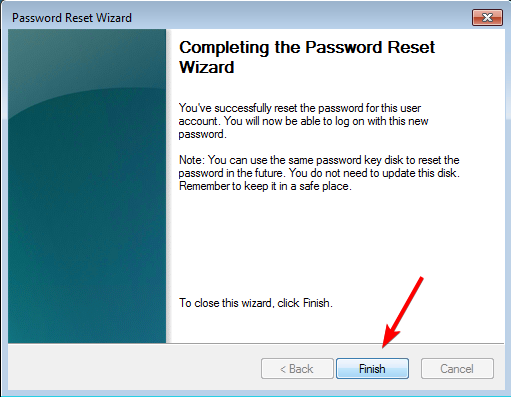
- Finally, click Finish to reset your password.
- You can then use the newly created password to unlock your HP computer.
3. Use HP Recovery Manager
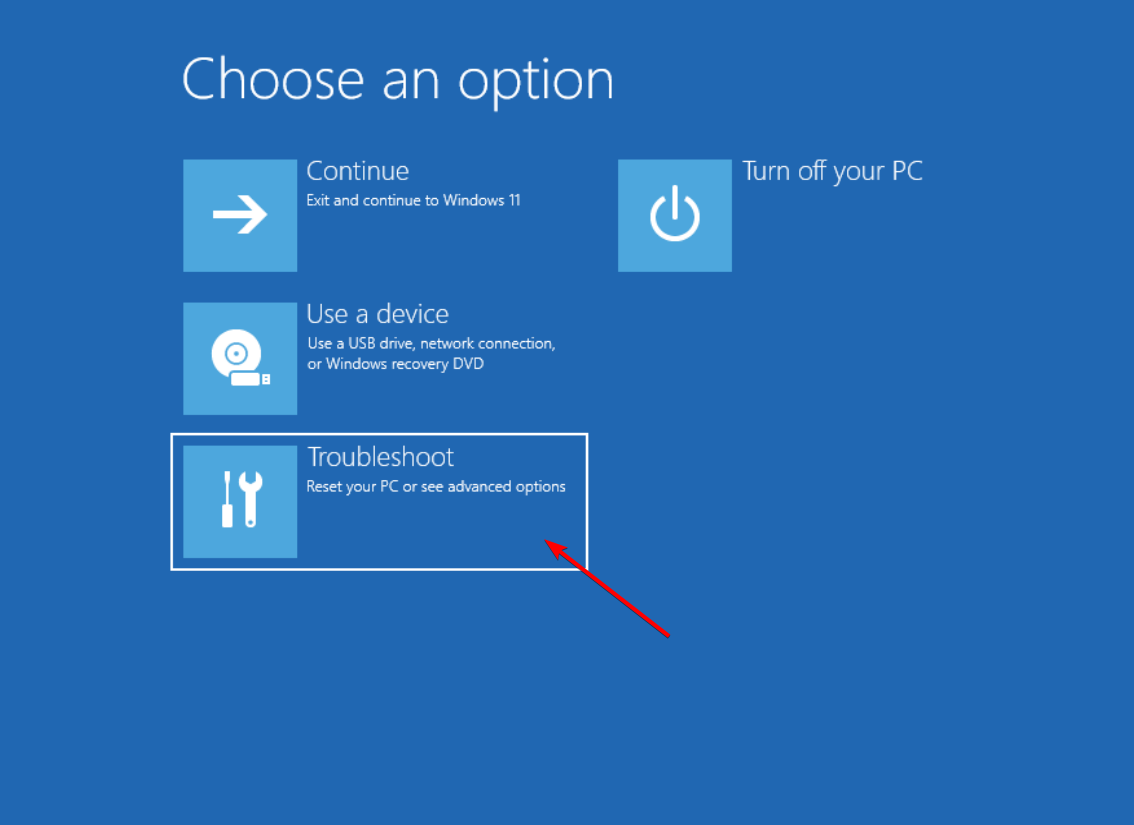
- Turn on or restart your HP Windows laptop and repeatedly press the F11 key on your keyboard until the Windows Recovery Environment appears. Then, click on Troubleshoot to proceed.
- Click on Recovery Manager on the next screen.
- Next, select System Recovery from the Help section.
- Follow the on-screen prompts to reset your HP laptop to its original factory settings.
- After that, restart your laptop, and you should be able to unlock your HP laptop without a password.
4. Use the Windows installation disk
4.1 Access Command Prompt
- Create a Bootable Installation Media (USB or DVD) on a different computer for the respective Windows operating system, and then insert it into your HP laptop.
- Turn on or restart your computer and press F9 or Esc, or any other respective key to open Boot Device Options menu.
- Select the Installation media (USB or DVD) to boot from it.
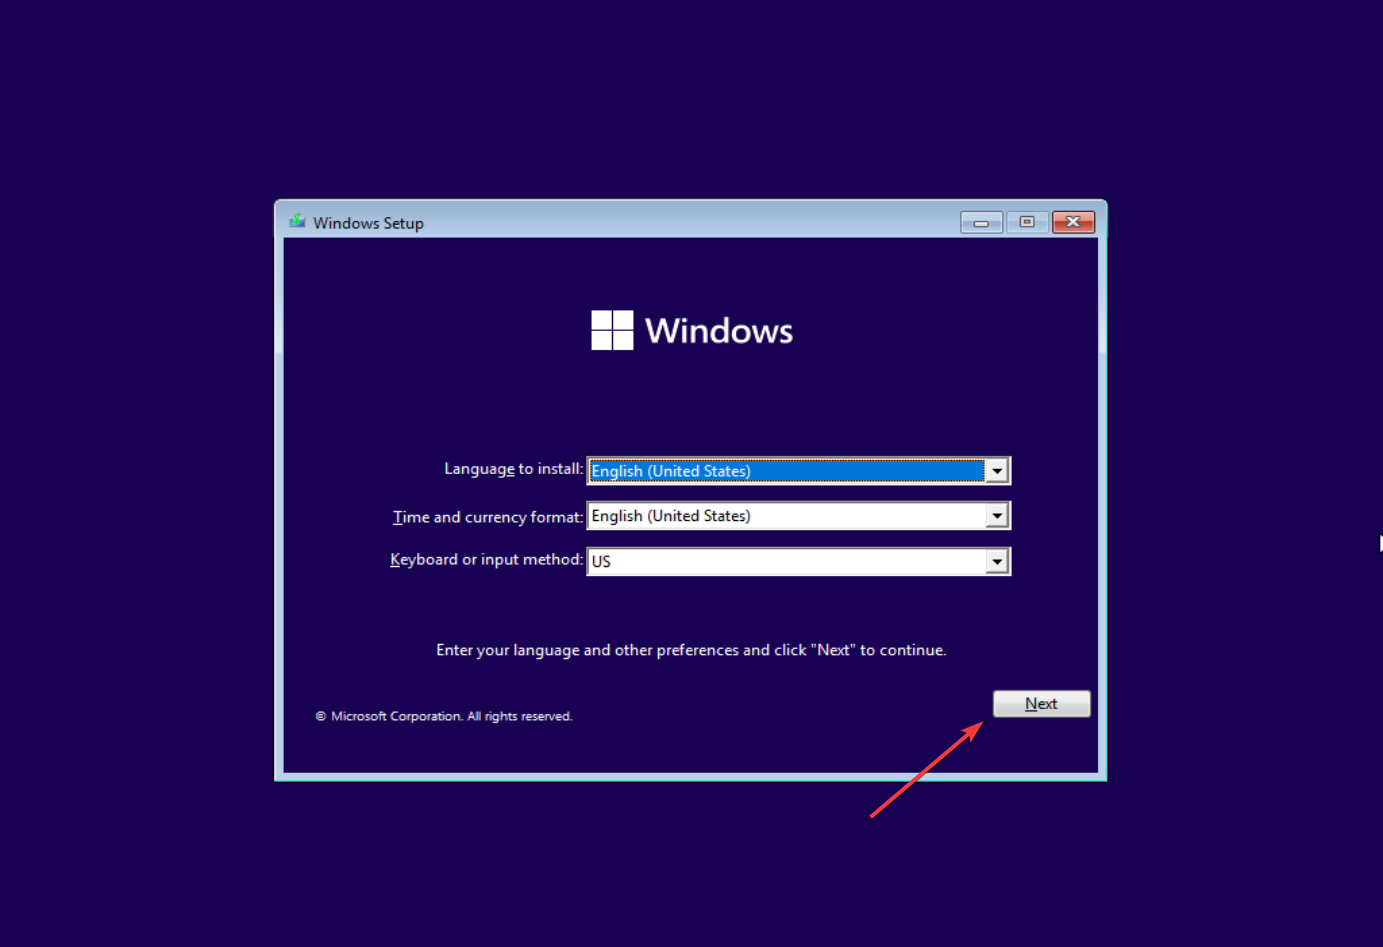
- When the Windows Setup screen appears, click Next to proceed.
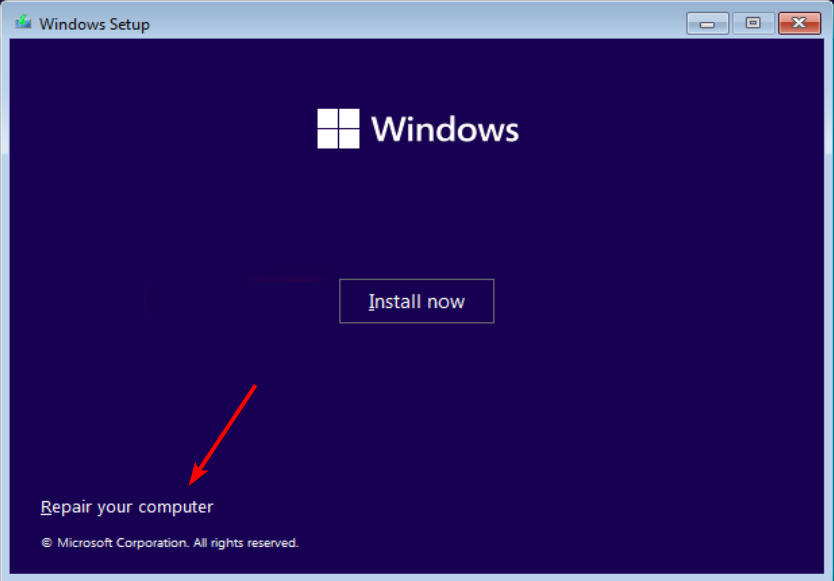
- Next, click on Repair your computer to enter the Windows Recovery Environment.
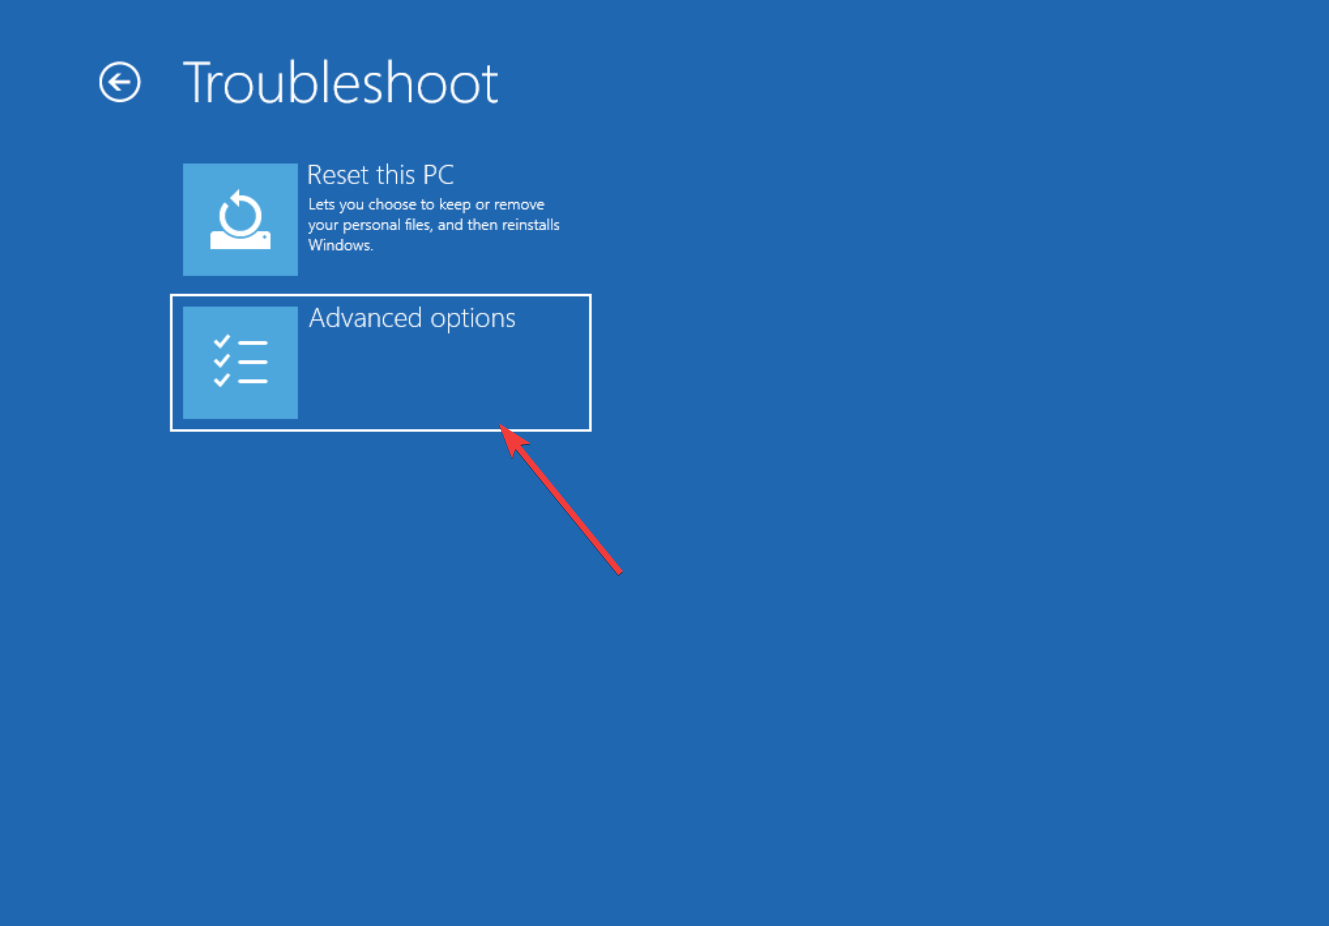
- Click on Troubleshoot to proceed.
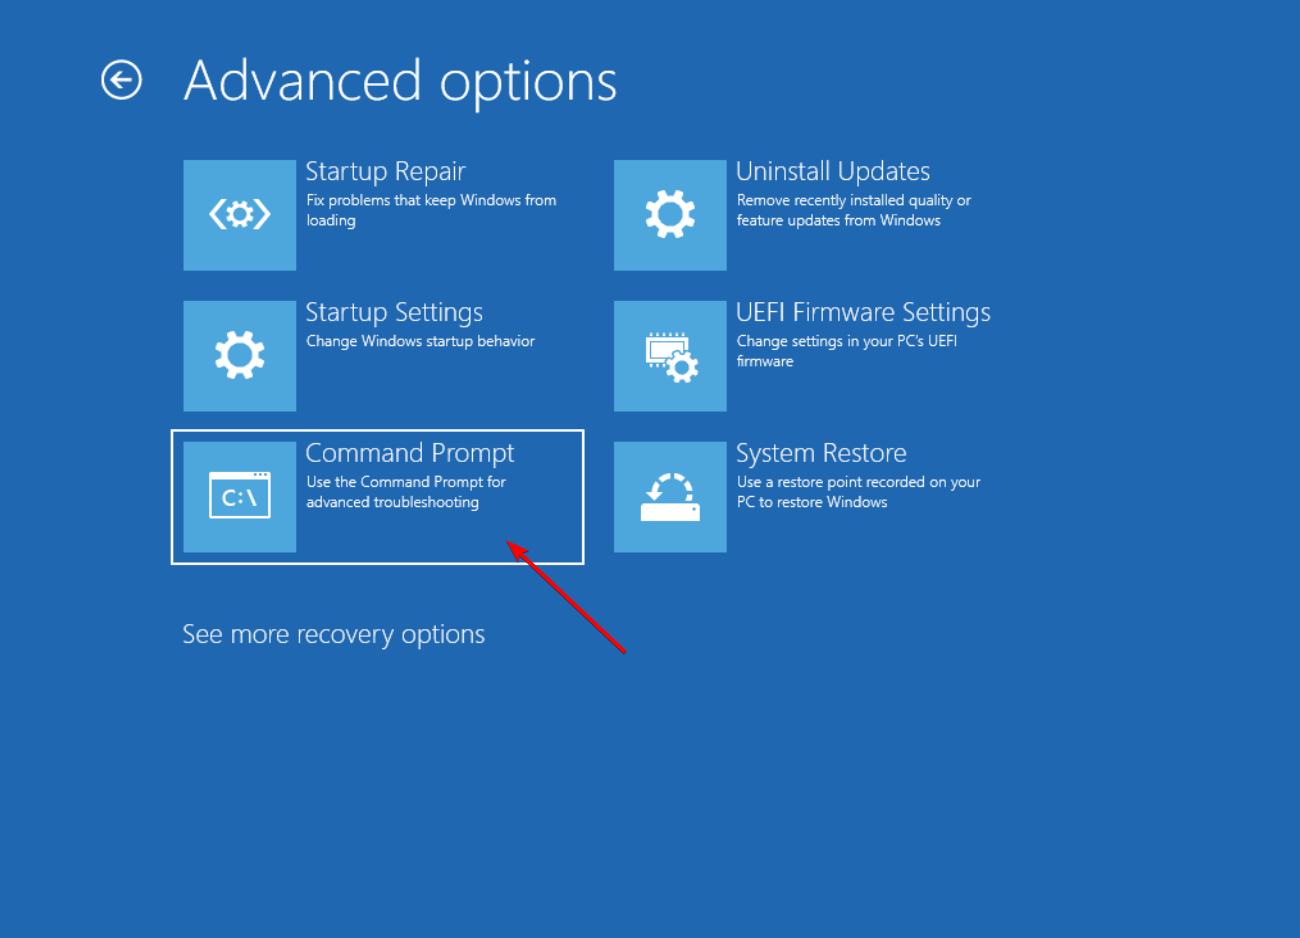
- Next, select Advanced options.
- Select Command Prompt under Advanced options.
4.2 Identify the drive letter for the system drive
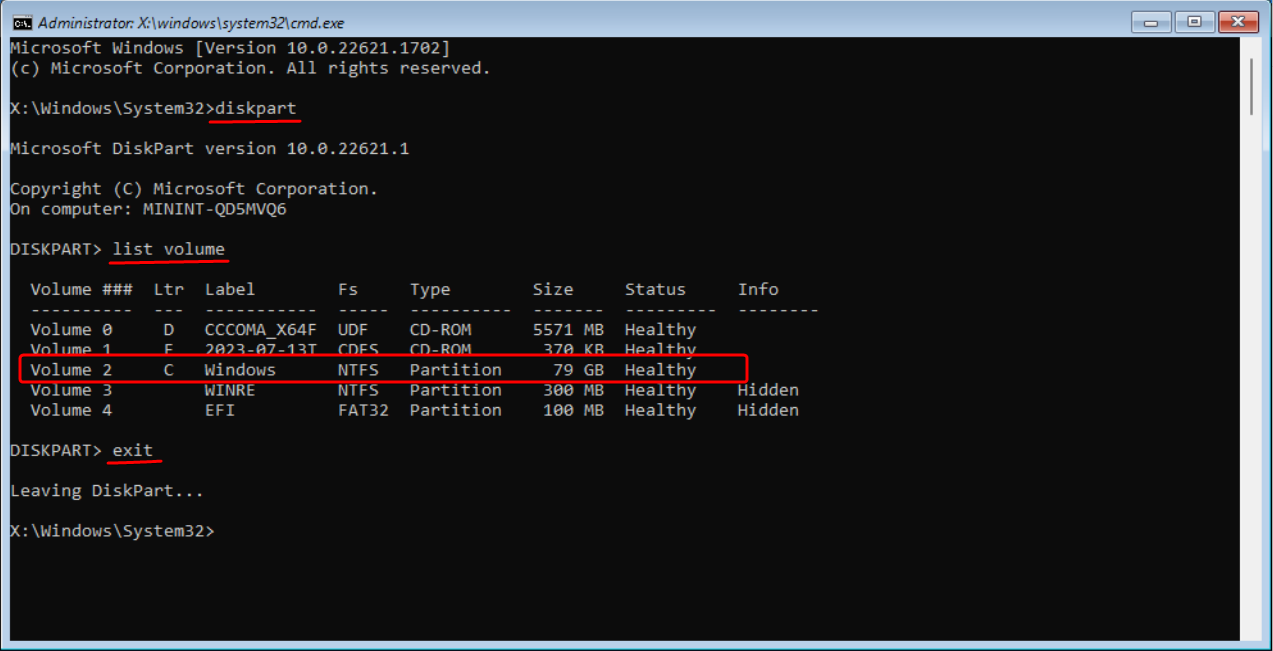
- To determine the current drive letter of the system drive, run the following commands one after the other:
diskpartlist volume - This command will display all the available volumes and their corresponding drive letters. Take note of the Windows drive letter.
- Type this command to leave the Diskpart utility:
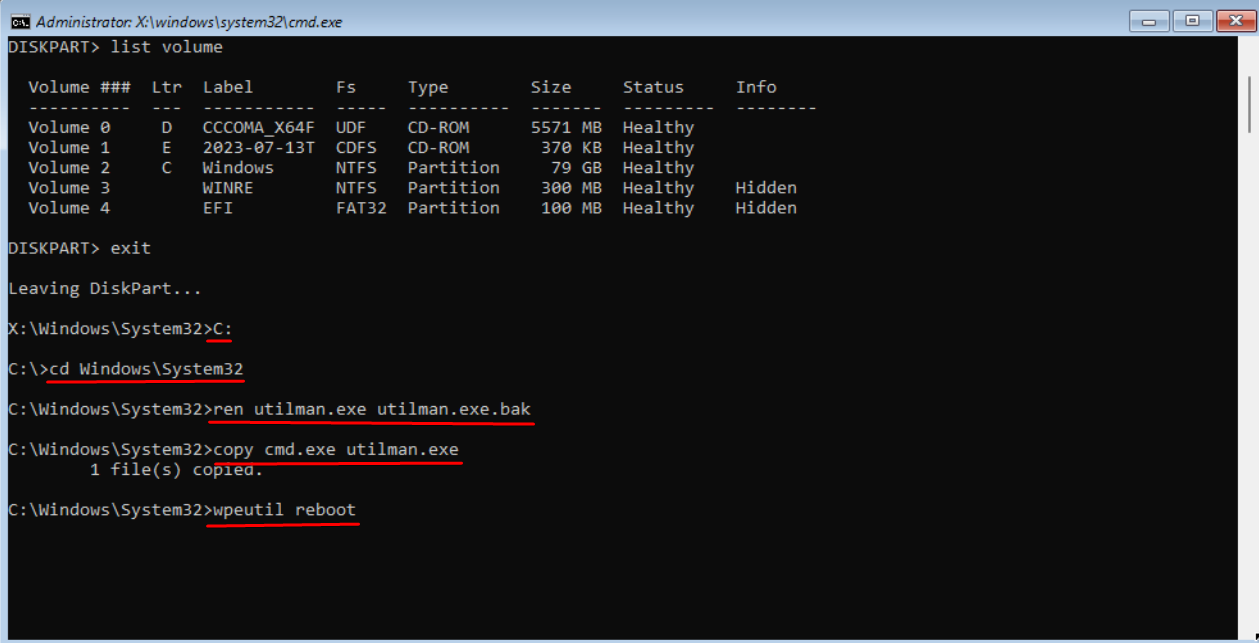
exit - Once you find out the drive letter, use the below command to navigate to that drive while replacing C: with the drive letter of your system drive:
C:
4.3 Execute commands
- Type the following commands one after the other and press Enter after each:
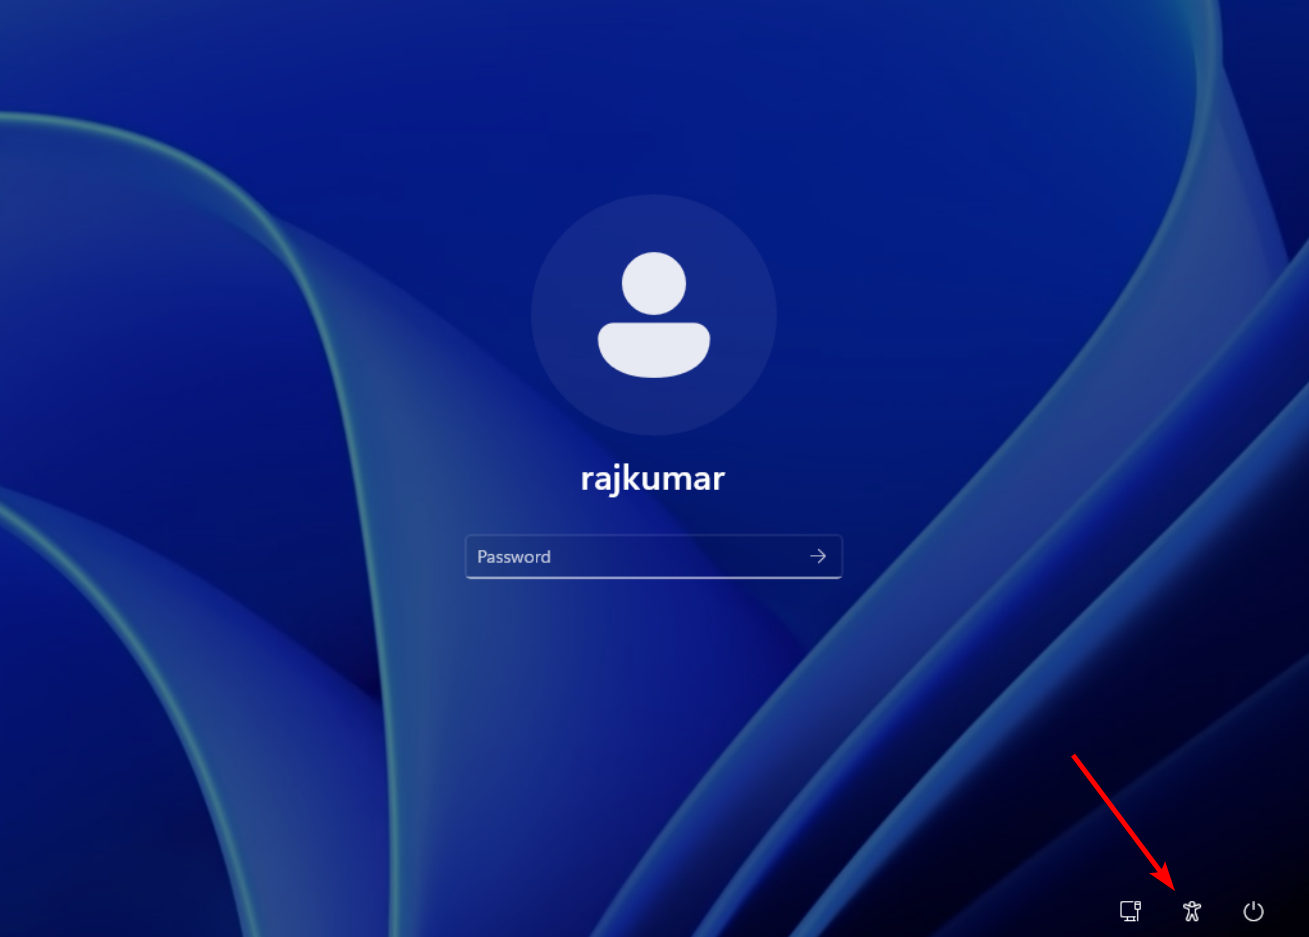
cd Windows\System32ren utilman.exe utilman.exe.bakcopy cmd.exe utilman.exewpeutil reboot - After the computer restarts, click on the Ease of Access icon next to the Power button on the login screen.
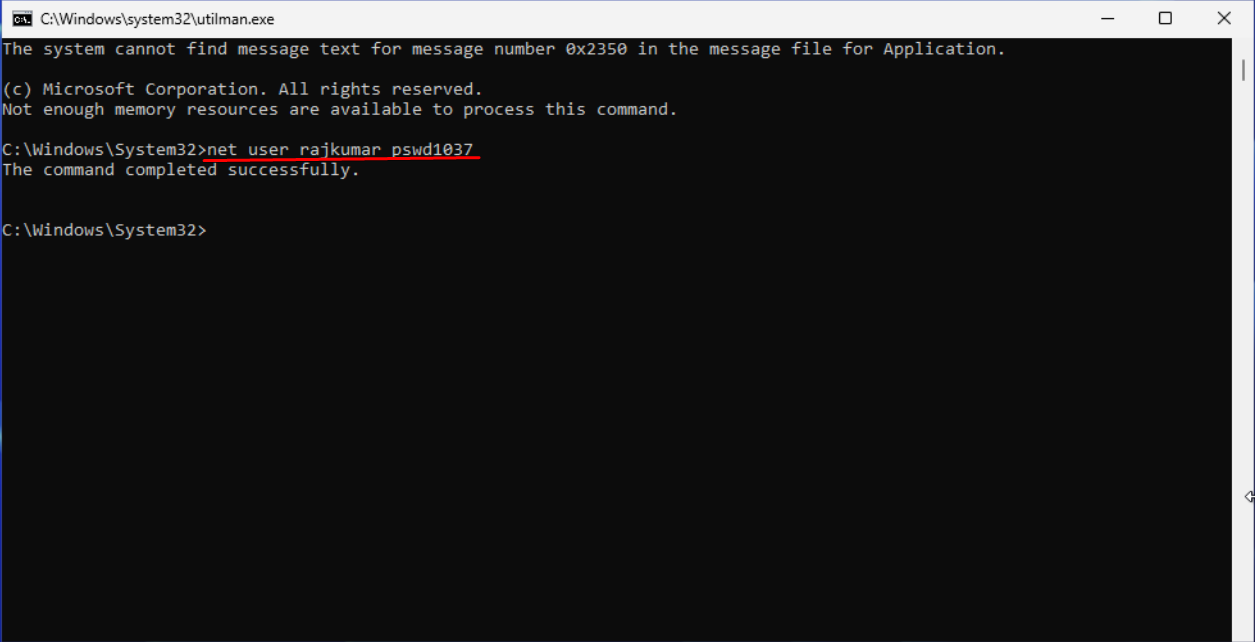
- This will launch a Command Prompt window on your login screen.
- Now, type the following command and press Enter while replacing the username with your locked account username and password with your new password:
net user username password - You can now log into your computer using the new password.
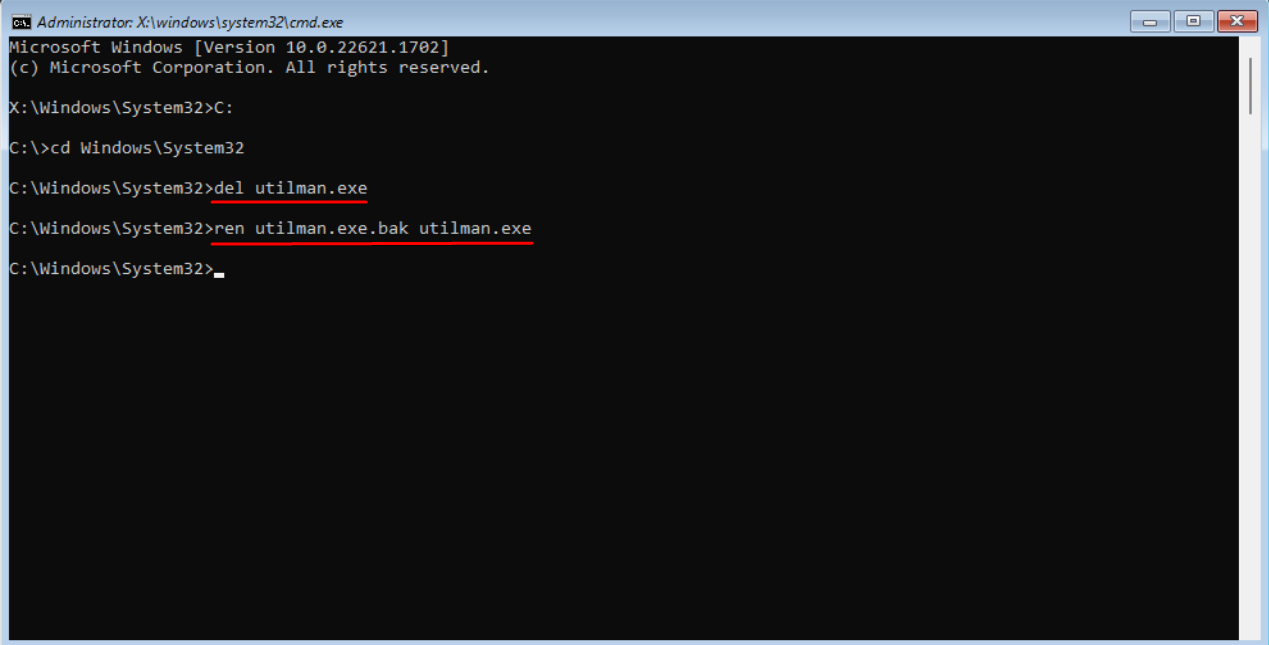
- After resetting the password, you need to restore the utilman.exe and cmd.exe files.
- To do that, follow the steps under 4.1 and 4.2, and run these commands instead:
cd Windows\System32del utilman.exeren utilman.exe.bak utilman.exewpeutil reboot
5. Reset your PC
- Turn on your system and go to the Sign-in screen.
- Click on the power icon and, while holding the Shift key on your keyboard, select the Restart option.
- Then, confirm the restart by clicking on Restart anyway.
- Your PC will restart and boot into the Windows Recovery Environment (WinRE). Click on the Troubleshoot option to continue.
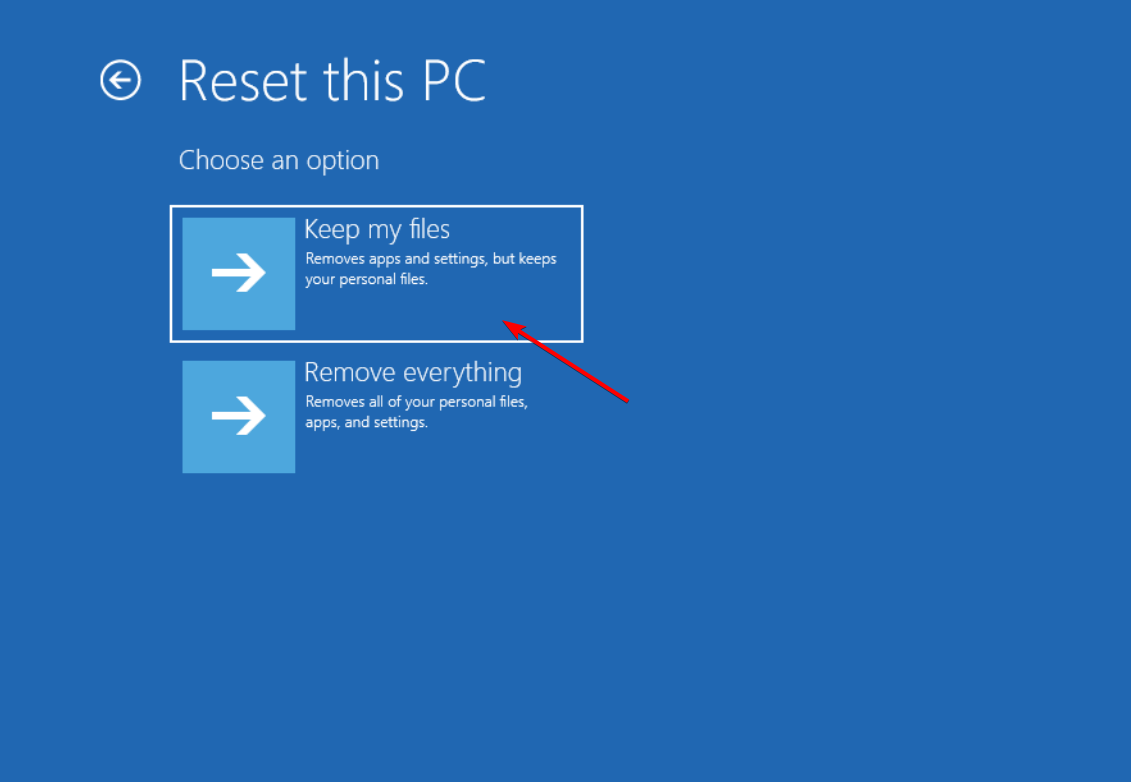
- Next, click on Reset this PC.
- Select the Keep my files option to keep your personal files.
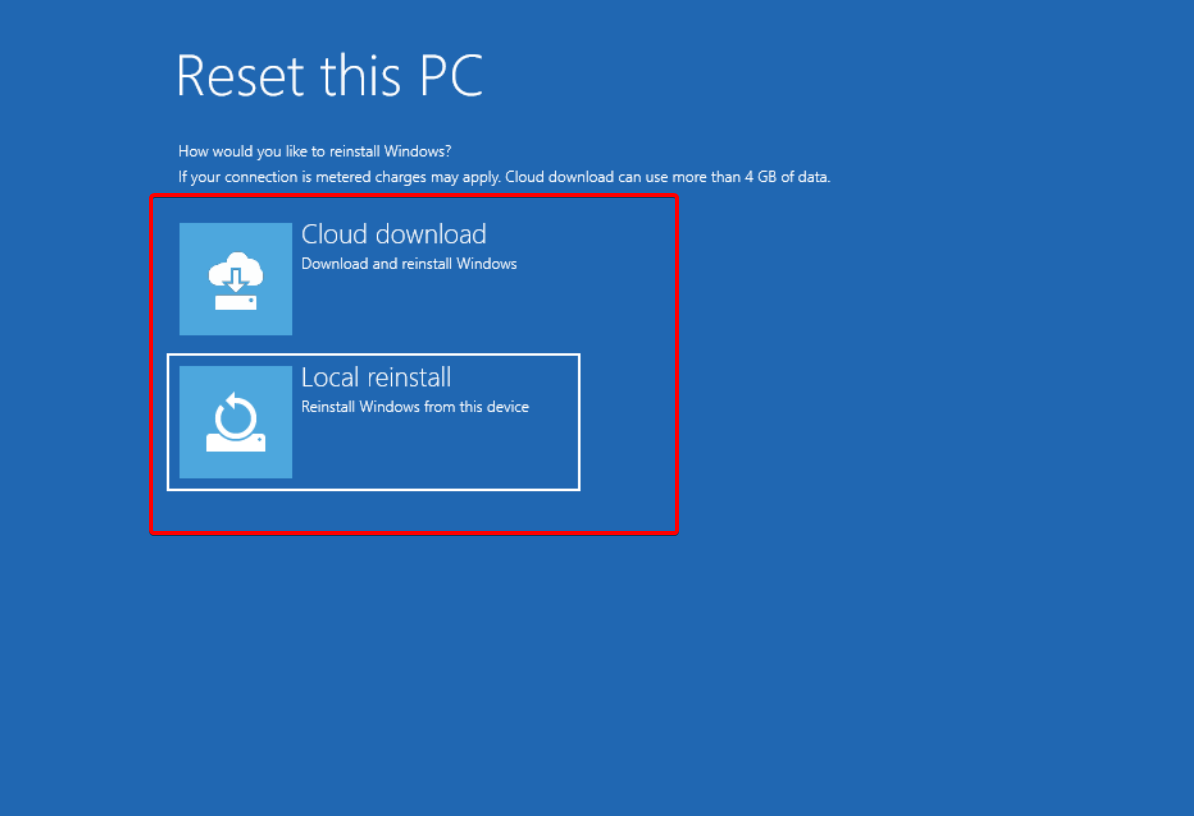
- Next, decide how you want to install Windows on your computer: either by Cloud download or Local reinstall.
- Finally, click on the Reset button to start the process.
- Be patient and wait for the process to complete, as it may take some time, depending on your settings and system performance.
Please remember that when you perform a reset, it will restore your computer to its original settings. This means that all your installed apps and settings you have made will be deleted. So, it’s best only to use this method if you have no other options.
If you happen to lose or forget your laptop password, try these specialized password recovery tools to recover them on your Windows 10 or 11 devices.
Let us know in the comments which method worked for you or if you have any other suggestions.










User forum
0 messages