Upgrade Surface to Windows 11: Quickest Steps to do it
Easy steps for all eligible Surface devices
3 min. read
Updated on
Read our disclosure page to find out how can you help Windows Report sustain the editorial team Read more
Key notes
- Windows 11 can also be used as an OS on other household devices, not just on your PCs.
- There are phones, tablets, and other mobile devices that can support this brand-new OS.
- Depending on the version of your Surface gadget version, you will be or not be able to install Windows 11.
Windows 11 is the latest OS from Microsoft, delivering a more intuitive and efficient user experience. If you own a Surface device, you can easily upgrade to the OS by following a few simple steps.
So, this article will guide you through the quickest and most straightforward way to upgrade your Surface to Windows 11.
Which Surface models can upgrade to Windows 11?
Not all Surface models are eligible for the Windows 11 upgrade. Currently, Microsoft has confirmed that the following Surface models can upgrade to Windows 11:
- Surface Pro 7
- Surface Pro X
- Surface Laptop 3
- Surface Pro 6
- Surface Laptop 2
- Surface Go 2
- Surface Book 3
It’s important to note that the availability of the Windows 11 upgrade for Surface devices may vary based on region and other factors.
Also, to check if your specific Surface model is eligible for the upgrade, you can visit the Microsoft website or check for updates in Windows Update on your device.
Additionally, check if your device meets the minimum system requirements before going into the upgrade process.
How do I upgrade my Surface to Windows 11?
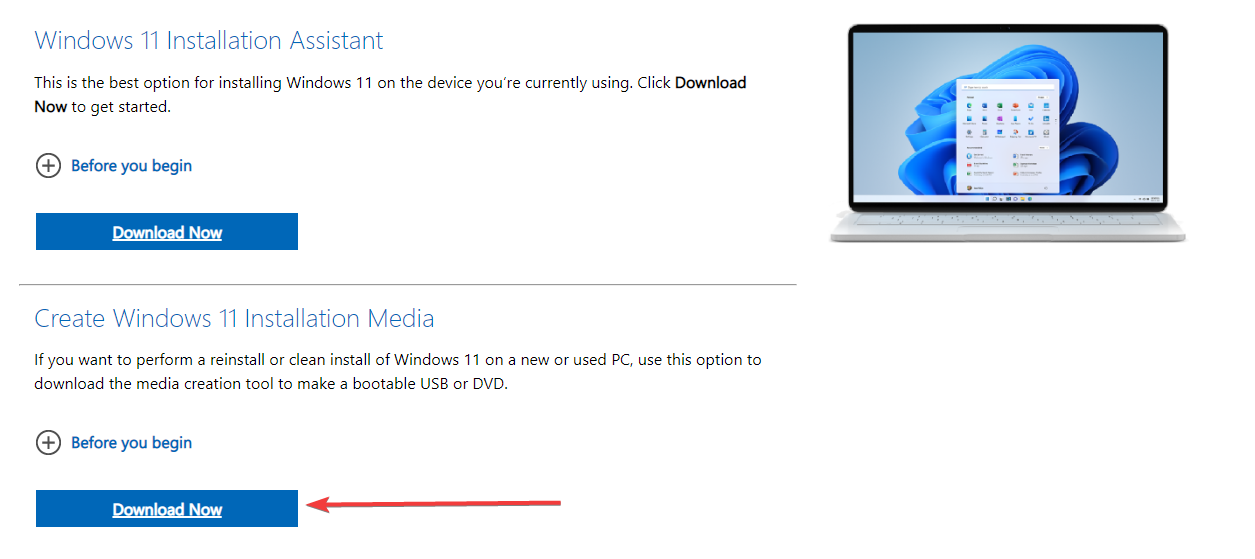
- Visit the Windows 11 download page.
- Click the Download button for Create Windows 11 Installation Media.
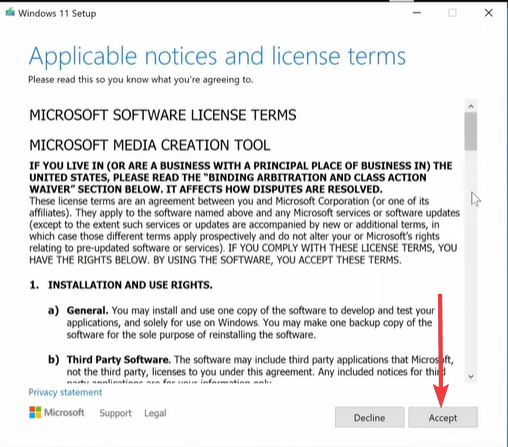
- Run the downloaded file as administrator and hit Accept to continue.
- Select your language and click the Use the recommended options for this PC link.
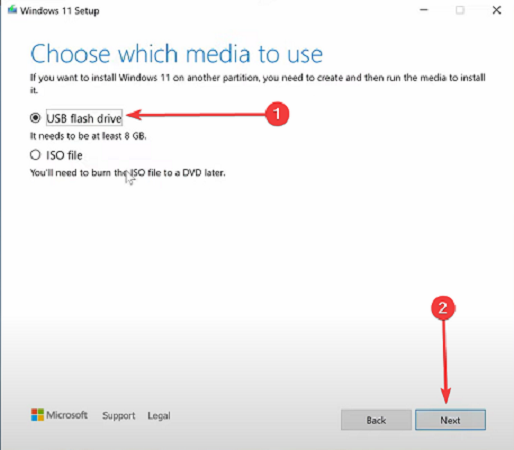
- Choose either USB flash drive or ISO file, then click Next. In our case, we will be using a USB flash drive.
- The boot drive should be downloaded. Open it and right-click on Setup.exe, then choose Run as Administrator.
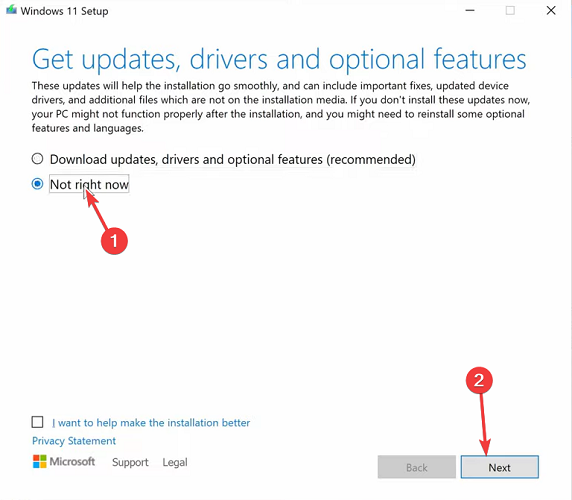
- On the updates windows, select Not right now and click the Next button.
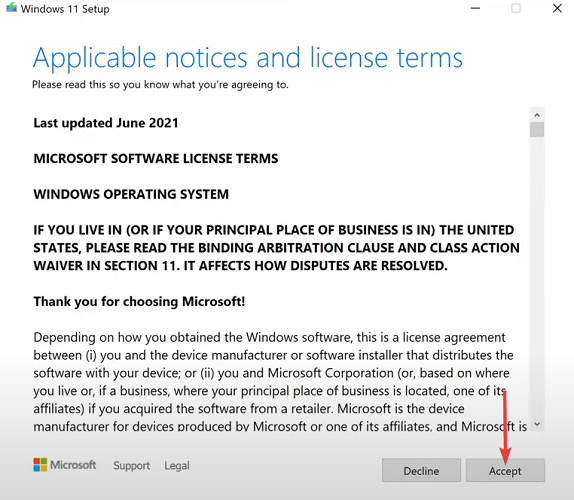
- Now, accept the license terms.
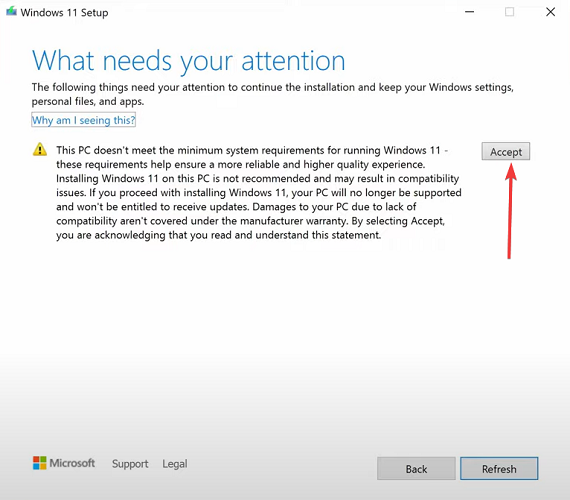
- If you get a window telling you that the device does not meet the minimum requirements, click on the Accept button (This means you are willing not to have updates or bear the risk of installation).
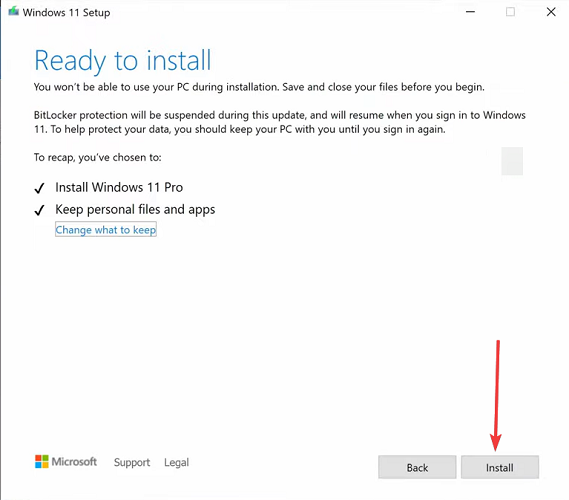
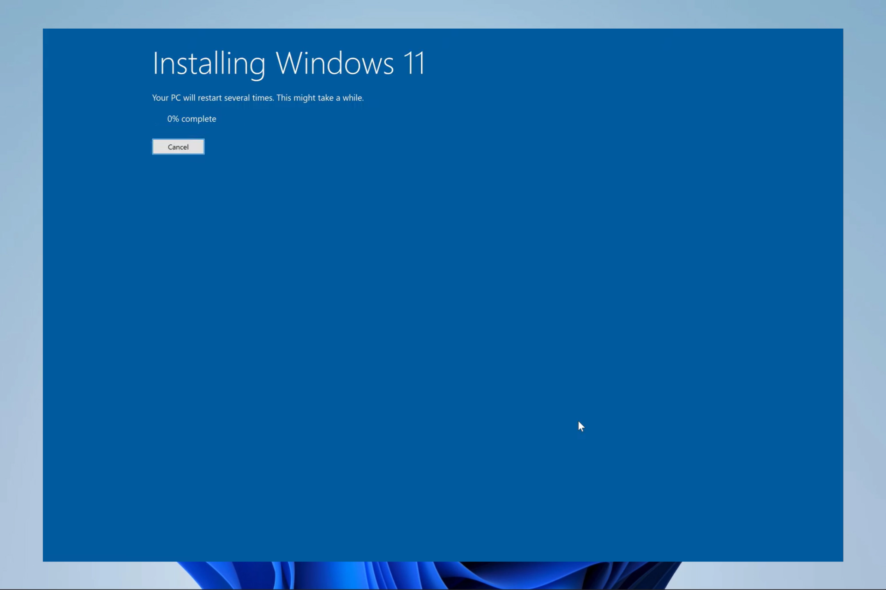
- Now you are set to install, so click on the Install button.
- Finally, the installations should begin. You will have to wait several minutes for it to complete, but once it is done, you can log in and configure your Windows 11.
That is as much as you need to know to upgrade from Windows 10 to 11 on a Surface. We recommend that you do these on systems that meet the minimum requirements, but as you must have observed, even if your system does not meet these requirements, the upgrade could still work.
Whether you’re looking for improved performance, enhanced security, or a more intuitive user experience, Windows 11 has something to offer everyone.
In case you want to check the Warranty of the Microsoft Surface device, we have a detailed guide with instructions for you.
So, if you’re ready to take the next step, upgrade your Surface to Windows 11 today and start exploring all this new operating system has to offer!

