How to Use Outlook Scheduling Assistant on Your PC
Learn how to plan meetings with a dedicated tool
3 min. read
Updated on
Read our disclosure page to find out how can you help Windows Report sustain the editorial team Read more
Key notes
- Outlook's Scheduling Assistant helps users plan meetings and send out invitations to attendees.
- The Scheduling Assistant can be found in Outlook's Meeting tab.
- The tool allows you to set a time, date, location, and attendees.
- You can also create a custom note to send to the people you want to invite to the meeting.
Setting up meetings or booking conference rooms aren’t necessarily activities you enjoy. Outlook has ways to handle this for you, so don’t hesitate to learn how to use Outlook Scheduling Assistant.
Let’s assume you’ve been tasked with planning a meeting with several attendees. You set up the meeting and send it out without having any way to make sure everyone can actually come. What happens next?
Instead of ending up with several responses telling you that either they are unavailable or would like to propose a new time, let the Scheduling Assistant do the heavy lifting.
How can I use Outlook Scheduling Assistant?
1. Plan a meeting
1. Open Outlook on your computer.
2. In Outlook, click on the Calendar section in the bottom left corner of the screen.

3. From the Home tab, at the top left of the screen, click on the New Meeting icon.
4. Select New Meeting from the drop-down list.
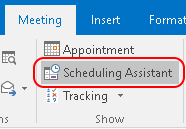
5. A new window appears next. From the Meeting tab, click on Scheduling Assistant.
6. Now, it’s time to enter a description of the meeting in the Title text box.
7. In the Required text box, enter the email address of each attendee required to attend the meeting. In Outlook 2016 and 2013 instead, enter the attendees in the To field and the conference room you want to book under the Resources field.
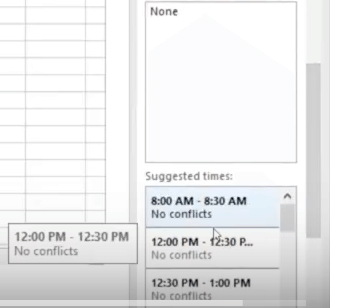
8. Then enter the Start and End times. From the Suggested Times list, you can choose the desired time or make adjustments to your time and date to find a time that works for everyone.
9. In the Location text box, enter the address or room number where the meeting will be held.
10. Up next, in the Message area, enter any notes your attendees will need to know before the meeting such as any special instructions or the Agenda.
11. When you’re done setting up the meeting, click Send.
Outlook Scheduling Assistant can be easily used to plan a meeting . You can set up the time, date, location and attendees, as well as create a special note to be sent to them.
When you send a meeting invitation in Outlook, the invitation includes a request for a response and gives the recipient the option to suggest a new time for the meeting.
2. Export the Outlook Scheduling Assistant to Excel
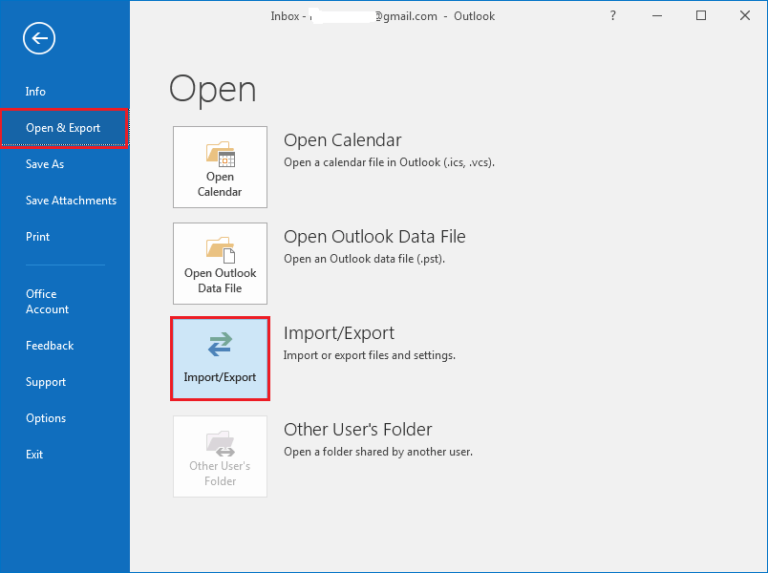
- Open Outlook and go to File.
- Go to Open & Import and the Import/Export wizard will open.
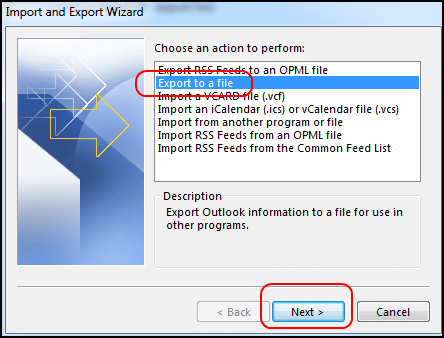
- Select Export to a file.
- Click Next to continue.
- In the Export to a File dialog, select Comma Separated Values.
- Then, click Next.
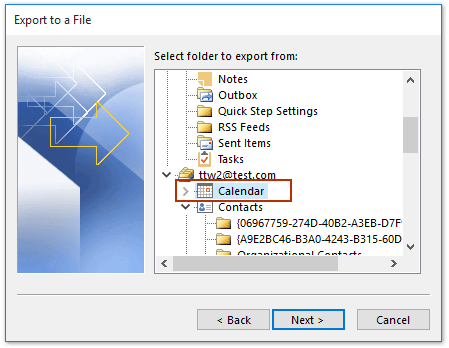
- Now, select Calendar from Outlook Data File.
- Click Next once more.
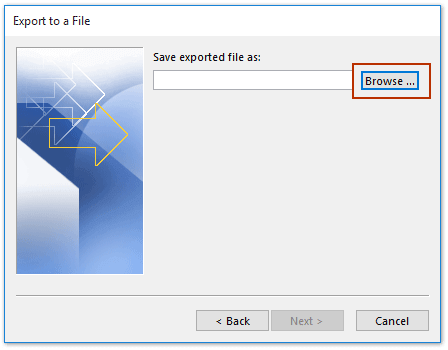
- When the Export to a File dialog displays, click the Browse button. Here you can select the file’s destination.
- Choose the destination where the file can be saved. Name the file and click OK to close the dialog.
- When the Export to a File dialog displays again, hit Next to continue.
- Then, click Finish to export your Outlook calendar.
- Outlook exports the specified calendar as a CSV file. Open it with Microsoft Excel, and then save the file as a workbook.
If you’re looking for a way to share your Outlook Scheduling Assistant with others, you can export your calendar to Excel, and then import it into others’ Outlook calendar folder by following the above steps.
3. Set a time zone for a meeting or appointment
Note that when you create such new meetings or appointments, Outlook uses the default time zone in your Outlook preferences for Calendar. This doesn’t mean that you cannot specify a different time zone for an event as you are creating it.
To display the Time zone selector, on either the Organizer Meeting tab or the Appointment tab, click Time Zones. There, specify the precise time zone of the event.
If older versions for Outlook for Mac can display only two time zones, in the most recent version of Outlook for Mac for Office 365 and Outlook 2019 no less than three separate time zones can be displayed in the Calendar.
Eager to download Outlook calendars? Find out how it’s done right here!
This article showed you how to use Outlook Scheduling Assistant, export it to Excel, and set the time zone for a meeting or appointment in Outlook. Easy, right?
Just remember that instructions apply to Outlook for Office 365, Outlook 2019, Outlook 2016, and Outlook 2013.
If you found this article useful, let us know in the comments section.

