VirtualBox Shared Folder Permission Denied [Windows 11 Fix]
Reshare the Shared folder to fix the issue
Key notes
- You may get this error if the folder you want to share is not selected or the "Auto-mount" option is disabled from the settings of the VM.
- To fix this issue, you can enable Auto mount and reshare the folder using the command on Terminal.
You are not alone if you encounter Permission Denied when accessing a Shared folder on a virtual machine via VirtualBox on Windows 11 host. Unfortunately, it is more common than you think. Thankfully, it can be fixed.
Here, in this guide, we will discuss how to fix this issue right after explaining the causes of its occurrence. Let’s get started!
What causes the VirtualBox shared folder permission denied error?
There are several possible reasons for the permission denied error when accessing a shared folder in VirtualBox on a Windows 11 host. Some of the popular ones are:
- Lacking permission on the host – If the user account of the host machine doesn’t have read and write permissions on the folder you want to share, you might get this error.
- Issues with VirtualBox settings – You can see this error if the shared folder doesn’t have the Auto mount option selected in the VM settings.
- No admin rights – If the virtual machine is not running with administrative rights, you will also not have enough permissions to access the shared folder. This could give you the permission denied error.
- VirtualBox Guest Additions – If there is an issue with the VirtualBox Guest Additions installed on the virtual machine, you can see this error.
- Incorrect path to the shared folder – If the path to the shared folder is not set correctly, you can encounter the Permission Denied error.
What can I do if VirtualBox shared folder permission is denied?
Before engaging in the troubleshooting steps, please make sure you go through these preliminary checks:
- You need to use a user account using administrator rights on the host machine.
- Run the VM with admin privileges.
- Check if you have the latest version of VirtualBox installed on your Windows 11 host.
- Should have VirtualBox Guest Additions installed on the VM to share folders between the host and guest machines.
1. Allow access to the shared folder permanently between the Windows host and VM
- Open Terminal with admin rights on VirtualBox.
- Type the following command, replace $USER with the username, and press Enter. This command appends the user <username> to the vboxsf group, which is the owner of the shared folders:
sudo usermod -G vboxsf -a $USER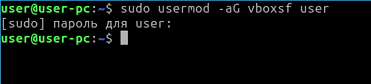
- Log out of the VM machine, then log in.
- If the problem persists, reboot your VM and host machine.
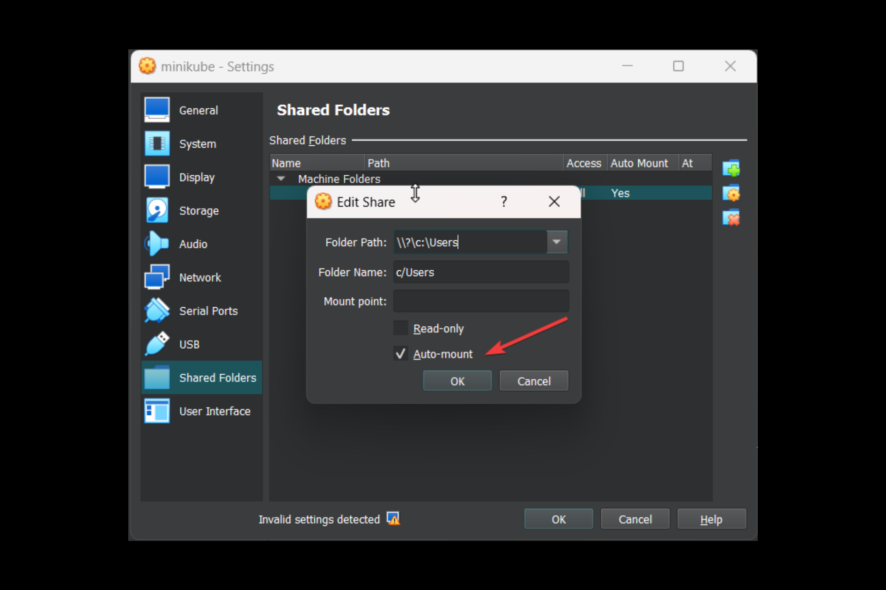
2. Check if the Auto mount is selected
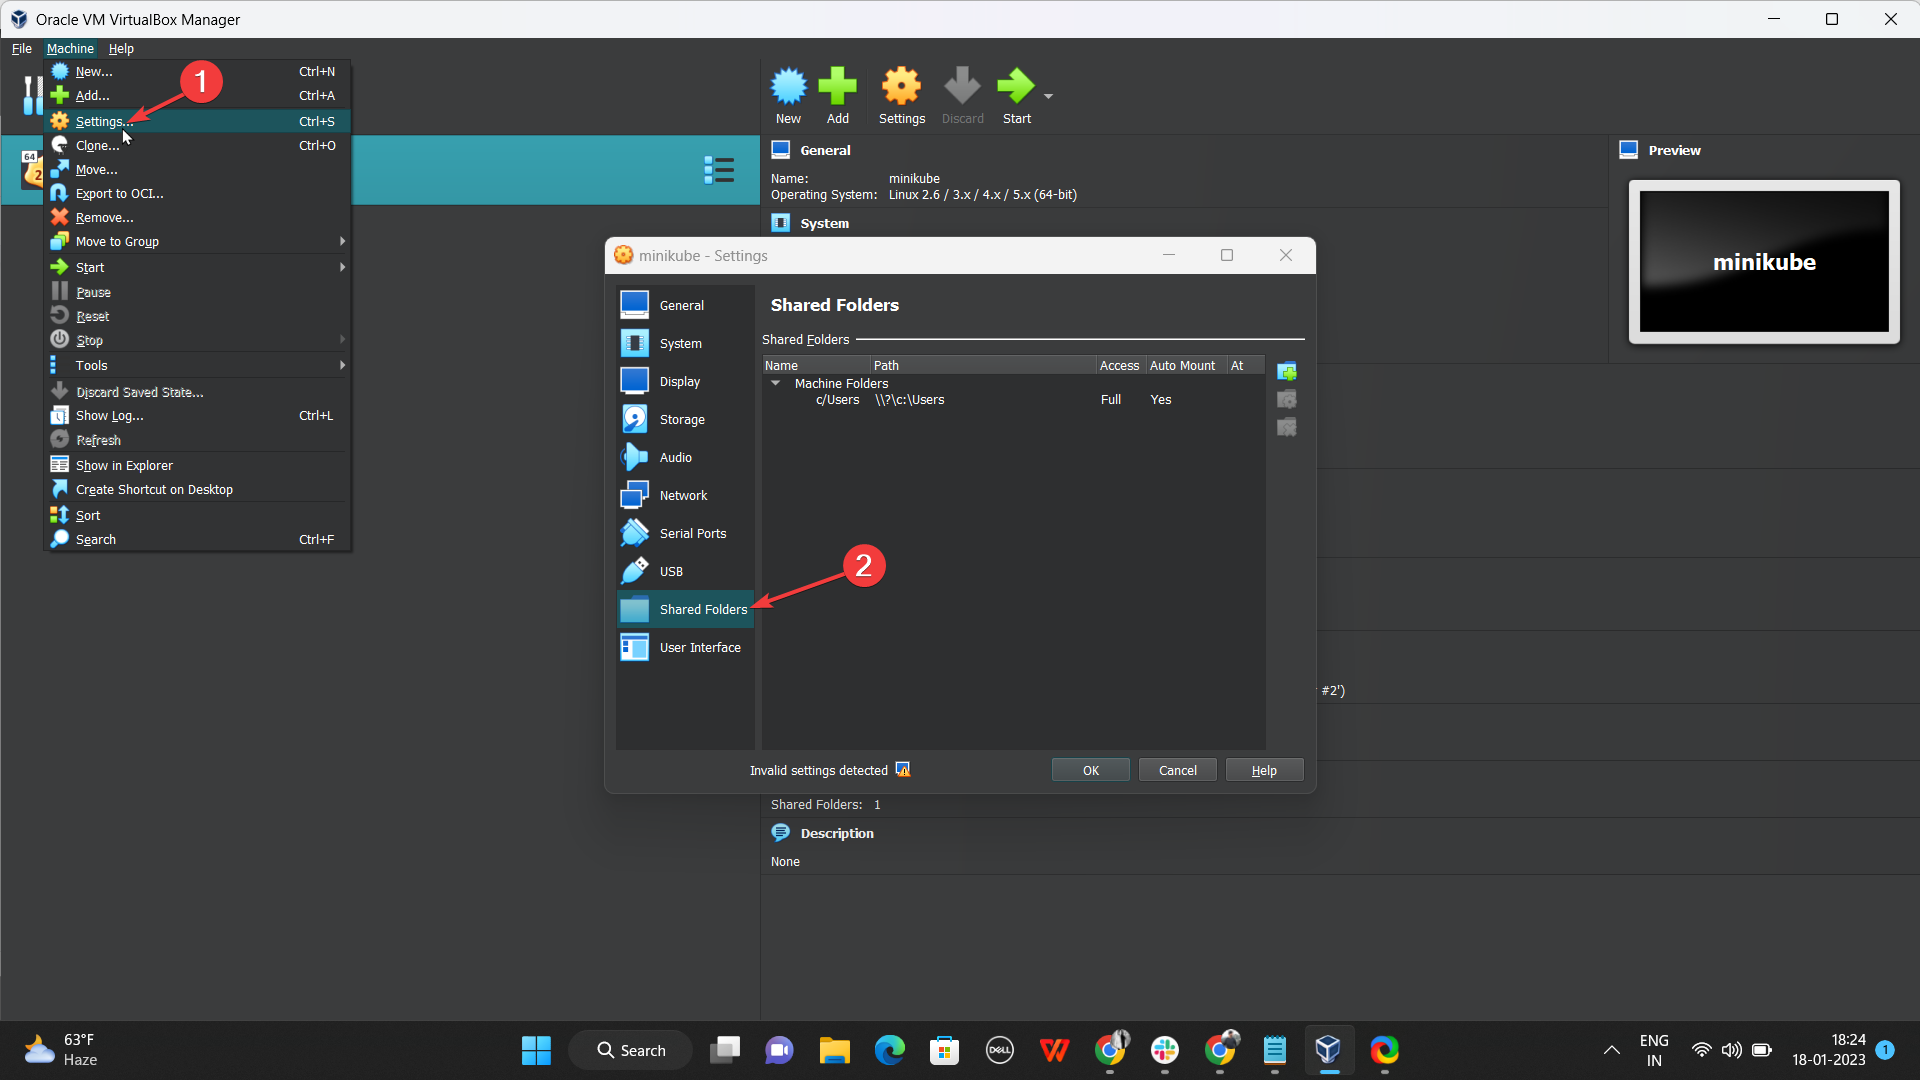
- Launch the VirtualBox. Go to the Devices, right-click on it, and select Settings.
- Click Shared Folders.
- You will get the Edit Share window; ensure there is a checkmark beside Auto Mount and click OK.

- Again click OK to close the virtual machine settings.
So, these are some methods to fix permission denied for the shared folder on VirtualBox. If none of the steps worked for you, it is advised you reinstall VirtualBox Guest Additions on VM.
Please let us know in the comments section below if you have questions or concerns about the error.
Read our disclosure page to find out how can you help Windows Report sustain the editorial team. Read more


Improve this guide


User forum
0 messages