How to Fix Action Needed, No Internet Windows 11 Error
Get your network working properly once more within minutes

The action needed no internet error is usually easy to get past by clicking the Connect button. Unfortunately, it’s not as smooth for all of us.
If you can’t get past it, you my have to tweak the Registry or power settings. Find below a few working methods that won’t disappoint.
Table of contents
How can I fix the action needed no internet issue?
To fix this, you need to disable the NCSI (Network Connectivity Status Indicator) passive or active probes that the NCSI component uses.
1. Disable the NCSI probe from Windows Registry
- Press the Windows Key + R to open the Run dialog box.
- Type regedit.exe and press Enter.
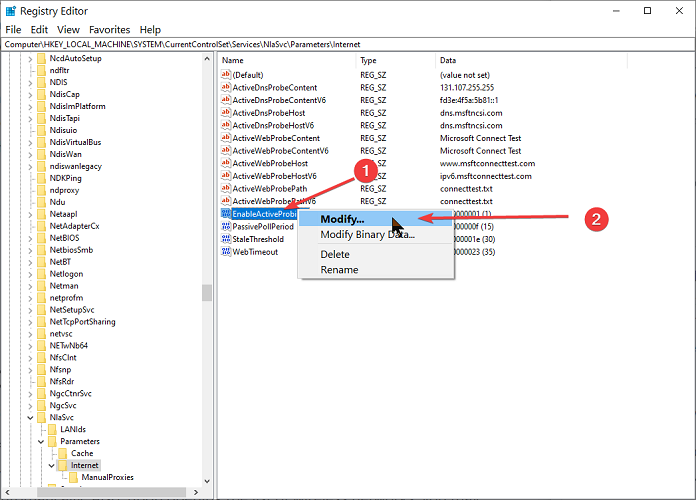
- Navigate to the following path in the Registry Editor:
HKEY_LOCAL_MACHINE\SYSTEM\CurrentControlSet\Services\NlaSvc\Parameters\Internet - On the right-hand side, right-click on EnableActiveProbing.
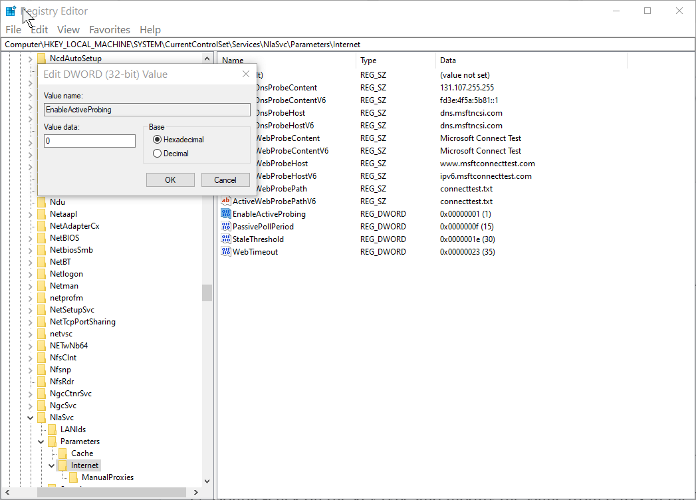
- Select Modify…
- Change the Value data from 1 to 0.
- Click on the OK button.
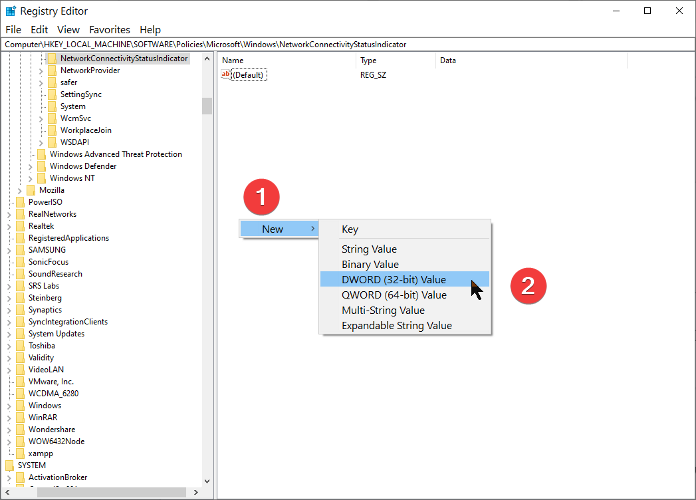
- Navigate to the following path in the Windows Registry:
HKLM\Software\Policies\Microsoft\Windows\NetworkConnectivityStatusIndicator - Right-click on the empty space on the right pane and choose New > DWORD (32-bit) Value.
- Name it NoActiveProbe.
- Right-click on the newly created NoActiveProble key and select Modify…
- Change the Value data from 0 to 1.
- Click on OK to save the changes.
- Navigate to the following path in the Registry:
HKLM\Software\Policies\Microsoft\Windows\NetworkConnectivityStatusIndicator - Right-click on the white space on the right and go to New > DWORD (32-bit) Value.
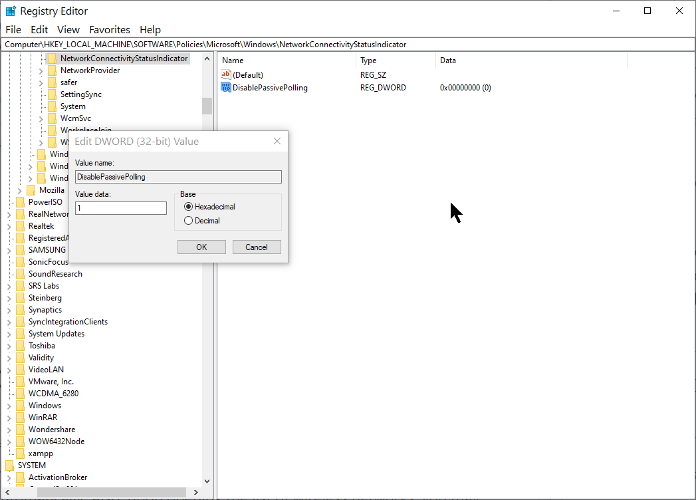
- Rename it to DisablePassivePolling.
- Right-click on this DisablePassivePolling key and hit Modify…
- Double-click on the key type and modify the value from 0 to 1 in the Edit String box.
- Hit the OK button to save your changes.
NOTE: To navigate to the locations in the guide, simply copy the given path, paste it in the address bar, and hit ENTER.
2. Disable NCSI problem from Group Policy Objects
2.1 Turn off Windows Network Connectivity Status Indicator active tests
- Press the Windows key and R combination to open the Run dialog box.
- Enter gpedit.msc in the Run dialog box and press Enter.
- In the Group Policy Editor, navigate to the following path:
Computer Configuration\Administrative Templates\System
- Click on the System folder to expand it.
- Select the Internet Communication Management subfolder.
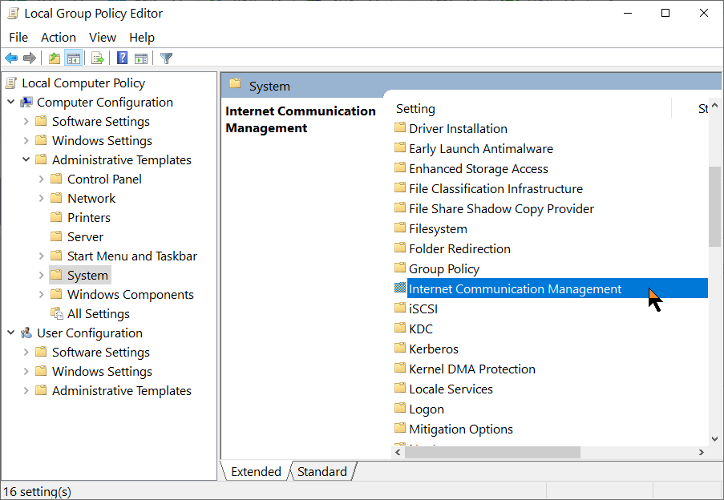
- Reveal the Internet Communication settings sub-folder by clicking on Internet Communication Management.
- Select the Internet Communication settings sub-folder.

- Hit Turn off Windows Network Connectivity Status Indicator active tests under the Settings window.
- Mark the Enabled option.
2.2 Disable NCSI probes
- In the Group Policy Editor, navigate to the following location:
Computer Configuration\Administrative Templates\Network - Reveal the Network Connectivity Status Indicator sub-folder by expanding the Network folder.
- Double-click on Network Connectivity Status Indicator.
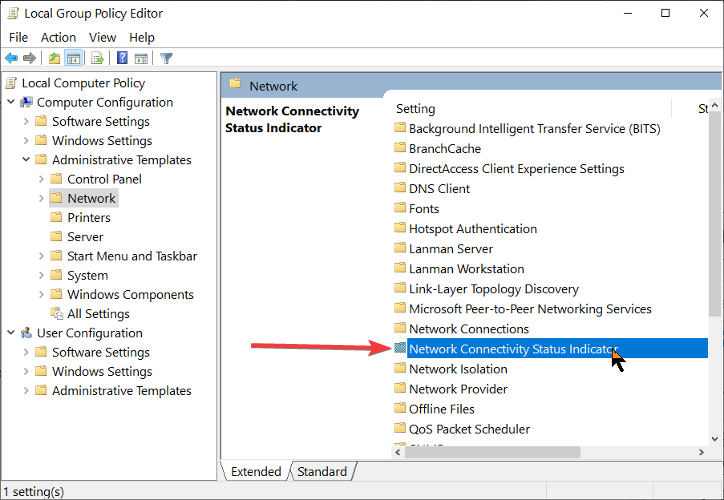
- Double-click on Specify passive polling status.
- Mark the Enabled option.
- Exit the Group Policy Editor.
3. Turn off Fast Startup
Another confirmed fix for this error is to disable the Fast Startup feature. We have dedicated guides on this that you can access right now:
4. Tweak the PC’s power settings
This is a solution that worked for users, as seen on forums:
- Open the Windows search box.
- Type device manager in it and click on the first result to open the app.
- Locate the Network Adapters section in the list.

- Right-click on your adapter and then select Properties.
- Go to the Power Management tab.
- Uncheck the box next to Allow the computer to turn off this device to save power.

5. Run the Network Connection troubleshooter
- Open the Settings app.
- Go to the System section and select Troubleshoot.

- Select Other troubleshooters.

- Locate and Run the Network and Internet troubleshooter.

- Wait for the process to complete.
We hope that the steps and methods in this guide have solved the action needed no internet Ethernet or WiFi problem once and for all.
You may also encounter a no internet, secured error message which is just as easy to fix. For more tech info, check out our guide on how to use WiFi and Ethernet at the same time.
If your Wi-Fi suddenly disappeared on Windows 11, it’s often caused by driver issues or system glitches, and luckily, you can fix it by updating drivers or resetting network settings.
Similarly, if you’re facing no Wi-Fi networks found on Windows 10 or a Wi-Fi adapter not working, these guides offer clear, step-by-step solutions to troubleshoot and restore your connection quickly.
Feel free to share your experience with us using the comment section below.
Read our disclosure page to find out how can you help Windows Report sustain the editorial team. Read more


Improve this guide

User forum
9 messages