Change Windows Camera Save Location: How to do it
Modify your settings to change Camera save location
Key notes
- If you use the Camera app on your PC, you might want to use a different save location.
- Changing this is pretty simple, and it can be done by modifying your settings.
If you have ever used the Camera app on your PC, you probably wondered how to change the Windows Camera save location.
We have a great guide on Windows 10 Camera save location that will answer some of your questions.
If you aren’t pleased with the current save location, be sure to keep reading to learn how to change it.
What is the Camera Roll folder in Windows 10?
Camera Roll directory is the default directory for all images created by the Camera app. The location of this folder is the following: C:\Users\your_username\Pictures\Camera Roll
Now that you know the default location, let’s see how we can change it.
You can learn more about saving new photos directly to the Camera Roll folder by following this guide on saving pictures to Camera Roll in Windows, which explains how the Camera app stores images and how to ensure every shot is saved correctly.
How can I change the Windows Camera save location?
1. Change the storage drive of Camera Roll
- Click the Start button and select Settings.
- Choose System and then go to Storage.
- Click on the Change where new content is saved hyperlink.

- Expand the New photos and videos will save to section and choose the preferred drive.

In our case, since we have two HDD partitions (system and data partitions), we can choose between one of them. If you make changes, the system will recreate the whole directory path in the alternative partition.
So, the original location will be mirrored to an alternative partition or external drive. Creating redundant folder tree in the process.
However, this only specifies the drive where you save the images, not the actual folder. It will still be the Camera Roll folder but on another drive.
Some users notice the Camera Roll folder missing from the Pictures directory. Learn how to restore it with a simple Camera Roll recovery guide.
You can also explore how to remove Camera Roll and Saved Pictures folders when you want more control over these directories by checking remove Camera Roll and Saved Pictures folders guide.
2. Change the folder location of the camera photos from the Registry
- Press the Windows + R keys to start Run console.
- Type regedit and press Enter or click OK.
- Now, navigate to the following location in Regedit:
HKEY_CURRENT_USER\SOFTWARE\Microsoft\Windows\CurrentVersion\Explorer\User Shell Folders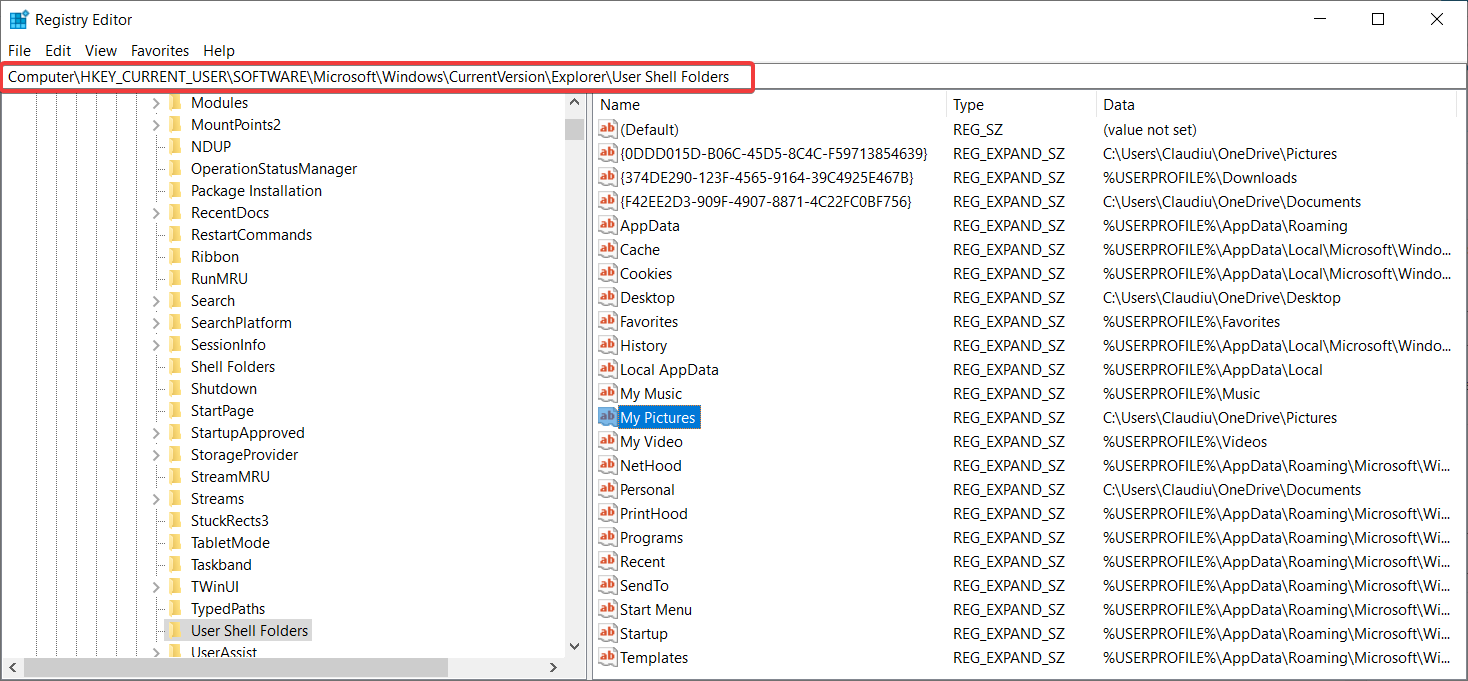
- Double-click My Pictures and change the path of the folder you want to store the images to the one you want to use. We have changed it to D:\Test.

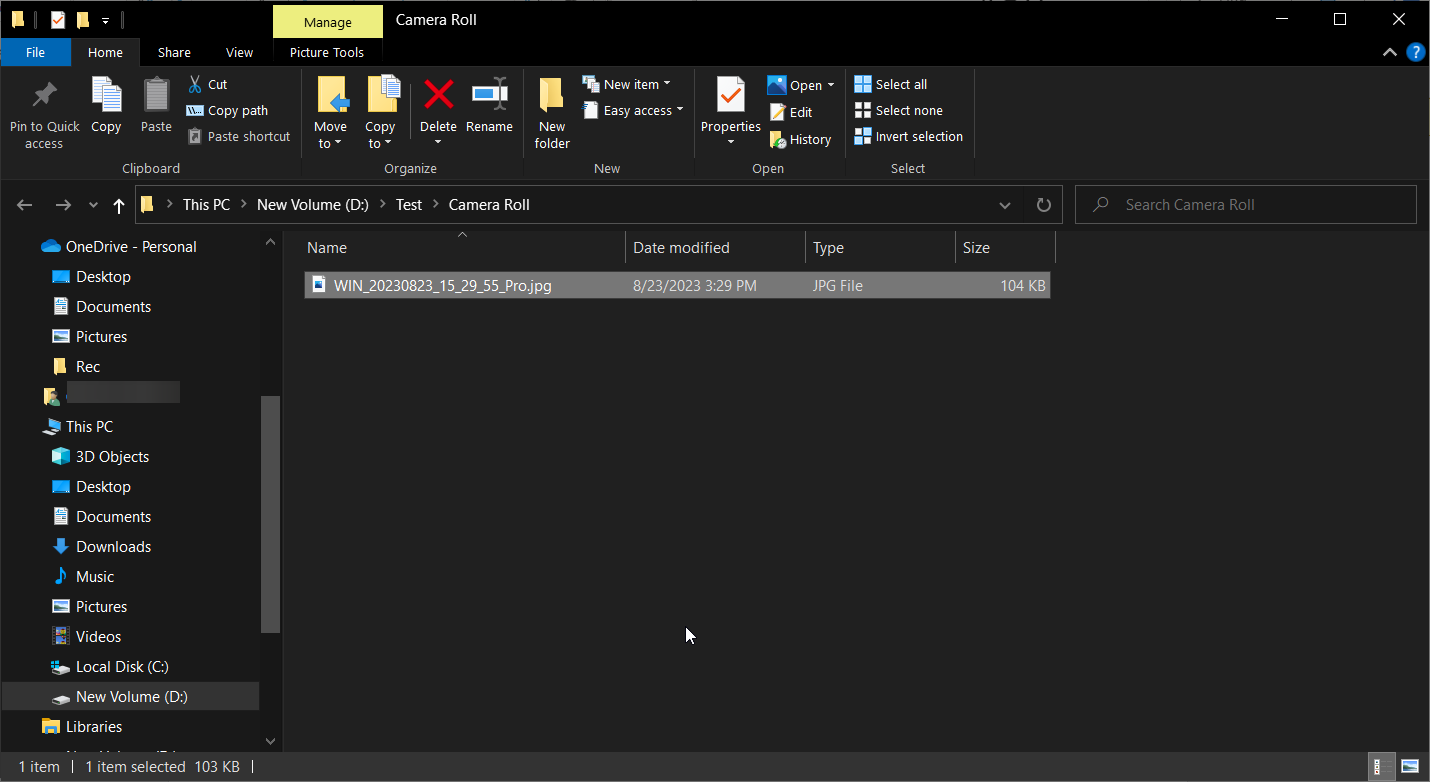
- Now, when you take a picture with Windows Camera, it will be automatically stored in the new folder D:Test\Camera Roll. Yes, the Camera Roll folder is created automatically.
In case you’re having problems, we also have a great guide on what to do if Camera app is not working, so we encourage you to visit it.
Finally, if you have any issues with the procedure, give us a shout in the comments. We’ll be glad to provide additional information.
Read our disclosure page to find out how can you help Windows Report sustain the editorial team. Read more


Improve this guide


User forum
2 messages