FIX: Windows 10/11 error applying security
6 min. read
Updated on
Read our disclosure page to find out how can you help Windows Report sustain the editorial team Read more
Key notes
- The Windows 10 error applying security is usually caused by incorrect security settings.
- You can also get the error while trying to create or save a new file directly on your hard drive.
- A good idea to solve this problem is to create a new user account and try to fix your profile.
- You can also take ownership of the specific folder in Windows as instructed in our guide.

When you get a Windows 10 apply security error, the issue is usually caused by incorrect settings, or, when you are not the owner of the content you’re trying to access.
The error, which reads as Failed to enumerate objects in the container. Access is denied is usually resolved by changing permission settings and can also be brought about by file encryption.
Another variation of the same error comes with the following message: An error occurred while applying security information to Windows 10.
In order to check whether the problem is with the file encryption, right-click on the folder, then select Properties, and go to Advanced settings.
The same error pops up when you try to save or create a new file on your main drive directly, which essentially is saying you have no permission to create or edit your files even if you’re an admin in Windows 10.
Admin accounts are heavily limited as to what you can do even if your User Account Control settings are on the lowest level possible.
This article looks at the various other solutions so you can try and see which one helps.
How can I fix the applying security error in Windows 10?
- Create a new user account
- Change security settings to open the folder
- Change Permissions
- Allow permission to Full Control
- Use UAC setting to change privileges
1. Create a new user account
1.1 Create another user account
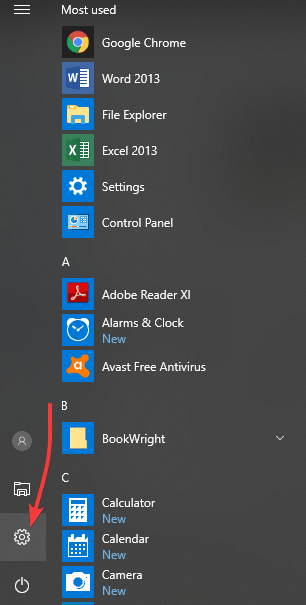
- Click Start.
- Select Settings.
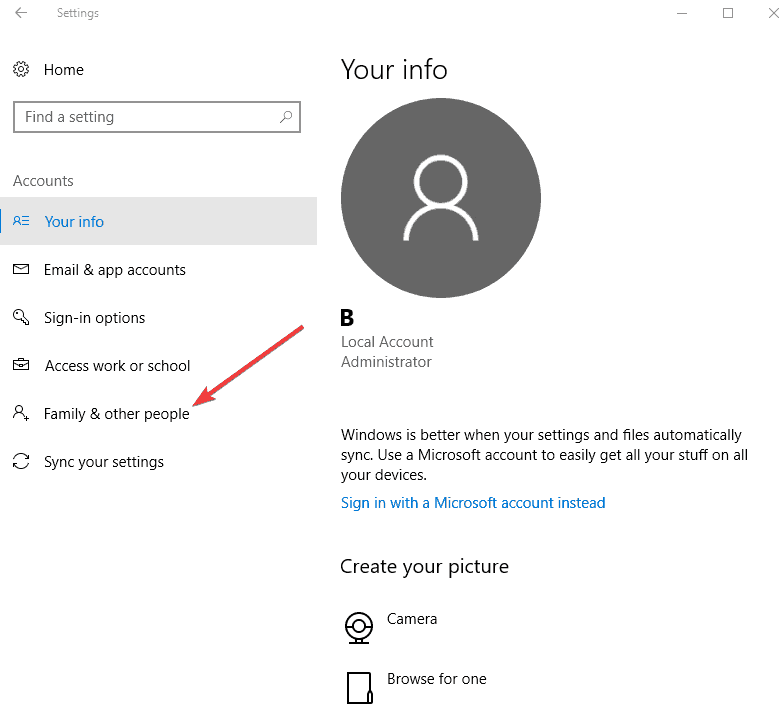
- Select Accounts.
- Click Family and Other people.
- Under Other people, click Add someone else to this PC.
- Fill in the form with the user name and password. Your new user account will be created.
- Click on Change account type.
- Click the drop-down arrow and choose Administrator to set the account to administrator level.
- Restart your computer.
- Login to the new account you just created.
If the issue is resolved in the new profile, then it may mean your other user profile is corrupted, you need to fix the profile.
1.2 Fix your profile
- On your new account, use it to downgrade your usual account.
- Click Apply or OK.
- Raise back your old account to its default admin level.
- Rinse and repeat a few times as this will help to remove any corruption.
- Leave your account on as Administrator.
Some Windows operating system files are usually under the ownership of the system by default as these are the core files needed for the smooth running of the OS.
Other files and folders like pictures, videos among others, are under the owner’s name (the current person logged in as user or admin).
If the problem disappears, then you can either fix the old user account or migrate to the new account.
2. Change security settings to open the folder
- Right-click the Main Folder.
- Go to Properties.
- Select Security Tab.
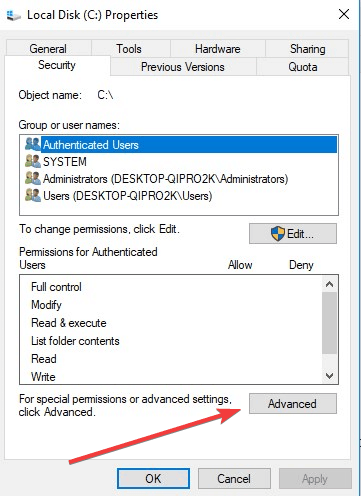
- Click Advanced.
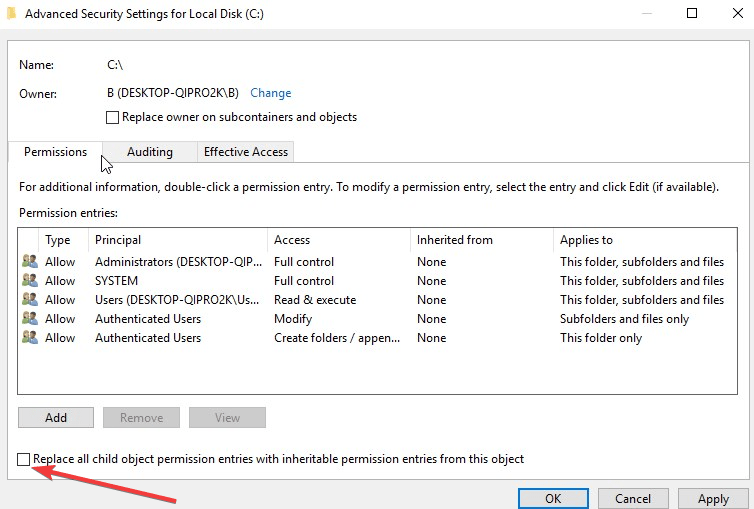
- Check the box Replace all child object permission entries with inheritable permission entries from this object
- Click OK or press Enter.
This will change all the permissions for the child accounts and will prevent the security error from Windows.
If the security settings block you from downloading a file from the Internet, check out this expert article that will help you fix the problem quickly.
3. Change Permissions
- Press Windows key + E to start File Explorer.
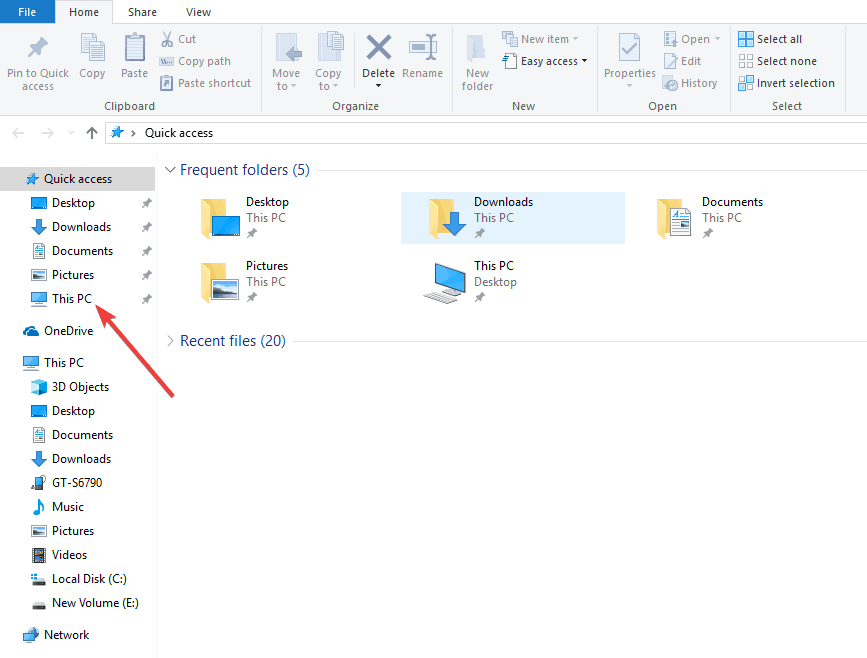
- Click on This PC from the left pane.
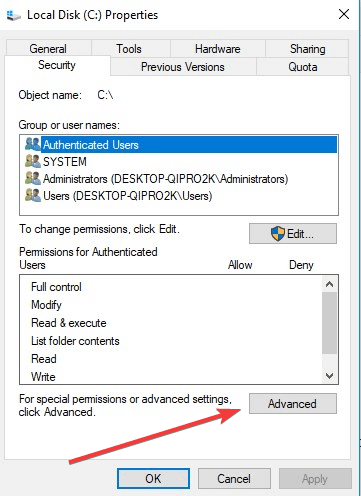
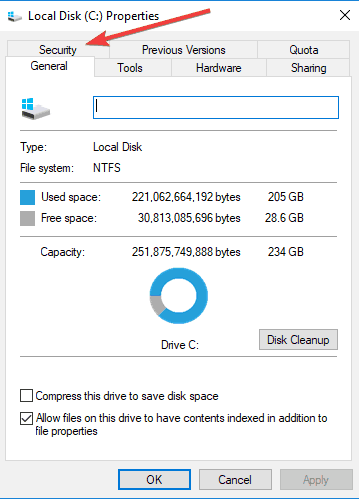
- Right-click on the external hard disk drive (or drive C:) and select Properties.
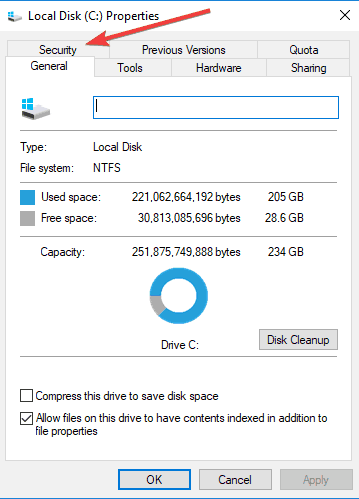
- Select the Security tab.
- Click Advanced.
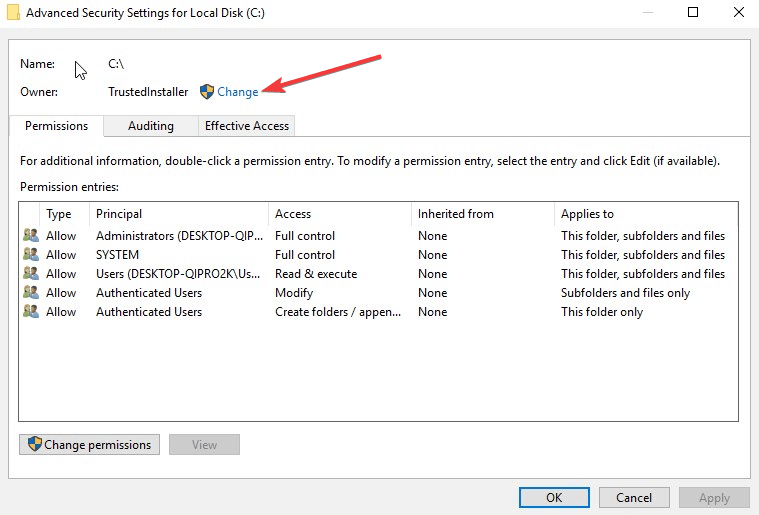
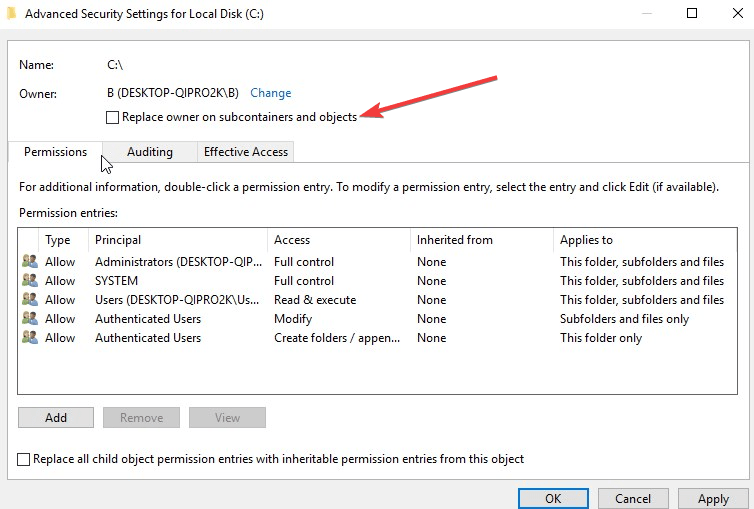
- The popup window should show the current owner, so click Change.
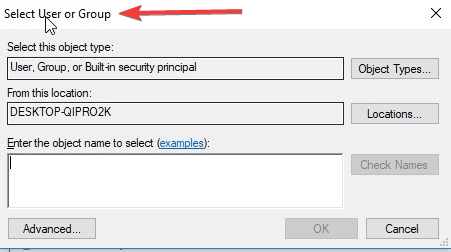
- The Select User or Group pop-up box appears.
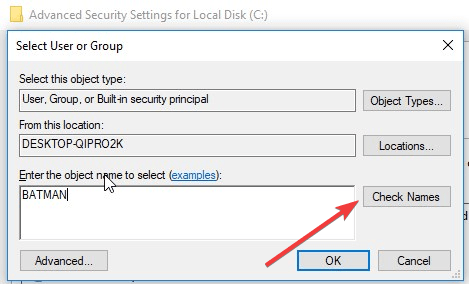
- In the text box, type in your current username if you’re the administrator.
- Click the Check Names button. Your name will be replaced with the official system name (preceded by the computer name and back slash symbol).
- Click OK or press Enter.
- The box disappears, sending you back to the Advanced Security Settings window.
- A new tick box appears below owner, with the text: Replace owner on subcontainers and objects. Select this tick box.
- Select the tick box Replace all child object permission entries with inheritable permission entries from this object.
- Make sure that everyone appears on the Permission entries window, if not, click Add.
- Type everyone, click Check Names, and then OK.
- Click Apply.
Did you accidentally deleted the Admin account? Here’s a great guide that will help you fix that.
4. Allow permission to Full Control
4.1 Manually change permissions to Full Control
- Right-click on the file.
- Select Properties.
- Select Security tab.
- Click Advanced.
- The popup window should show the current owner, so click Change.
- Change the Owner to your user name; you need to have admin access to change this. Close the window once this is done.
- Right-click on the file again.
- Select Properties.
- Select Security tab and click on Advanced.
- Click Disable Inheritance and select Convert inherited permissions into explicit permissions on this object.
- Remove any permissions entries which you don’t want. Make sure Everyone and your user has Allow permission to Full Control.
- Click OK. Now you should be able to open the file.
4.2 Use Command Prompt to take ownership
- Type cmd in Windows search and click on Run as administrator to run Command Prompt with full privileges.
- Type the following command and press Enter:
takeown /f <foldername> /r /d y - Type the following command and press Enter (replace <foldername> with the path of the folder):
icacls <foldername> /grant administrators:F /T
The above process lets you take ownership of the folder and then assigns the Admin group Full Control of the Permissions folder.
If you can’t run Command Prompt as administrator, here’s a helpful guide that will help you solve the problem right away.
5. Use UAC setting to change privileges
- Right-click Start and select Run.
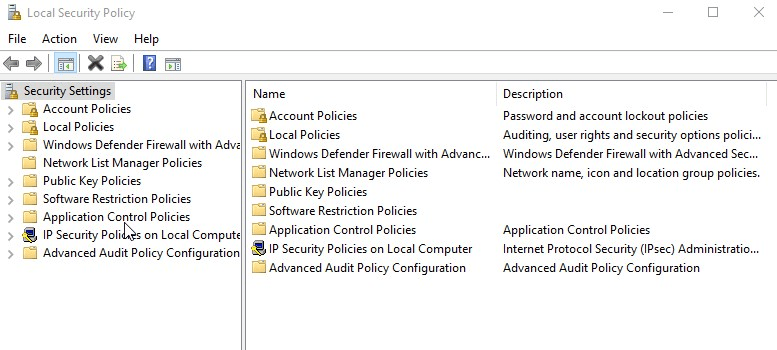
- Type secpol.msc to load Local Security Policy with admin privileges.
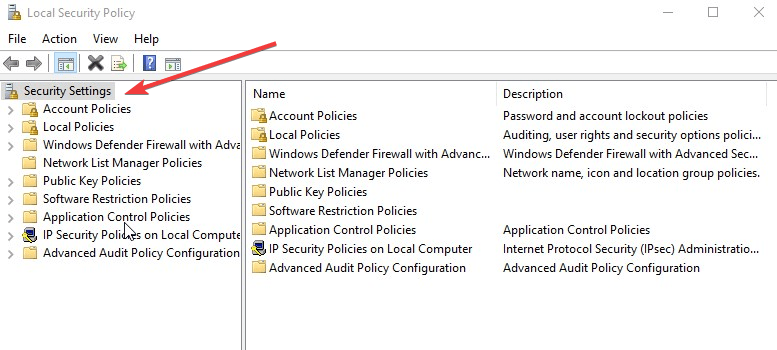
- Go to the left pane and navigate to Security Settings.
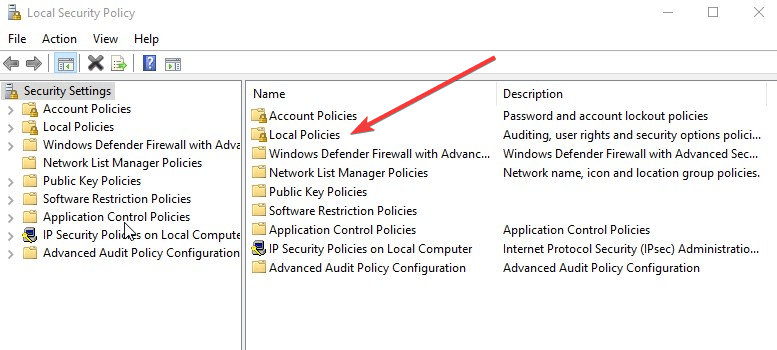
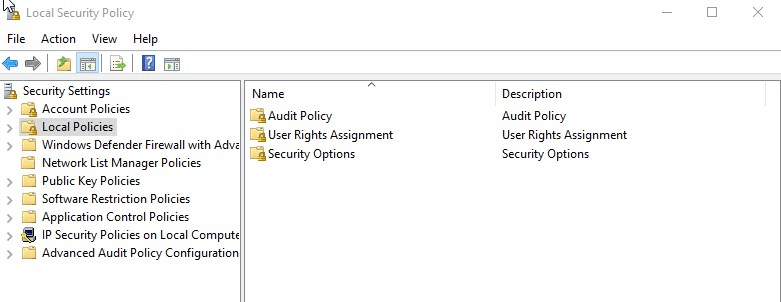
- Select Local Policies.
- Select Security Options.
- Scroll down on the right-hand list to find the User Account Control setting: Run all administrators in Admin Approval Mode
- Double click it or right-click and select Properties.
- Change the setting from Enabled to Disabled.
- Click Apply.
- Click OK or press Enter.
A notification will pop up saying You must restart your computer to off User Account Control.
Restart your computer, and you’re good to go! You can now add, change or edit your files without receiving Windows 10 error applying security, or other permission errors.
However, you need to note that if the UAC is turned off, some potentially bad programs can run without your permission, but these can be thwarted if your security software is up to date.
Did any of these solutions help you fix the Error applying security. Access is denied? Let us know in the comments section below.

