FIX: Windows 10 Lenovo camera not working
3 min. read
Updated on
Read our disclosure page to find out how can you help Windows Report sustain the editorial team. Read more
Key notes
- If the Lenovo camera is not working on Windows 10, this can cause a wide range of inconveniences to users during work.
- When you see an image with a grey background, instead of the normal screening, you should know that the integrated camera doesn't work.
- In order to start the troubleshooting process, it is recommended that you adjust the camera permission settings.
- Updating your system is an efficient process that will help you fix the camera not working problem and also avoid other issues.
Most of us frequently use our laptop camera for chats on apps like Skype, Google Meet, or Zoom. Thus, it is important to keep it in regular conditions, and not worry about our day-to-day performance.
Users often reported that the Lenovo camera is not working on Windows 10. This can be an extremely annoying issue, but we are here to fix it.
This is what the users see whenever they try to use their camera:
This article will let you be aware of the best options to fix your Windows 10 Lenovo camera not working issue. So, read it with interest!
What can I do if the Lenovo camera is not working?
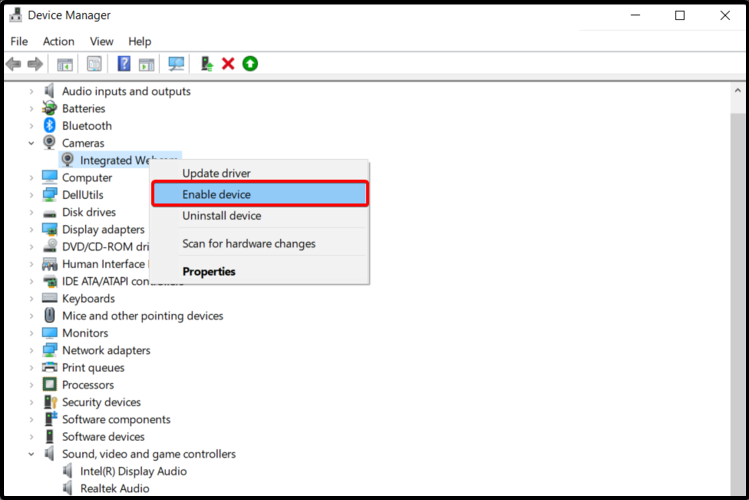
1. Check if the camera is disabled
2. Turn off Lenovo Privacy Mode
- Click on the Start button, and type Lenovo in the search bar.
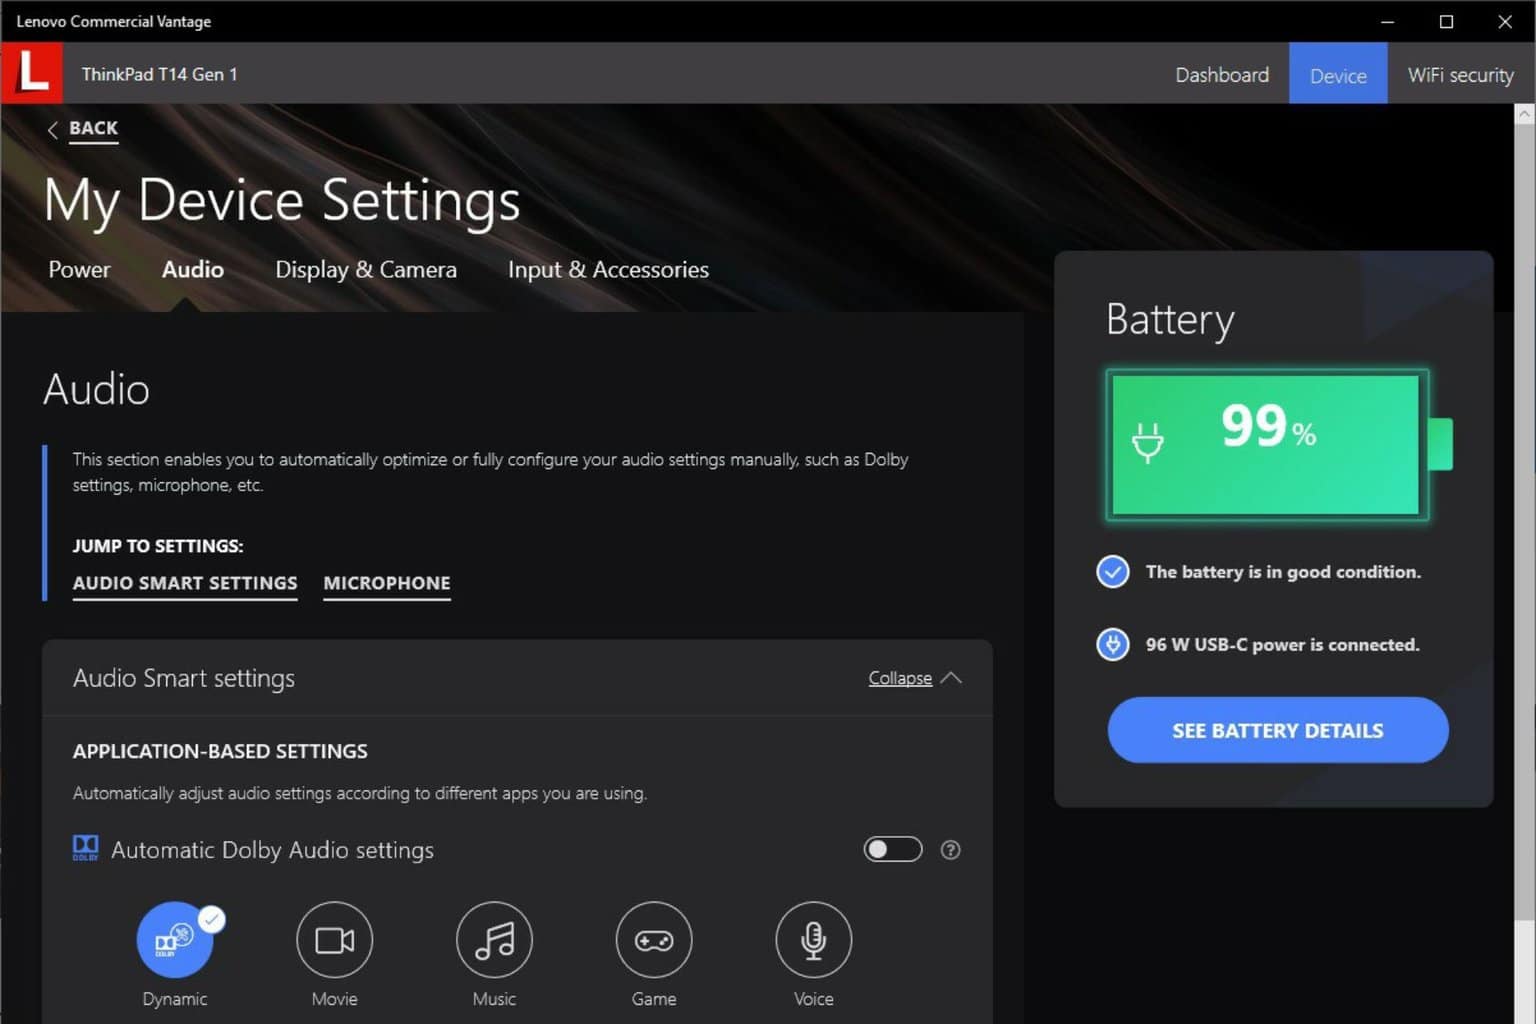
- Select Lenovo Settings.
- To open the setting from your Lenovo camera, click on the Camera icon.
- Scroll down, and turn off the Privacy Mode.
- Restart your PC, and check if the camera is working.
There are times when the button that you need the most fails to function. This guide dedicated to fixing Windows 10 Start button not working is exactly what you’re looking for.
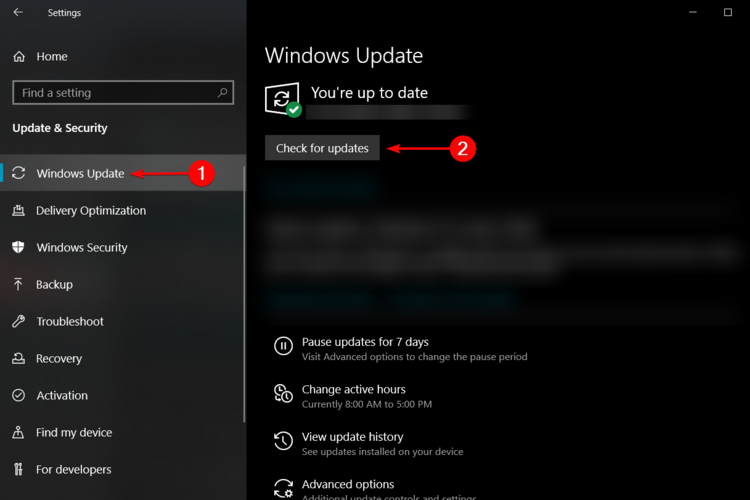
3. Check for Windows updates
- Go to Settings.
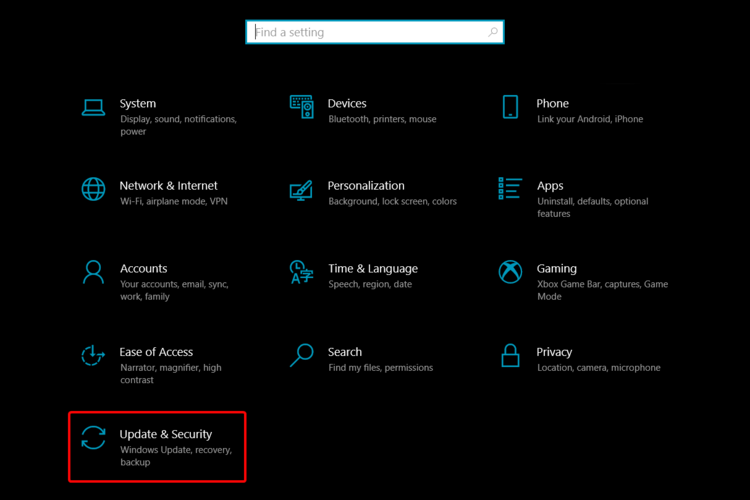
- Select Update & Security.
- On the left side, click on Windows Update, then select Check for updates, from the right side.
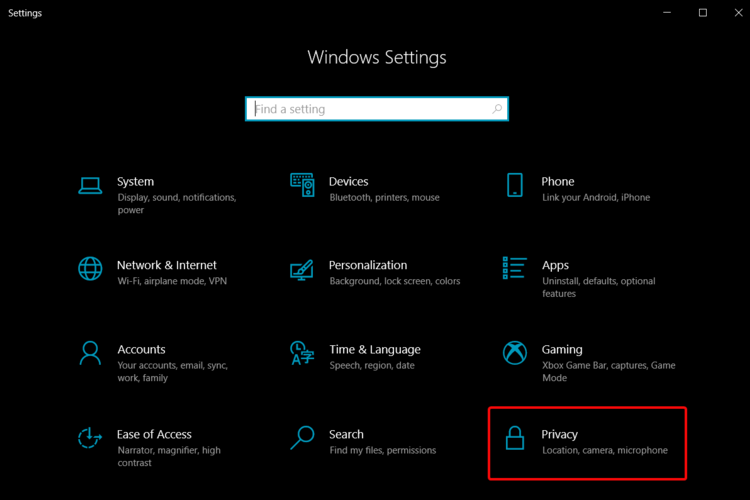
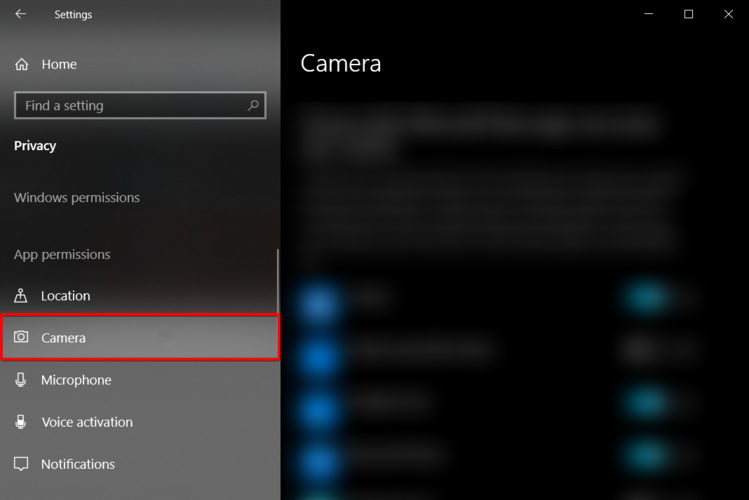
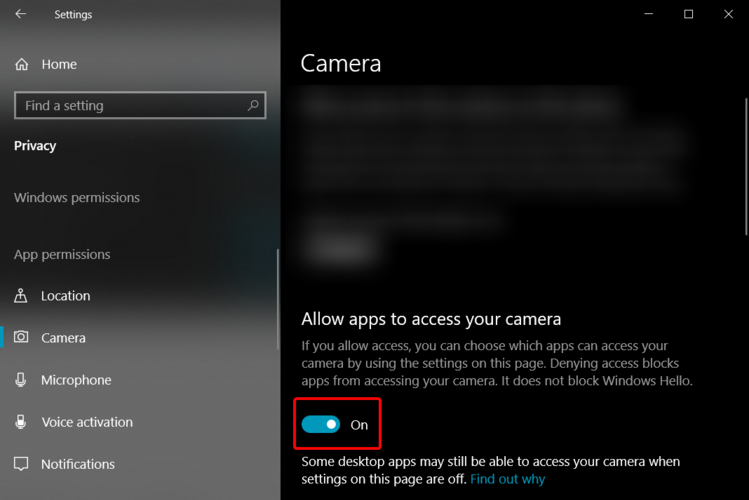
4. Adjust camera permissions
- Open Settings.
- Go to Privacy.
- On the left side, click on Camera.
- On the right side, under Allow apps to access your camera, click on the toggle button and turn it on.
5. Uninstall and reinstall the camera
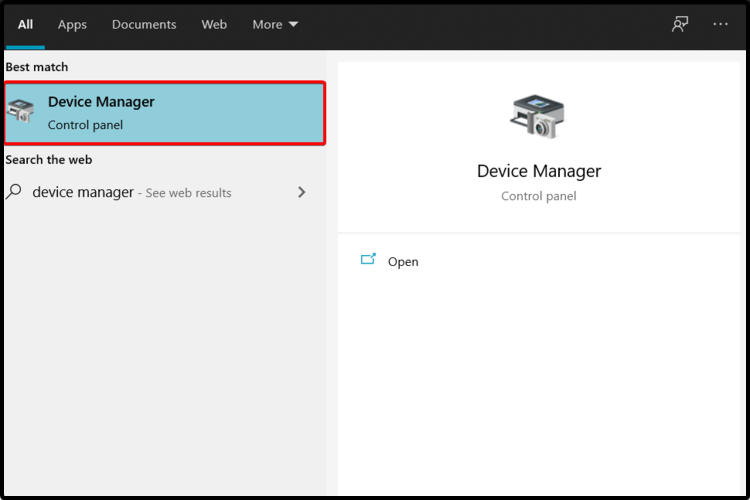
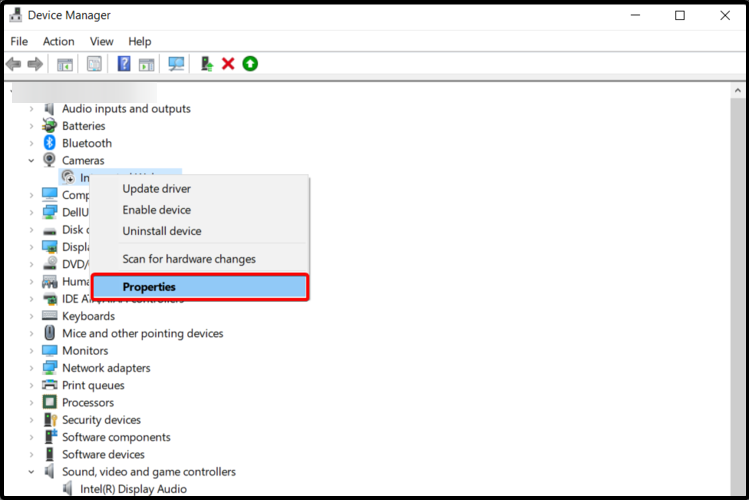
- Open Device Manager.
- Expand Cameras, right-click on your Lenovo camera, and select Properties.
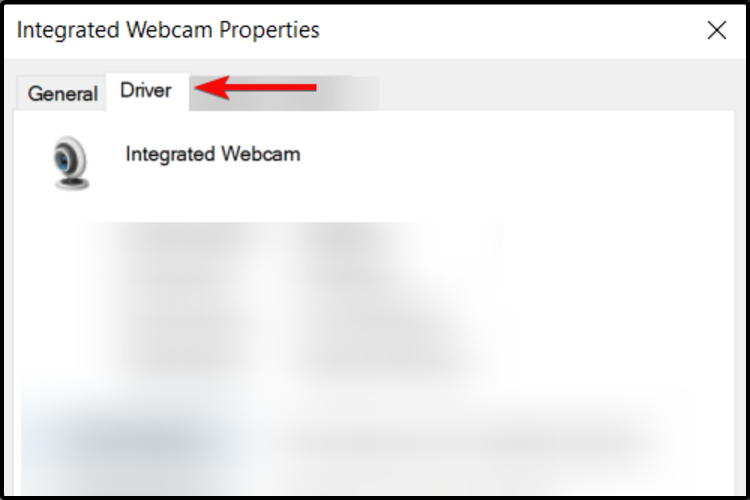
- Click on the Driver tab.
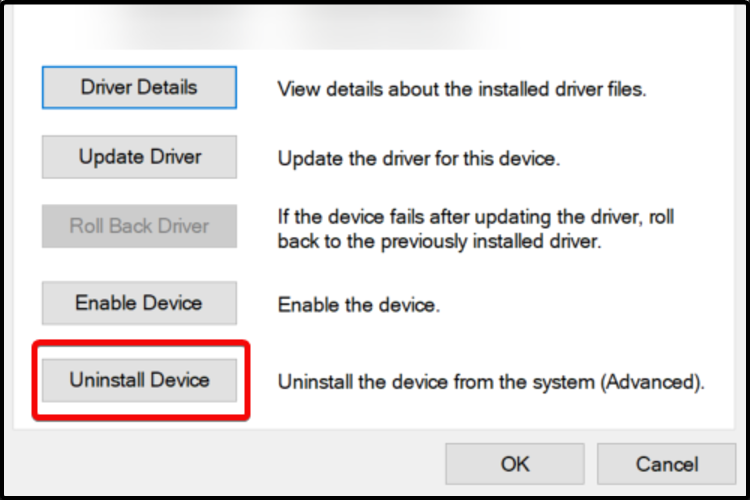
- Select Uninstall Device.
- Select the check box for Delete the driver software for this device, then click on OK.
- Go back to Device Manager main window, right-click on Camera, and select Scan for hardware changes.
- Wait for it to scan, then reinstall updated drivers, and restart your PC.
6. Check for incompatible camera drivers
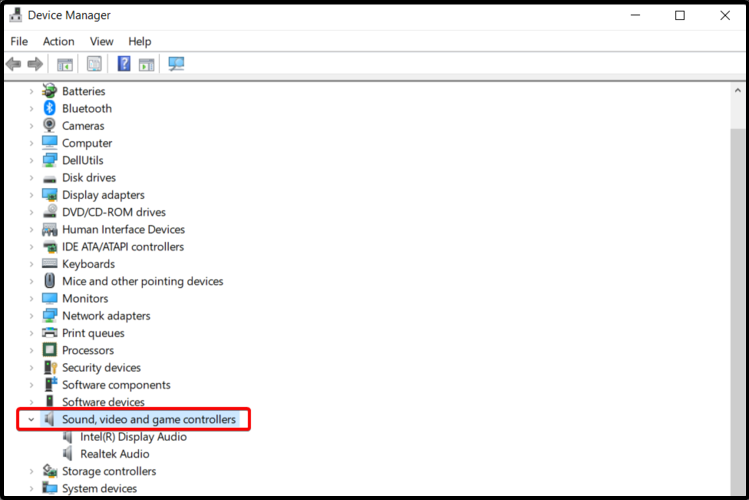
- Open Device Manager.
- Expand Sound, video, and game controllers.
- Right-click on the name of your camera, then select Properties.
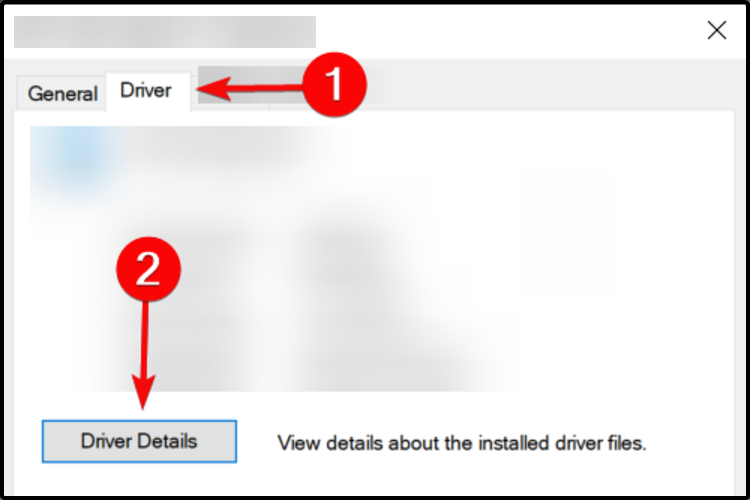
- Select the Driver tab, then click on Driver Details.
- Look for a file name that includes stream. sys.
 NOTE
NOTE
7. Roll back the camera driver
- Open Device Manager.
- Right-click on Camera, then select Properties.
- Select the Driver tab, then click on Roll Back Driver, and choose Yes.
- After the rollback is done, restart your PC, and then try to open the Camera app again.
Some drivers don’t provide this alternative, so if yours doesn’t have the Roll Back Driver option available, you should try the suggestions above.
These are the best solutions you can find to fix the Windows 10 Lenovo camera is not working issue.
Also, feel free to check more ways to solve the laptop camera not working troubles, so you won’t worry again about your device crash.
In addition, please comment below, and let us know which of the recommended suggestions worked best for your problem.



User forum
0 messages