Windows 11 Best Performance Settings: Storage, Background Apps & More
Tweaking Windows 11 for best performance
What if I told you that you can increase the performance of your Windows by tweaking some settings without the need for third-party software?
The default Windows 11 settings are optimal for all-around enjoyable performance, but you can take advantage of some factors to speed up and optimize your system.
What are the best Windows 11 performance settings?
1. Adjust performance settings
- Click the Search icon in the Taskbar.

- Type in advanced and select View advanced system settings.

- Then, select Settings in the Performance section.

- Select Adjust for best performance then click OK.

2. Clean the startup
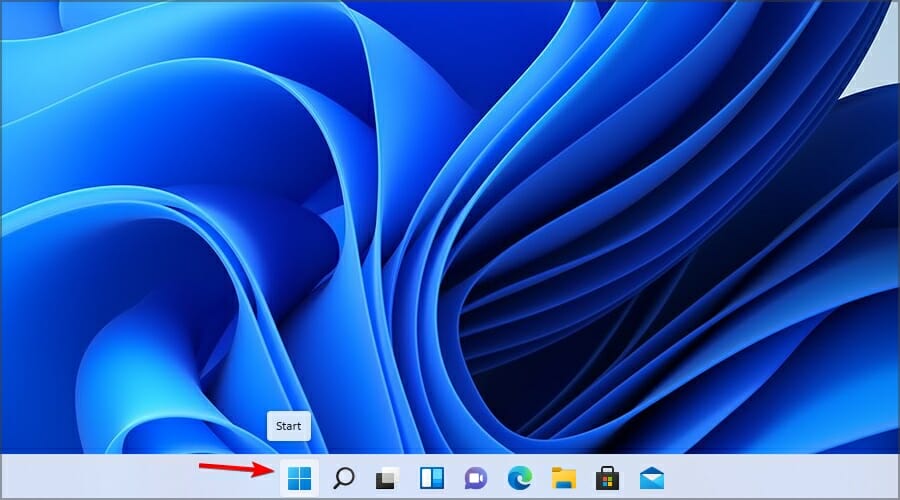
- Click the Start button in the Taskbar.
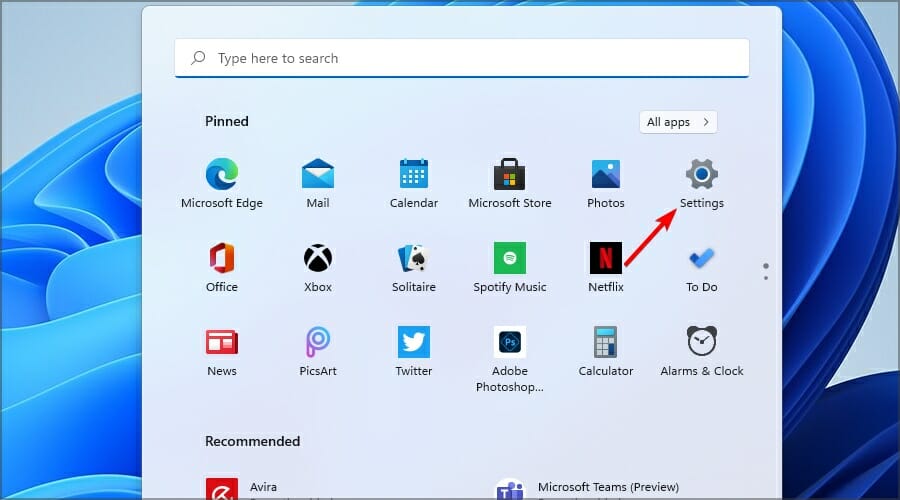
- Select Settings.
- Go to Apps, then Startup.

- Toggle off the apps you no longer wish to start with your PC.

3. Disable background apps
- Click the Start icon in the Taskbar.
- Now select Settings.
- Navigate to Apps section in the left pane. In the right one, click the three dots icon next to the application that you want to disable.

- Select Advanced options.

- Set the Background app permission to Never.

- Repeat this step for all apps that you want to disable.
 NOTE
NOTE
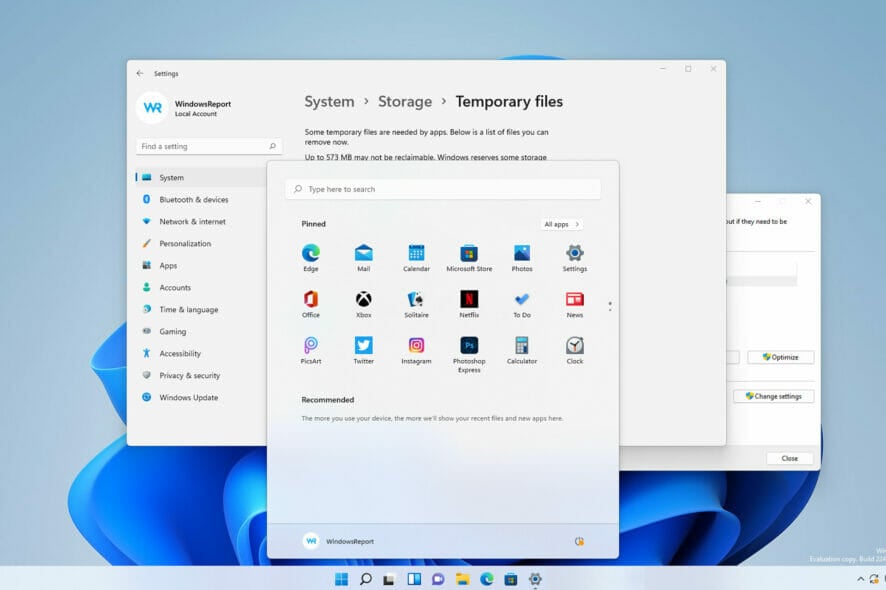
4. Enable Storage Sense and clear the temporary files
- Press Windows Key + I to open the Settings app.
- Now select Storage.

- Turn Storage Sense on.

- You can also schedule and adjust your settings by click on Storage Sense.

While you’re here, you can also clear the temporary files by doing the following:
- In Storage section, click on Temporary files.

- Select the files that you want to remove and click on Remove files button.

- When the confirmation dialog appears, click on Continue.

- Wait while Windows completes the process.
5. Change power settings
- Press Windows Key + S and enter power plan. Select Choose a power plan from the list of results.

- Then, select High Performance. You might have to expand Show additional plans section in order to see the option.

6. Disable transparency effects
- Press Windows Key + I to open the Settings app.
- In the left pane, select Personalization. Now select Colors.

- Now, toggle Transparency effects off.

NOTE
Is Windows 11 more demanding than Windows 10?
Yes, the new version is slightly more demanding than its predecessor. To run Windows 11, you’ll need at least 4GB RAM, 64GB of storage space, and a dual-core 64-bit CPU.
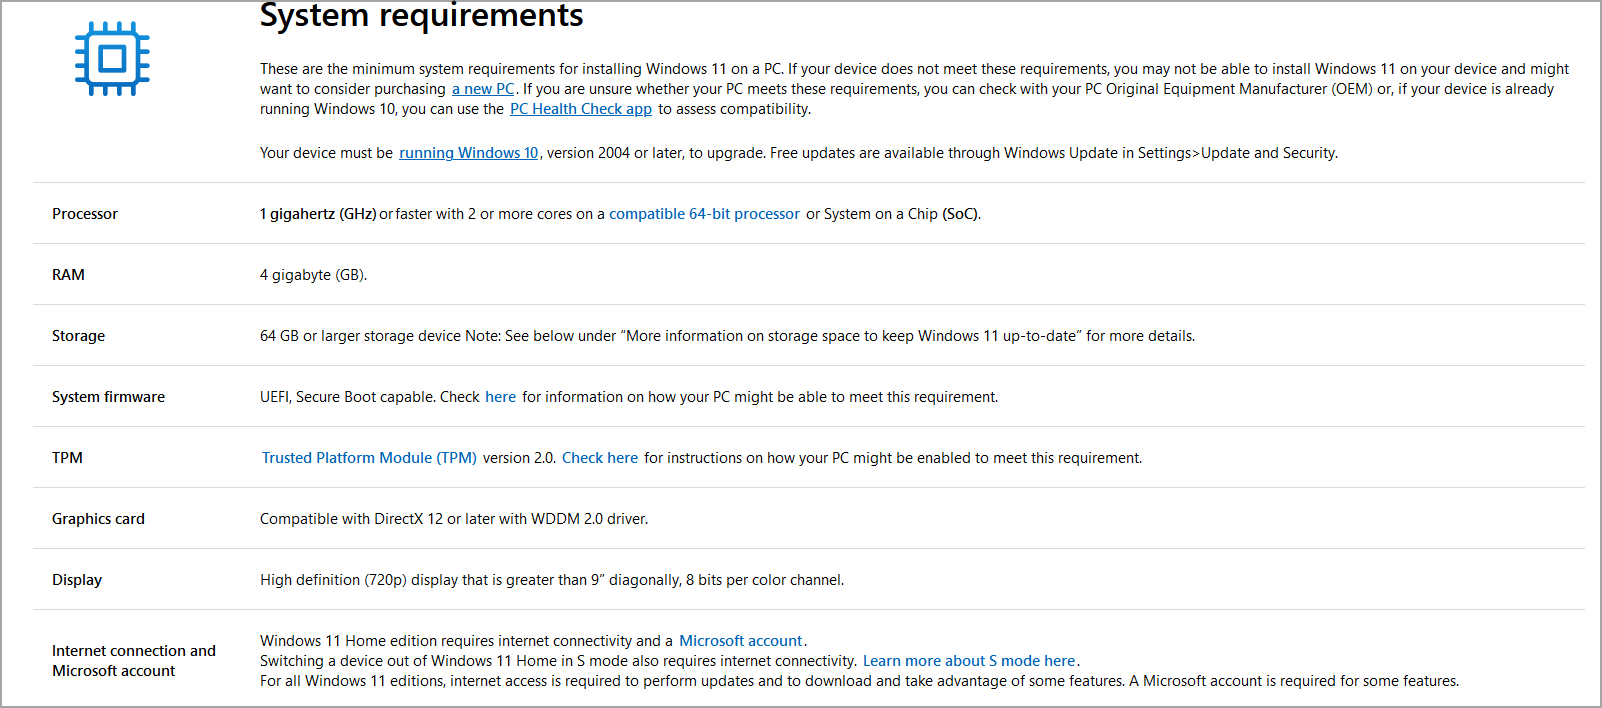
This isn’t a significant change compared to Windows 10. However, not all processors will work with the latest release, so if you want to upgrade, make sure you don’t use hardware over four years old.
We suggest checking the list of supported CPUs on Microsoft’s website for detailed information.
Can third-party apps affect my performance?
Yes, third-party apps can negatively impact performance. They take up space and may require lots of resources to run. That’s not to say you should only run Windows apps. Just make sure to clean up your PC regularly and get rid of apps you no longer need.
Can defragmentation speed up my PC?
Defragmentation can improve your performance if you’re using a hard drive and not an SSD. If you’re unfamiliar, this process will rearrange data, allowing you to access it faster.

This process is usually performed automatically by Windows, and if you want to learn more about it, we suggest reading our how to defrag drives on Windows 11 guide.
Can using High performance power plan cause problems?
In most cases, High performance won’t cause any issues. By using this plan, your CPU speed won’t be reduced at all, so you should get better results in apps and games.
However, this power plan will use more power and cause more heat in some cases, so if you use it on your laptop, ensure you have a good cooling system and that your device is connected to the wall outlet.
That’s about it for this article. We’ve included all the ways you can optimize your device and make Windows 11 faster in a matter of moments.
All these settings are incredibly easy to access and perfectly safe to use, so try them on your PC and check if they work for you.
Once you have configured your PC, you can use Windows 11 performance overlay and check for improvements. After applying these tweaks, run a computer performance test to verify gains and track CPU, GPU, RAM, and disk improvements.
Users with older PCs can also enable ReadyBoost on Windows 11 for a small performance boost.
If you have any suggestions or know about other settings that could improve Windows 11, don’t hesitate to tell us in the comment section below.
Read our disclosure page to find out how can you help Windows Report sustain the editorial team. Read more


Improve this guide

User forum
2 messages