Windows 11 Controller is Acting Like a Mouse? How to Stop it
Uncheck Xbox configuration support to regain access
Key notes
- The Controller acting as a mouse issue can happen due to misconfigured Steam settings or enabled mouse functionality on it.
- To fix it, try to plug in the controller after you load the game or disable the controller under Mouse on Control Panel settings.
- To know the detailed steps, keep reading!

If your controller acts like a mouse on your Windows 11 when you load a game, disrupting your gaming experience, this guide can help!
We will discuss some expert-tested solutions with step-by-step instructions right after explaining the probable causes of the same.
Why is my controller acting like a mouse?
- Misconfigured controller settings on Steam.
- Enabled as a mouse in Control Panel settings.
- Software conflicts.
- Outdated drivers.
How do I stop my controller from acting like a mouse on Windows 11?
Before moving the detailed troubleshooting steps, try these fixes to eliminate the problem:
- Restart your computer and check for pending Windows updates.
- Let the game load first, then plug in or connect your controller to avoid the mouse input issue.
- Add the non-Steam game to the Steam Library.
- Check if the game controller is properly calibrated.
1. Disable the Xbox configuration support option
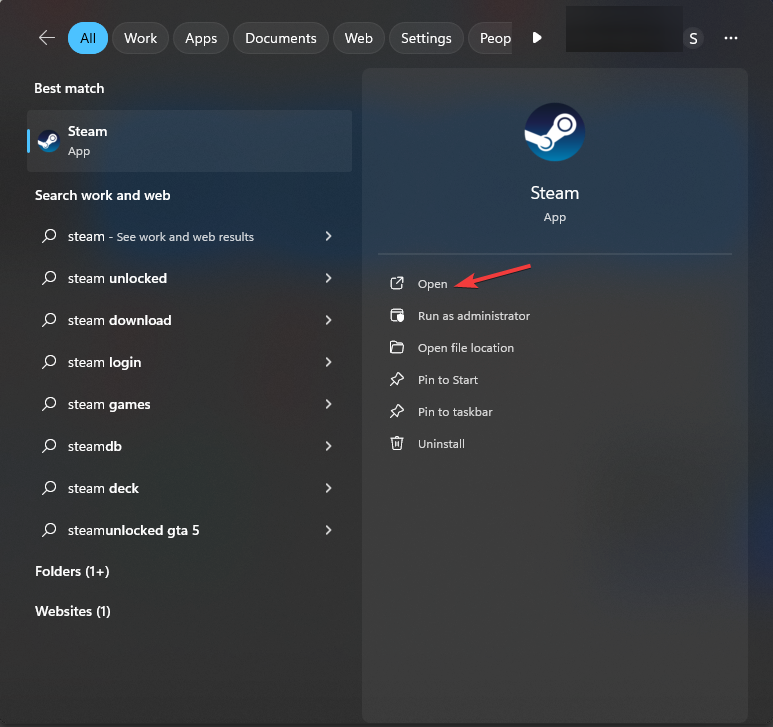
- Press the Windows key, type steam, and click Open.
- On the top left corner, click Steam and select Settings.
- Next, navigate to Controller on the Settings window.
- Go to General Controller Settings.
- Remove the checkmark next to the Xbox Configuration Support option and click the Back icon.
- Click OK to save the changes, then reboot your PC and check if the controller controls the mouse cursor.
This method works if you are using the controller to play non-Steam games. However, don’t forget to reverse-engineer these steps to enable the feature before playing a game from Steam Library.
2. Deactivate the Enable the Steam Overlay while in-game option
- Press the Windows key, type steam, and click Open.
- On the top left corner, click the Steam app Menu and select Settings.
- Locate In-Game from the left pane on the Settings window.
- Toggle off the switch next to the Enable the Steam Overlay while in-game option.
- Restart the Steam app to let the changes take effect.
However, if you want to disable it for a single game, follow these steps:
- Launch the Steam client, click Library, and locate the game from the home screen.
- Right-click it and select Properties.
- On the Properties window, go to the General tab and turn off the toggle switch next to the Enable the Steam Overlay while in-game option.
- Restart Steam to save the changes.
3. Disable it as a mouse from the Control Panel
- Press the Windows key, type control panel, and click Open.
- Select Category as View by and click Hardware and Sound.
- Under the Devices and Printers option, click Mouse.
- On the Mouse Properties window, select the mouse related to the controller. Generally, it appears by the name AlphaMouse; select it and click Properties.
- On the following window, go to the Driver tab and click the Disable device button.
- Click OK on both windows to save changes & deactivate the mouse emulation.
You can also use the same steps to disable the controller as a keyboard if it is acting like one. All you need to do is click the Keyboard link under the Devices and Printers option, choose the keyboard, and Disable it.
4. Choose the Disable Steam Input option
- Press the Windows key, type steam, and click Open.
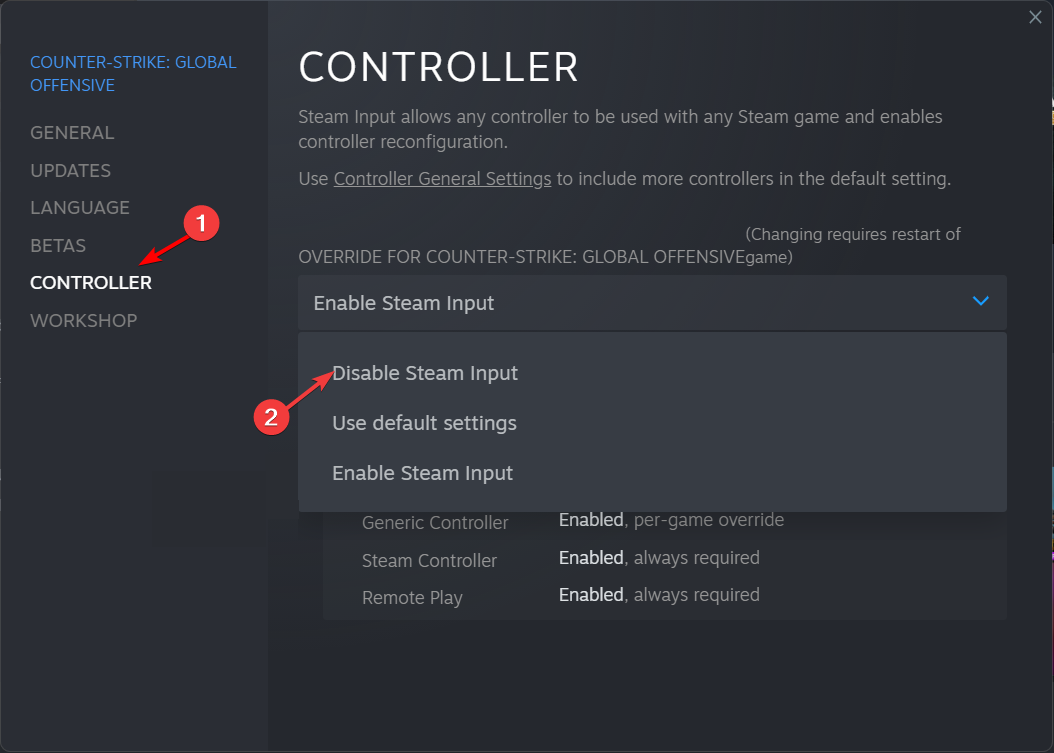
- Go to Library, locate, and right-click the game to select Properties.
- On the Properties window, click the Controller tab.
- Select the Disable Steam Input option from the drop-down to turn off mouse emulation.
Turning the Steam input on or off can also help you fix other controller issues, like the controller not working on your PC.
5. Modify the Desktop Configuration settings
- Launch the Steam client, then from the top left corner, click Steam and select Settings.
- Next, navigate to Controller on the Steam Settings window.
- Click the Desktop Configuration button.
- If you see the same image as below, then the Joystick Mouse is enabled; change it to None and close Steam. Now check if the controller moves the mouse pointer.
Always keep your Steam application updated and establish the controller connection properly, especially when using a wired one.
In case you are facing other Xbox controller issues, you can try using controller software for Windows; read this guide to know more about it.
If you have any questions or suggestions on the subject, feel free to mention them in the comments section below.
Read our disclosure page to find out how can you help Windows Report sustain the editorial team. Read more


User forum
0 messages