Windows 11 Ethernet not Working: How to Fix it
Tested and Trusted solutions to get your Ethernet working again
Key notes
- Several users have reported facing trouble with the Ethernet and being unable to access the Internet.
- In some cases, PCs were connected to Ethernet, but still had no Internet.
- It could be due to issues as trivial as loose or faulty connections to intricate ones like outdated or corrupt drivers and misconfigured network settings.
- The error can be easily fixed by updating the driver, resetting the network settings, or using built-in troubleshooters.

Windows 11, the latest iteration in the series from Microsoft, has a lot to offer, both in terms of functionality and design.
However, after the upgrade, many users reported that the Ethernet was not working in Windows 11. Usually, their PCs weren’t connecting to the internet.
On the other hand, for some, Ethernet was connected but no they had no internet.
This poses a significant problem since they have trouble establishing a secure Internet connection. Hence, it becomes imperative that the Windows 11 Ethernet not working error is immediately fixed.
But before we head to the existing solutions, you must first understand the error’s exact causes. This will help you identify the underlying problem in your case and make the troubleshooting simpler and quicker.
What causes the Ethernet not working error in Windows 11?
A bunch of reasons can cause the issue, and we have tried to list them all below:
- Outdated or corrupt drivers
- Running an older version of the Windows
- Issues with the hardware
- System infected with malware or virus
- The Ethernet adapter is disabled
- Misconfigured settings
- Conflicting applications
Now that you understand the underlying causes, it’s time we head to the fixes.
Why is Ethernet not working, but Wi-Fi is?
It might be due to connectivity issues if your Wi-Fi is working but not your Ethernet. On the other hand, it might be that the cables are not correctly plugged in or there is some damage to your cable.
Also, it might be due to outdated or corrupt drivers. Lastly, the problem can be because of conflicting network settings.
How do I fix the Windows 11 Ethernet not working issue?
1. Check Ethernet cable connections
When dealing with the Ethernet not working error in Windows 11, your primary approach should be to check if the connections are in order.
It would help if you first verified whether the cables are plugged in firmly. Or, unplug and replug them and ensure they fit perfectly into the port.
Also, check for damages to the Ethernet cable. More often than not, a damaged line is found to be the underlying cause. Check for any significant bends or cuts in the cable; if any are found, replace them.
2. Restart the modem/router
A simple fix for problems encountered when establishing an Ethernet connection is to restart the modem/router. Then, you can either unplug the power cable or check for a power switch to turn it off.
Some newer models have built-in batteries, in which case, these will have to be removed as well to turn off the modem/router.
After turning it off, wait for a minute or two, plug it back into the power source, and check if the Ethernet not working error in Windows 11 is fixed.
3. Restart your Windows 11 PC
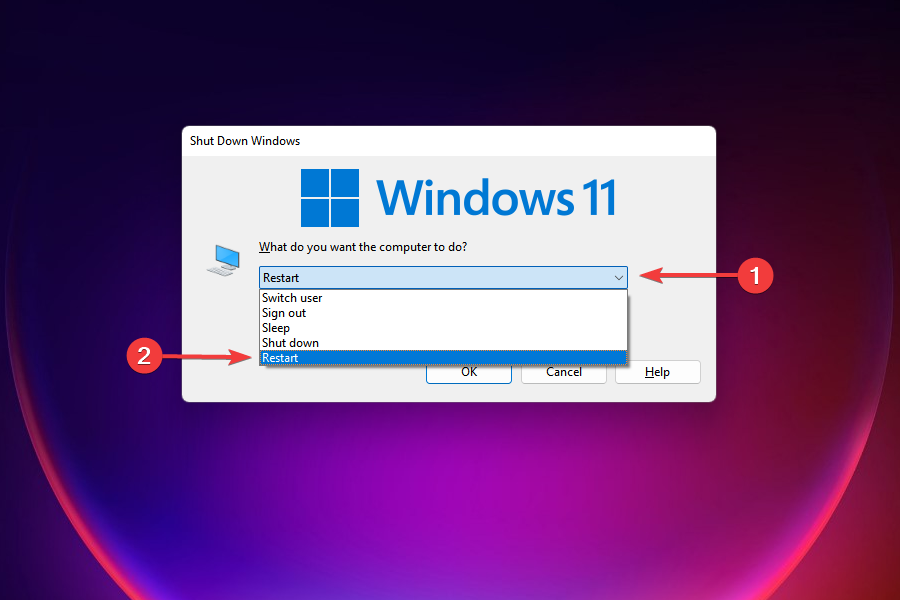
- Navigate to the desktop and press Alt + F4 to launch the Shut Down Windows box.
- Click on the dropdown menu and select Restart from the list of options.

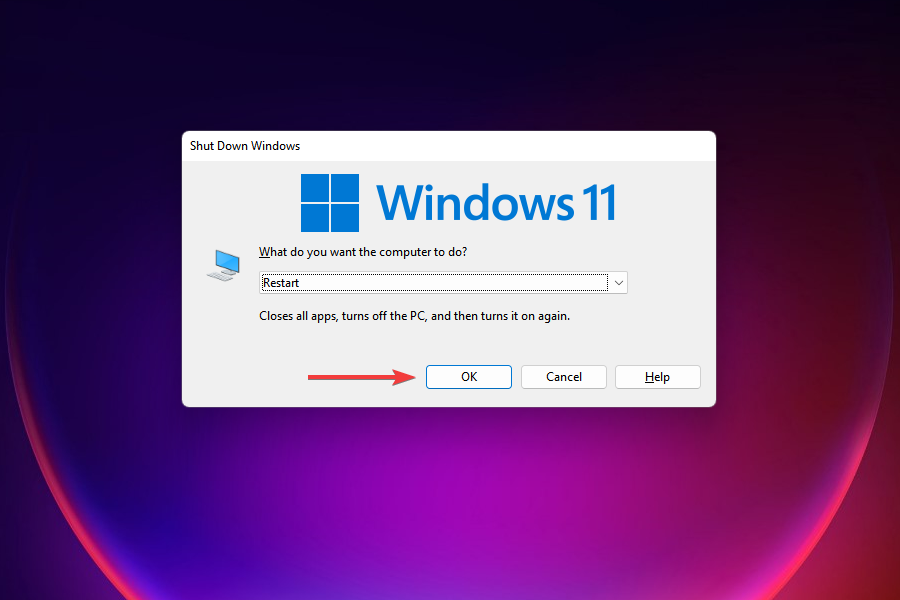
- Click on OK to restart the computer.

In most cases, it’s a trivial bug behind the Ethernet not working error which can be fixed by restarting the computer. When you reboot the Windows, the OS is reloaded, and any bug that crept in earlier will be eliminated.
After restarting the PC, check if you can establish a connection via Ethernet. In case it doesn’t, head to the next fix.
And even if it does, you should execute the remaining fixes since rebooting generally acts as a temporary solution to most problems.
4. Check if the Ethernet adapter is enabled
- Press Windows + R to launch the Run command.
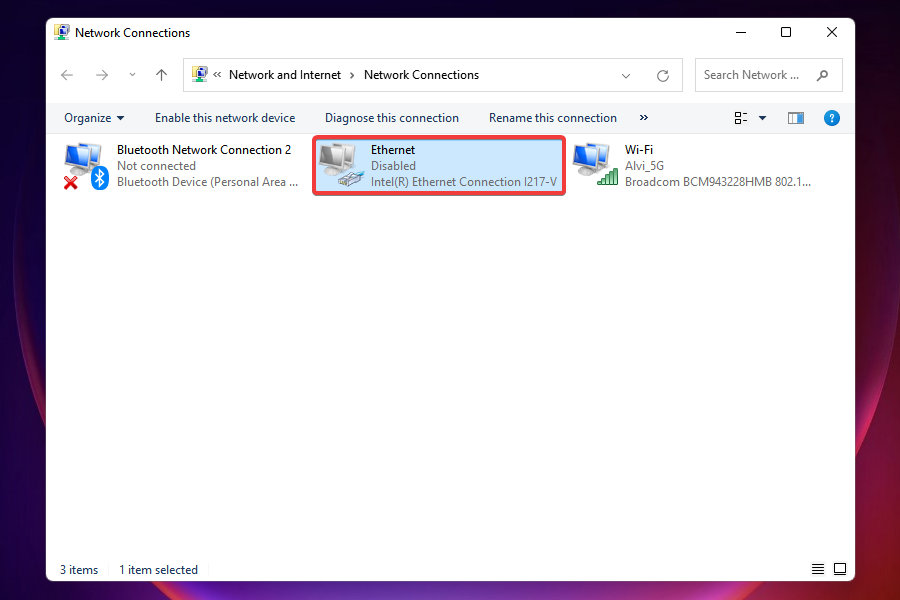
- Type ncpa.cpl in the text field, click on OK at the bottom, or press Enter to launch the Network Connections window.

- Locate the Ethernet adapter and check if it’s greyed out. If that is the case, the concerned adapter is disabled and will require to be manually turned on.

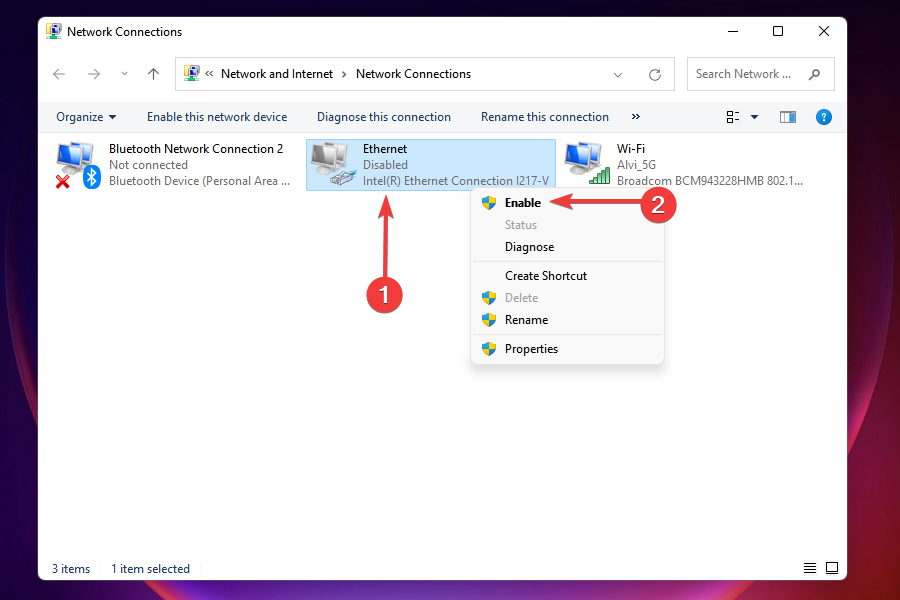
- Right-click on the Ethernet option and select Enable from the context menu.

- After enabling the adapter, check if the Windows 11 Ethernet not working error is fixed.
5. Reinstall the Ethernet driver
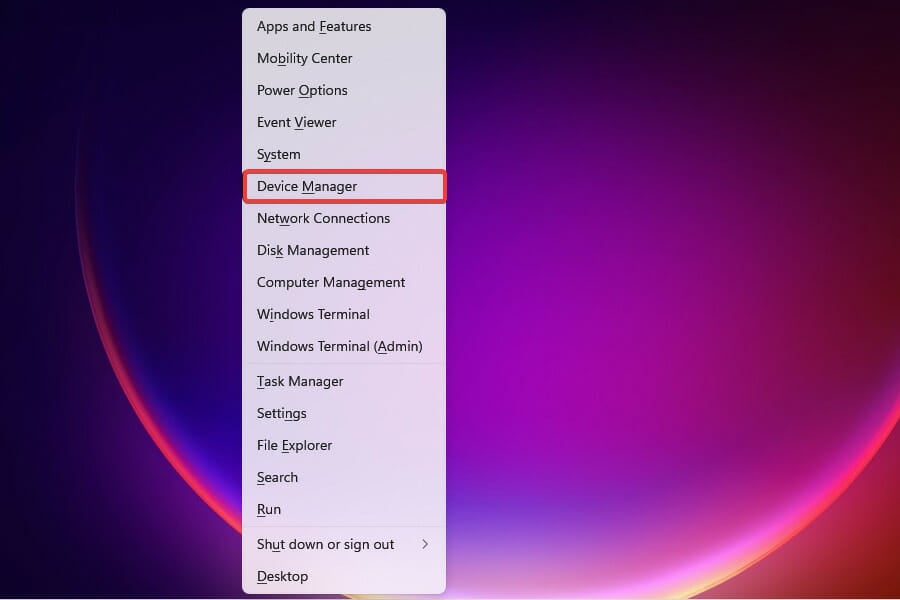
- Right-click the Start button in the Taskbar or press Windows + X to launch the Power User/Quick Access menu.
- Select Device Manager from the list of options that appear.

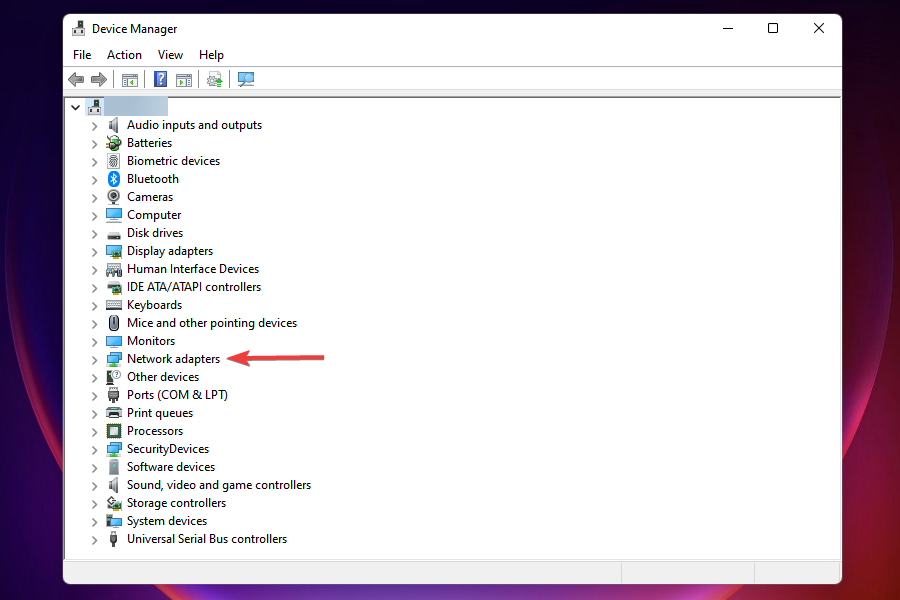
- Locate and double-click on the Network adapters entry.

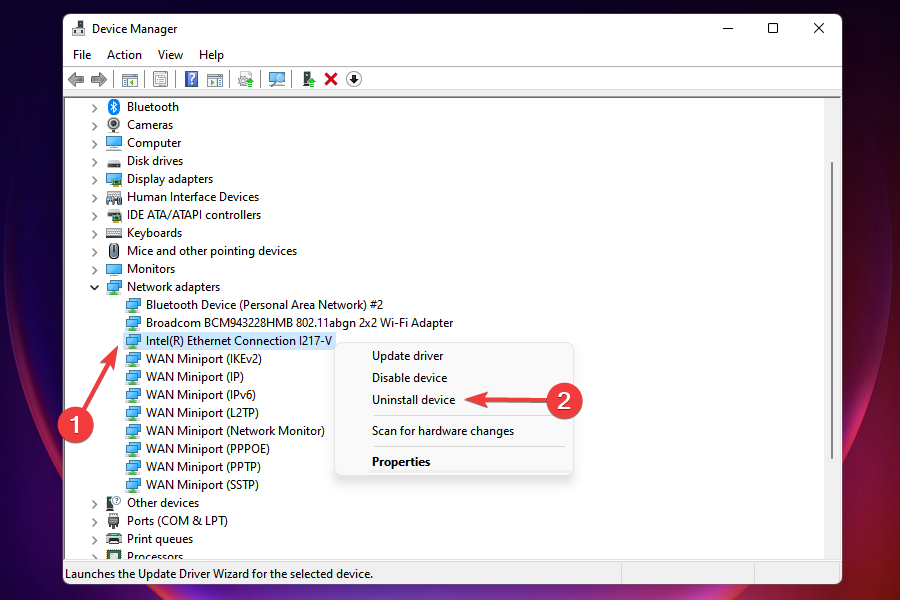
- Right-click on the Ethernet adapter and select Uninstall device from the context menu.

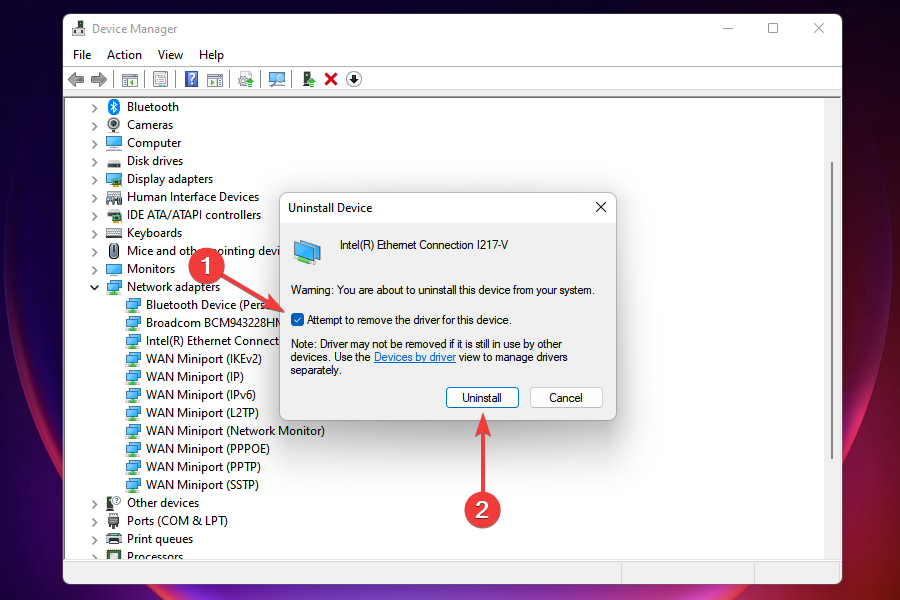
- Next, tick the checkbox for Attempt to remove the driver for this device and click on Uninstall.

- After removing the driver, restart the Windows 11 PC.
In many cases, the driver may corrupt over time and lead to various errors with the Ethernet. Here, all you have to do is reinstall it.
Once you restart the computer after uninstalling the corrupt Ethernet driver, Windows will automatically install a fresh copy of it that is not corrupt. This should fix the Ethernet not working error, and the Ethernet doesn’t have a valid IP configuration issue in Windows 11.
6. Update the Ethernet driver
If an outdated version of the driver is installed on the PC, it’s likely to cause many errors, including the Ethernet not working issue. Hence, it would help if you kept the driver up-to-date.
 Editor’s tip
There are three ways you can update a driver in Windows 11: using the Device Manager, Windows Update, and manually downloading the latest version from the manufacturer’s website.
All three methods have been listed to help you update the Ethernet driver.
6.1 Via Device Manager
 NOTE
NOTE
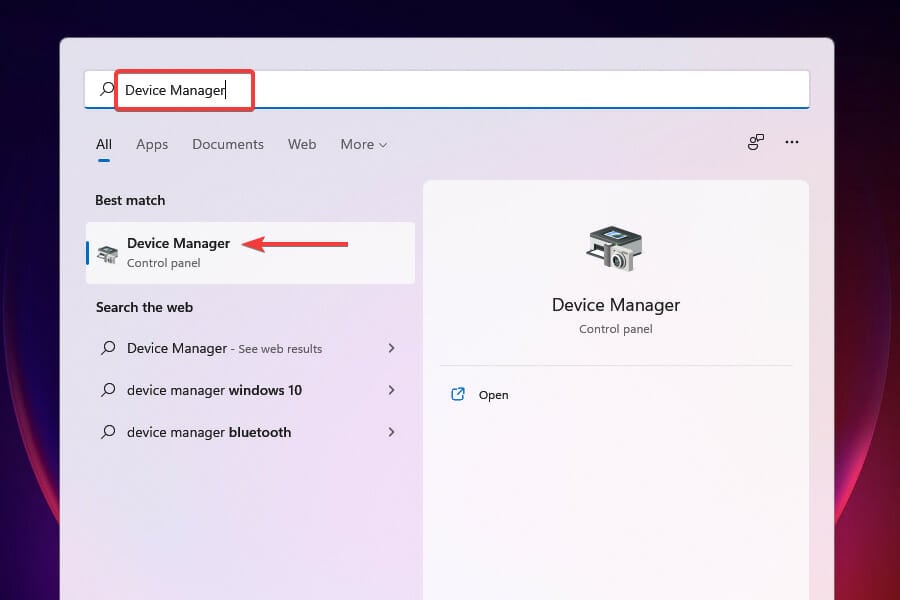
- Press Windows + S to launch the Search Menu.
- Enter Device Manager in the text field at the top and click on the relevant search result to launch the component.

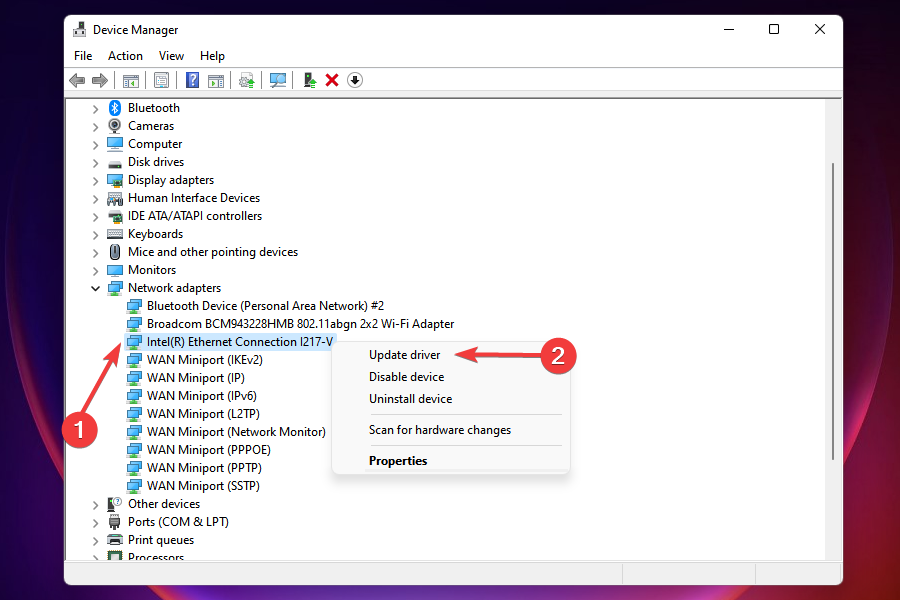
- Locate and double-click on Network adapters.

- Right-click on the Ethernet adapter from the ones listed here and select Update Driver from the context menu.

- Next, select Search automatically for drivers, the first option in the Update Drivers window, to let your system scan for the best available driver on the PC and install it.


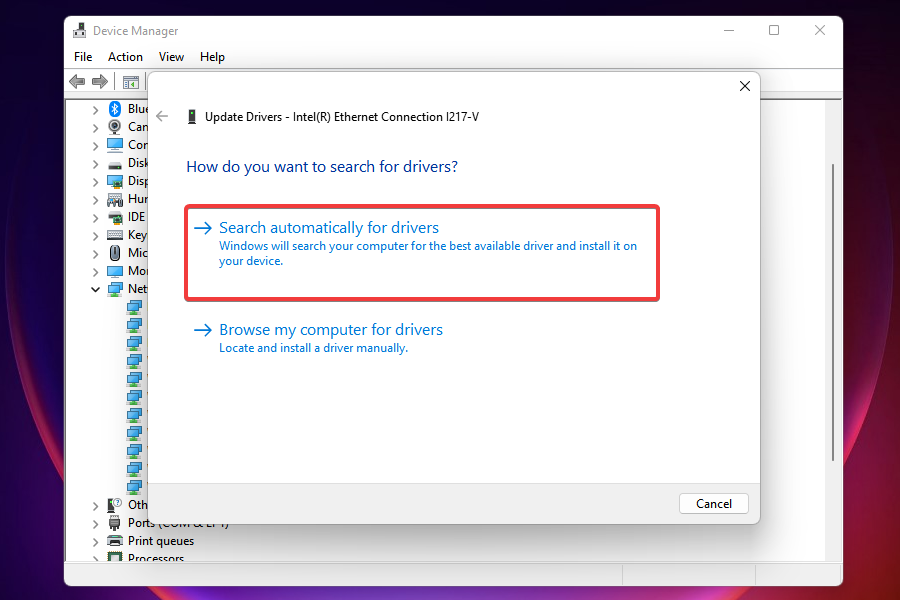
After the driver is updated, check if the Ethernet not working error in Windows 11 is fixed. If it didn’t help or Windows couldn’t find a newer version on the system, head to the following method to update the driver.
6.2 Via Windows Update
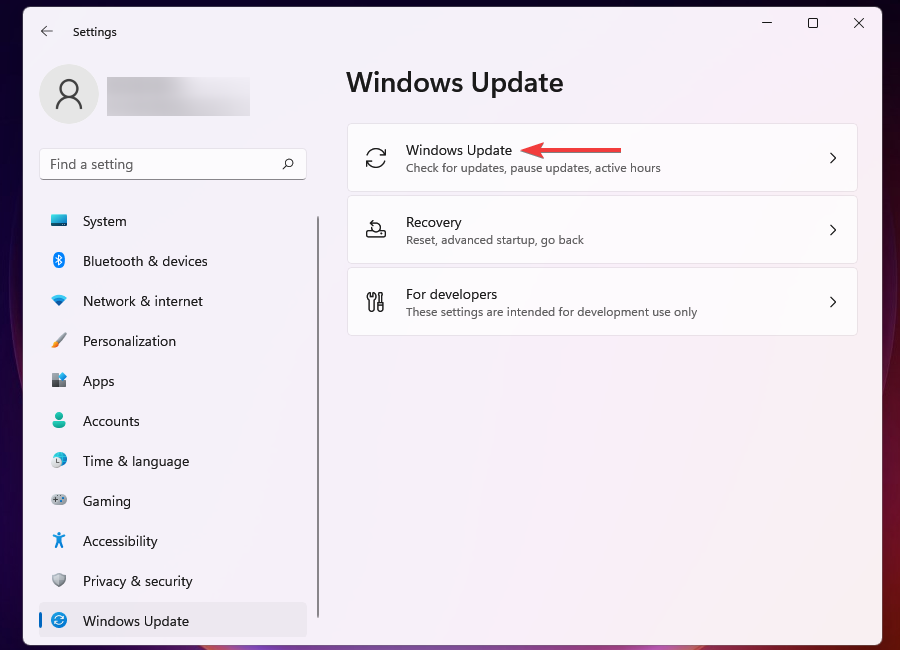
- Press Windows + I to launch the Settings app.
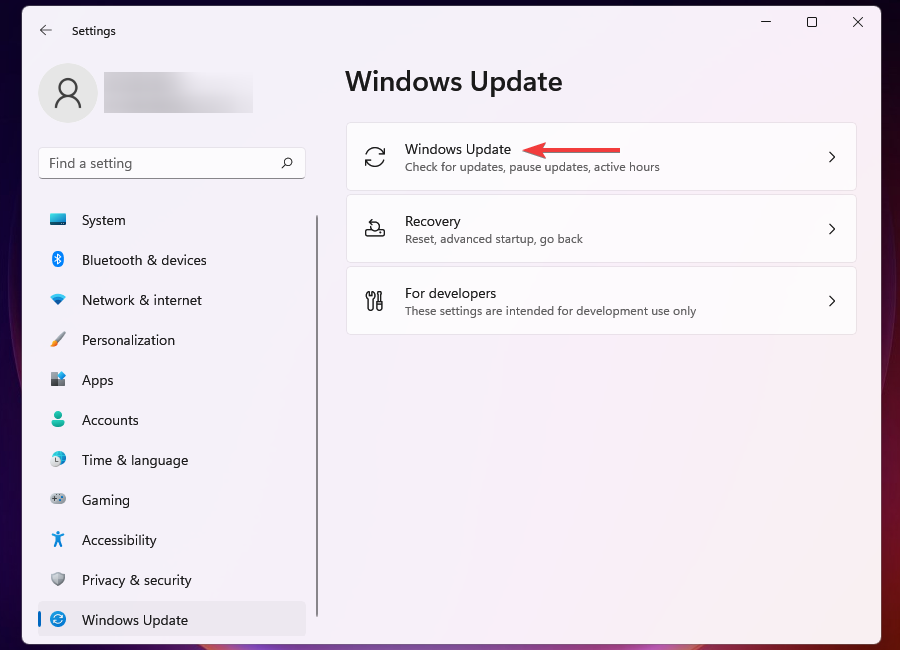
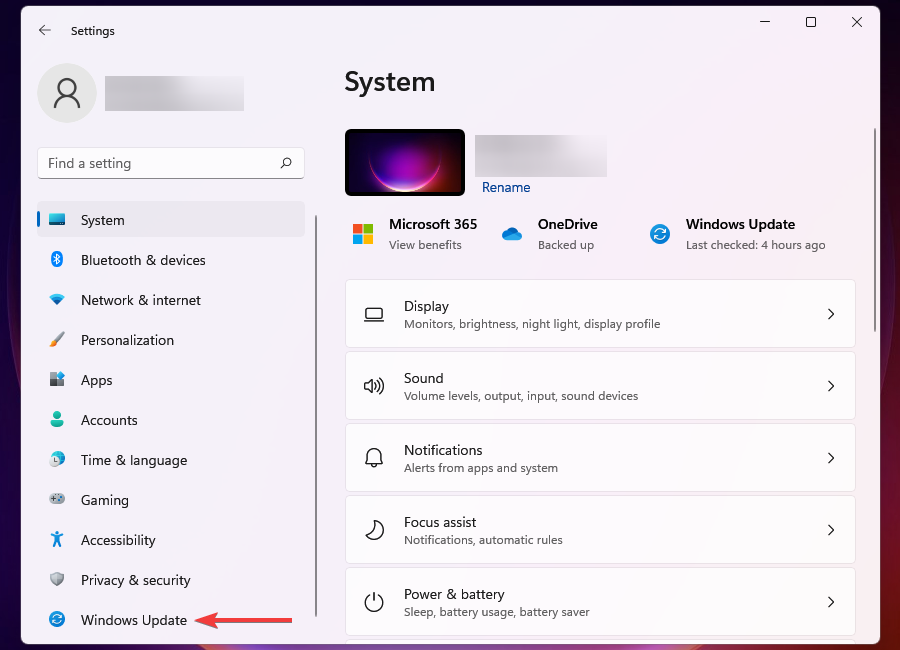
- Select Windows Update from the tabs listed in the navigation pane on the left.

- Next, click on Windows Update on the right.

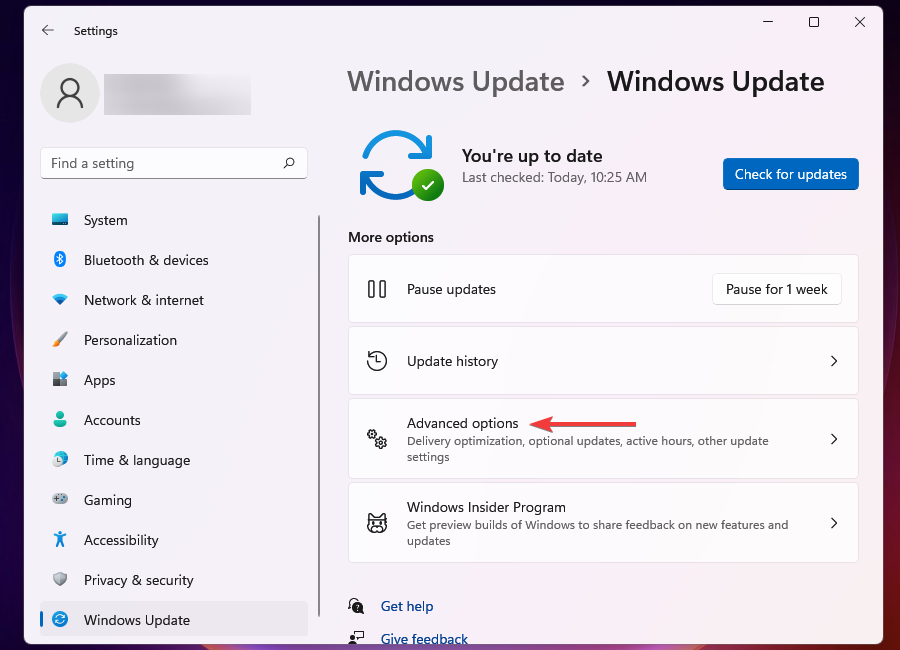
- Locate and click on Advanced options under More options.

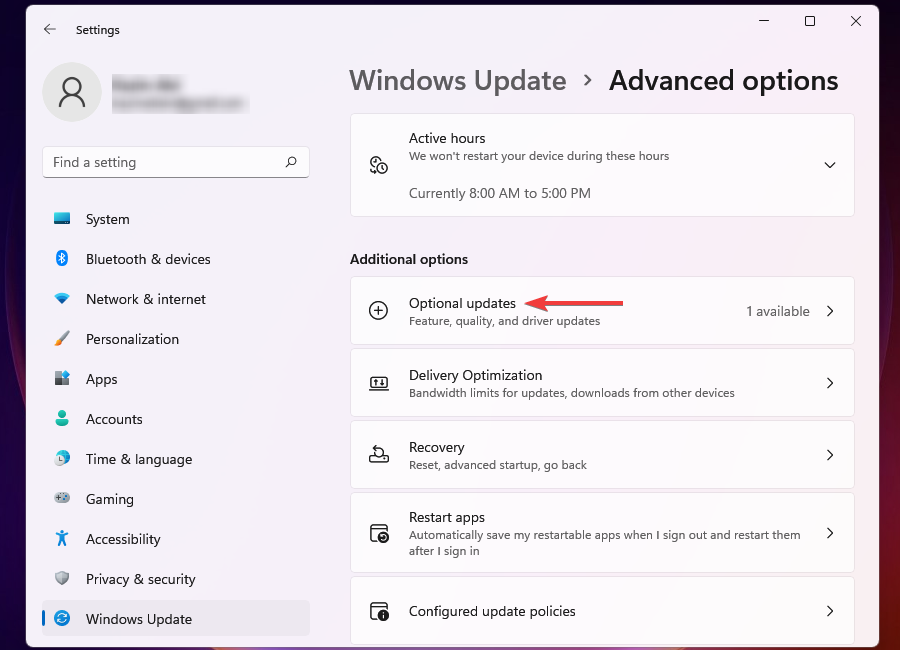
- Now, locate and select Optional updates under Additional options. At the end of the option, you can find the number of updates available. If there are none available, you can skip the following steps and go to the following method for the update.

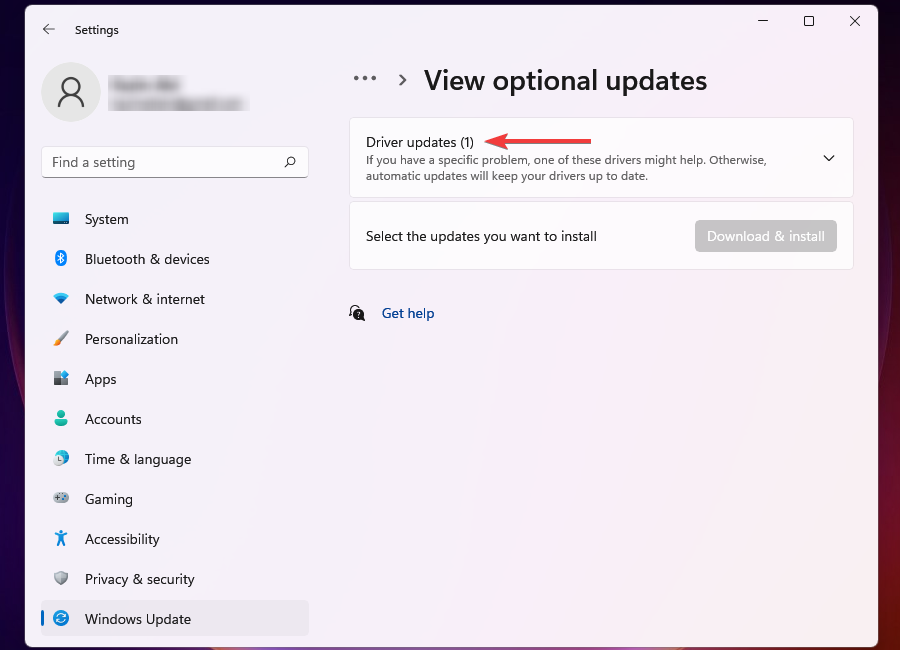
- Click on Driver Updates.

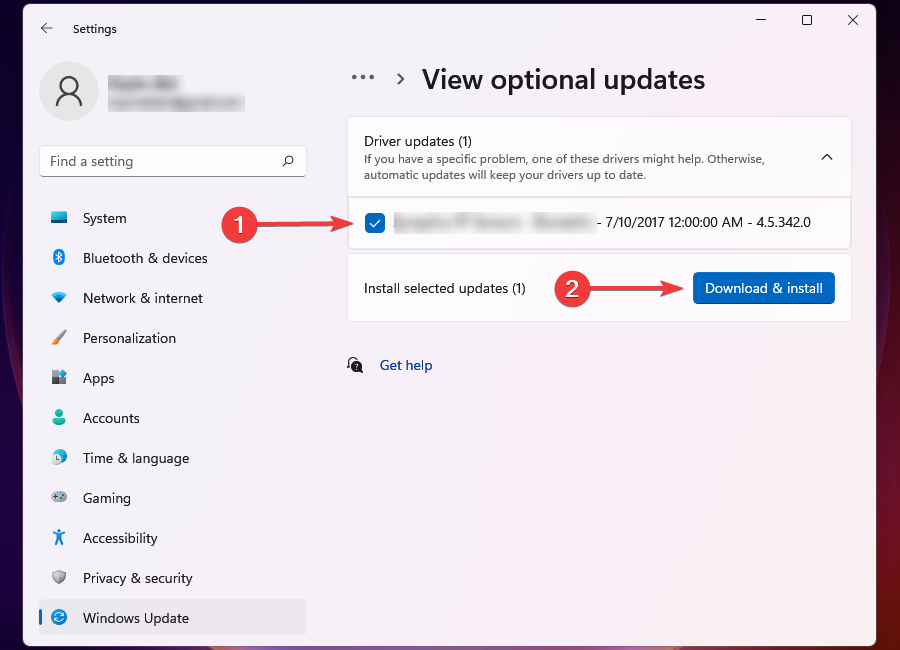
- If there’s an update available for the Ethernet driver, tick the checkbox for it and click on Download & install.


Windows Update is a quick and safe method to update the drivers installed on the system. But, only the drivers that have been submitted to Microsoft and have been certified will be listed here. And the whole process takes time.
This means there’s a good chance of an update on the manufacturer’s website while it is yet to be approved by Microsoft, and these, too, are also safe to install. Hence, it becomes essential to visit the manufacturer’s website.
6.3 Via the manufacturer’s website
NOTE
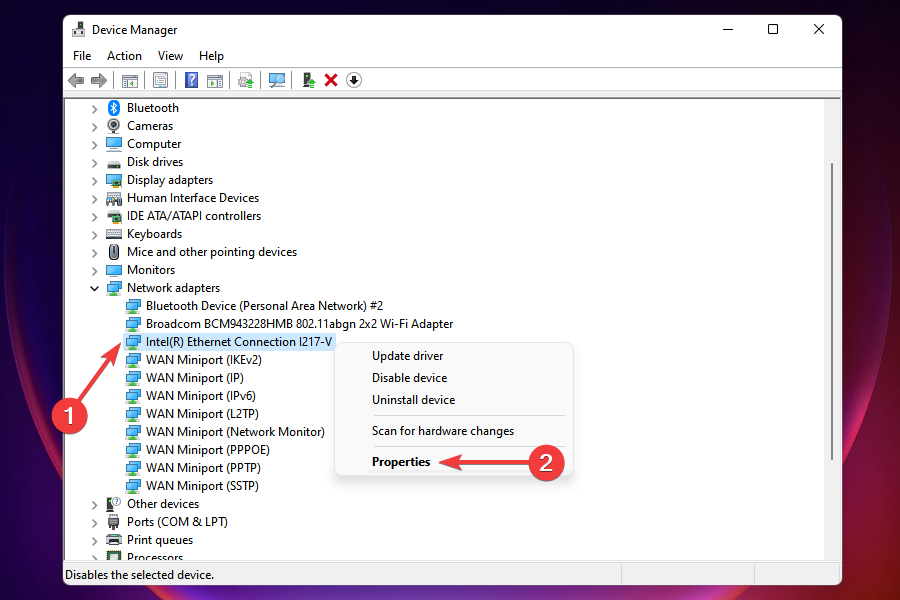
- Launch the Device Manager as discussed earlier.
- Double-click on the Network adapters entry.

- Right-click on the Ethernet adapter and select Properties from the context menu.

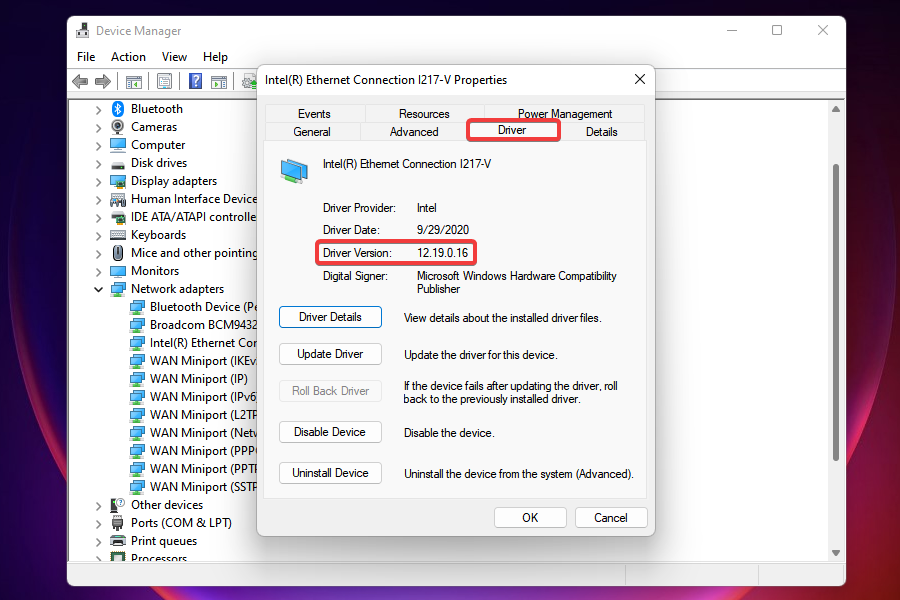
- Navigate to the Drivers tab and note the Driver version.

- Now, go to Google and search for a driver update with Device Name and OS (Windows 11) as the keywords, followed by Driver Update.

- Locate and open the manufacturer’s official website from the search results.
- Check for a newer version using the current version you noted earlier.
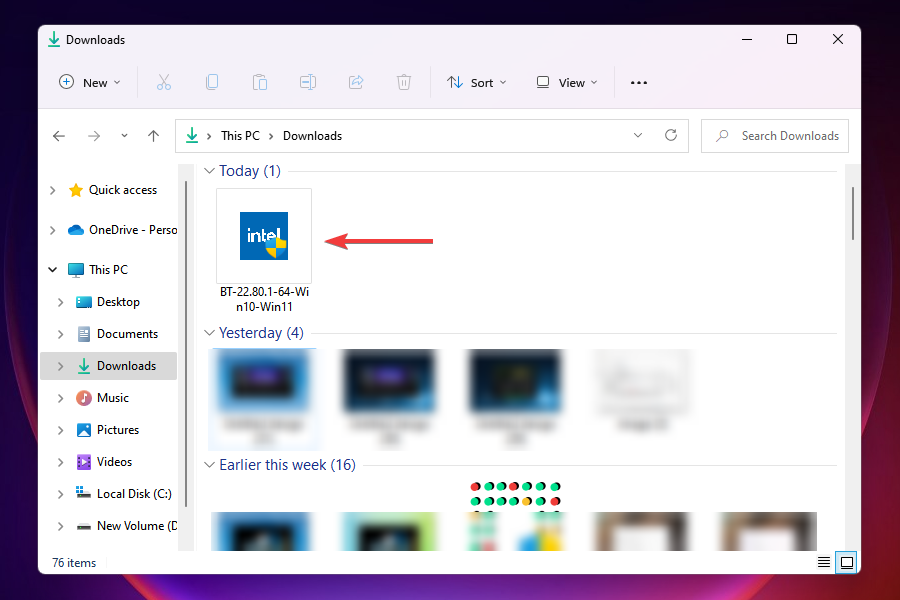
- If there’s an update available for the Ethernet driver, download it. This file will most likely be in .exe format.
- Navigate to the folder where the downloaded file is stored, and double-click on it to launch the installer.

- Follow the on-screen instructions to complete the installation process.

Sometimes, a driver update may be available on a third-party website, not the official manufacturer’s website. In such cases, it’s recommended that you thoroughly verify the source before proceeding to the download.
After downloading the latest version, check if the Ethernet not working error in Windows 11 is fixed. For automatic scans of missing or outdated drivers, we recommend using a dedicated tool such as Outbyte Driver Updater.
If the error persists, it does not have anything to do with the driver. Hence, move to the next solution.
7. Run the Network Adapter troubleshooter
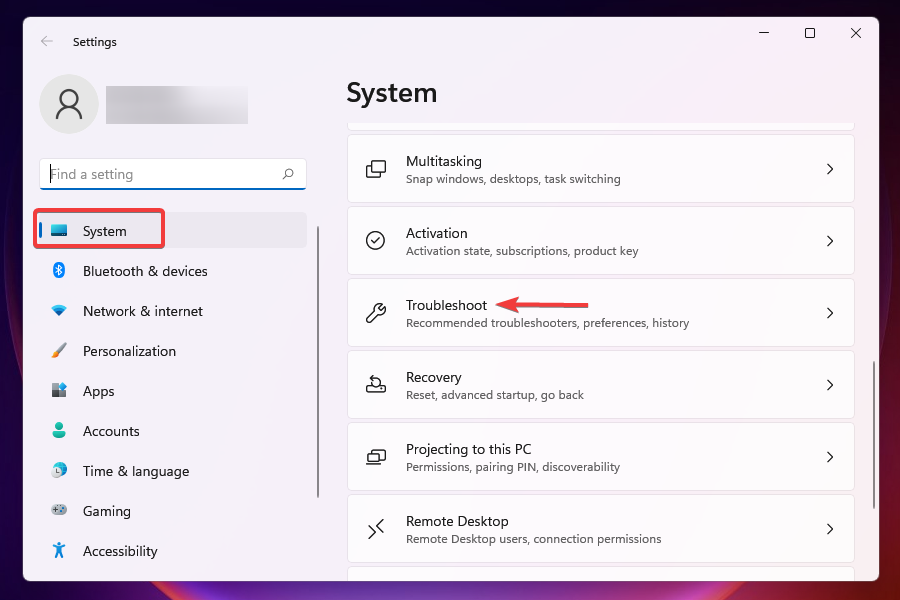
- Press Windows + I to launch the Settings app.
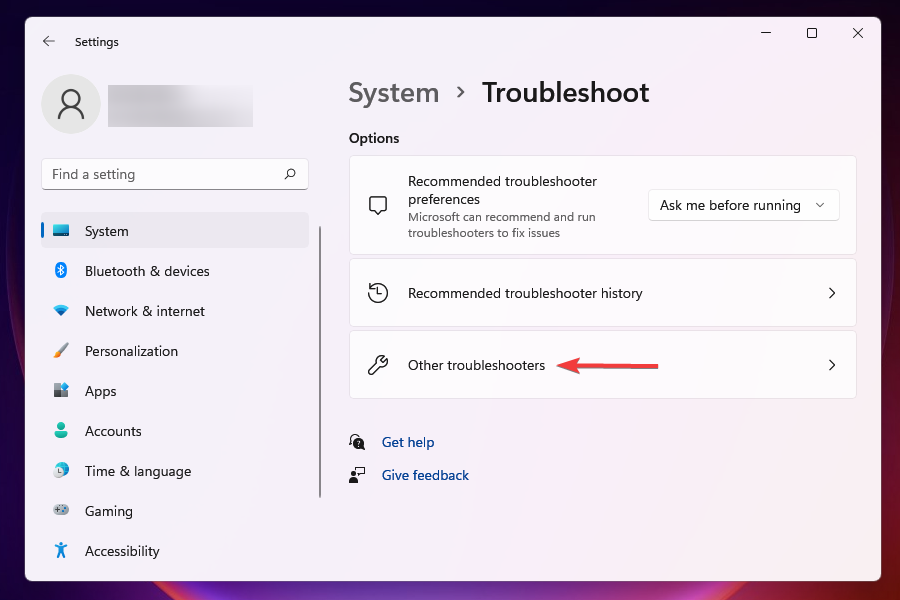
- Click on Troubleshoot on the right in the System tab.

- Next, click on Other troubleshooters.

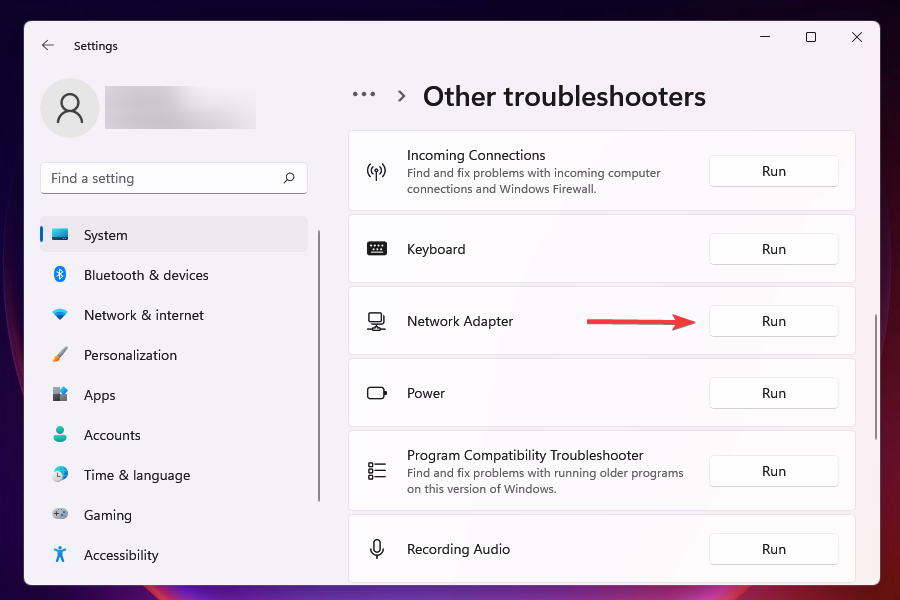
- Locate the Network Adapter troubleshooter and click on the Run button next to it.

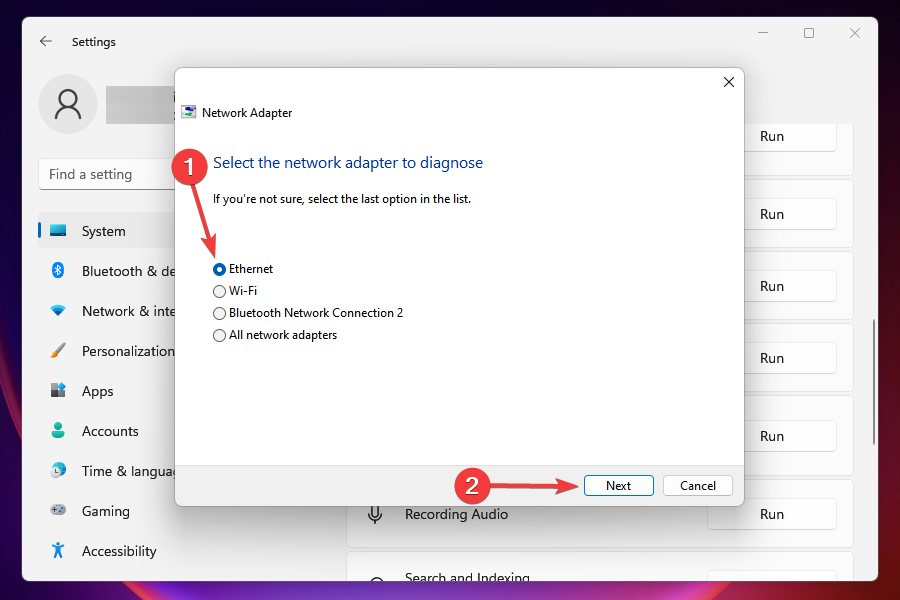
- Wait for the troubleshooter to start running, select the Ethernet option when prompted, and click Next.

The built-in troubleshooters offered by Microsoft are one of the best ways to fix an error. And you can use it to improve the Windows 11 Ethernet keeps disconnecting issue.
Just locate the relevant troubleshooter, run it, follow the on-screen instruction, choose the response when prompted, and it’s done.
8. Update Windows 11
- Press Windows + I to launch the Settings.
- Select Windows Update from the tabs listed on the left.

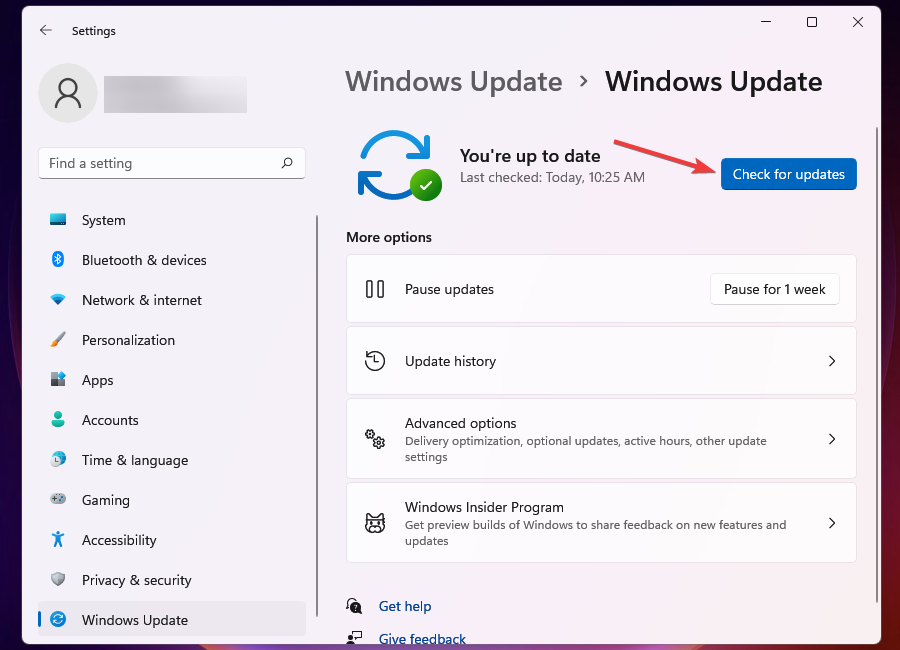
- Click on Windows Update on the right.

- Click on Check for updates to scan for available ones and download them.

Running an older version of Windows is also known to cause many problems, including the Ethernet not working error. Hence, it’s recommended that you keep Windows updated to avoid encountering errors.
Apart from errors, with each update, Microsoft releases a bunch of features and patches for previously known bugs. These are bound to make your Windows experience a lot better and safer.
9. Reset network settings
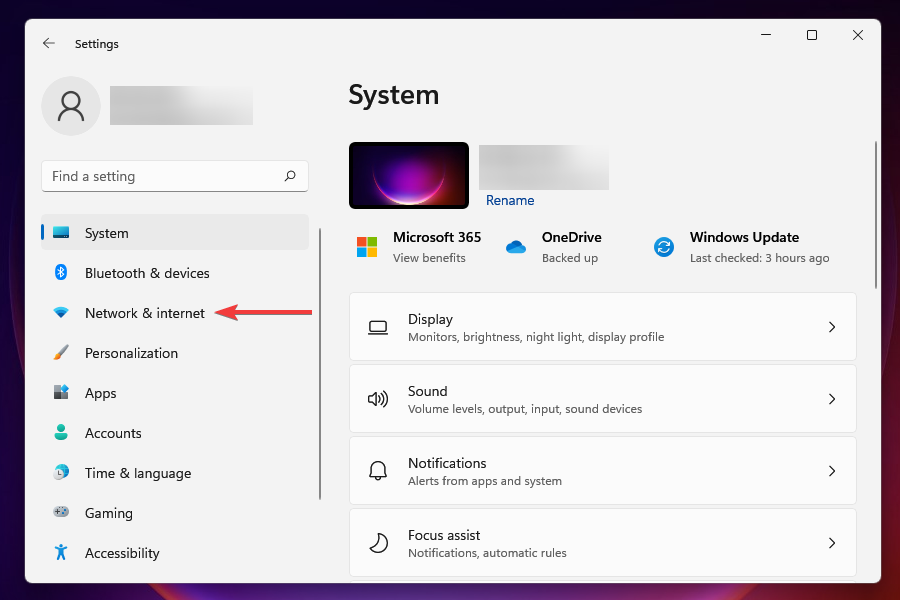
- Press Windows + I to launch the Settings app.
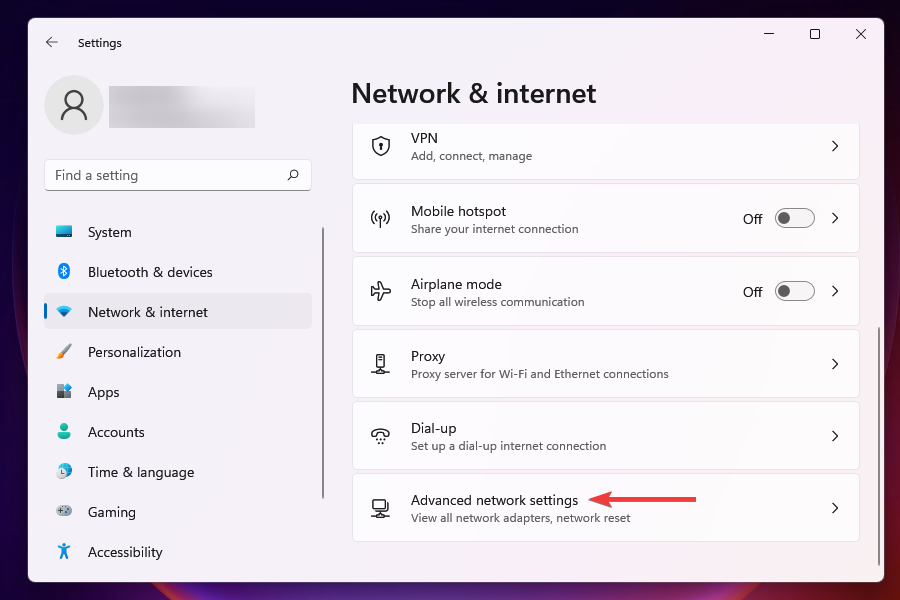
- Select the Network & internet tab from the ones listed in the navigation pane on the left.

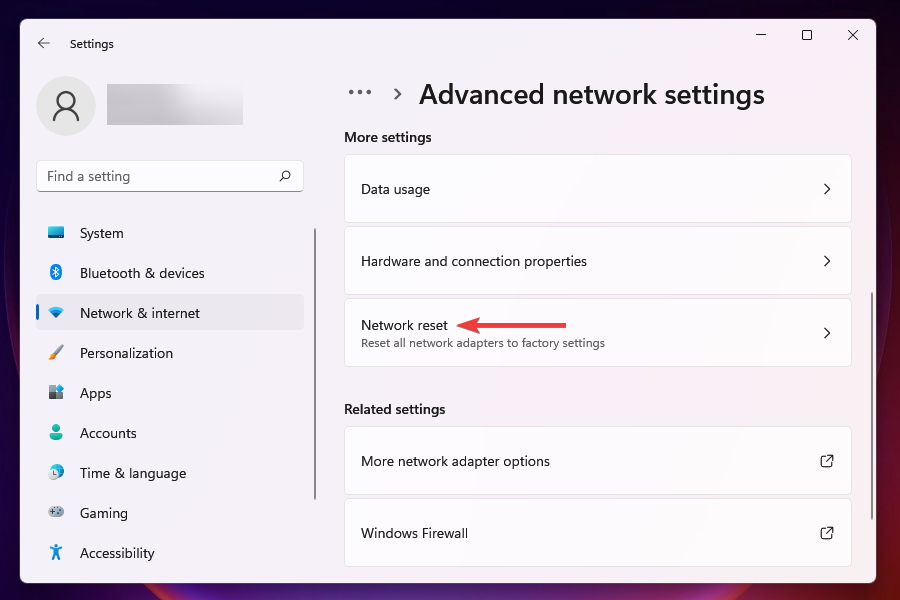
- Click on Advanced network settings from the options listed on the right.

- Next, click on Network reset under More settings.

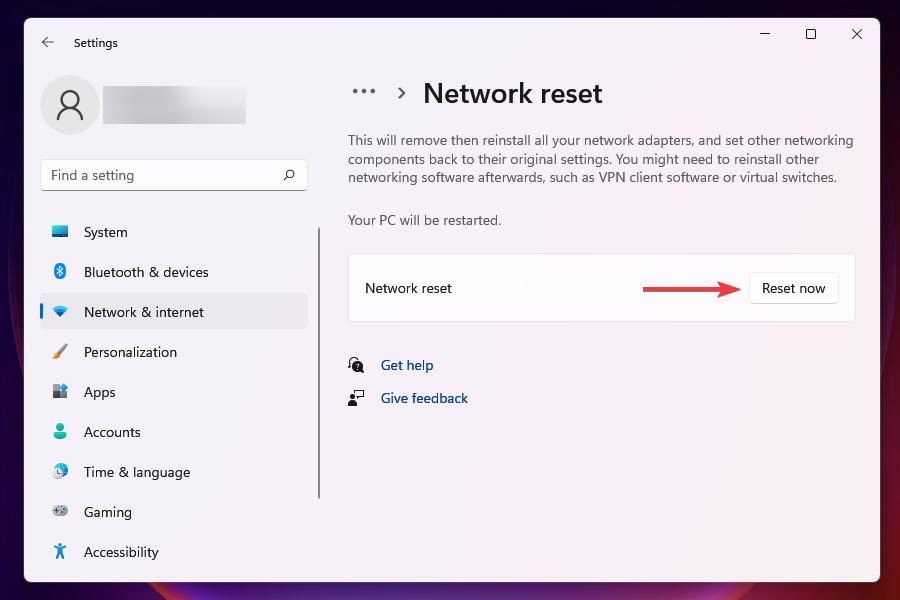
- Click on the Reset now button next to Network reset.

- Click Yes on the confirmation box that appears.

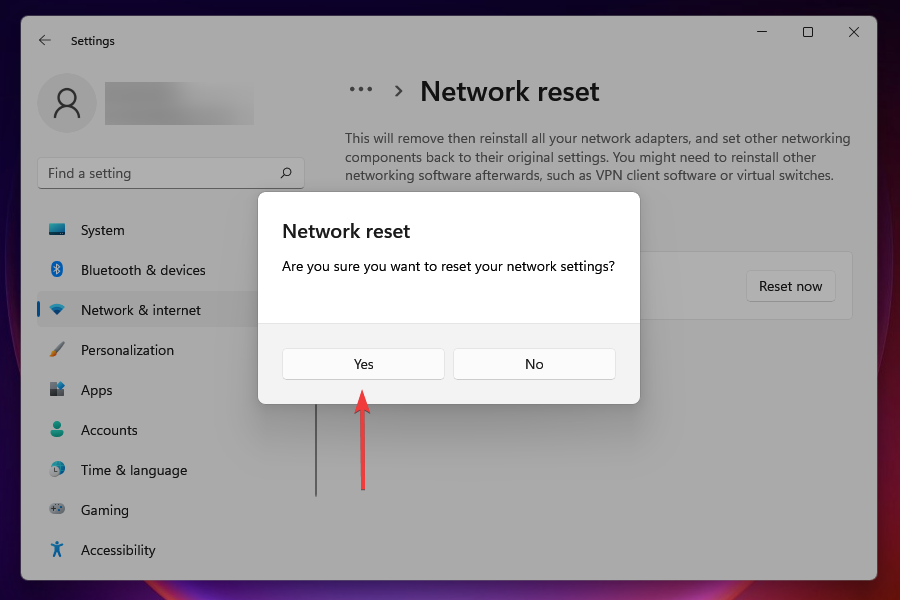
If the above methods didn’t work, resetting the network settings might fix the Ethernet not working error in Windows 11 or an unidentified network issue. When you reset, the network adapters are reinstalled, and the settings revert to their default state.
Is Ethernet faster than WiFi?
Generally, Ethernet is faster and offers less latency than Wi-Fi. Also, it is usually more reliable and secure.
The speed you also get from Ethernet depends on the cables you are using, with some of the latest producing about 1GB/s. However, Wi-Fi is a more friendly option for mobile users and offers consistent speed.
How do I execute the fixes if an Ethernet connection cannot be established?
If the Windows 11 Ethernet is not working in error, you can try establishing a Wi-Fi connection, if that’s available. However, if you are also facing trouble with that, boot Windows 11 into Safe Mode.
We are going through all this trouble since some of the fixes listed here will require a working Internet connection. Rest assured that these solutions are the critical ones that have a higher chance of resolving the issue.
The fixes listed above will, in all likelihood, resolve the Ethernet not working error in Windows 11. However, if the error persists, you can either restore the system or reset Windows 11 to its factory settings.
Besides that, take a closer look at this article dedicated to solving Wi-Fi issues in Windows 11. You’ll see that some of the culprits are similar.
In case WiFi is not working but Ethernet does, check out our dedicated guide for more details.
Please let us know which fix worked for you in the comments section below.
Read our disclosure page to find out how can you help Windows Report sustain the editorial team. Read more


Improve this guide


User forum
0 messages