Windows 11 Keeps Installing Old or Wrong AMD Drivers [Fix]
Key notes
- Some users are reporting that Windows 11 keeps installing old AMD drivers as part of a regular update.
- To prevent this from happening, reconfigure the device installation settings in the Control Panel.
- You can also roll back the graphics card driver through Device Manager.

Microsoft pushes users to update drivers on their system from time to time. Most of the drivers, if not all, are provided by the processor manufacturer. The manufacturer could either be Intel or AMD.
In the case of AMD systems, many users have reported that when they try updating their driver set, Windows 11 keeps installing older versions of the AMD drivers.
According to some users, Windows 11 automatically installs outdated AMD drivers after the PC has been inactive for a couple of minutes, and it causes the graphics card to malfunction.
While it’s generally not going to cause damage to your system or lead to malware, it can still be downright frustrating.
There are a few ways to solve this issue. We are listing them below.
What can I do if Windows 11 keeps installing old AMD drivers?
1. Rollback graphics card driver
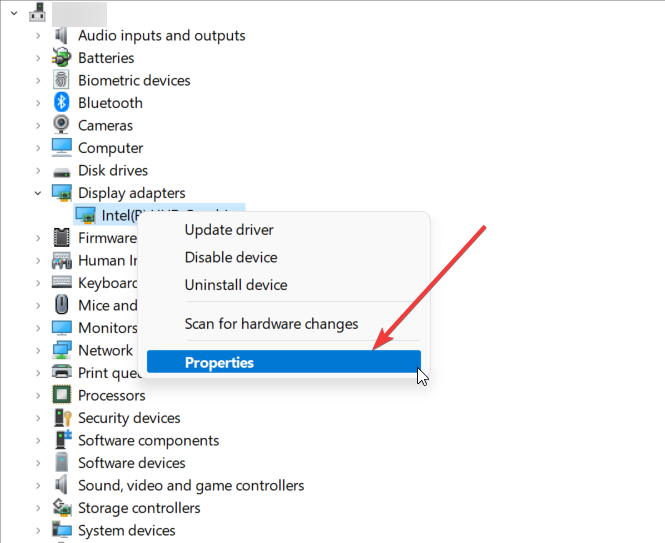
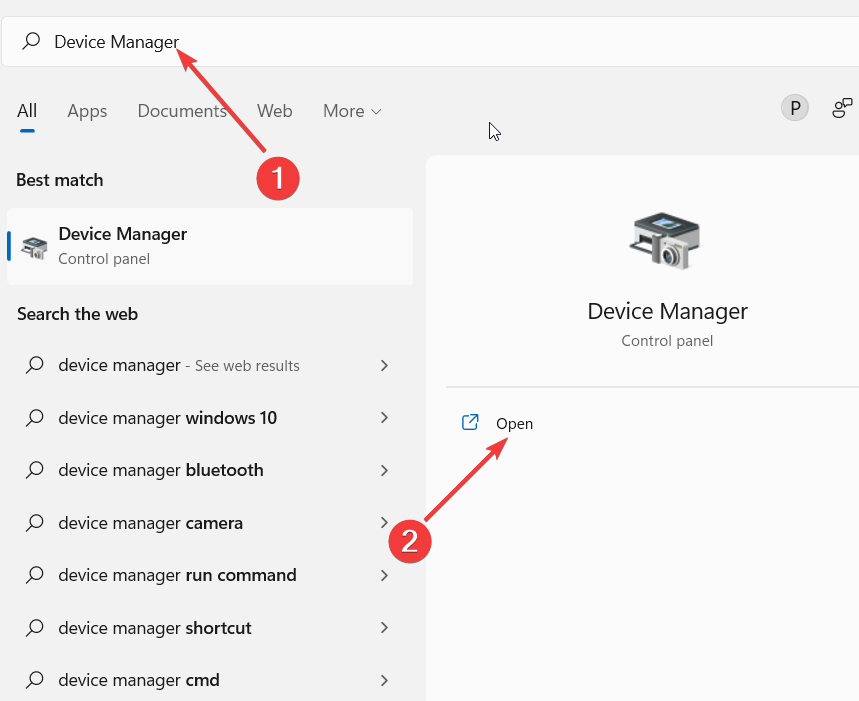
- Press the Windows + S keys simultaneously to open the search bar, type Device Manager, and hit Enter.

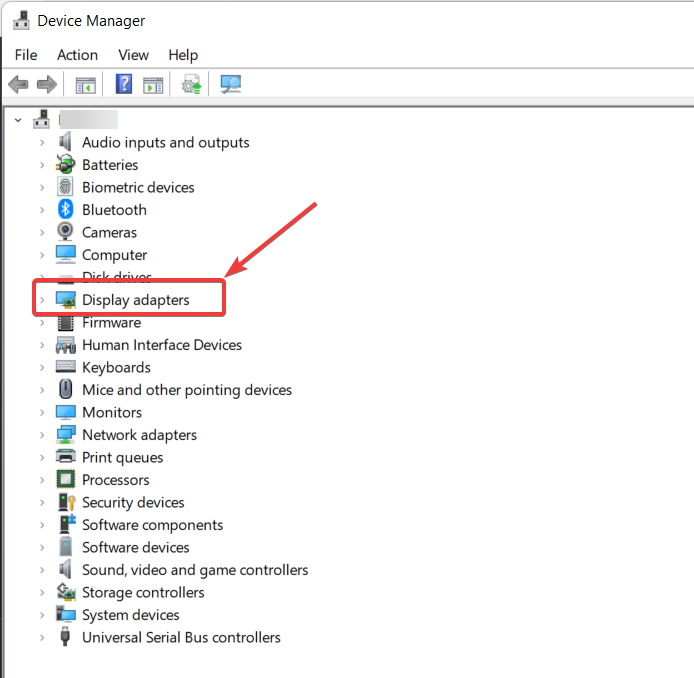
2. In the Device Manager window, go to Display Adapters.

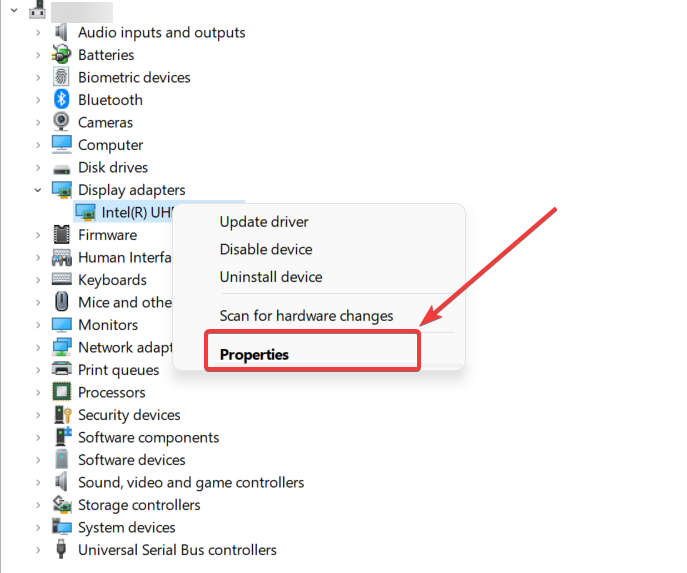
3. Under Display Adapter, select your graphics card.
4. Next, right-click and select Properties.
5. In the pop-up window, go to the Driver tab.
6. Scroll down and click the Roll Back Driver option.
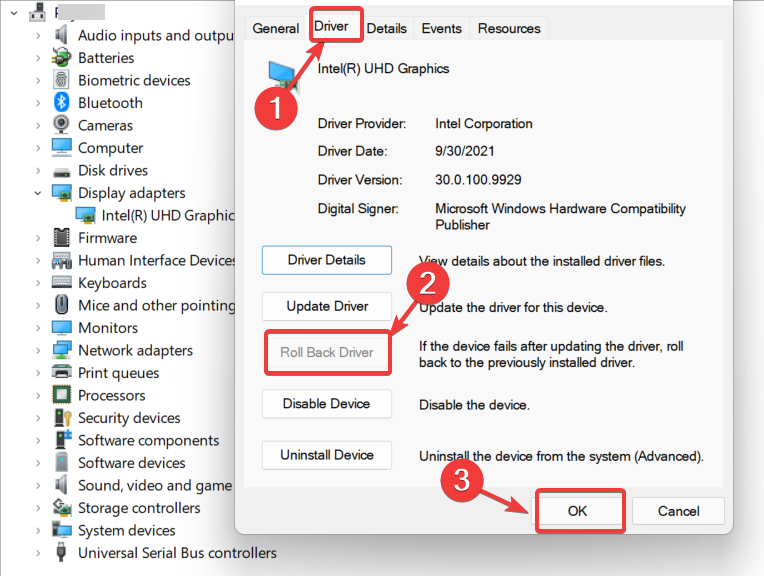
A window will pop up telling you why the change took place. The best bet is to select the option that most closely represents your reasoning and press next. Shortly after, the rollback process should begin.
 NOTE
NOTE
2. Use a third-party driver updater tool
Installing new drivers can be a difficult task. There are many things that can go wrong, so it is always best to have a professional handle the installation. However, if you are looking for an alternative way to install drivers, you may want to consider switching to an automated tool.
- Download and install the Outbyte Driver Updater app.
- Launch the software and wait for the app to detect all incompatible drivers.
- Now, it will show you a list of all faulty drivers to select the ones to Update or Ignore.

- Click on Update & Apply Selected to download and install the newest versions.
- Restart your PC to ensure the applied changes.

OutByte
Keep your GPU in a flawless state without worrying about possible driver issues.3. Change Device installation settings
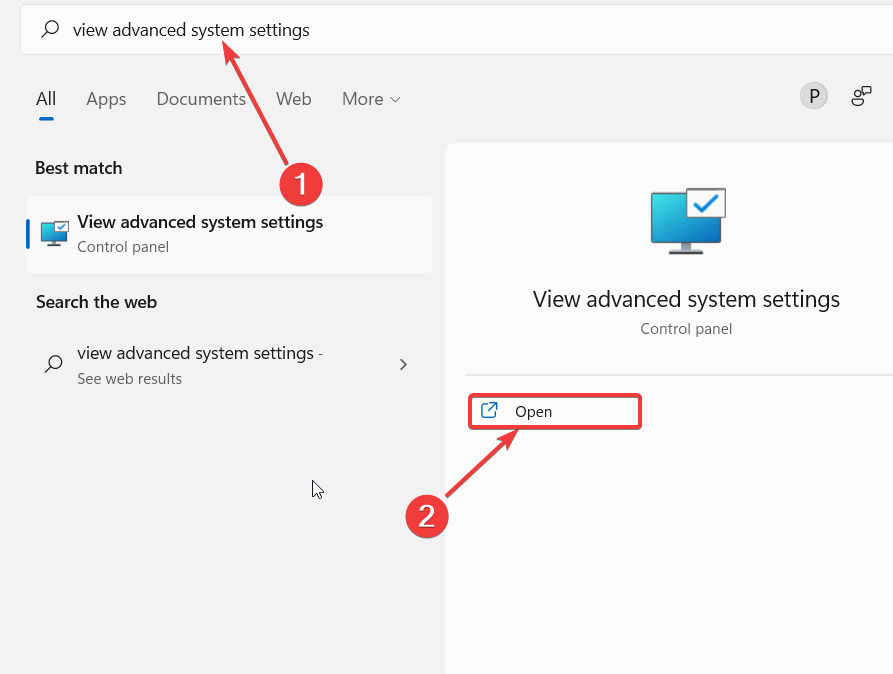
- Press Windows + S simultaneously. Type in View advanced system settings. Hit enter.
2. Go to the Hardware Tab, and click the Device Installations Settings option.
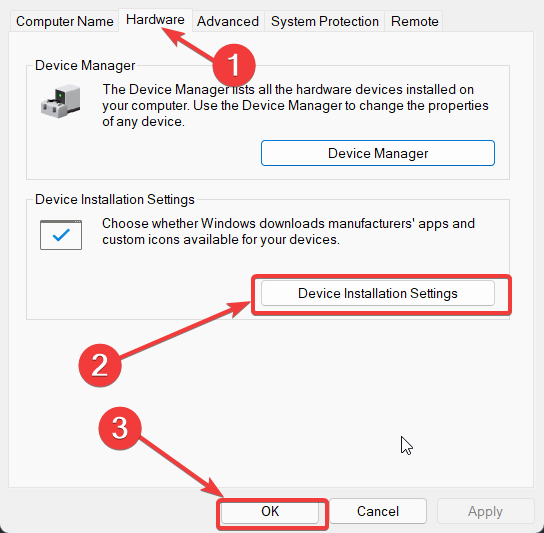
3. Select No (Your Device Might Not Work as Expected).
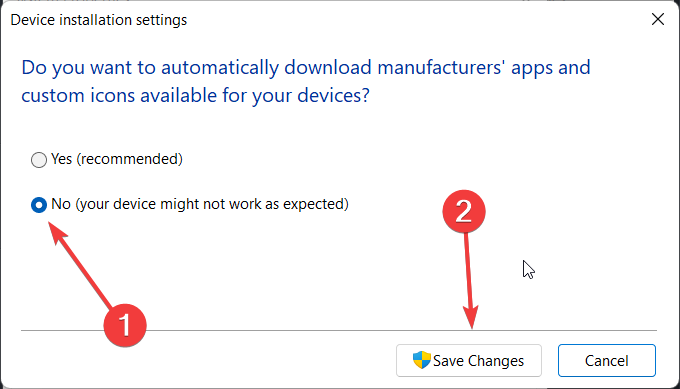
4. Click the button that says Save Changes. When prompted by User Account Control, click Yes.
5. Moving on, click Apply and OK to save the changes.
With this quick fix, you may be able to resolve the problem. However, if the issue persists, move on to the next solution.
4. Uninstall the current old driver through Device Manager
- Type devicemngr into the search bar and open up Device Manager.
2. Scroll down and expand Display Adapters.
3. Right-click your AMD graphics card and select uninstall driver.
4. Finally, Restart your PC.
You might have seen Windows 11 recently prompting you to update your AMD driver. Somehow, the old driver remains and takes priority. This simple solution will help you combat the issue.
Once the computer restarts, Windows will have installed a generic driver for your device. Moreover, you can download a new driver manually with the help of this guide.
In case Windows automatically updates your AMD driver, we have got you covered with this guide on how to stop AMD drivers from updating automatically.
Hopefully, at least one of these solutions helped you remedy the old AMD driver problem.
If you have any questions or concerns, feel free to share them in the comments section below.
Read our disclosure page to find out how can you help Windows Report sustain the editorial team. Read more


Improve this guide


User forum
0 messages