Second Monitor Not Detected in Windows 11: 4 Tested Solutions

If your second monitor is not detected in Windows 11, the issue can be caused by incorrect settings, cable problems, or hardware compatibility issues. Fortunately, Windows offers multiple built-in methods to help you connect and extend your display successfully.
Table of contents
What do I do if Windows 11 is not detecting my second monitor?
1. Restart your PC
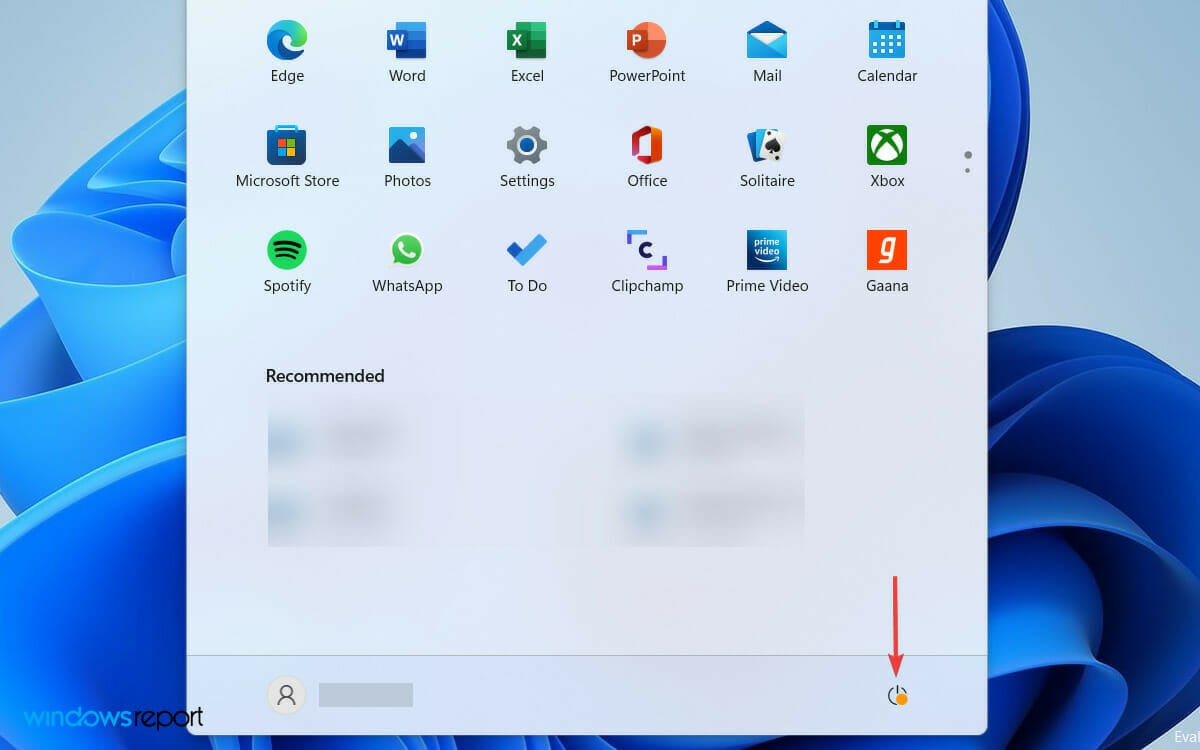
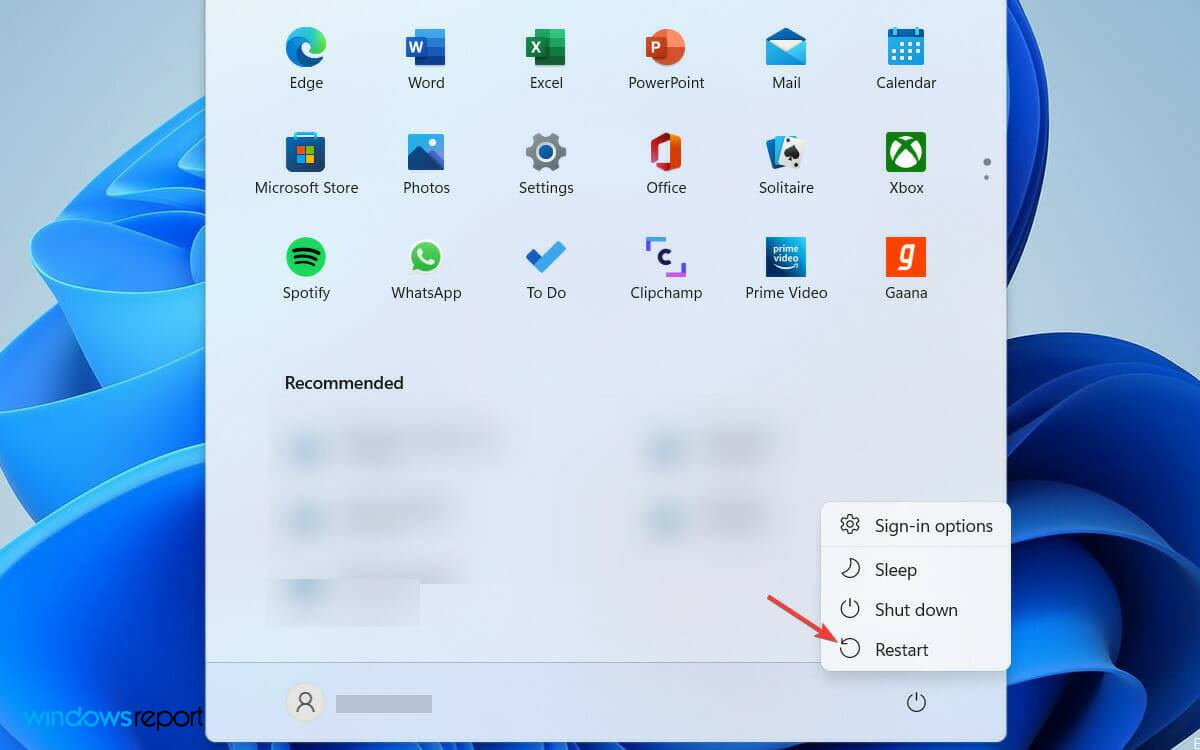
- Open the Start menu from the left side of your taskbar.
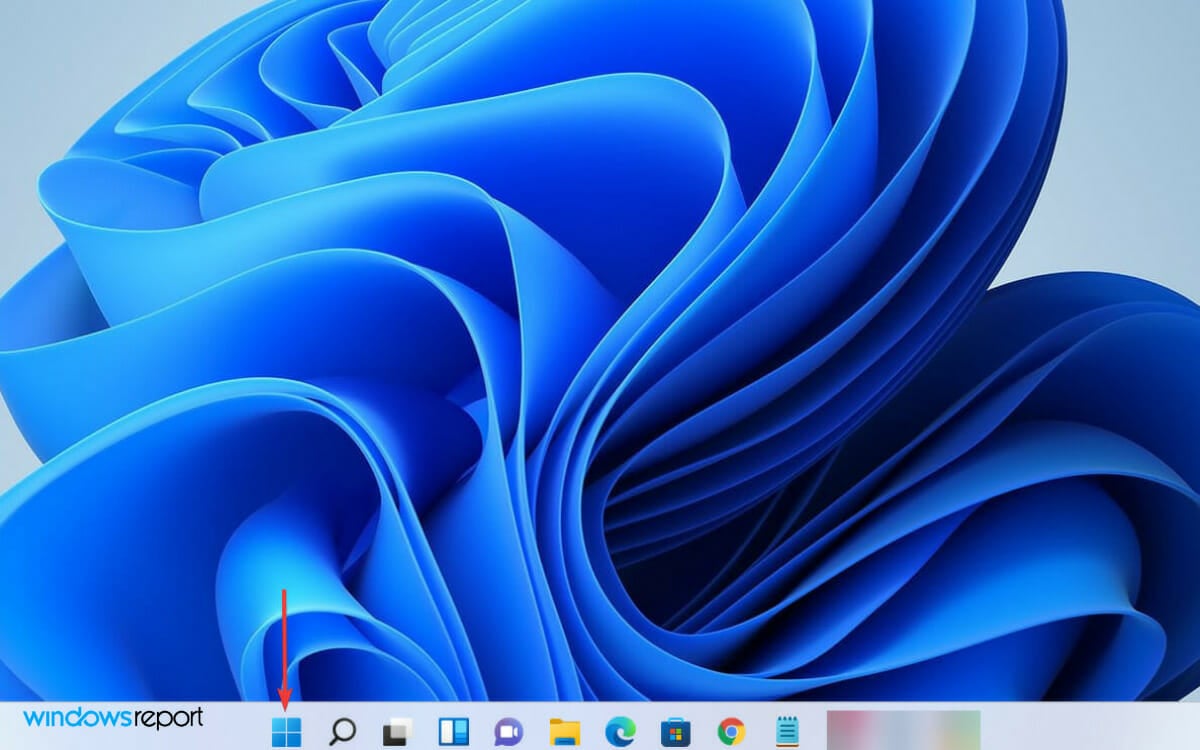
- Then click on the Power icon from the right.
- Select Restart from the list of options to restart your PC.
Restarting your PC is the easiest solution to apply if the second display is not detecting. It can be a temporary problem, and a simple restart of Windows is enough to fix it. In fact, the resolution has worked on Windows 10 PCs as well.
If you are using a laptop connected to an external monitor for a better viewing experience, then simply closing its lid is said to work for many users.
Often the reason behind the error can be a conflicting program that is running in the background. However, when you restart the computer, the program running gets closed, and you may get away from the issue.
2. Update the display driver
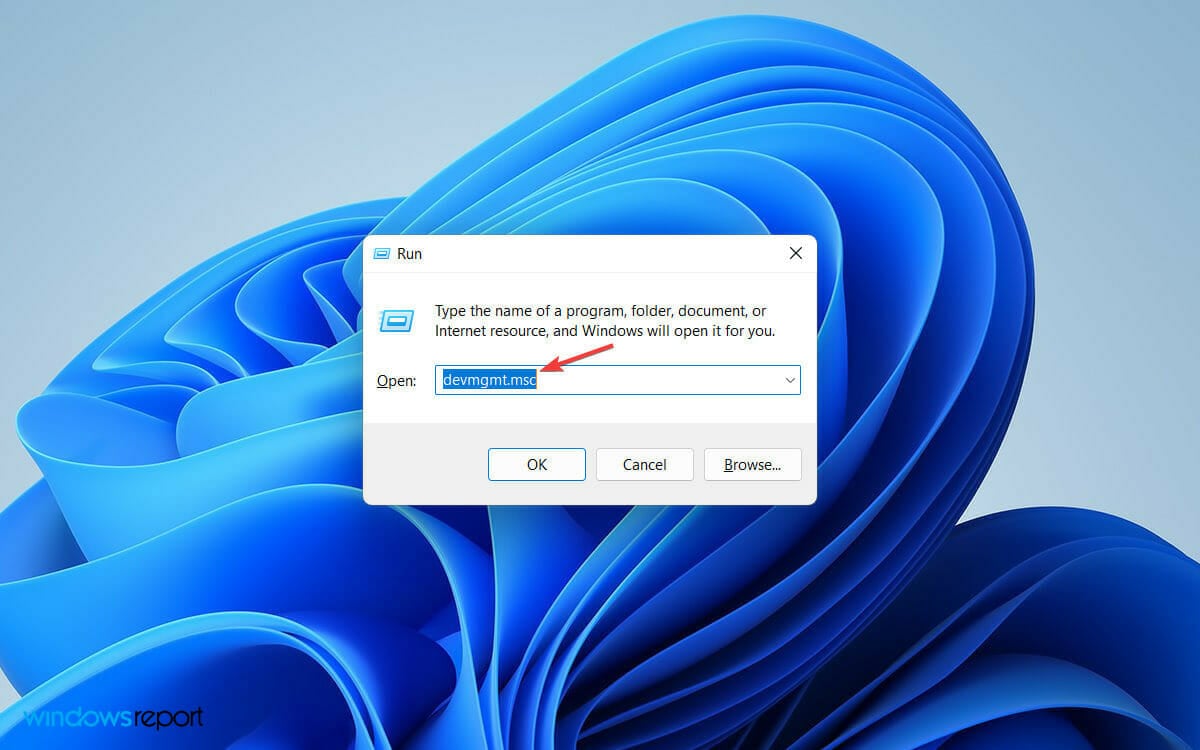
- Press the Windows key + R to open the Run dialog box.
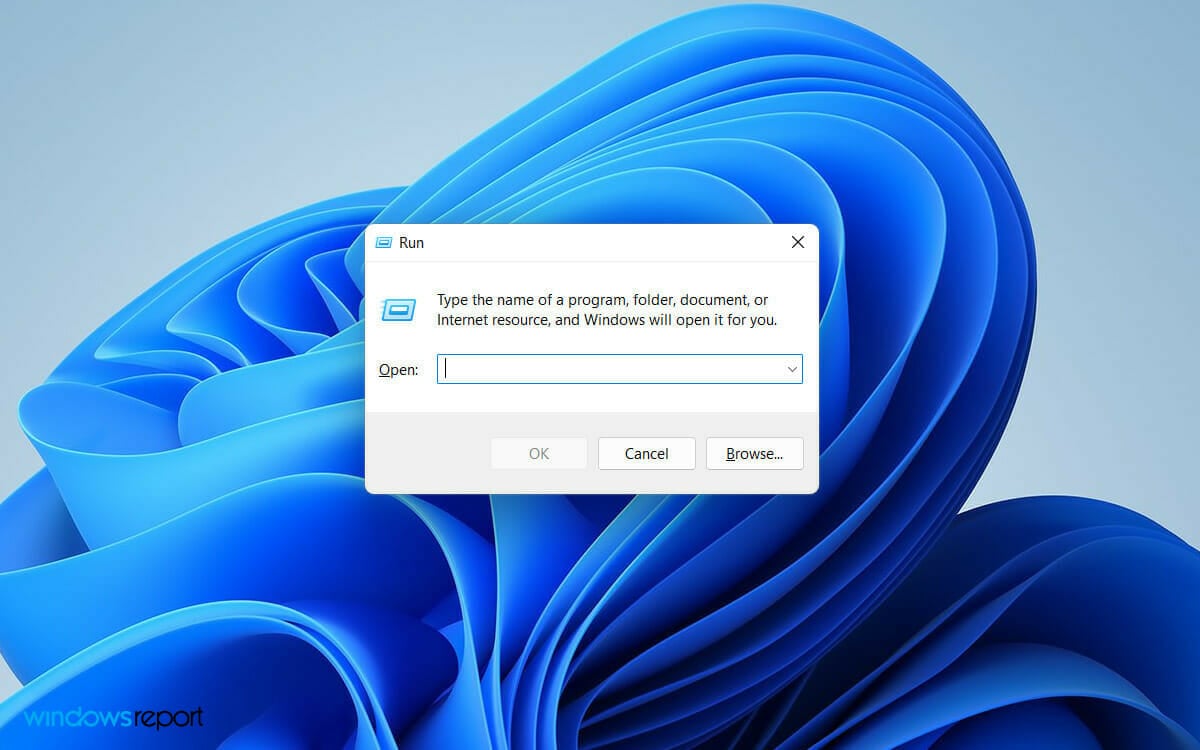
- Type devmgmt.msc on the search field and hit the Enter button.
- Locate and expand the Display Adapters tab on the Device Manager window.
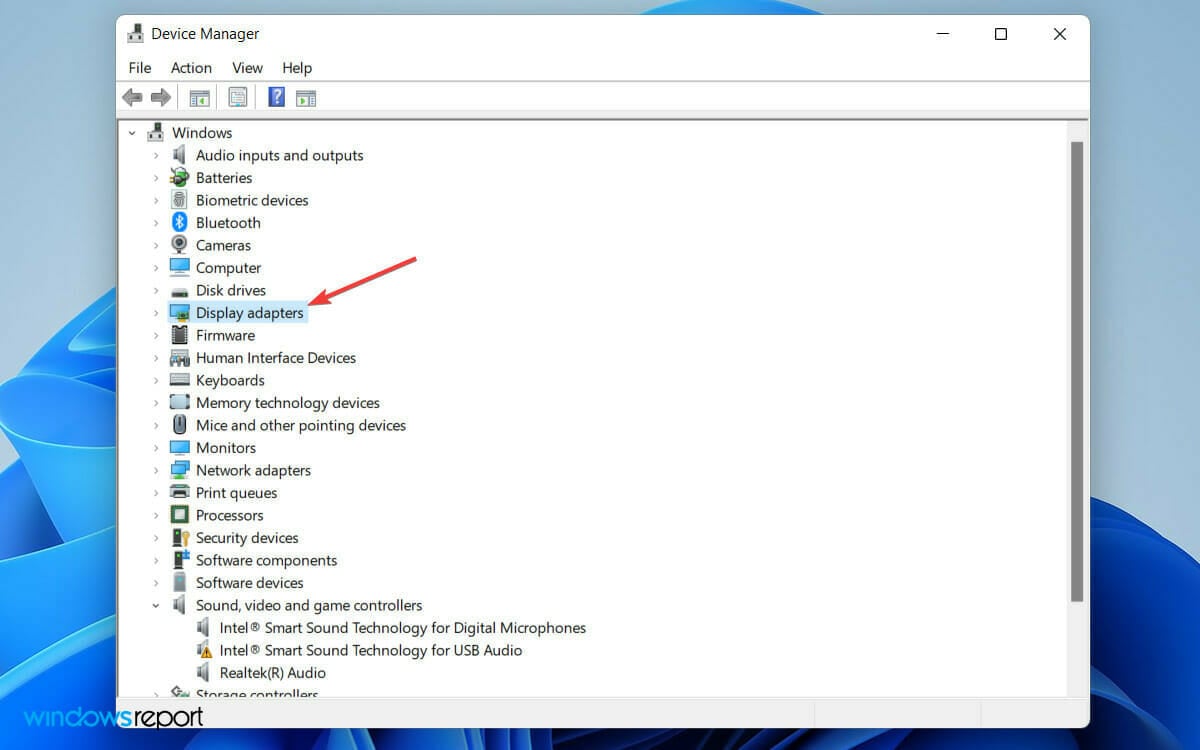
- Right-click on your graphics card, and from the list of options, select Update driver.

- Select the Search automatically for drivers option as the Update driver window opens.

- Now, wait until Windows completes the search for the latest driver.

- Finally, follow the simple on-screen process to update your display driver to its latest version.
An outdated display driver can cause conflicts between the software and hardware components of your PC.
Thus, if you haven’t updated the display driver recently, following the steps above will update it and fix the issue.
You can also opt for driver update software tools to keep your display driver updated automatically and fix every driver on your PC.
⇒ Get PC Helpsoft Driver Updater
3. Change the display frequency
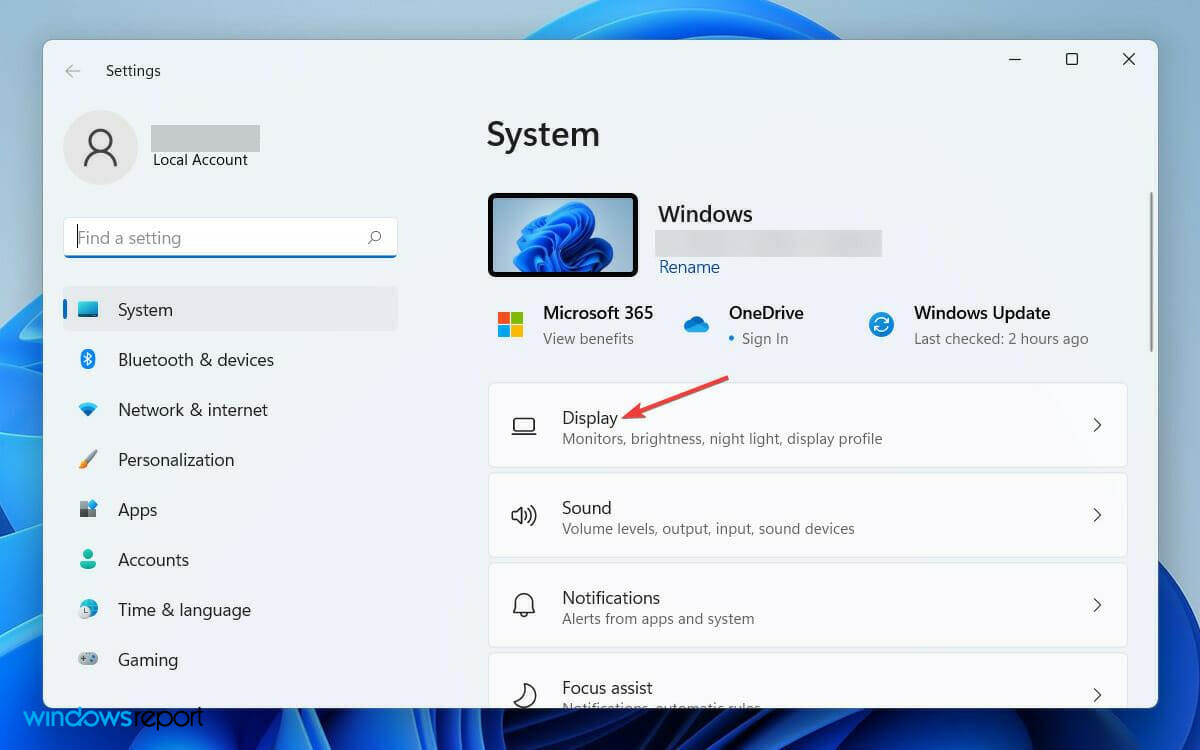
- Press the Windows key + I to open Settings on your PC.

- Then, click on the Display tab under System settings.
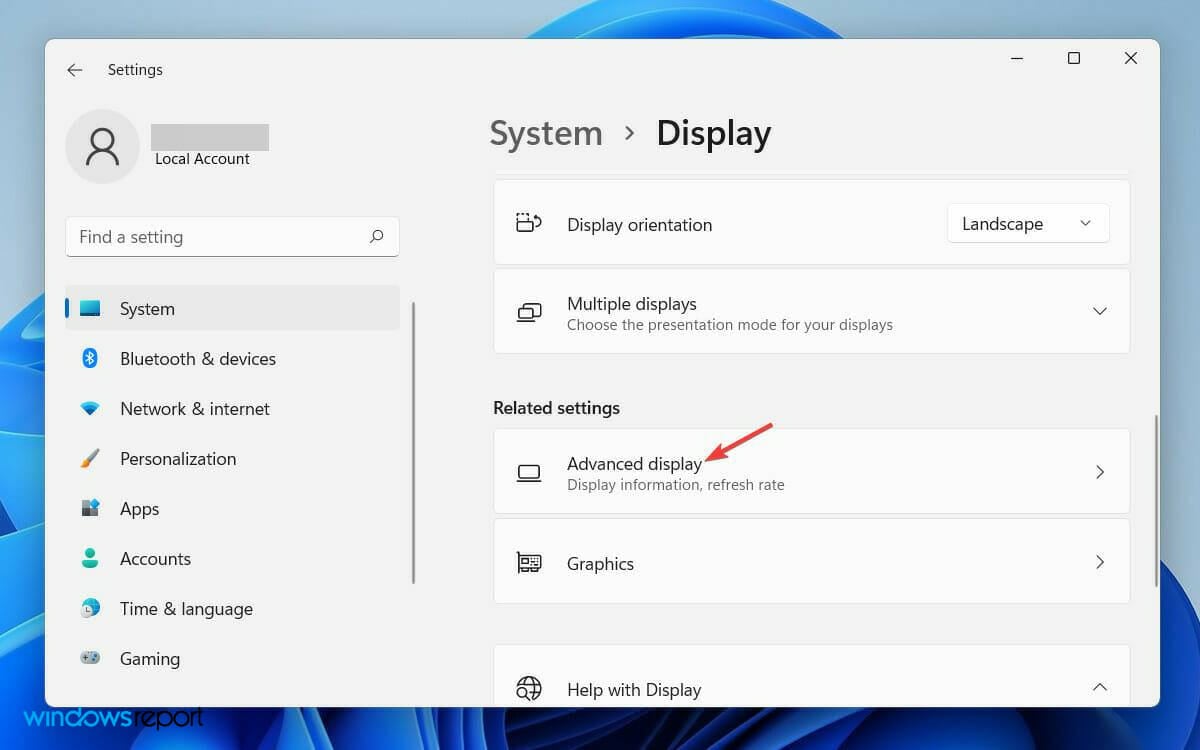
- Now, scroll down and click on the Advanced display option.
- Then, from Select a display to view or change its settings tab, choose the display for which you want to change the frequency.
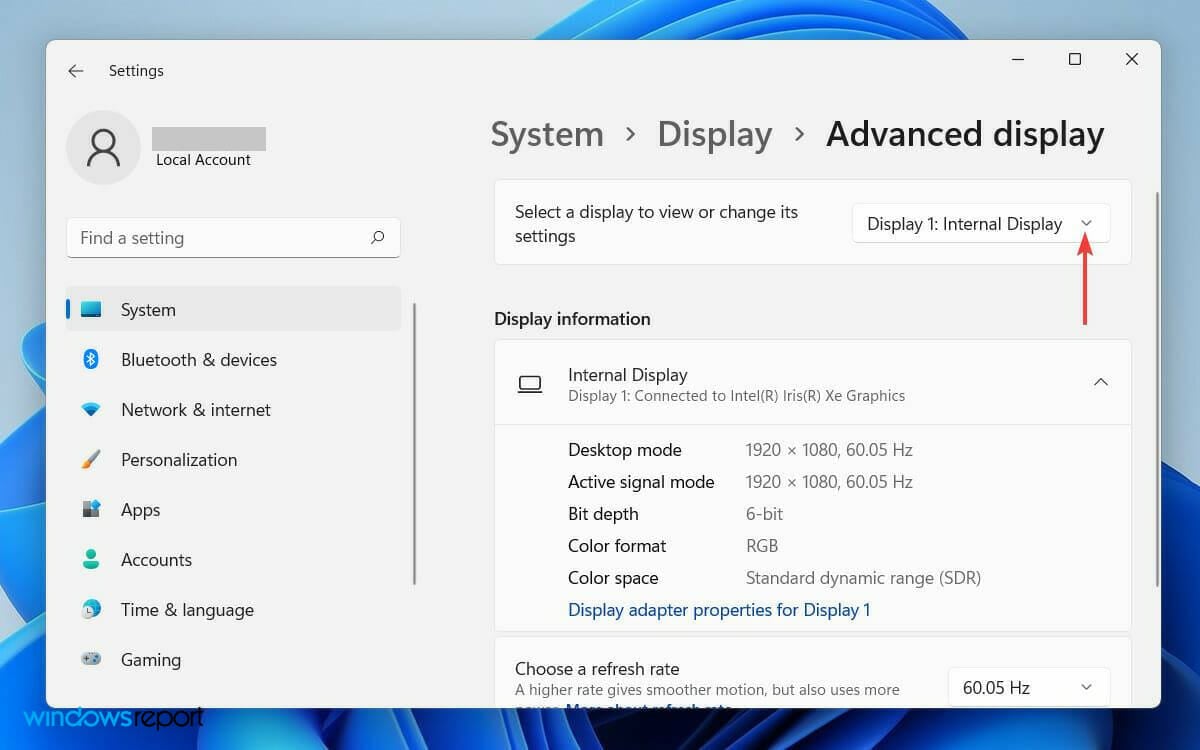
- Finally, from the Choose a refresh rate tab, select a refresh rate that both the displays support.
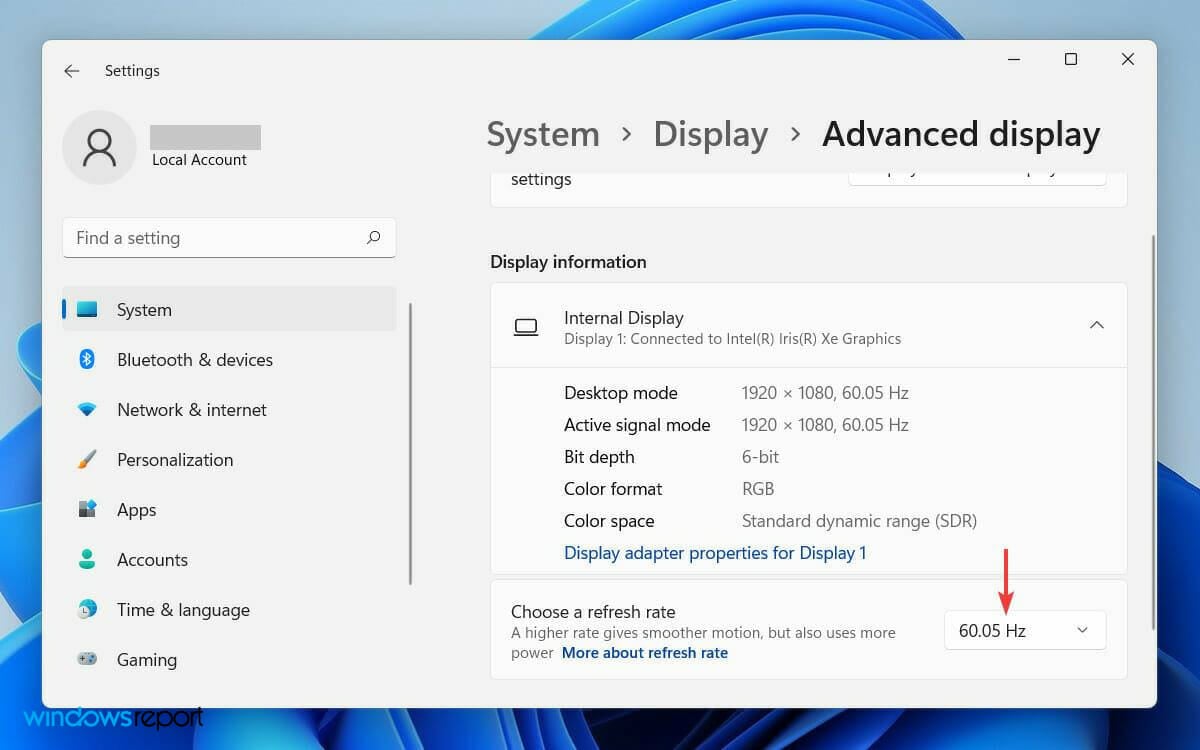
Having a different refresh rate on the second monitor can cause a temporary software conflict on your system.
Eventually, that may lead to Windows not detecting the monitor. However, you can resolve the issue by changing the display frequency settings.
4. Roll back the graphics card driver
- First, click on the Search icon on the toolbar and type Device Manager.
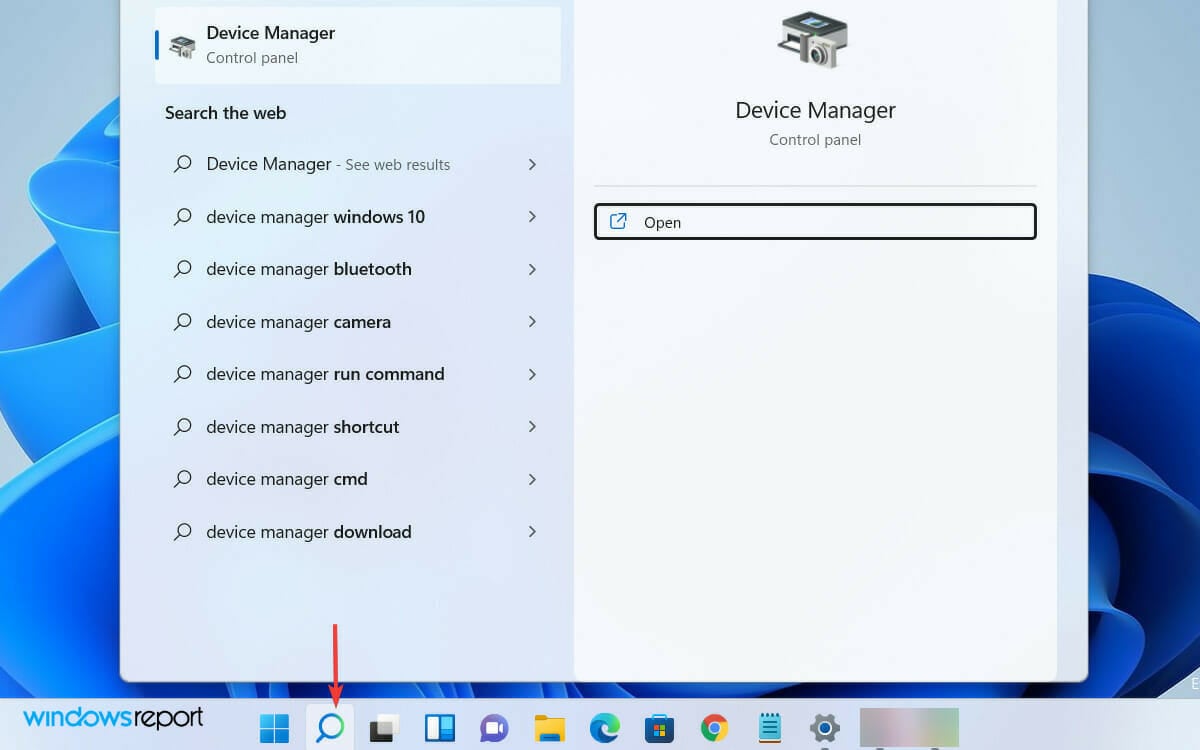
- Now, open Device Manager from the search result.
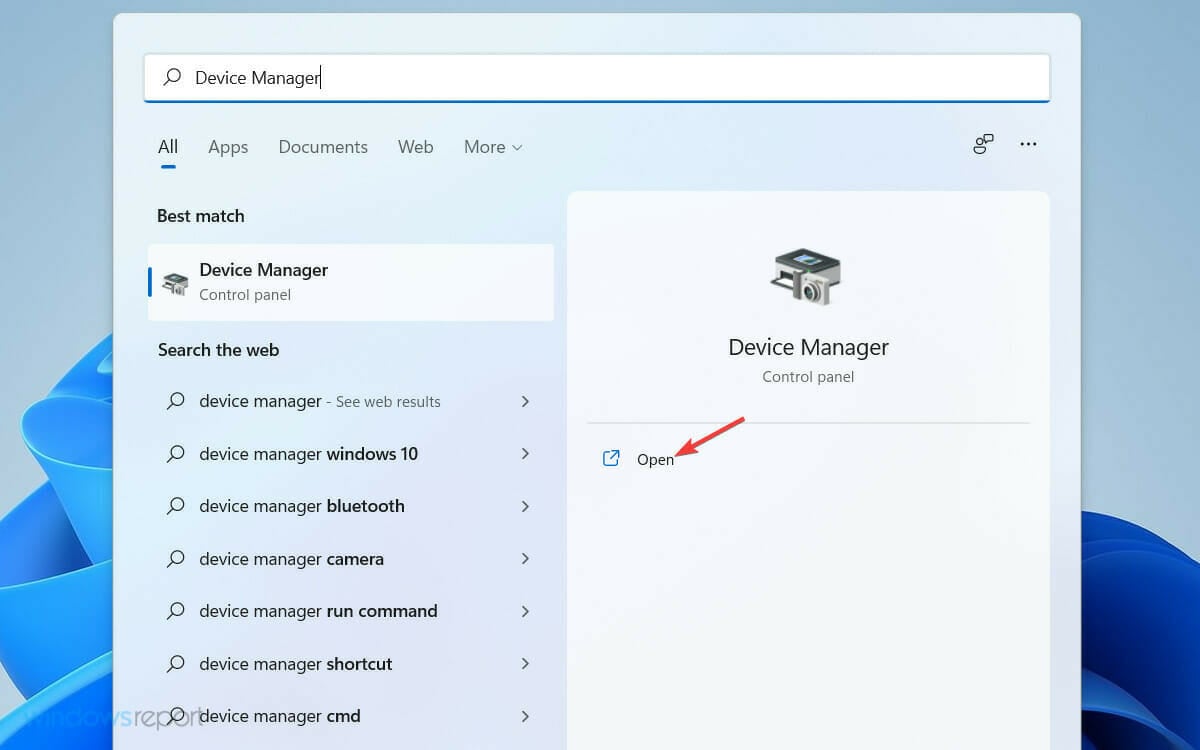
- Then, locate and expand the Display adapters tab from the list in the Device Manager window.

- Right-click on your graphics card driver and select Properties on the list.

- On the Properties window, click on the Driver tab and select the Roll Back Driver option.

- On the warning pop-up, select the option Previous version of the driver performed better.
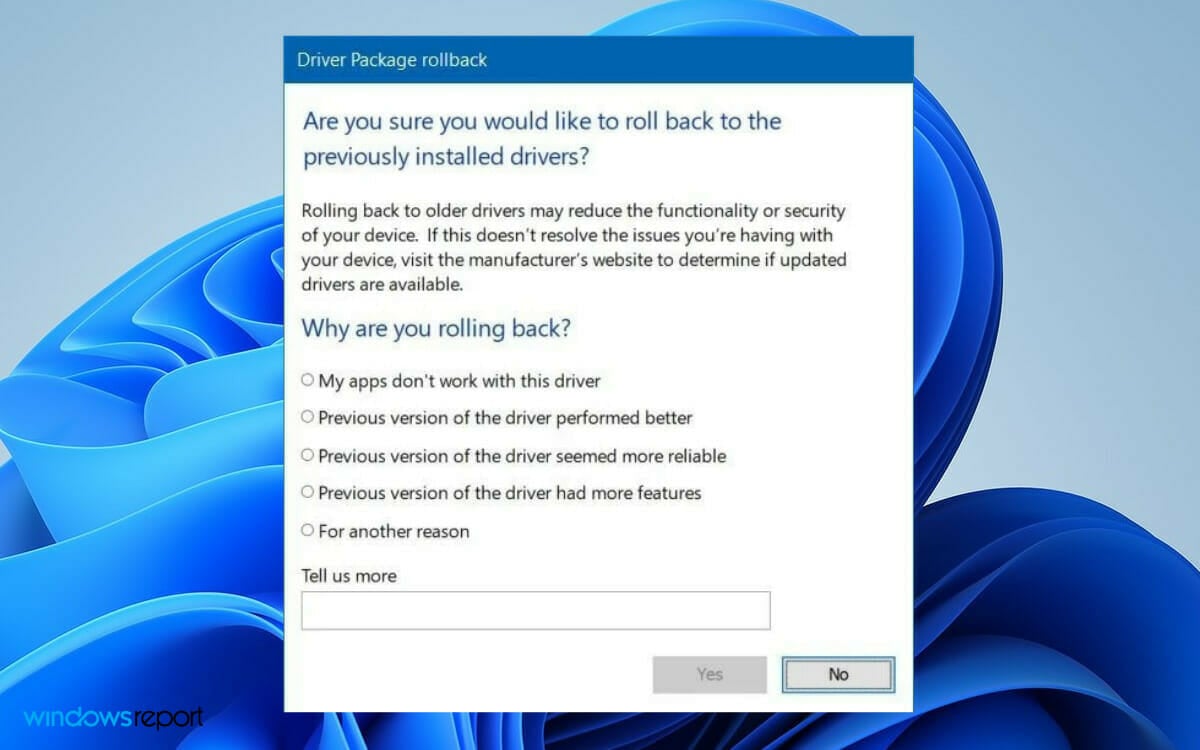
- Finally, click on the Yes button below.
Occasionally, an updated driver version comes with bugs. Rolling back to the previous version will resolve the problem in that case.
6. Check physical connections
Ensure the cable is firmly connected to both your PC and the monitor. If possible, test with another cable or port type (HDMI, DisplayPort, USB-C) to rule out hardware issues. A loose or damaged cable is one of the most common reasons for a monitor not detected in Windows 11.
7. Use the Detect Displays option
Windows can manually search for connected displays. To do this:
- Press Windows + I to open Settings.
- Go to System > Display.
- Scroll down and click Multiple displays.
- Click the Detect button next to “Detect other display”.
This forces Windows to recheck connected hardware and may make your external monitor appear.
8. Set the correct input source on the monitor
If the monitor is on the wrong input channel, Windows will not be able to display an image. Use the monitor’s on-screen menu to ensure the selected input matches the cable type you’re using (e.g., HDMI, DisplayPort, USB-C).
9. Check projection mode settings
Sometimes the display is connected but not configured to extend or duplicate. To check:
- Press Windows + P to open the projection menu.
- Select either Duplicate or Extend.
If it’s set to “PC screen only,” the second monitor will remain inactive.
How do I customize my second monitor?
While using a second monitor with your PC, Windows offers four different options. Depending on your need, you can select one and start working with it.
Here is an overview of how to customize your second monitor as per your work requirement.
As you connect the second display with your computer, Windows 11 will mirror your primary display on it. If you need to change the usability, follow the steps below.
- Press Windows key + P on your keyboard.
- Then from the list of following options, choose the one that suits your purpose.
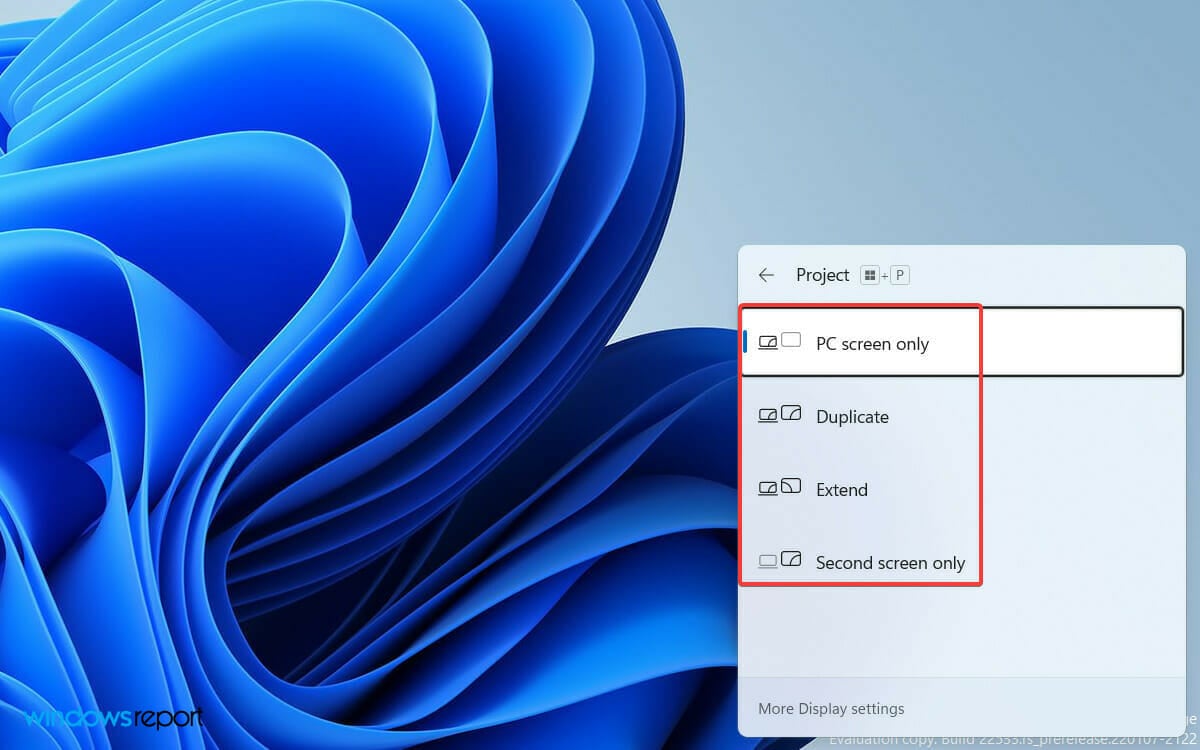
- PC screen only will allow you to see things on a single display
- The Extend mode will let you see your desktop across multiple screens where it’s possible to use two displays for different activities
- The Duplicate option comes by default, as it mirrors the primary display on the second one
- With The Second screen only feature, you can see everything only on the second screen
There are various dual monitor tools for Windows 11 available that may help improve your experience in a dual monitor setup. Third-party dual monitor solutions allow you to customize a lot more than you can usually do on Windows.
Hope the workarounds were helpful to you. Do not hesitate to use the comments section below to tell us which method worked for you.
Read our disclosure page to find out how can you help Windows Report sustain the editorial team. Read more


Improve this guide


User forum
0 messages