How to Use All RAM In Windows 11: 7 Tested Ways

Windows 11 not using all RAM can have a serious impact on performance. You need this memory to tempoarily store your in-progress files and if you don’t have enough, you’ll run into errors and possibly lose progress.
To help you prevent that, we’ll explain how to use all RAM in Windows and give you a glimpse into the most common causes of it.
Let’s get started.
How to use all RAM in Windows
1. Run the Windows Memory Diagnostic tool
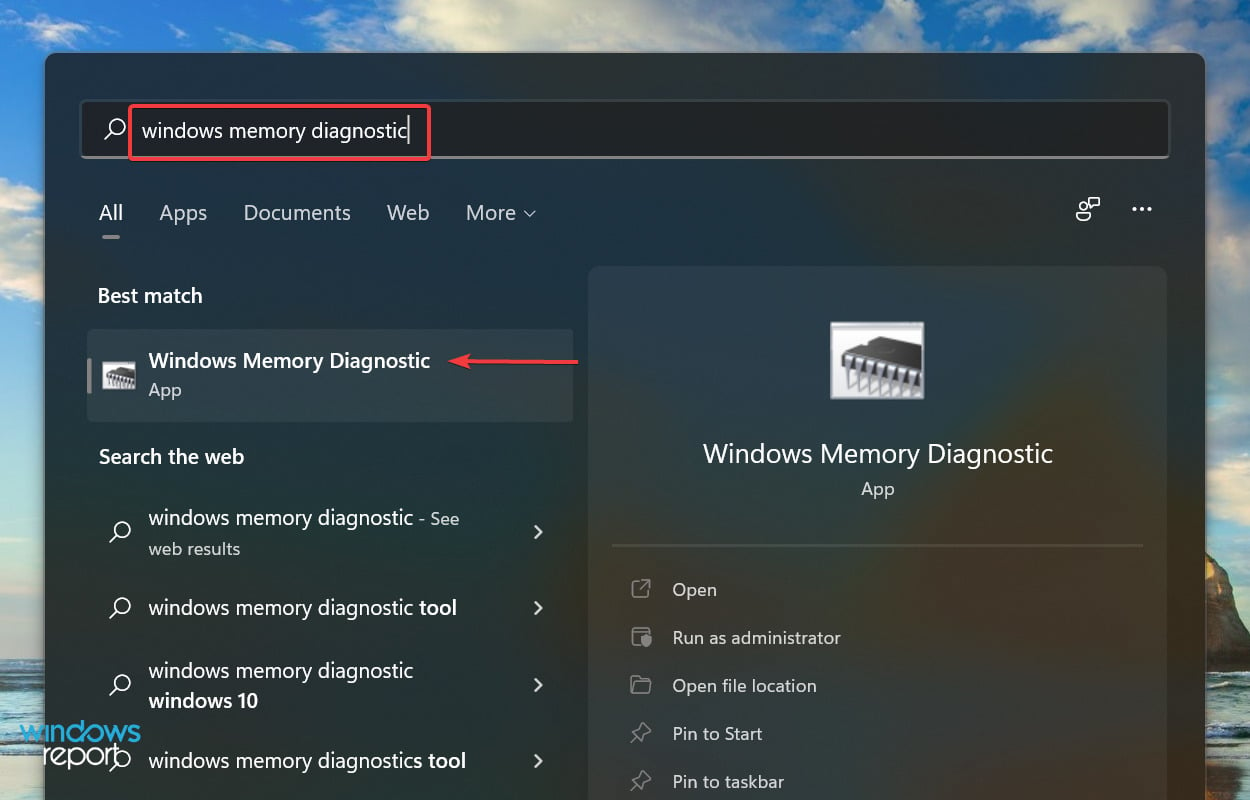
- Press Windows + S to launch the Search menu, enter Windows Memory Diagnostic tool in the text field at the top, and then click on the relevant search result that appears.

- Now, select Restart now and check for problems (recommended) from the two options listed here.

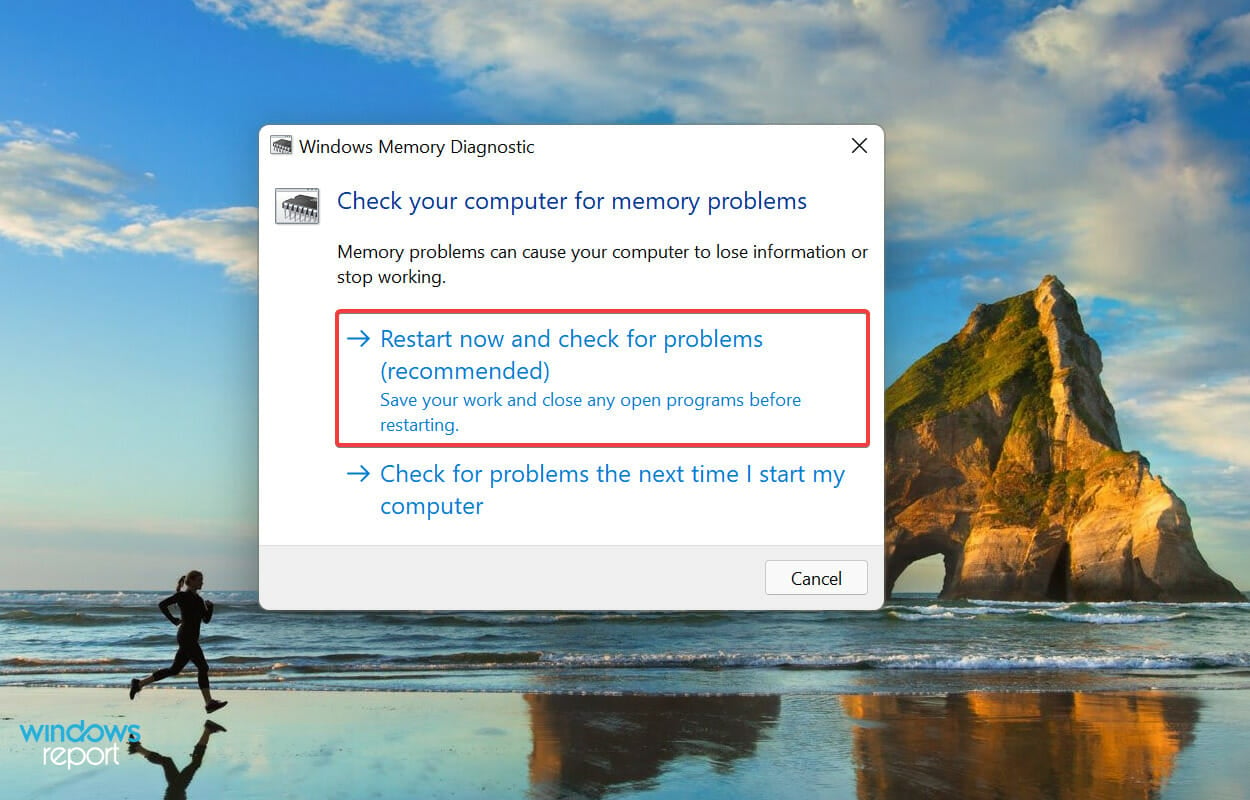
Windows Memory Diagnostic identifies problems with the RAM and automatically eliminates them. Before you run it, save any open files to avoid data loss, because your computer will restart.
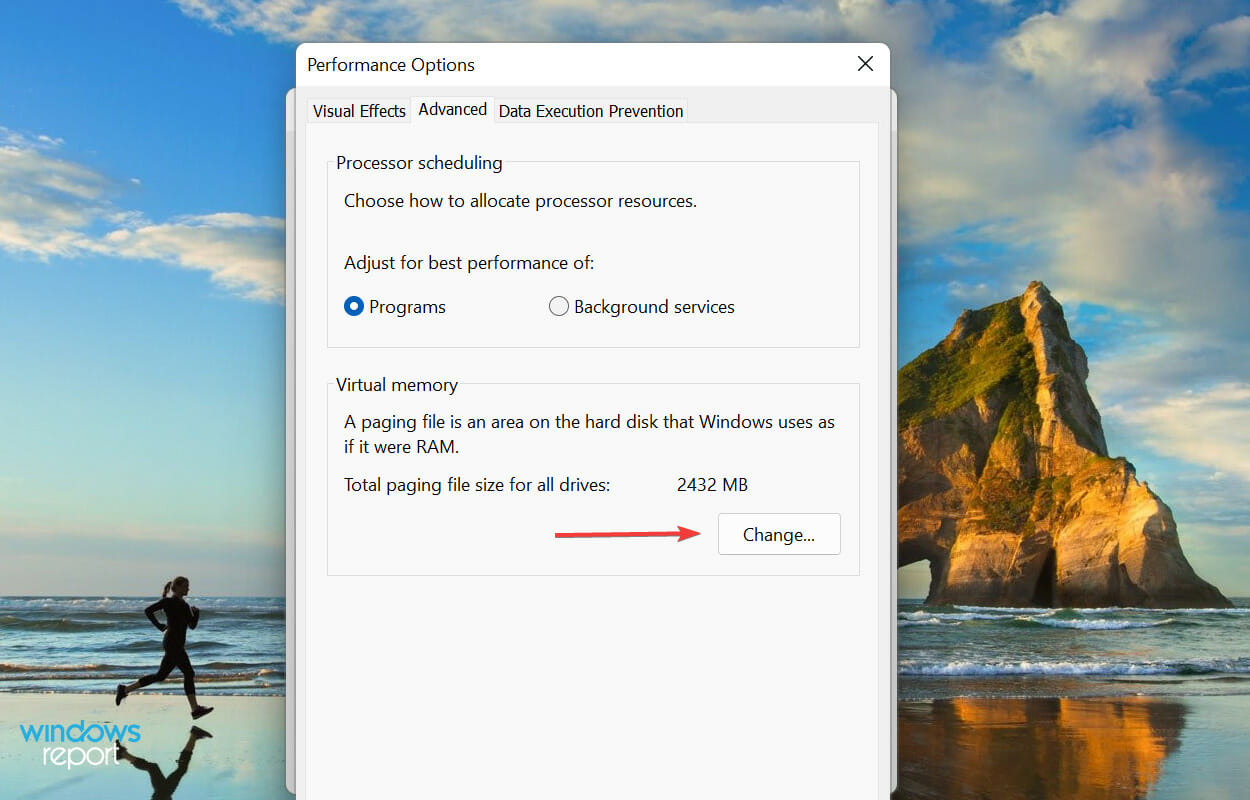
2. Check page file
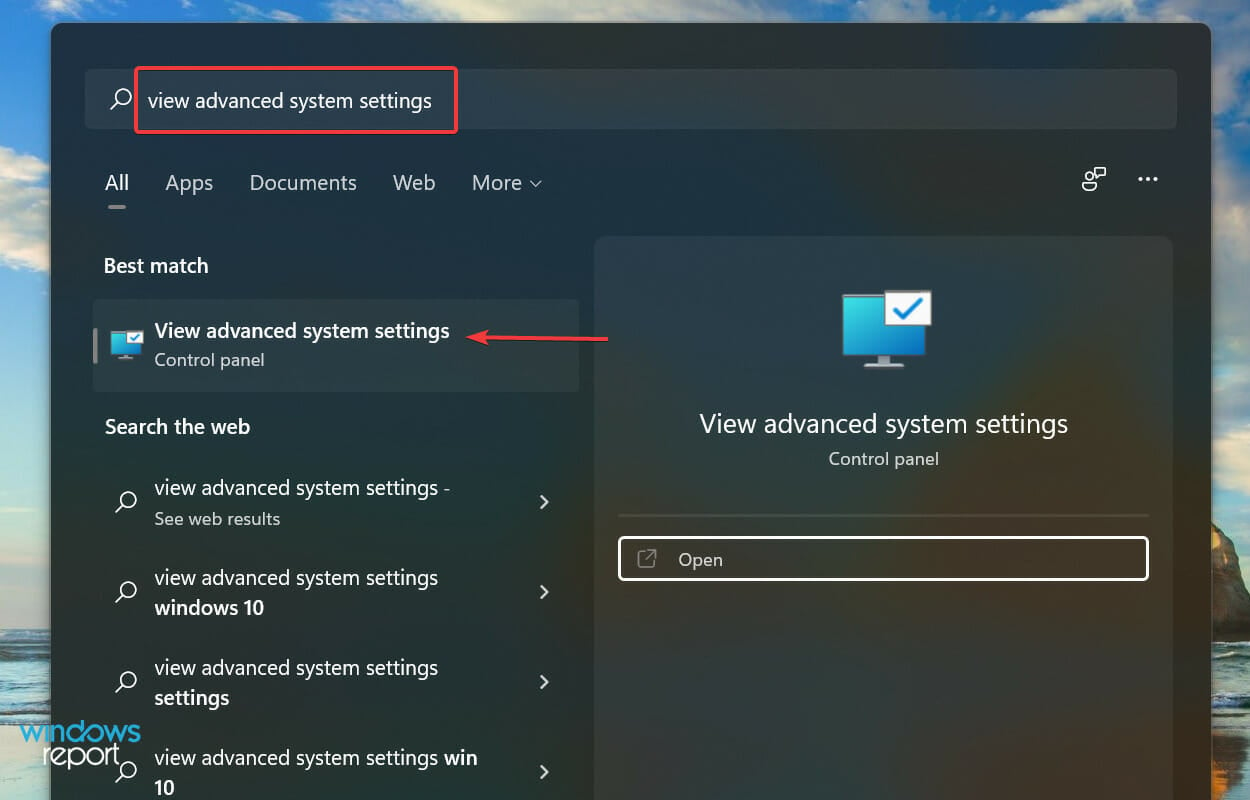
- Press Windows + S to launch the Search menu, enter View advanced system settings in the text field at the top, and click on the relevant search result that appears.

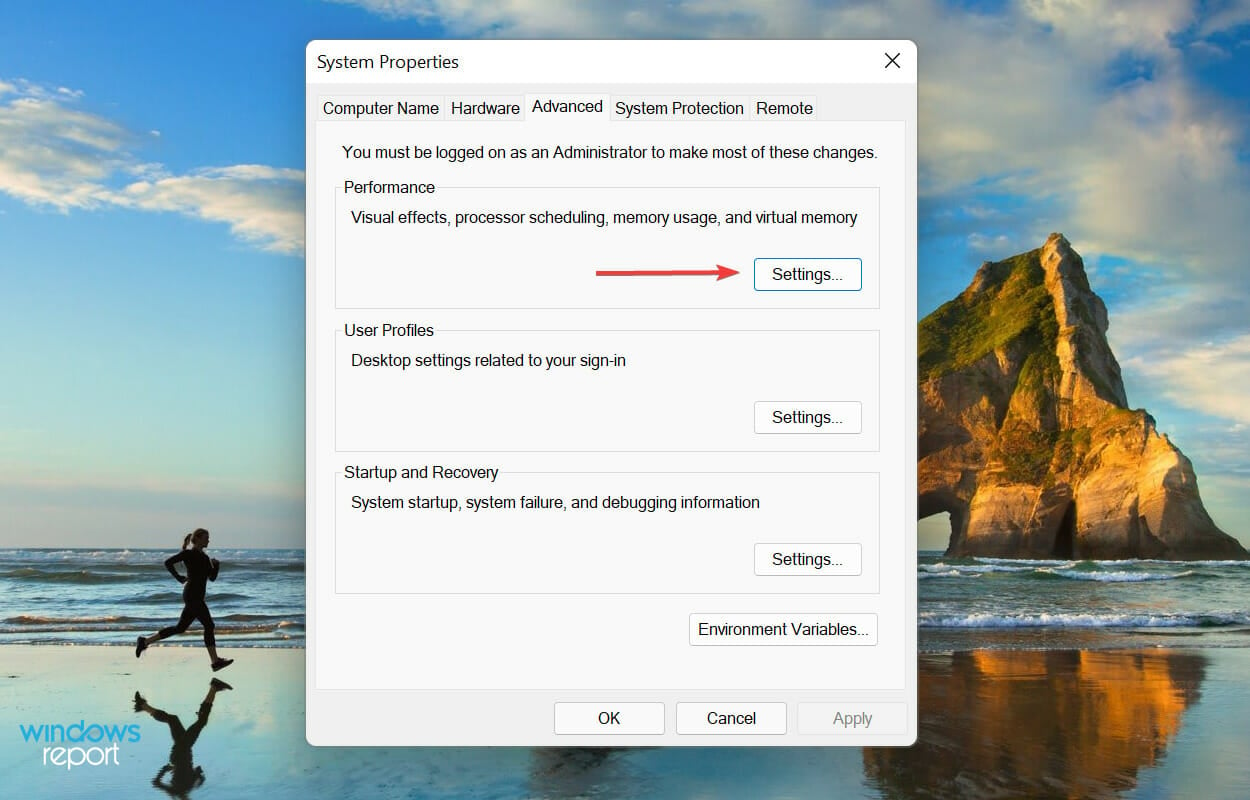
- Click on Settings under Performance in the Advanced tab.

- Navigate to the Advanced tab in the Performance Options window.

- Click on Change under Virtual memory.

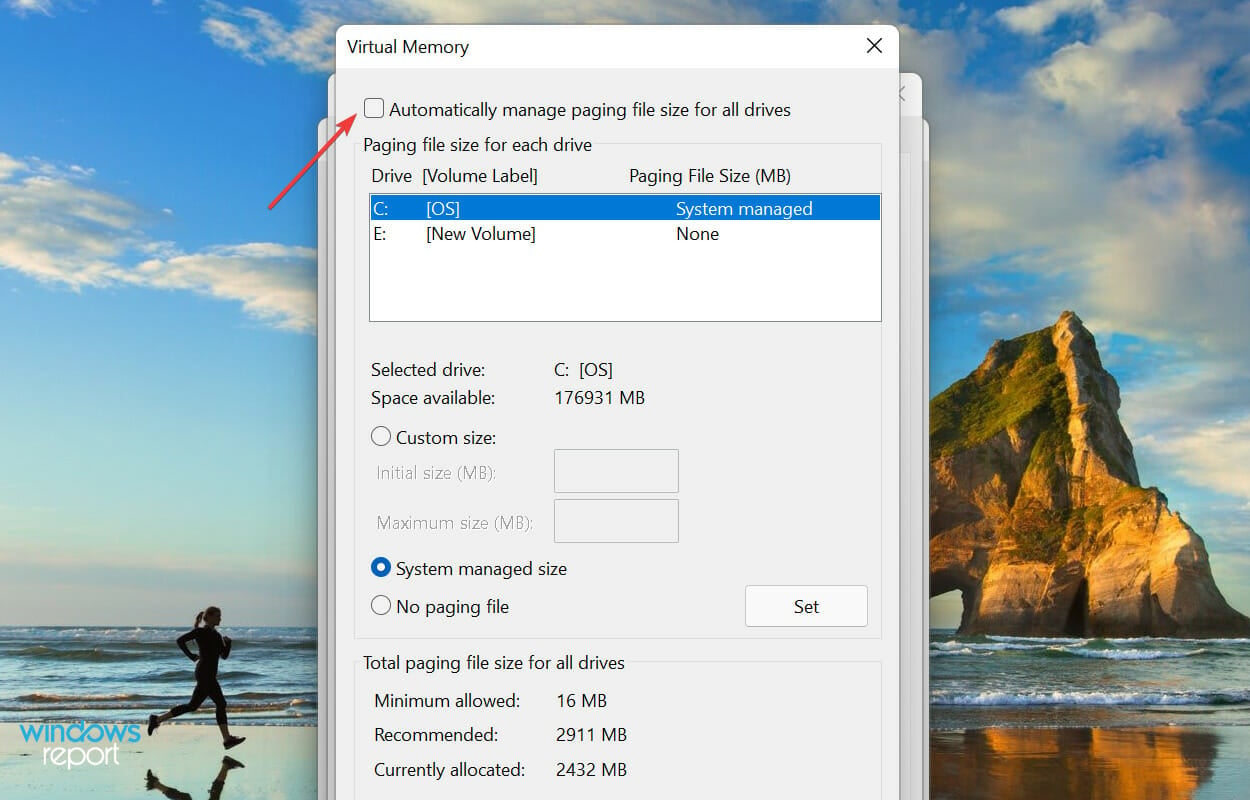
- Untick the checkbox for Automatically manage paging file size for all drives.

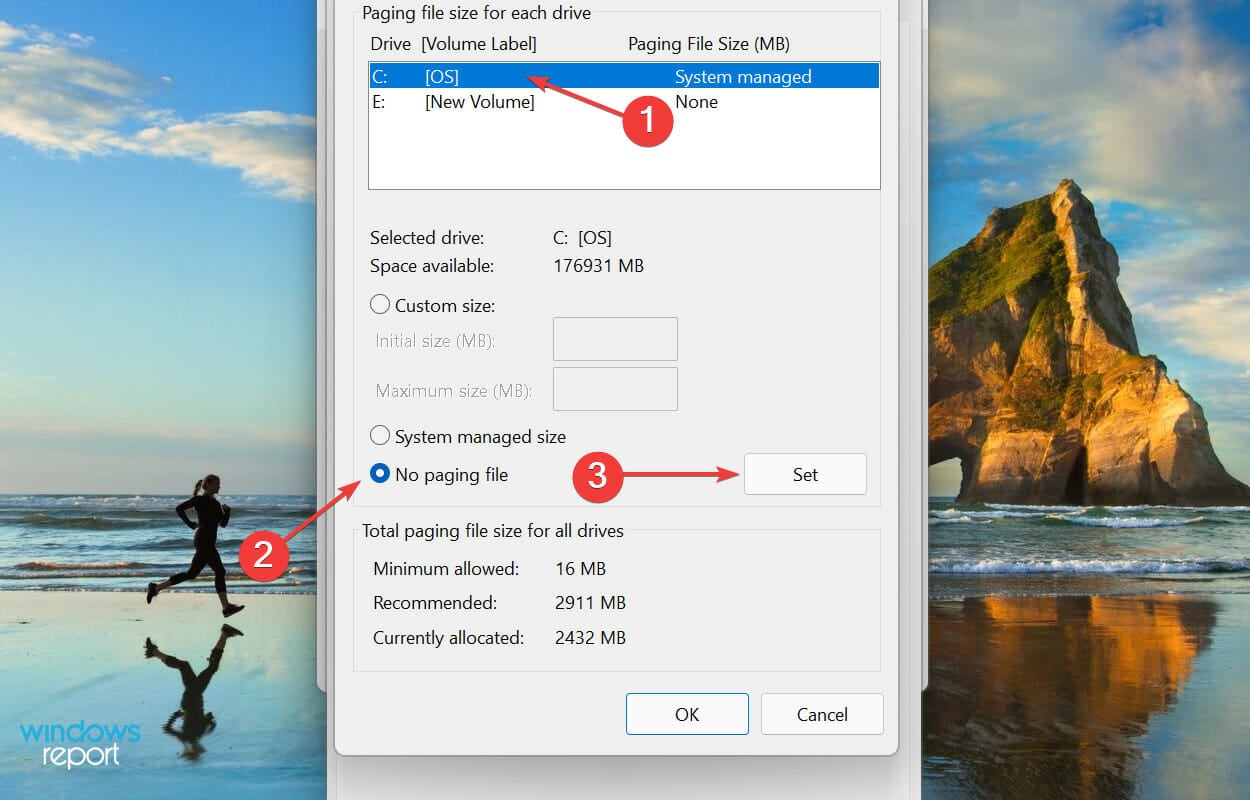
- Select the drive, check the No paging file option and then click on the Set button.

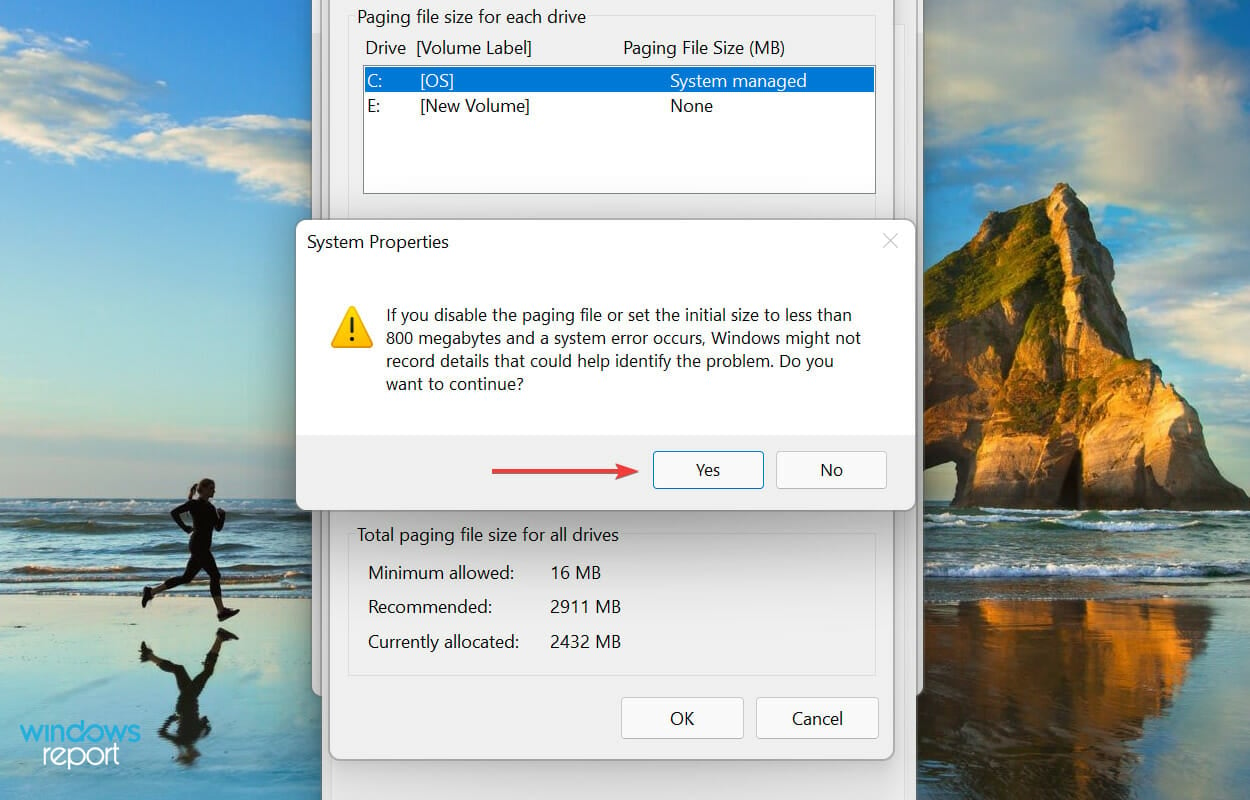
- Click Yes on the warning box that appears.

- Repeat the process for all drives if they have a page file, and then click on OK at the bottom to save the changes.

- Finally, restart the computer for the changes to come into effect.

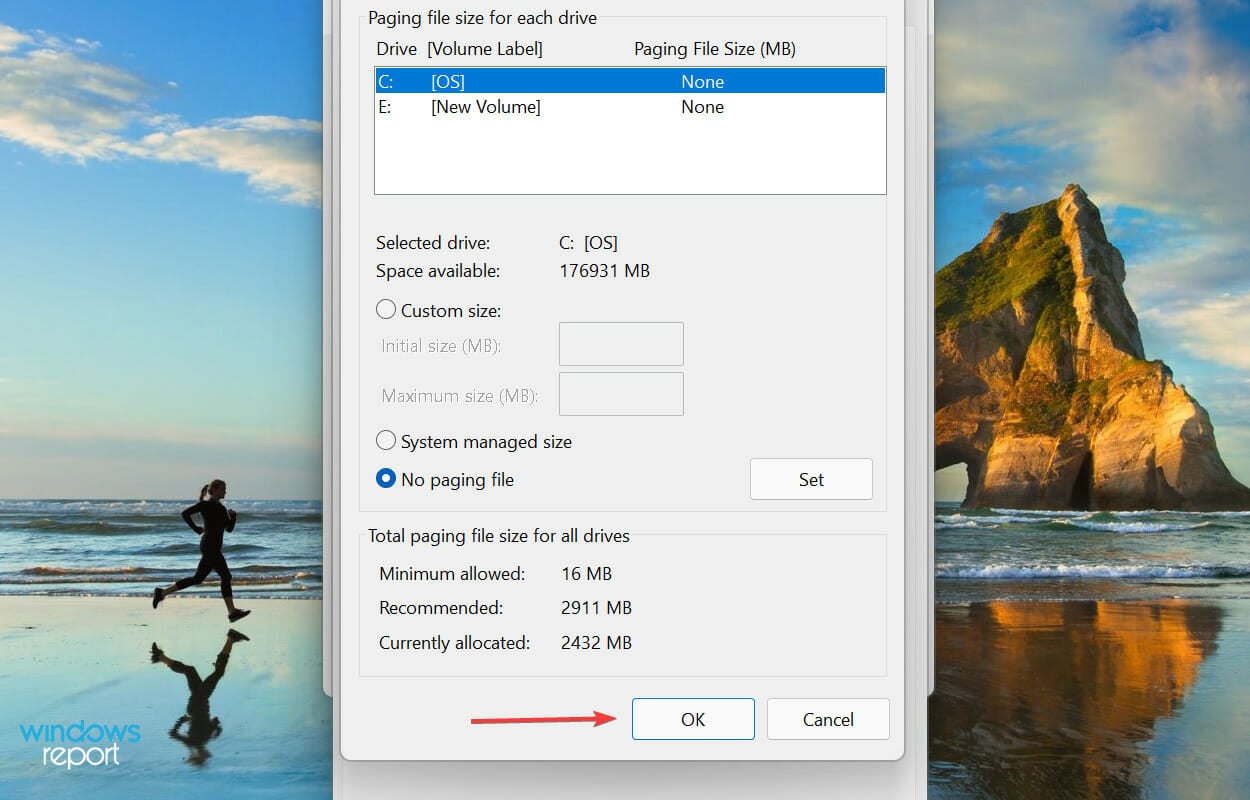
The page file is a set space on your storage drive that is used to store data temporarily when the RAM (memory) starts to fill up. If there are problems with it, you may notice that Windows 11 is not using all the RAM.
If disabling the page file doesn’t fix the problem, revert the changes you made earlier, and continue with the next fix.
3. Modify the usable RAM
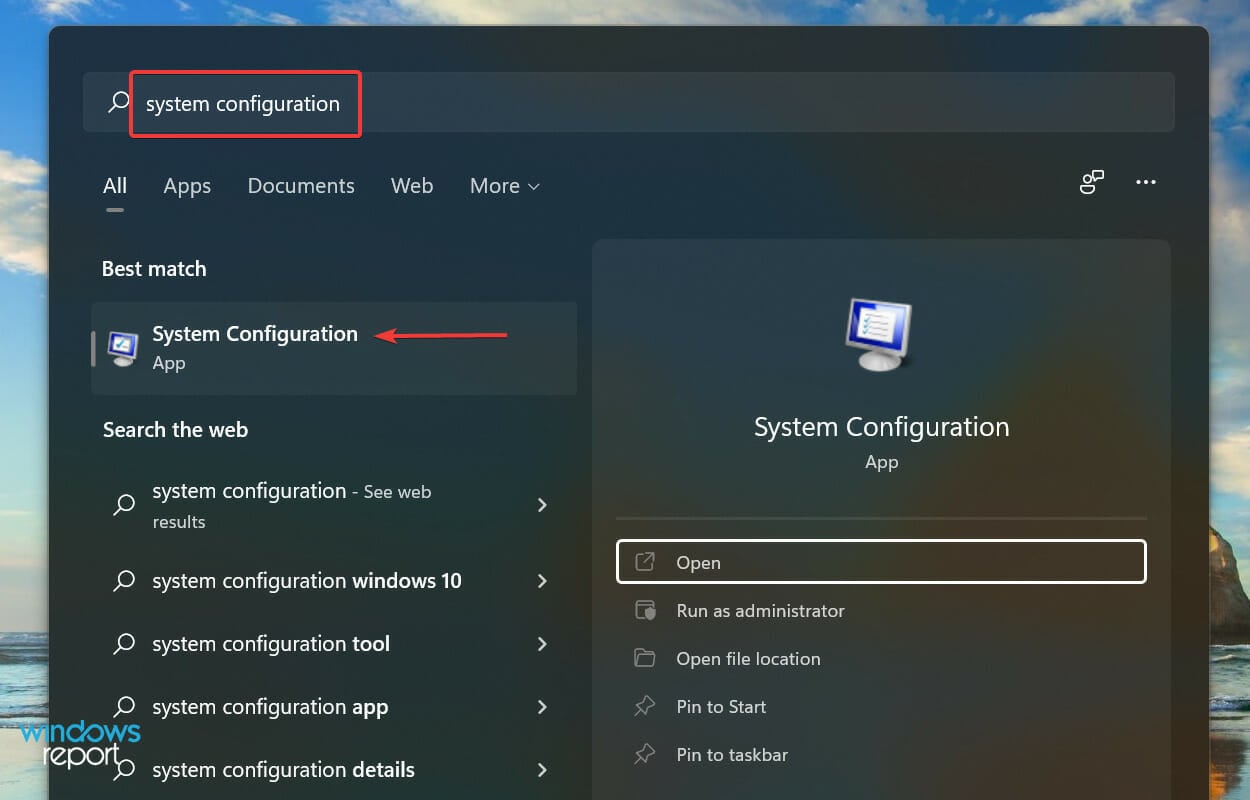
- Press Windows + S to launch the Search menu, enter System configuration in the text field at the top, and click on the relevant search result that appears.

- Now, go the Boot tab and click on Advanced options.

- Tick the checkbox for Maximum memory, enter the installed RAM on your system in the text field underneath, and then click on OK at the bottom.

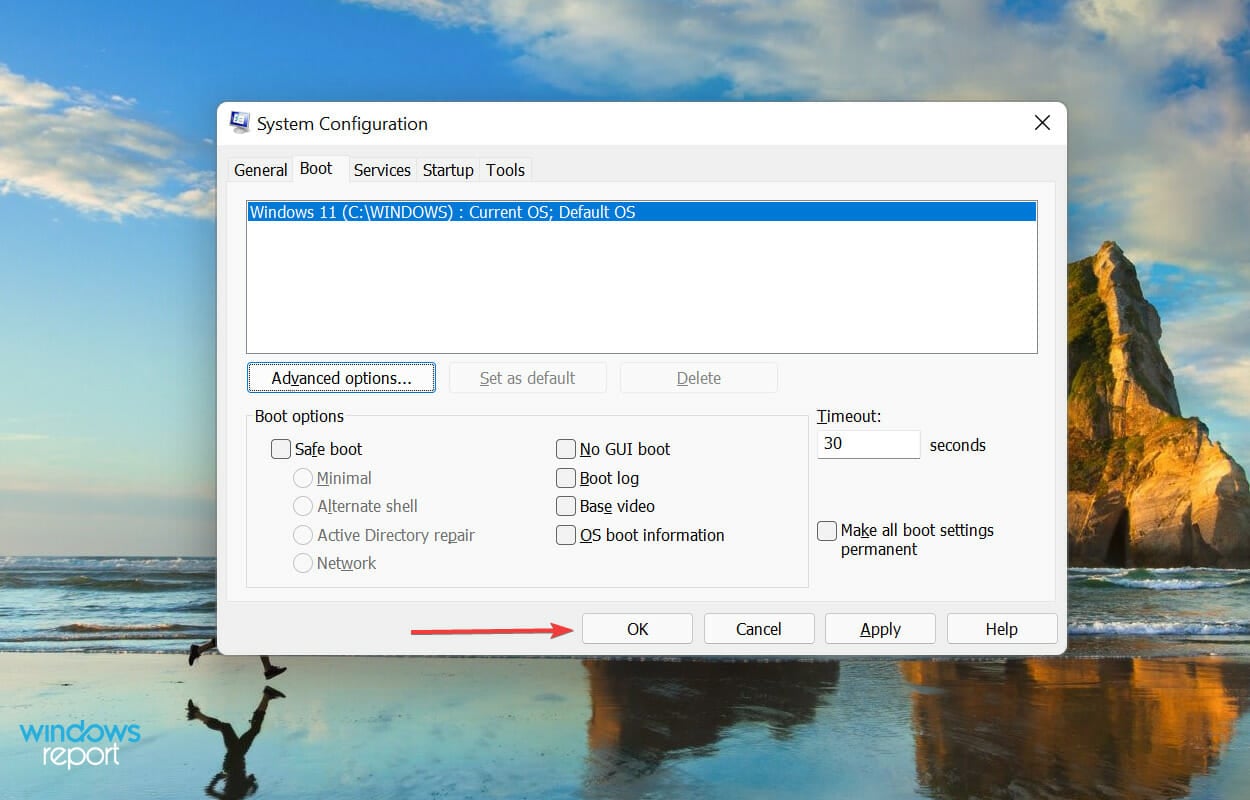
- Again, click on OK to save the changes and close the System Configuration window.

- Restart the computer, if prompted.
- In case it doesn’t work, uncheck the Maximum memory checkbox in BOOT Advanced Options window, and save the changes.

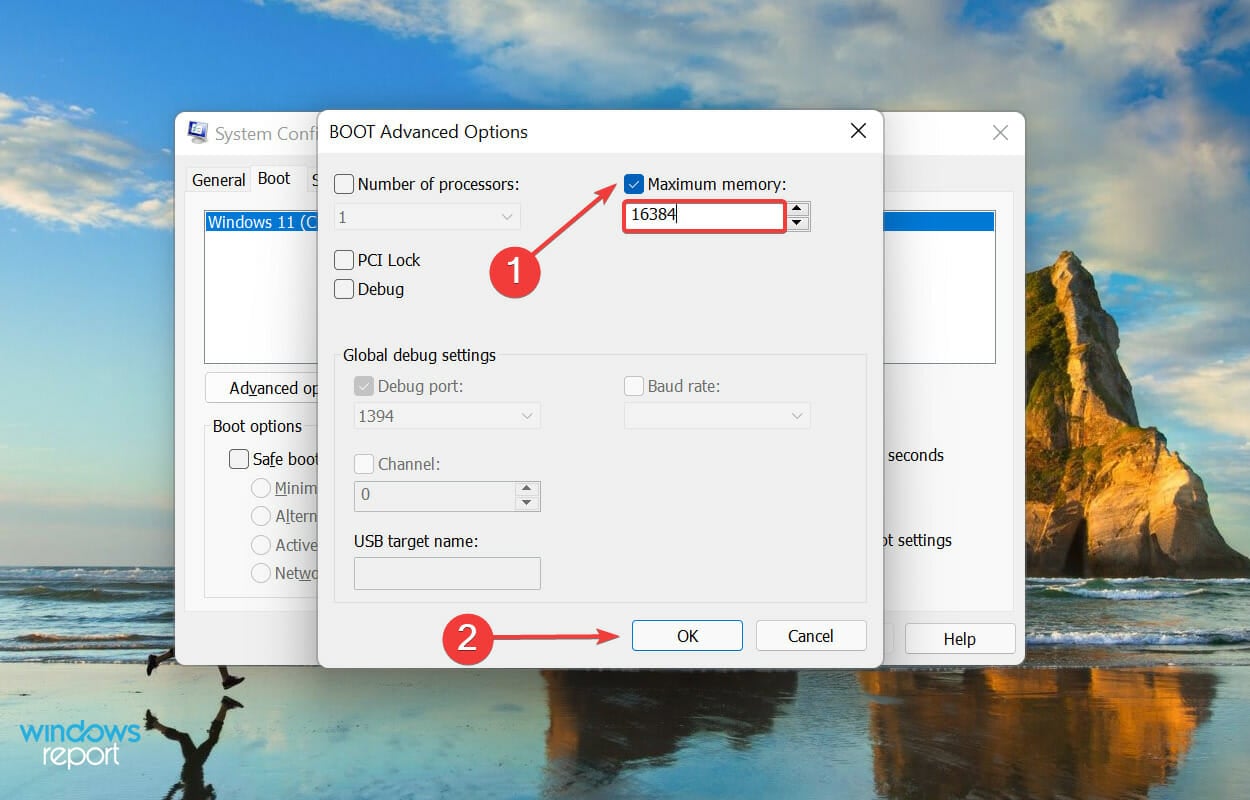
To calculate the value in the text field earlier, check the installed RAM in your system, and multiply it by 1024 to find the value in MB (Megabyte). For instance, your computer has 16 GB RAM, so the value to be entered becomes 16 x 1024 = 16384 MB.
4. Modify the registry
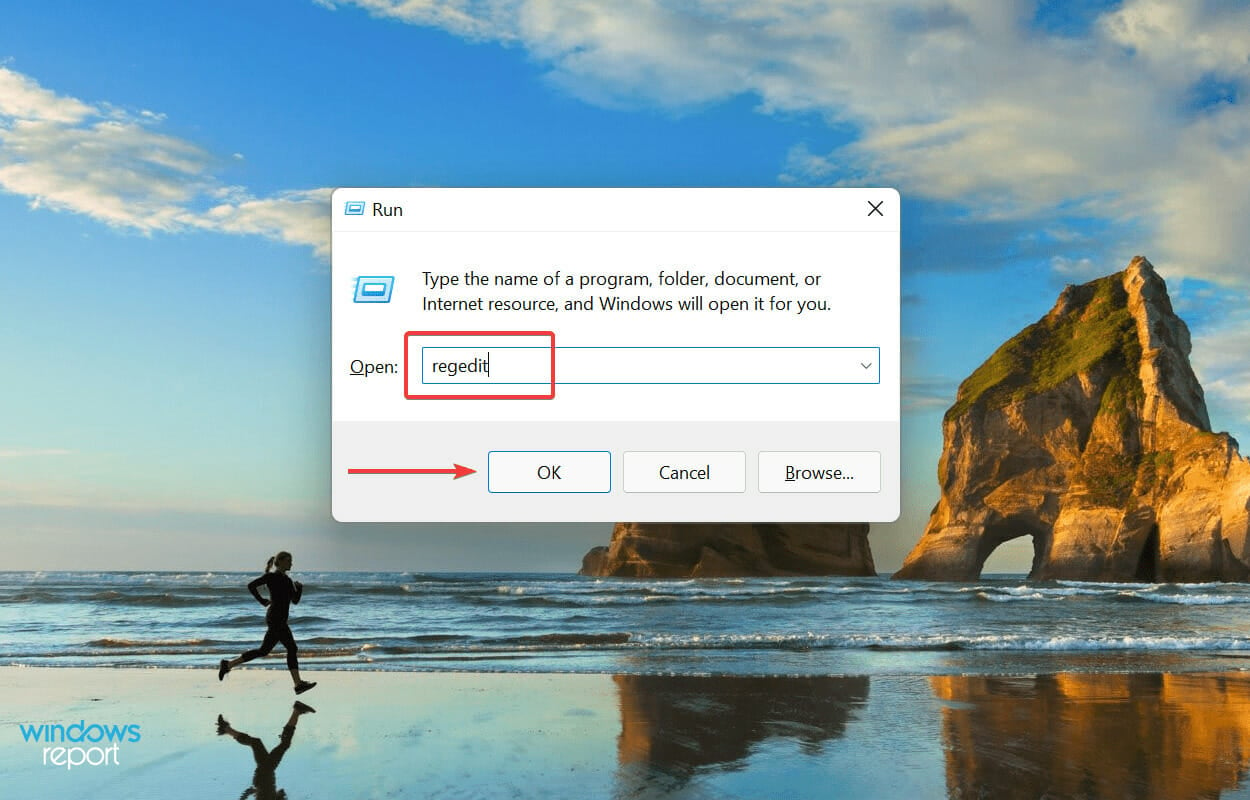
- Press Windows + R to launch the Run command, enter regedit in the text field, and either click on OK or hit Enter to launch the Registry Editor.

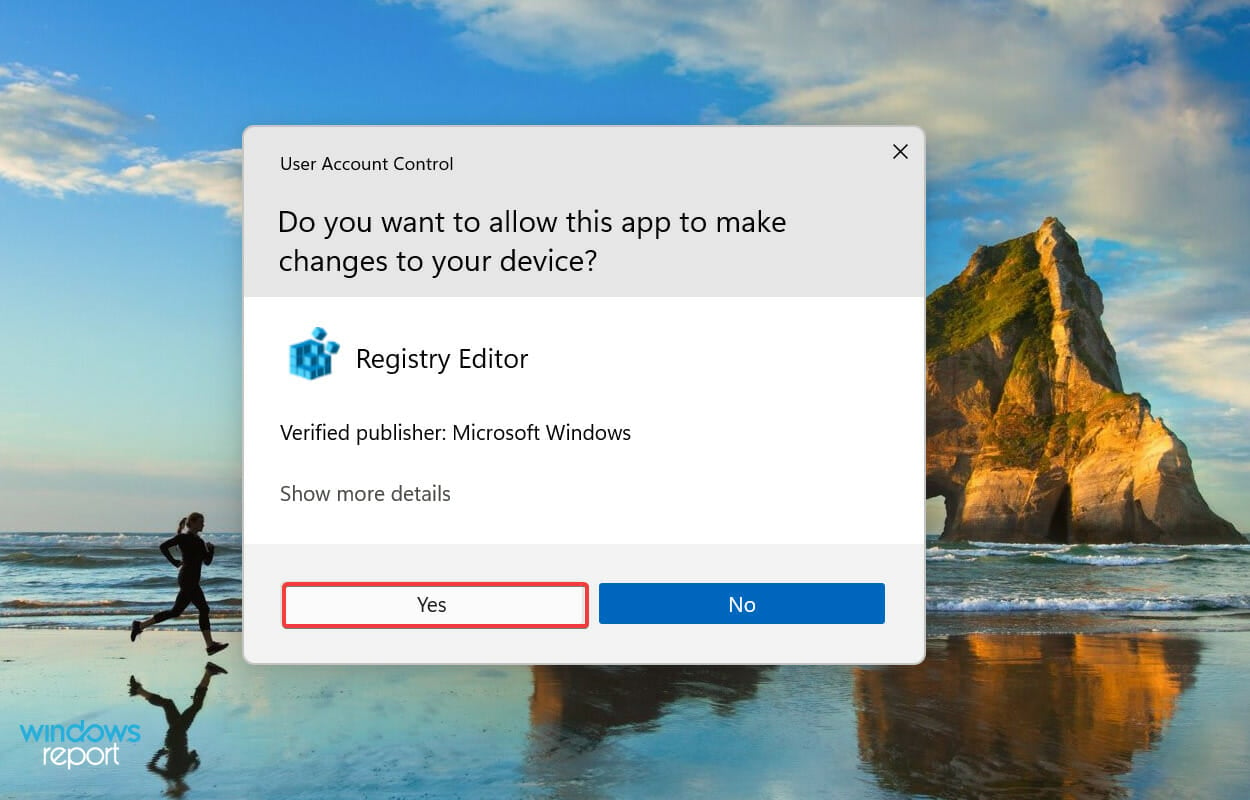
- Click Yes on the UAC (User Account Control) prompt that pops up.

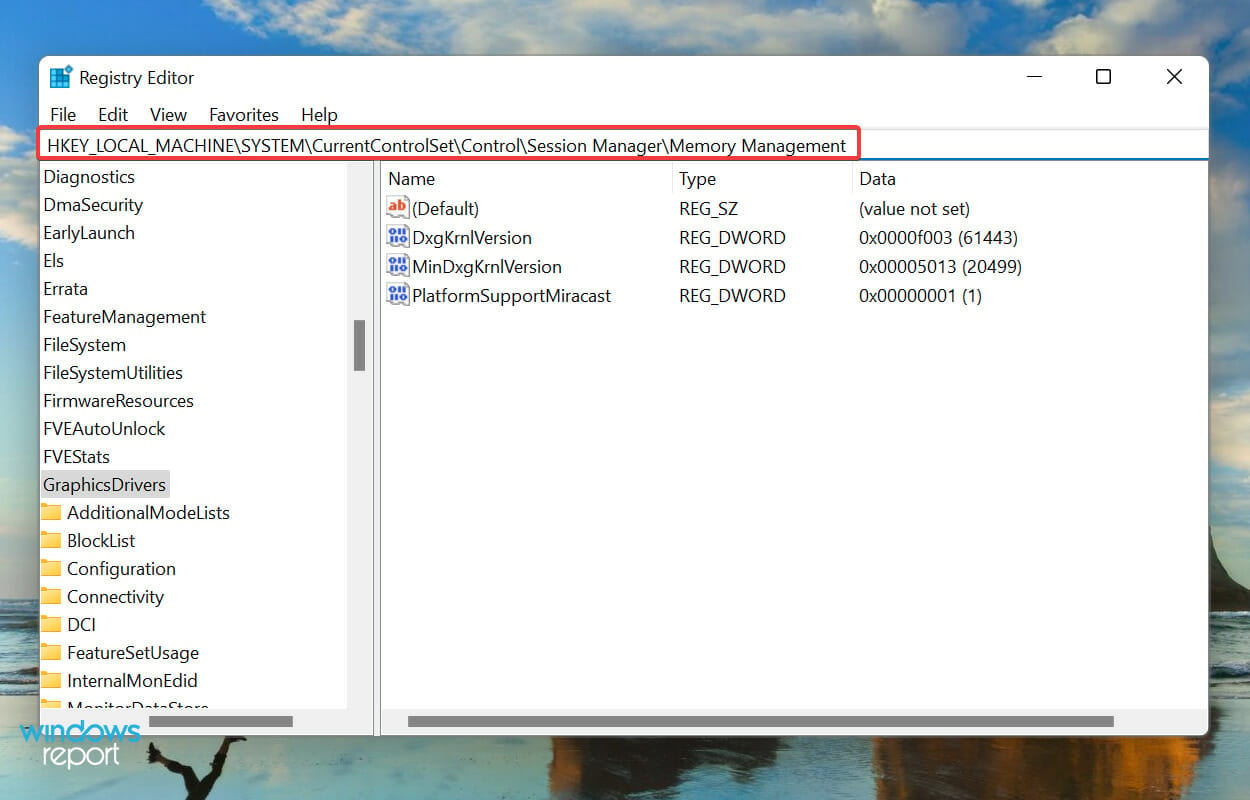
- Now, enter the following path in the address bar at the top and then hit Enter. Alternatively, you can navigate the path using the pane on the left:
HKEY_LOCAL_MACHINE\SYSTEM\CurrentControlSet\Control\Session Manager\Memory Management
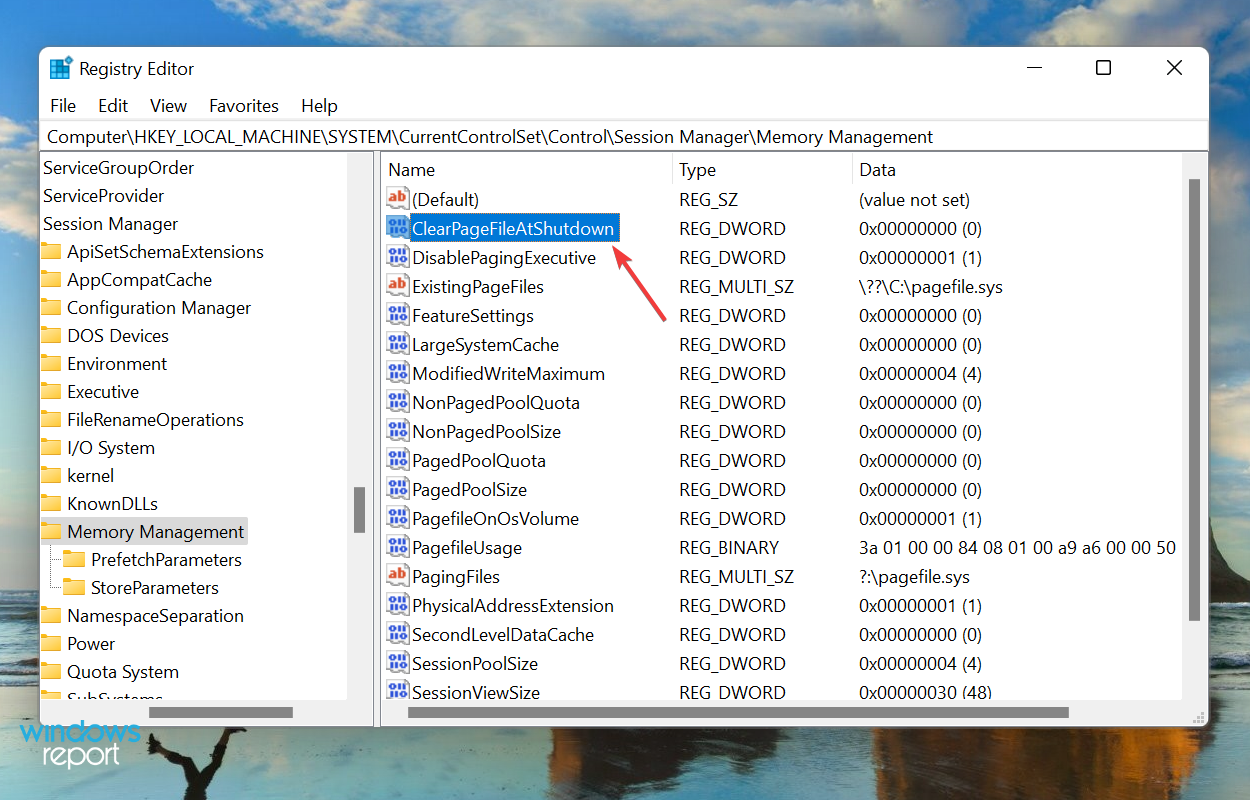
- Locate and double-click on the ClearPageFileAtShutdown DWORD to modify its value data.

- Enter 1 under Value data and click on OK to save the changes.

- Close the registry, and restart the computer.

5. Enable memory remapping in BIOS
 NOTE
NOTE
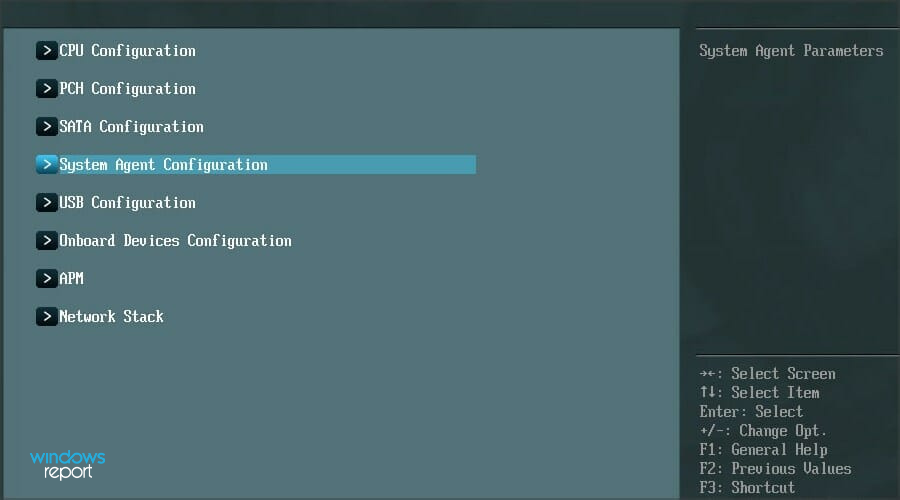
- Restart the computer, hit the F12 key as soon as the diplay lights up to enter the BIOS, navigate to the Advanced tab, and then select the System Agent Configuration option.

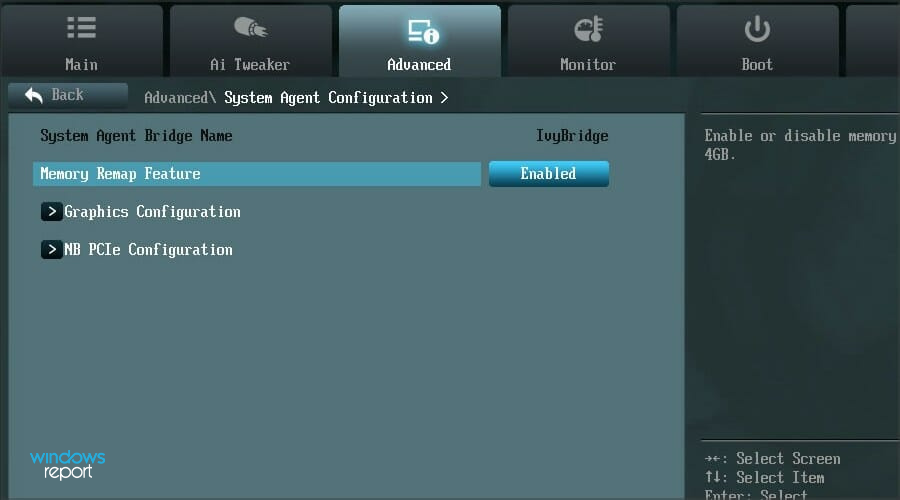
- Now, select the Memory Remap Feature and Enable it.

Enabling memory remapping is known to increase the available RAM to Windows on the system. But, the feature is not available on all devices, so do check if you have it before proceeding with the method.
Once done, check if Windows 11 now uses all the available RAM.
6. Rearrange the RAM modules
If you have multiple slots available, rearranging the RAM modules could help. To do that, turn off the computer, open the back panel, remove the memory modules and change their slots.
Check if that fixes the issue.
Also, some systems require you to arrange the RAM in a certain order when all the slots are not being used. For instance, if you have four slots available but are using only two memory modules, you may be required to use the first and third slots.
7. Take your PC to a repair center
If you have reached this part of the article after executing the methods listed above and the issue persists, it’s likely an issue with the hardware itself.
It could be broken or malfunctioning slots, issues with the connections, or other similar problems.
In such cases, we would recommend taking your PC to a repair center since the components we are dealing with here are fragile and the connections intricate. Any lapse on your part can severely damage the system.
Why isn’t Windows 11 using all RAM on my PC?
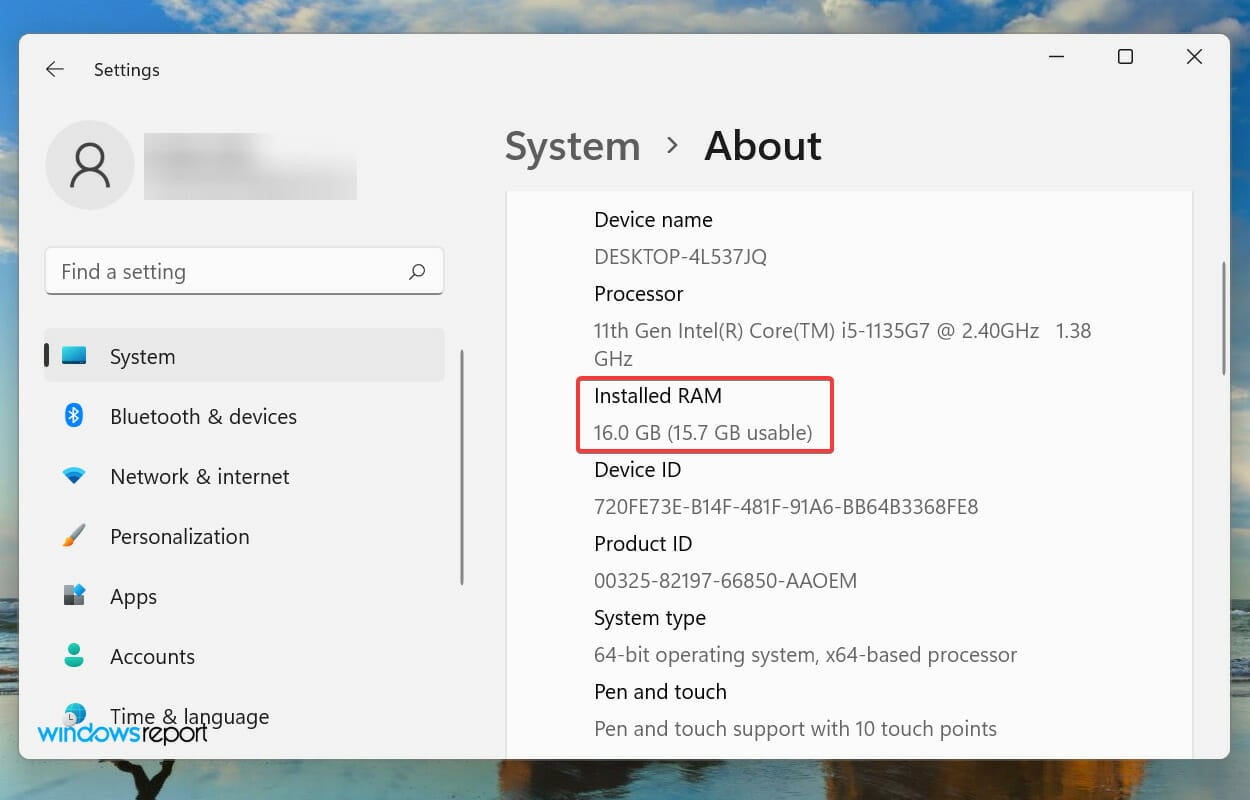
First of all, your computer would never use all the available memory or RAM. For instance, the Dell Inspiron laptop that is being used to write this article has 16 GB of installed RAM while only 15.7 GB of it is usable.
But if you notice that the OS isn’t able to utilize even the available RAM, it could be due to misconfigured settings, problems with the slot, or the RAM itself.
Apart from that, certain devices, say the graphic card, are also known to reserve a certain amount of RAM/memory.
By now, you are fairly acquainted with the concept and in a far better position to troubleshoot the problem. Let’s now walk you through the most effective fixes to eliminate the Windows 11 not using all the RAM issue.
If the installed RAM is low or you are using too many too programs at once, there’s a chance that the RAM usage becomes high, which will likely be evident through the poor system performance. The programs may lag or freeze, or the system may crash altogether.
That’s all there’s to eliminating issues preventing Windows 11 from using all available RAM. Once you are done executing these, the system performance will most likely be a lot better.
In case you are facing the same problem on the previous iteration, check what you should do if Windows 10 is not using all the available RAM.
High memory usage can seriously slow down your system, especially if you’re dealing with Windows 11 high RAM usage or hardware issues like when only one RAM slot works.
Tell us which fix worked for you in the comments section below.
Read our disclosure page to find out how can you help Windows Report sustain the editorial team. Read more


Improve this guide


User forum
0 messages