How to send organizational messages in Windows 11
Organizational messages will be generally available on May 31st.
2 min. read
Updated on
Read our disclosure page to find out how can you help Windows Report sustain the editorial team Read more
Key notes
- You will be able to send out organizational messages starting this week.
- Make sure you have the latest Windows 11 version installed.
- This is a very welcome feature, especially if you're a manager.
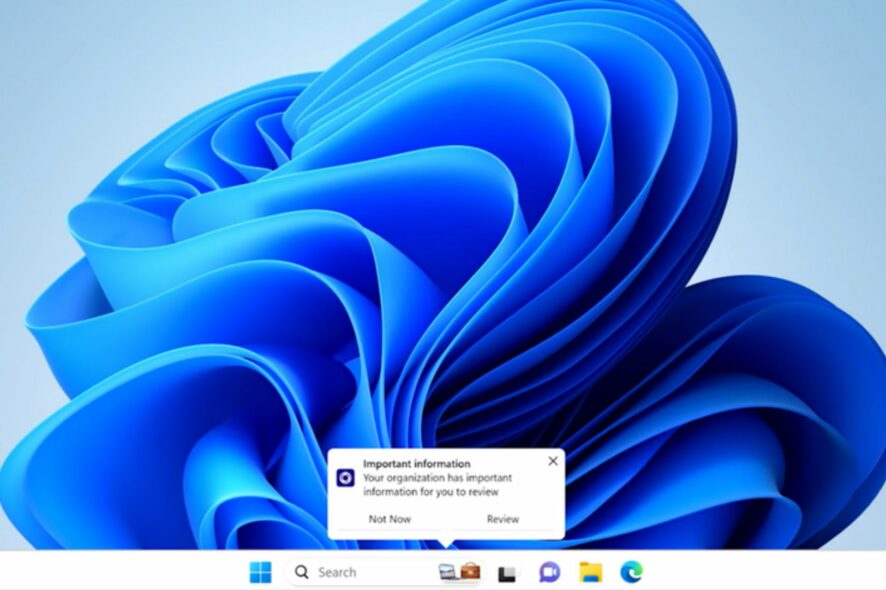
After a very big week for Microsoft, Windows users will be able to send organizational messages in Windows 11 very soon.
The Redmond-based tech giant announced the release of this feature on 31 May and it comes with a lot of updates and improvements.
You will be able to edit and schedule organizational messages on Windows 11. You will also be able to deliver messages in 15 languages and even configure fully customizable URL links.
Just make sure your OS is updated to the latest version, as organizational messages are only supported for devices running Windows 11, version 22H2, and later.
Without further ado, let’s get into it.
Here’s how you can send organizational messages in Windows 11
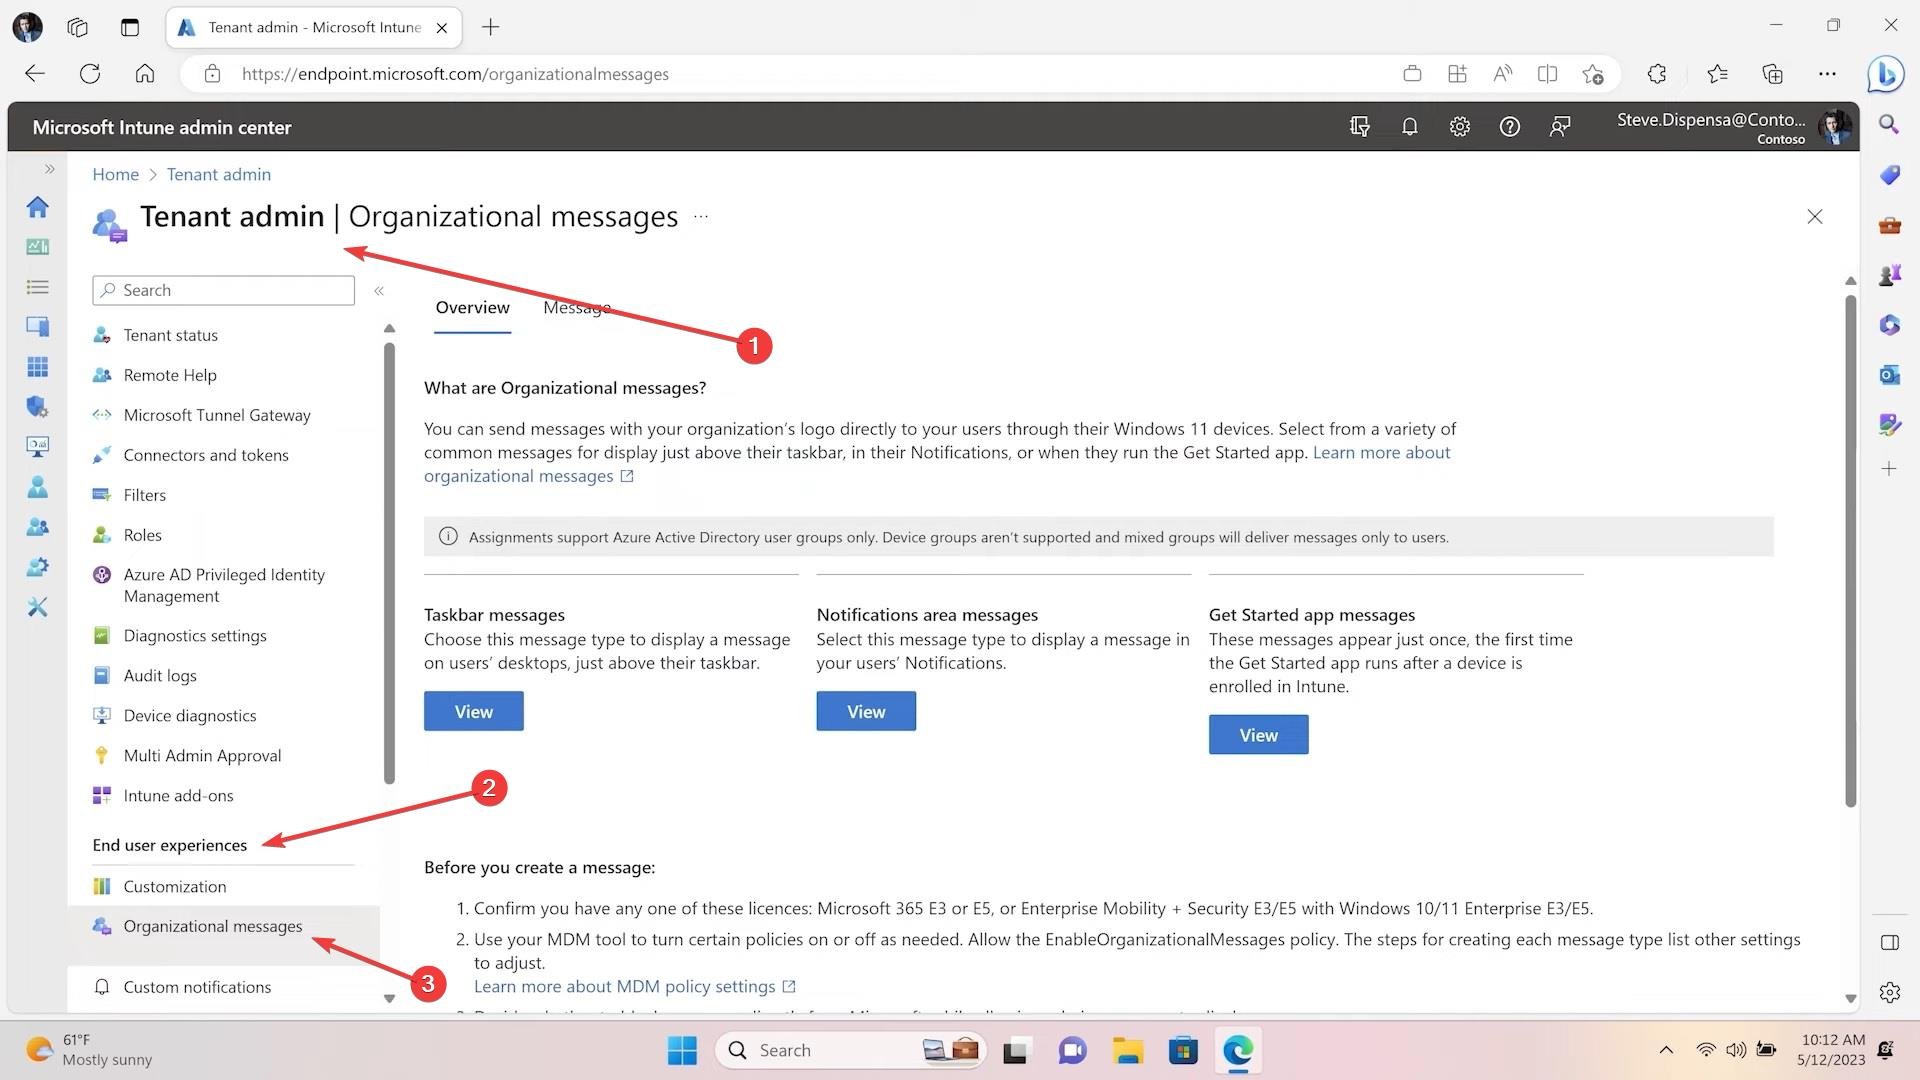
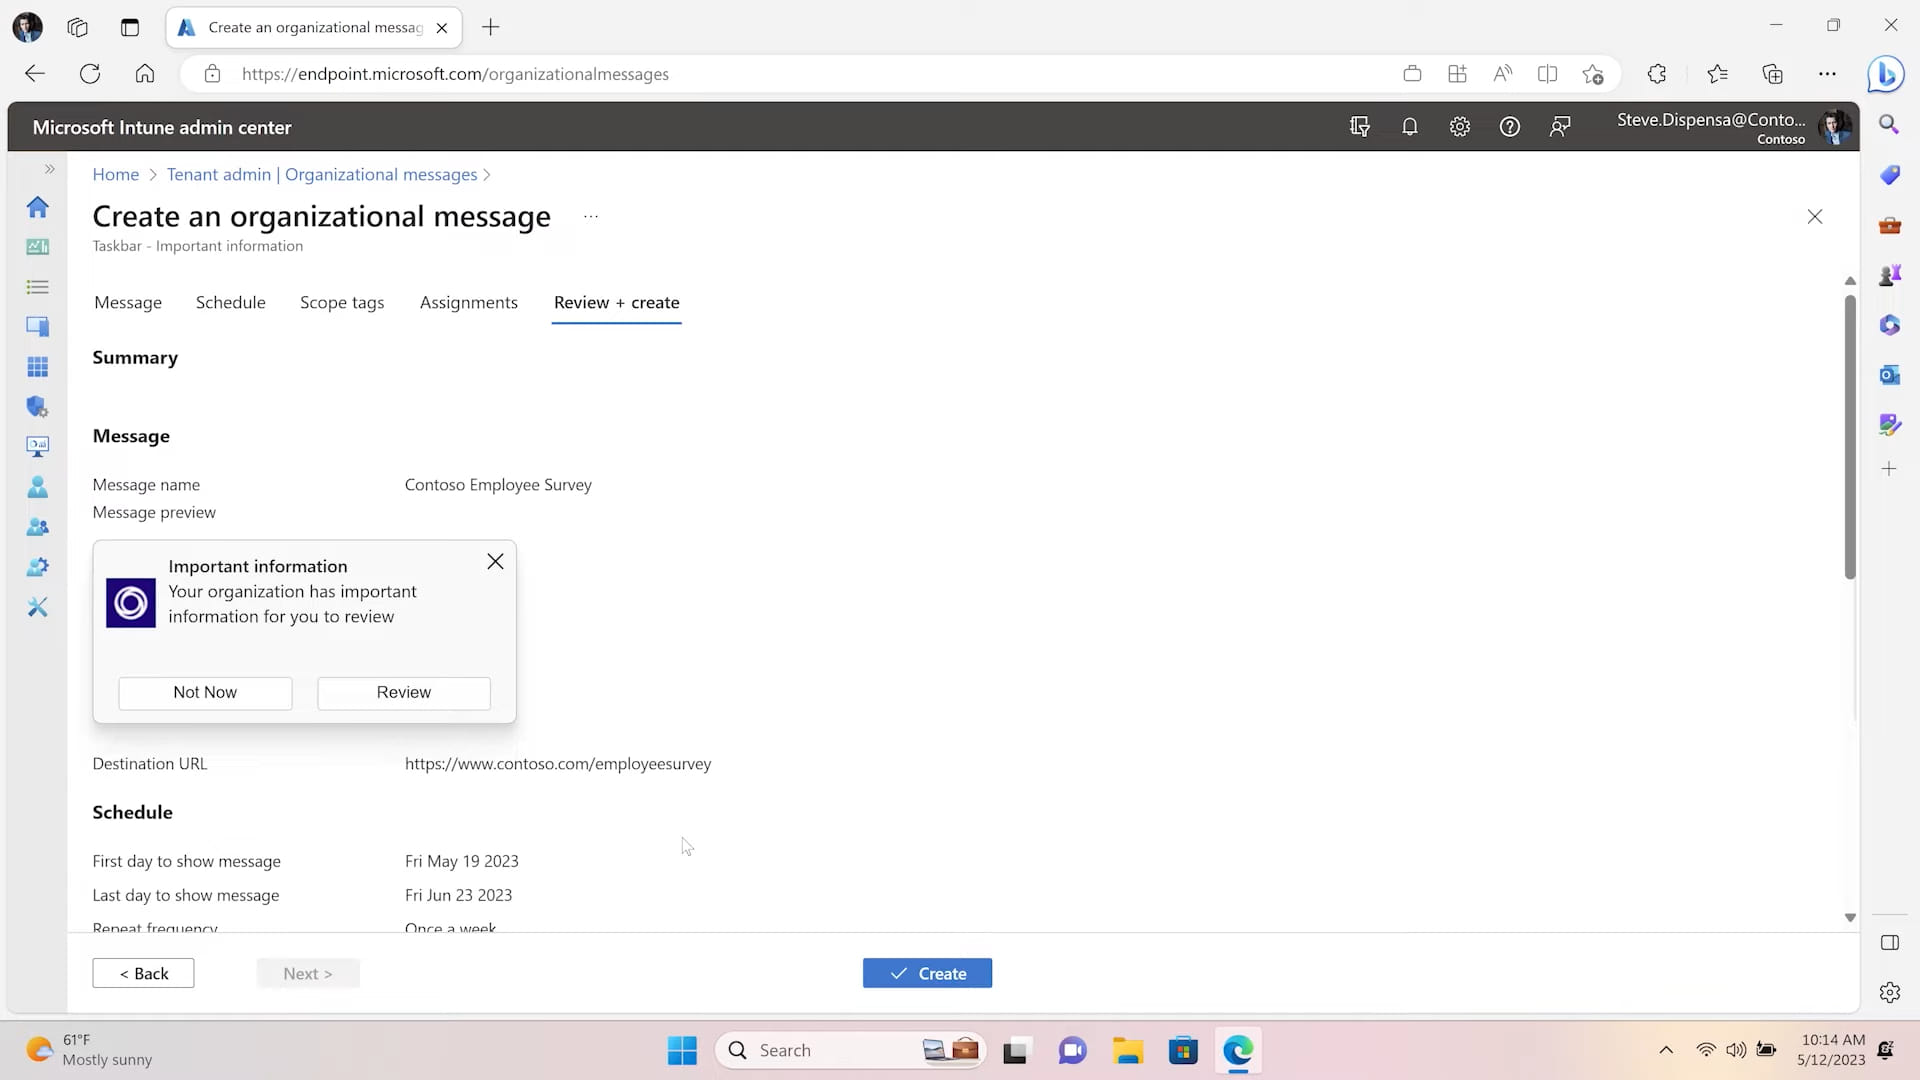
- Go to your Microsoft Intune admin center profile
- Once you’re there, head down to the End user experiences panel and select Organizational messages
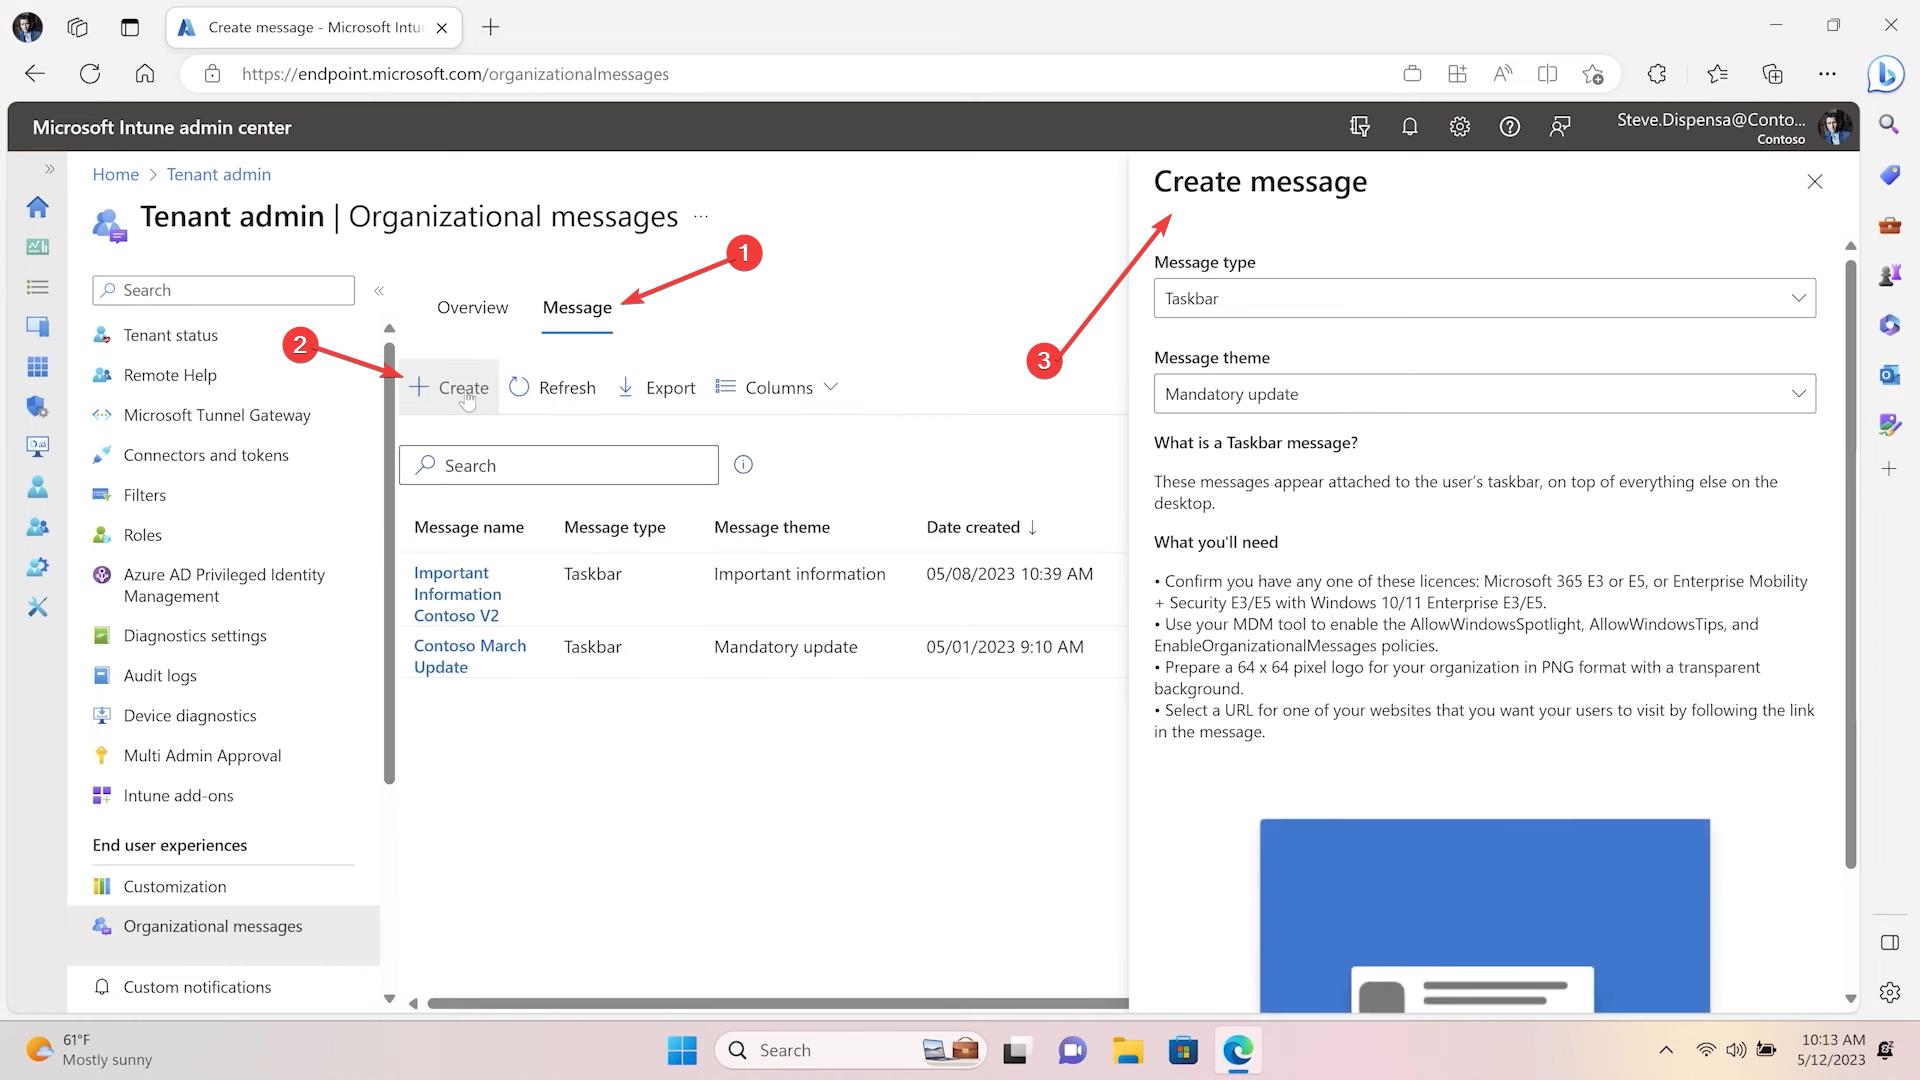
- Click on Message, then push the Create button. A Create Message panel will appear to the right.
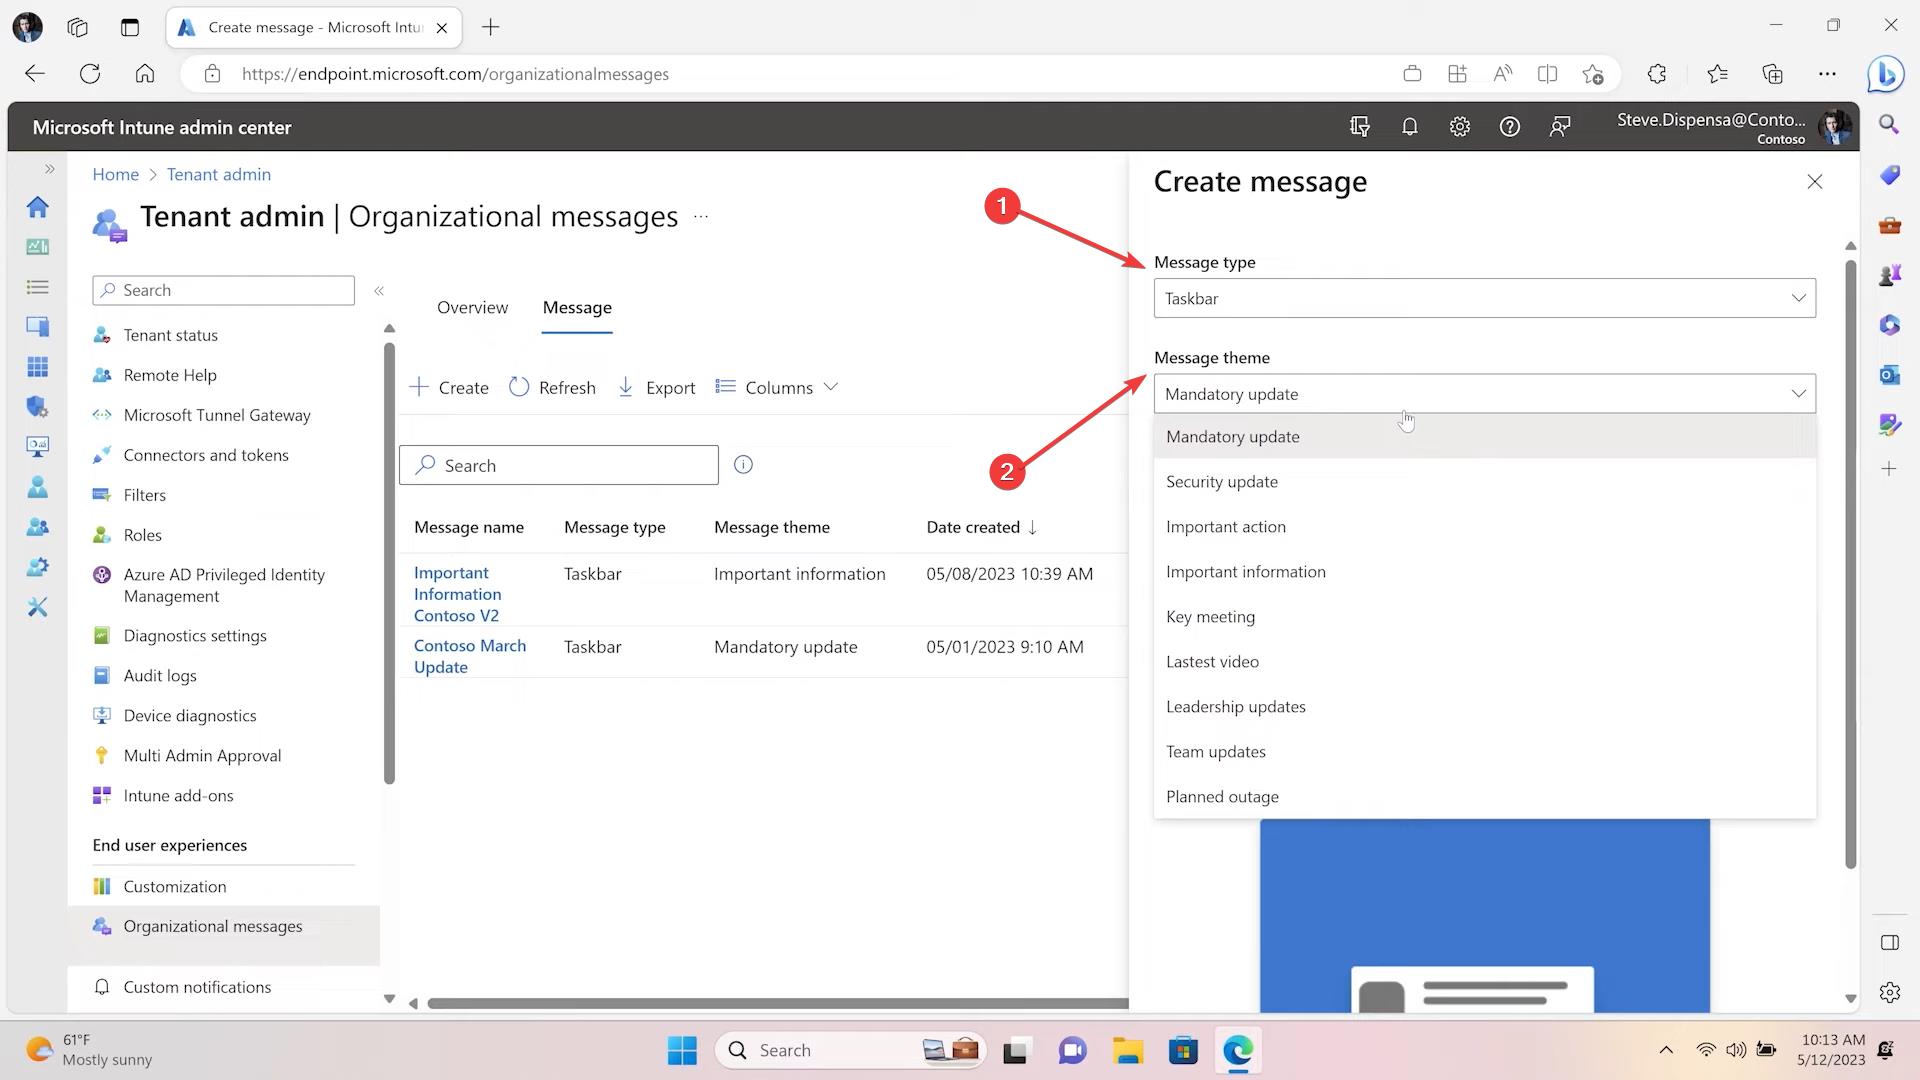
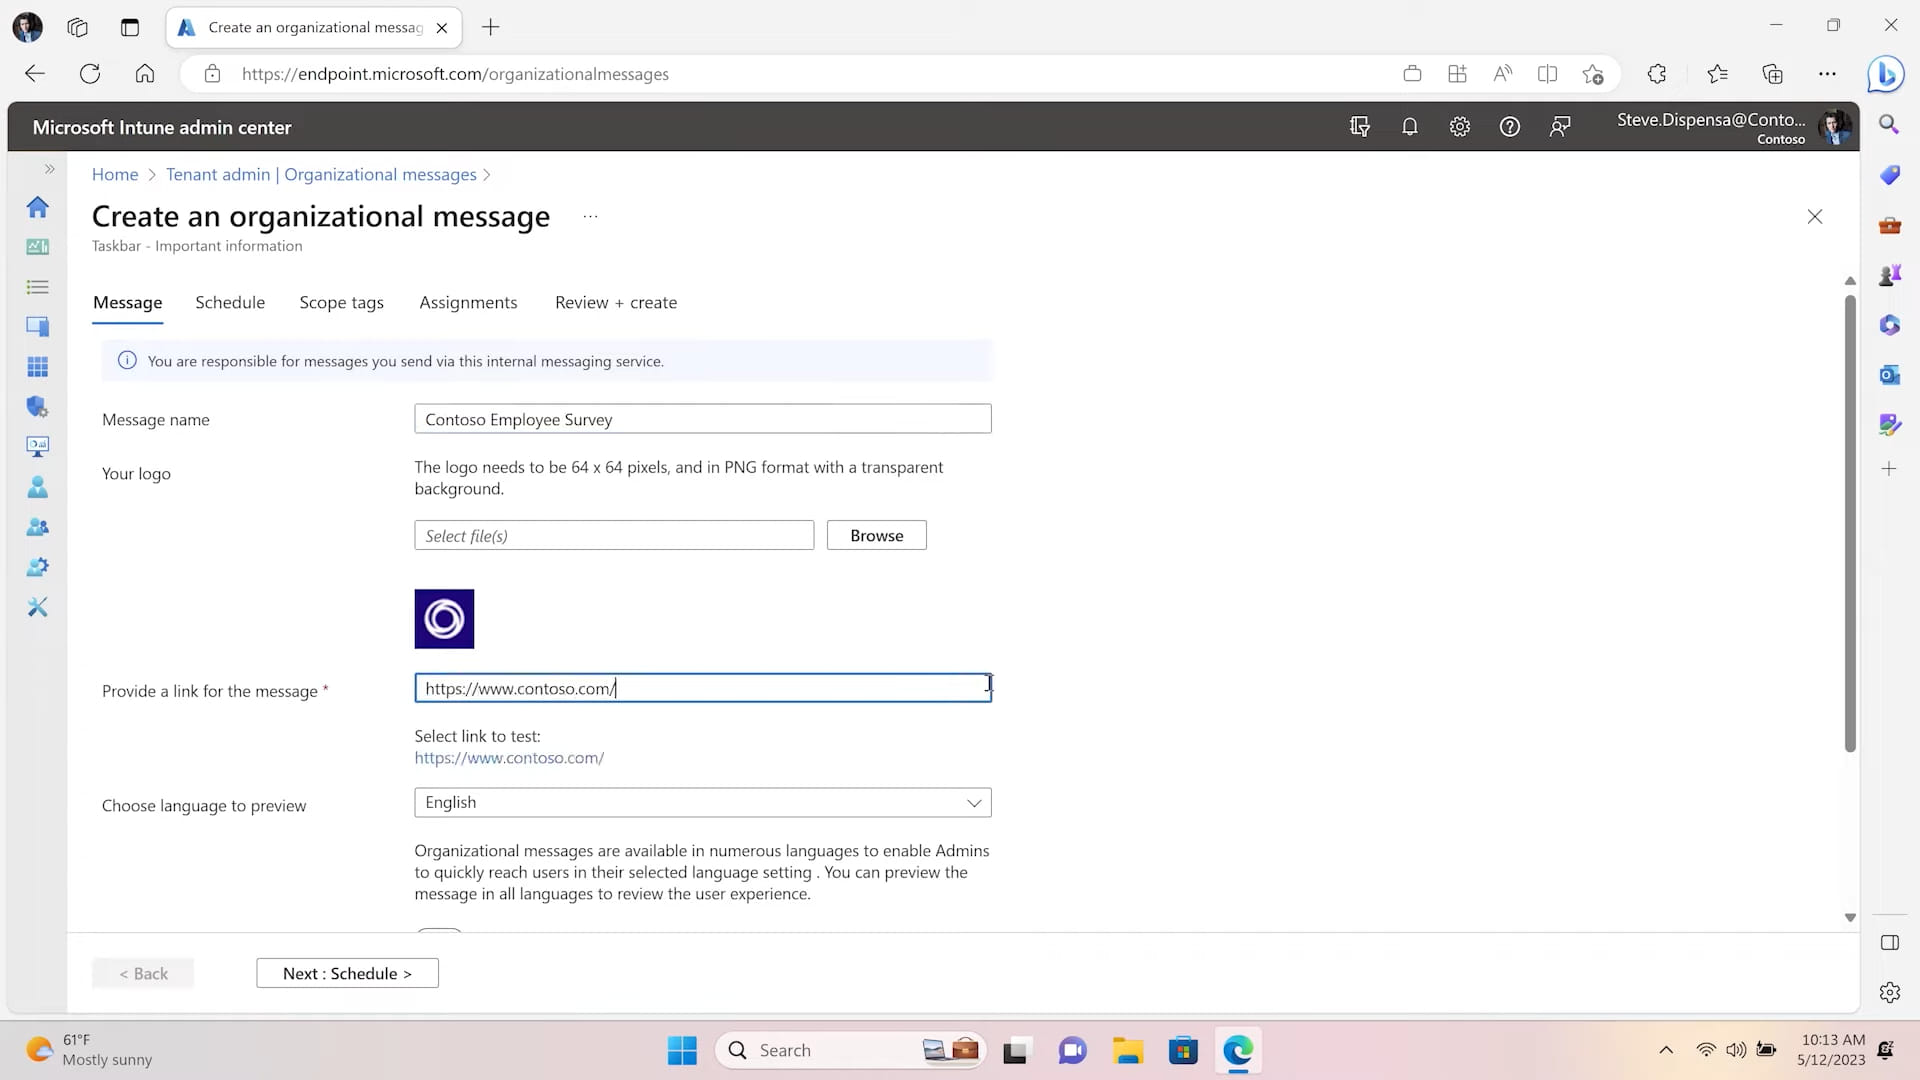
- Here you can start to customize your message according to your needs, as you can see.
- You can name your message, put the organization’s logo into it, URLs, etc.
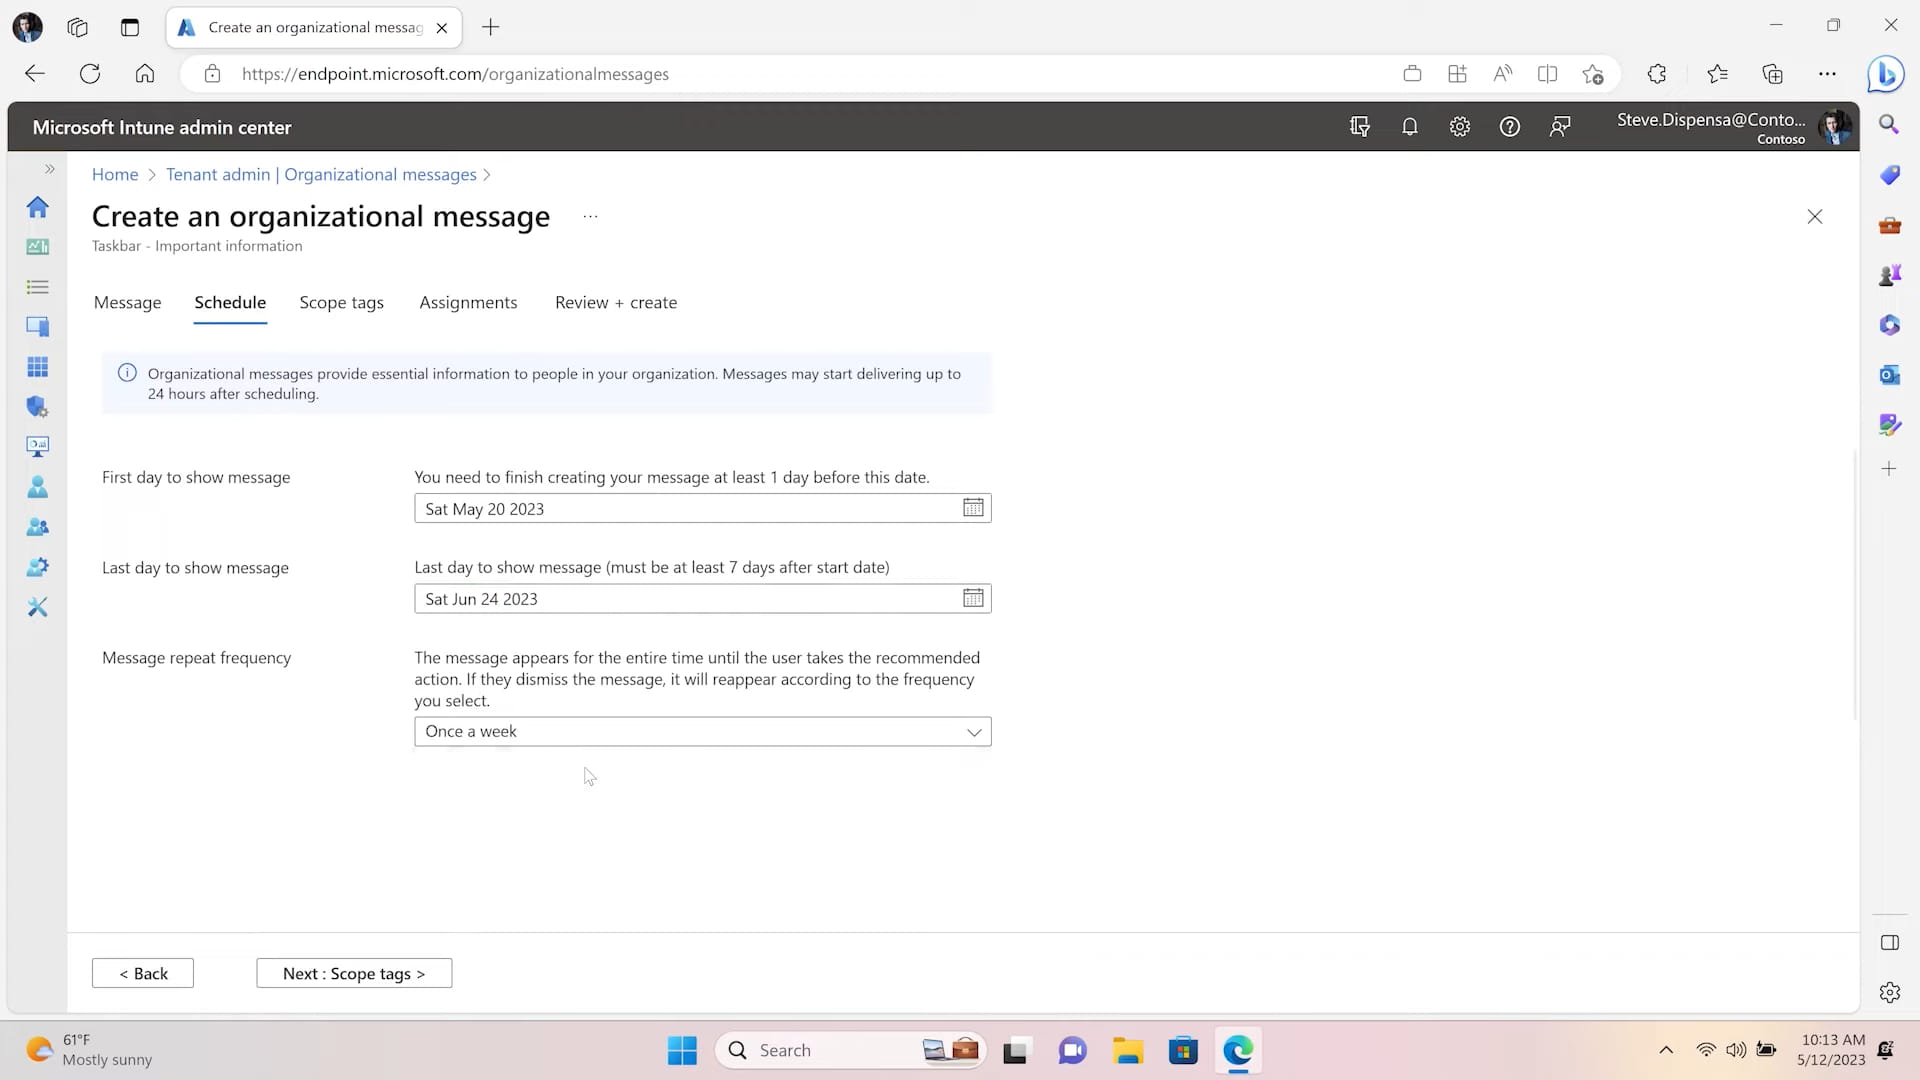
- You can schedule your messages in depth.
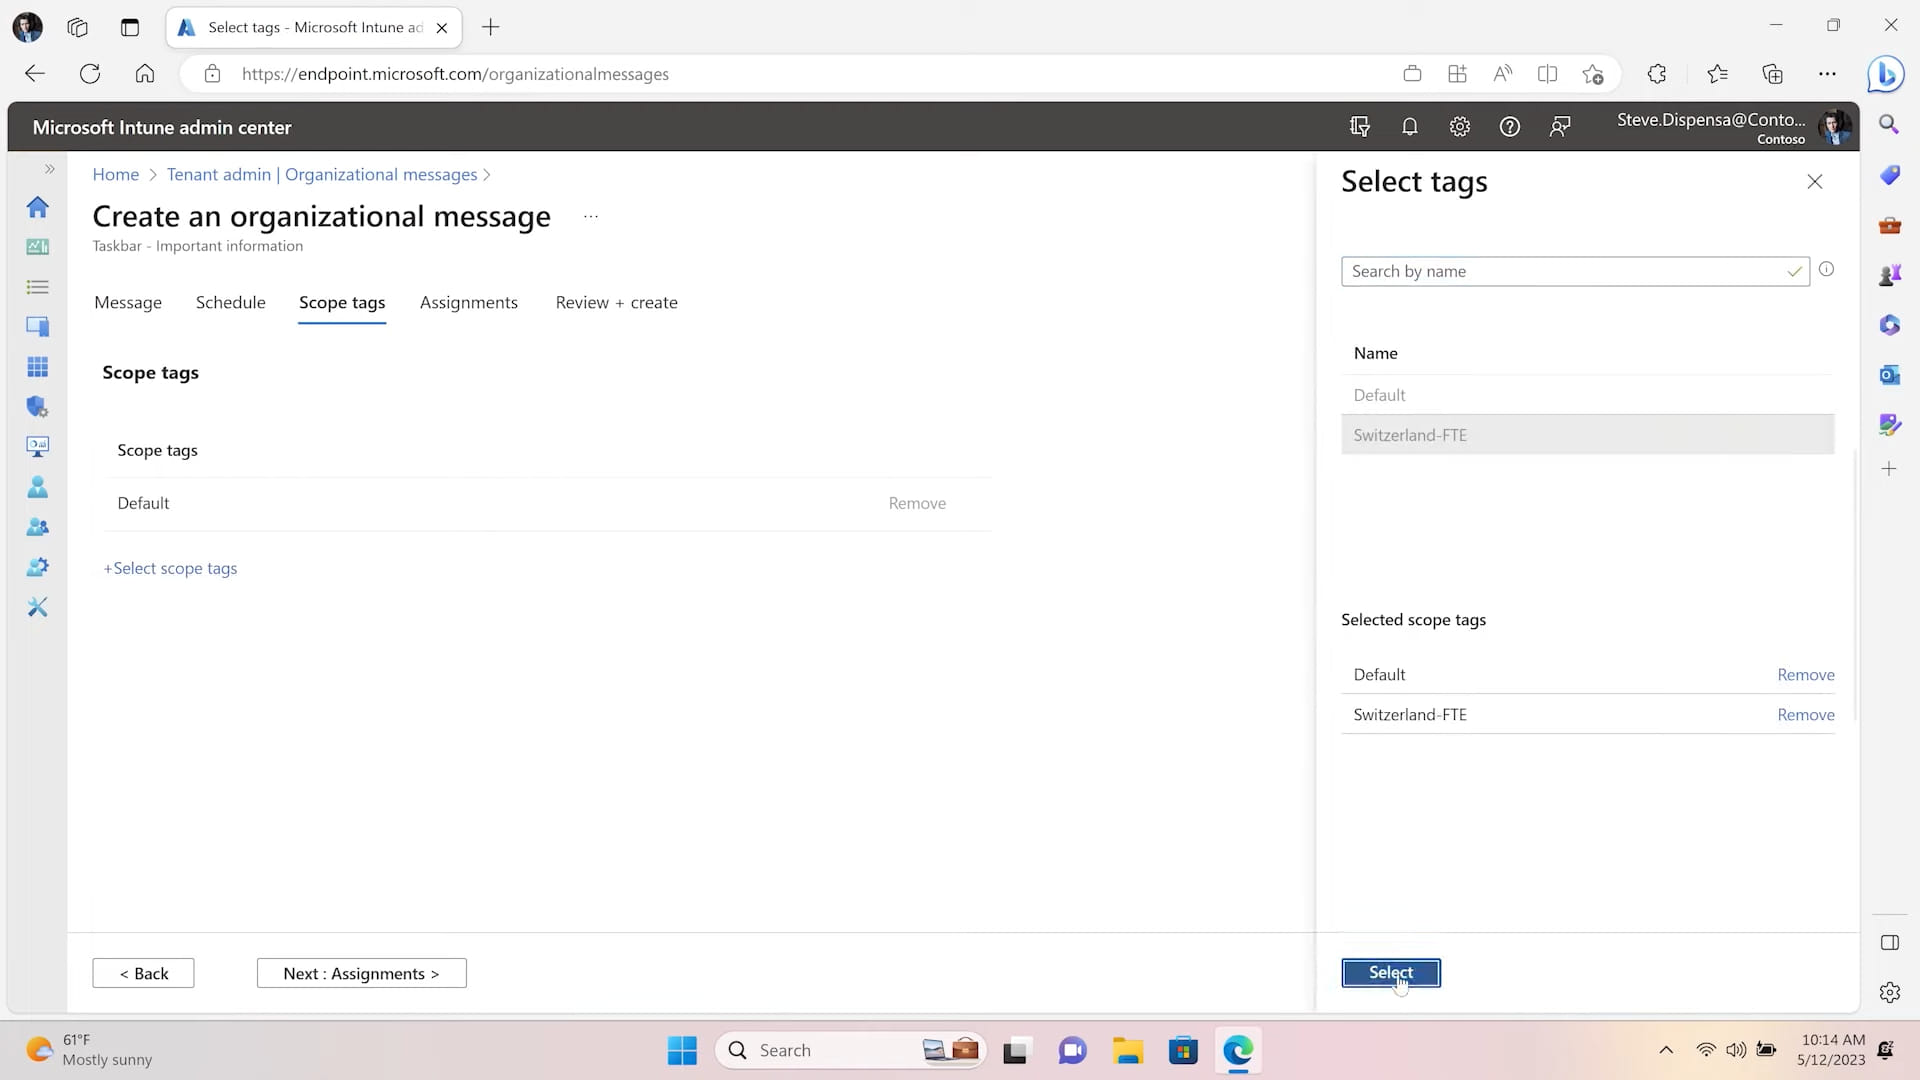
- In the scope panel, you can assign members from the admin group to see, edit or delete the organizational message.
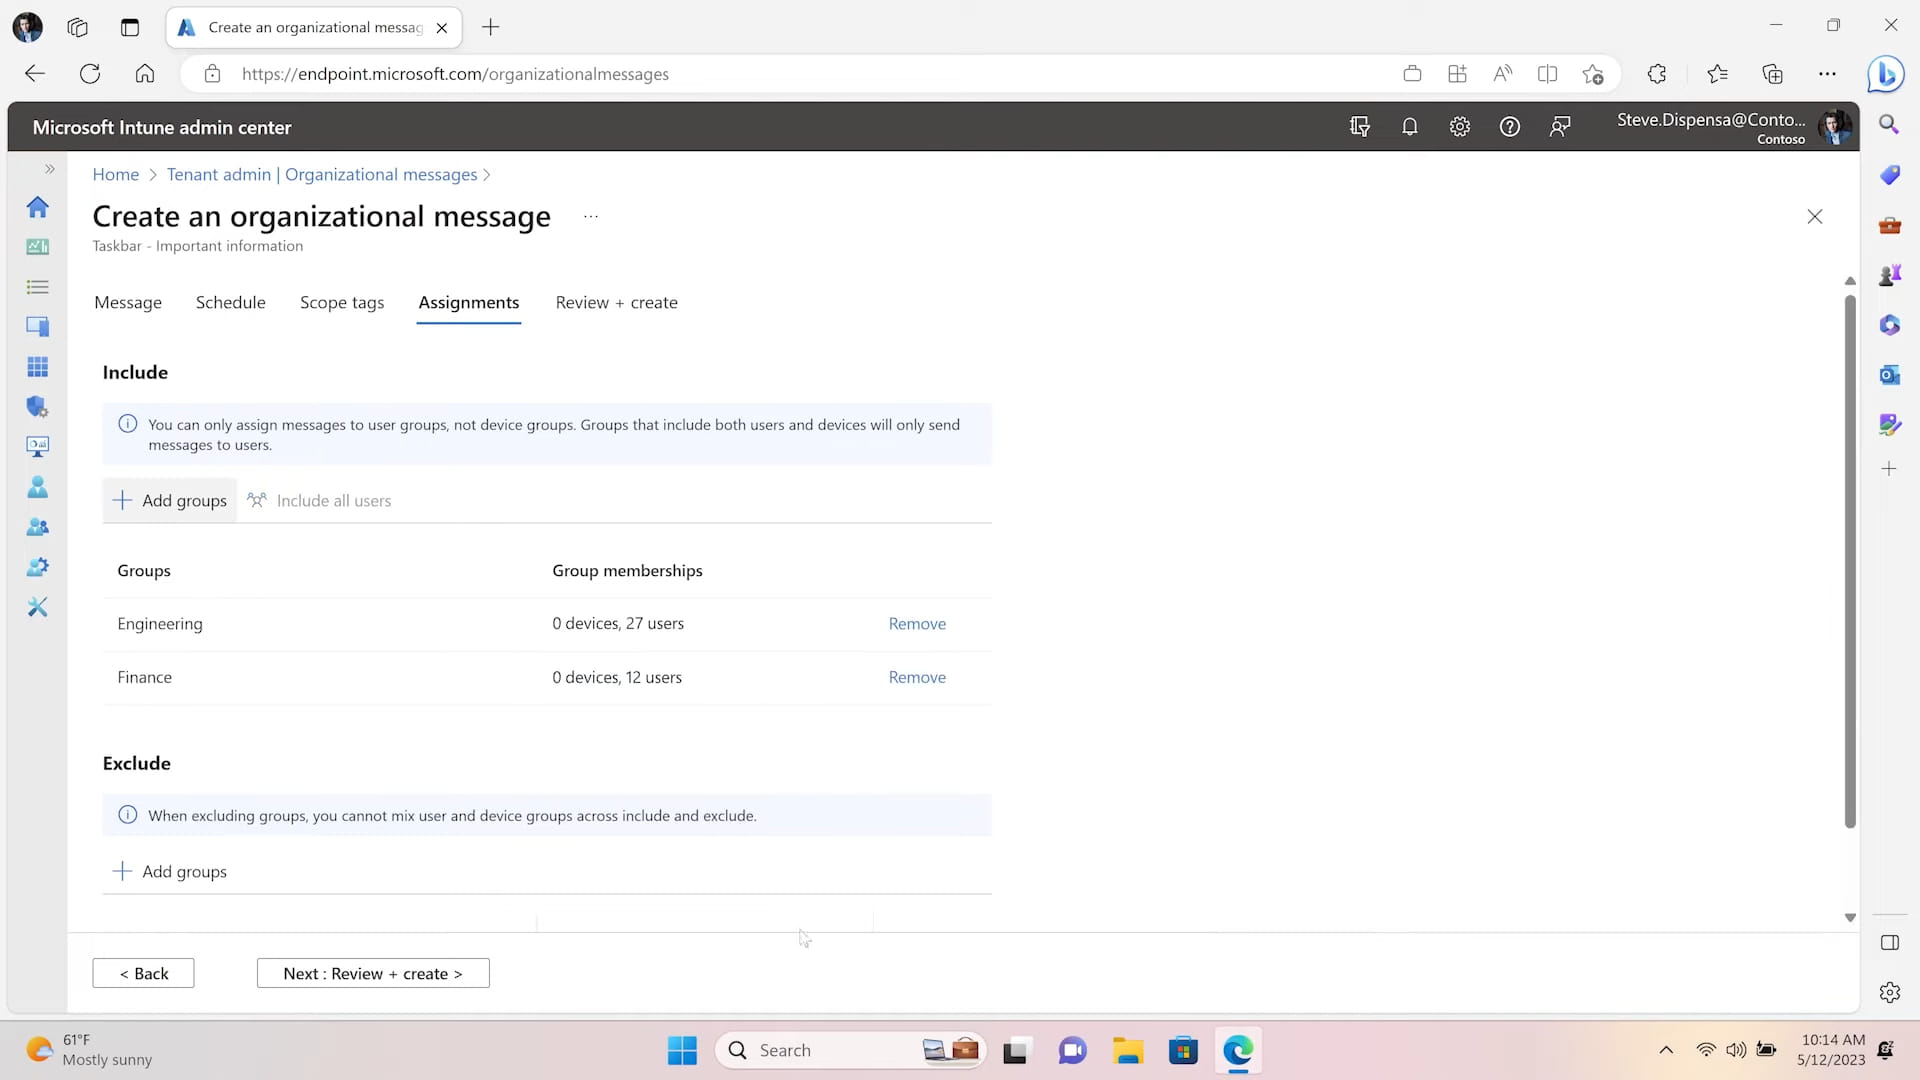
- The assignments panel lets you select the groups you want to send the messages.
- And finally, in the Review+create panel, you can review your message before scheduling it.
You’ll need some important files, before creating your messages. For branded messages, you’ll need the following:
- Three sizes of logos for your organization in PNG format with a transparent background
- 48 x 48 pixels (for messages in the Notifications area)
- 64 x 64 pixels (for messages attached to the Taskbar)
- 50 x 50 pixels or 50 x 100 pixels (for Get Started app messages)
- If your messages feature links, make sure the URLs use verified Azure AD custom domain names.
What do you think about this feature? Will it be helpful or not? Let us know in the comments section below.
User forum
0 messages