How to Get the Old Right Click Menu Back in Windows 11
To restore old context menu, you need to modify the registry
Key notes
- Before trying these solutions, back up your files and registry.
- You can modify the registry manually or with a single command.

Windows 11 has a new right-click menu, but many don’t like it and they are wondering if is there a way to get the old right-click menu on Windows 11 back.
In this guide, we’ll show you a couple of methods to achieve this, so keep on reading.
Why did Microsoft adjust the right-click context menu?
The simple answer is that Microsoft tries to achieve optimal aesthetics in Windows 11 while enhancing performance. The new context menu is designed to provide fewer options that are usually useful to users.
How do I show the old right-click menu in Windows 11?
1. Edit Windows Registry
 NOTE
NOTE
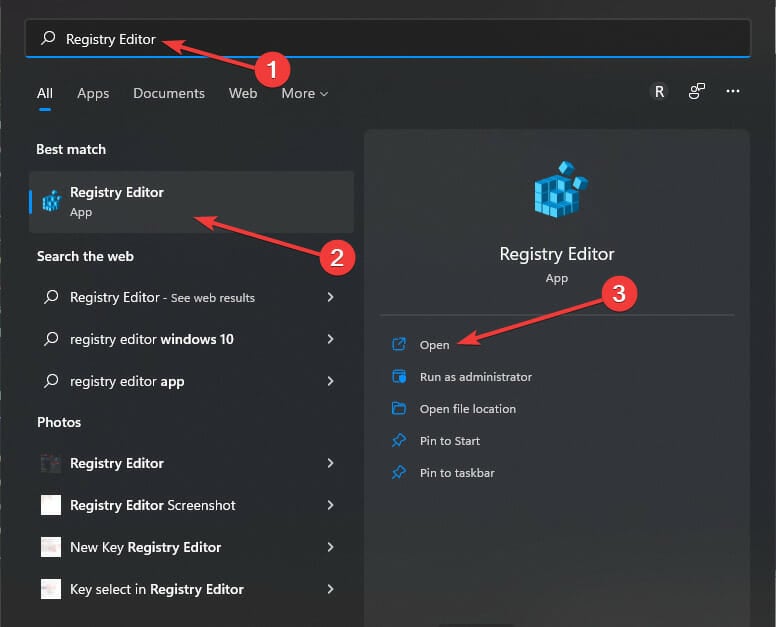
- Locate and open the Registry Editor using Windows Search.
- Select the Registry Editor, then click Open.

- Select Yes if the User Account Control requests permission.
- The Registry Editor will be displayed.
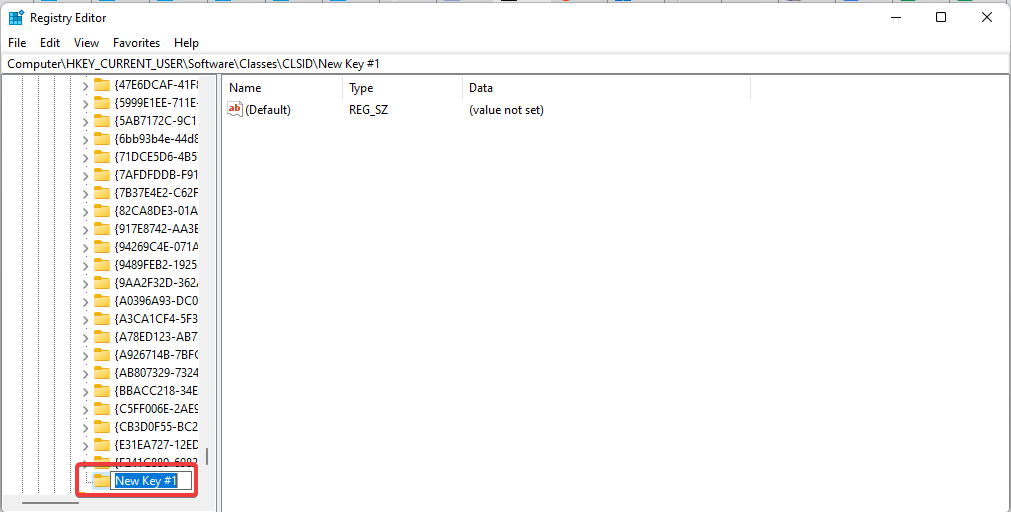
- To continue with the process of disabling Show more options in the new context menu, find the CLISID folder. You can copy the address below and paste it to search:
HKEY_CURRENT_USER\SOFTWARE\CLASSES\CLSID
- Right-click on the CLSID folder, expand New, and select Key. Or after right-clicking the folder (CLSID), next, right-click on an empty space in the pane.

- A new Key folder will be created.

- Rename the Key folder. Copy and paste from below to avoid an error:
{86ca1aa0-34aa-4e8b-a509-50c905bae2a2} - Create a sub-key by right-clicking the renamed key folder, placing the cursor on New, then selecting Key.

- Next, name the sub-key InprocServer32. With the newly named sub-key highlighted, double click the Default option. Examine the pop-up window and make sure the Value data is empty. Next, select OK.

- Exit Registry Editor. Next, restart your computer or restart File Explorer.


2. Run Command Prompt
- Select Windows key + R. Copy and paste the code below:
reg.exe add "HKCU\Software\Classes\CLSID\{86ca1aa0-34aa-4e8b-a509-50c905bae2a2}\InprocServer32" /f /ve
- Restart your computer or restart Windows Explorer.
This method will achieve the same results as modifying the registry, but it doesn’t require any user input.
How can I restore new context menu options?
- Open the Run dialog by pressing Windows key + R.
- Next, type the code below:
reg.exe delete "HKCU\Software\Classes\CLSID\{86ca1aa0-34aa-4e8b-a509-50c905bae2a2}" /f
By now, you should be able to switch between the new context menu and show all options. If you need more tricks, do not hesitate to learn how to disable Windows 11’s Show More Options Menu.
If you need more solutions, we have a whole guide dedicated to disabling the new context menu in Windows 11, so don’t miss it.
Also, if you find the Print action missing from the right-click menu, modifying the settings should do the trick!
For laptop users looking for touchpad-specific options, see how to right click on a laptop for easy steps before editing the registry.
Before you go, let us know if these methods helped you restore the old right-click menu on Windows 11. Did you solve it using another method? If so, we’d love to hear it. Please share in the comments section below.
Read our disclosure page to find out how can you help Windows Report sustain the editorial team. Read more


Improve this guide


User forum
18 messages