Forget Print Screen: use the Windows 10 Snipping Tool for more features
![]() 5 min. read
5 min. read
![]() Updated on
Updated on
Share this article

Read our disclosure page to find out how can you help Windows Report sustain the editorial team Read more
All of us have used the Print Screen button at some point. Maybe you wanted to show somebody a fragment of a conversation or an extract from a book or the drawing. In previous version of Windows, however this process used to be a bit of a drag. You had to Paste the image in Pain and then save it as an image. Only then could you have shared it with somebody else.
The Snipping Tool has been launched in Windows 7 and now users are wondering if the tool is also present in Windows 10, Windows 8.
Snipping Tool for Windows 10, Windows 8
Snipping Tool is a solid application, and in this article we’re going to cover the following subjects
- Snipping Tool not working – Problems with Snipping Tools can occur, and several users reported that this tool isn’t working properly on their Windows 10 PC.
- Snipping Tool quick launch – If needed, you can always add Snipping Tool to the quick launch section. Simply right click the application and choose the Pin option from the menu.
- Snipping Tool won’t open, save, print, close, copy – Several users reported various issues with this tool. According to them, the application won’t save, close or copy images. In some cases users weren’t able to open the application at all.
- Snipping Tool keeps freezing – Freezing is another problem that can occur with this tool. If you have this problem, simply restart the application and check if that solves the issue.
- Snipping Tool black screen, blurry, bad quality – Few users reported image problems while using Snipping Tool. According to them, they experienced blurry and bad quality screenshots. In some cases they even got a black screen instead of a screenshot.
- Snipping Tool timer, time delay – Snipping Tool has a built-in timer that allows you to take screenshots with time delay. This is rather useful if you want to take screenshots of hidden menus that you need to open first.
- Snipping Tool GIF – Snipping Tool fully supports GIFs, but it doesn’t have the option to create animated GIFs, so keep that in mind.
- Snipping Tool hotkey – Snipping Tool also supports hotkeys allowing you to quickly access certain features.
How to start Snipping Tool on Windows 10, 8.1
Within Windows 10, Windows 8 we can say that things have been simplified quite a lot, thanks to the Snipping Tool that has become available. To start this tool, you need to do the following:
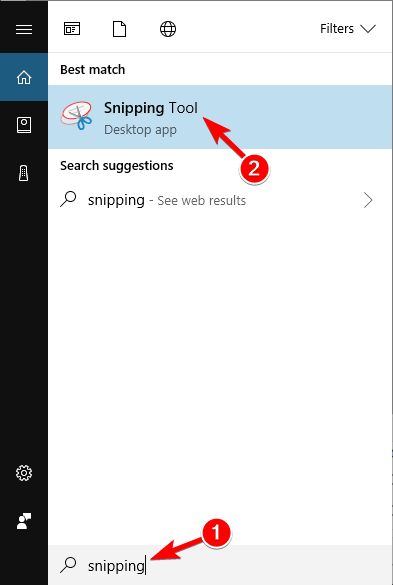
- Enter snipping in the Search bar. If you don’t have Search bar on your Taskbar, you can open it by pressing Windows Key + S.
- Select Snipping Tool from the list of results.

If you plan to take screenshots frequently and you want to access Snipping Tool with ease, you can always pin it to your Taskbar or Start Menu. To do that, follow these steps:
- Locate Snipping Tool using the Search bar.
- Now right click it and choose Pin to Start or Pin to Taskbar option.

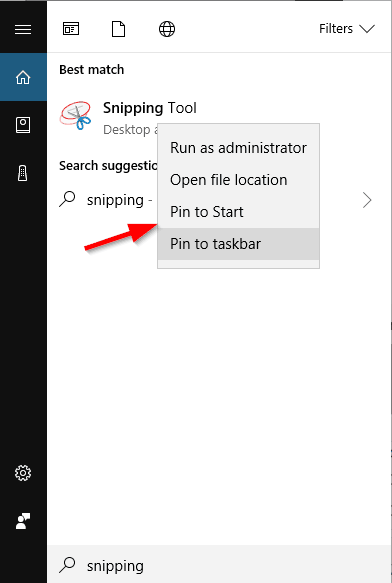
After doing that, the Snipping Tool will be pinned and just a single click away.
Snipping Tool – A quick overview of its features
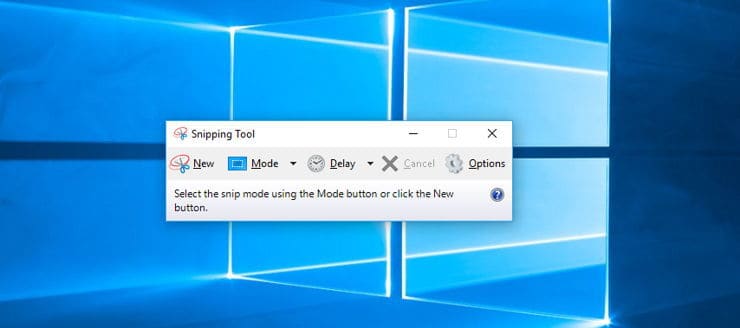
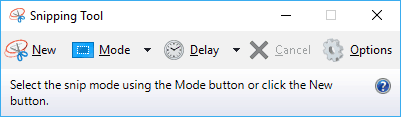
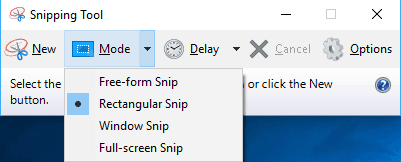
The Snipping Tool looks like a little window that feature three buttons: New, Mode and Delay. To create a screenshot, just click the New button and select the area you want to screenshot. It’s worth mentioning that the tool supports several modes, so you can easily screenshot of a selected area, a window or an entire screen. If you want, you can also use a free-hand tool to select the desired area.
It’s worth mentioning that the tool has a Delay feature that will take your screenshot after a short delay. As for delay, you can use 1-5 second delay for your screenshots. Unfortunately there isn’t an ability to set a custom delay, but most users will be okay with the current delay range.
- READ ALSO: 5 best snipping tools for Windows users
After taking a screenshot, you can perform some edits to it. For example, you can use the pen tool to draw on your screenshot, or you can highlight certain areas by using a highlight tool. The pen tool allows supports customization, and you can change its color, thickness or tip shape. There’s also an Eraser tool, so you can easily remove any highlights or lines from your screenshot.
The tool can also copy your screenshot to Clipboard, so you can easily paste it to any other application. There’s also a built-in email feature that allows you to send your screenshot as an email attachment. Keep in mind that this tool doesn’t allow you to upload your screenshots online. If you need this feature, we advise you to check out our list of the best tools to upload your screenshots online.
As for saving, Snipping Tool supports PNG, JPG, GIF and single page HTML format. However, the tool doesn’t support any quality adjustment, so you can’t optimize your screenshots while saving them.
Snipping Tool and keyboard shortcuts
It’s worth mentioning that Snipping Tool also supports some basic hotkeys so you can easily choose a snipping mode by using Alt + M shortcut. Of course, you can create a new screenshot simply by using Alt + N shortcut.
You can also use Alt + D shortcut to set the screenshot timer. Even though these shortcuts can be useful, they will in most cases just open a corresponding menu, so you’ll have to manually click the desired option.
Overall, Snipping Tool is a small and simple application that allows you to create screenshots easily on your Windows 10 or Windows 8.1 PC. The application offers the basic features, so if you want to create simple screenshots, we highly recommend to try it out. If you’re looking for a more advanced tool, be sure to check out our article on best Windows 10 screenshot-taking tools.