FIX: Windows Defender error 0x80016ba in Windows 10/11
6 min. read
Updated on
Read our disclosure page to find out how can you help Windows Report sustain the editorial team. Read more
Key notes
- Windows Defender error 0x80016ba can be caused by the presence of a third-party antivirus.
- Consider to stop using this dedicated security tool at least temporarily.
- Installing the latest OS updates or reverting from the newest ones can solve this issue.
- You can reset your PC in an attempt to fix the problem completely and benefit from a fresh start.

Believe it or not, in comparison to so abruptly enforced Edge, Microsoft did a fairly good job with Windows Defender.
It’s not the best, far from it, but it’s still a viable free option when it comes to antimalware system protection.
However, there seems to be a plentitude of error prompts concerning Windows Defender, with one distinctive error which bears the 0x80016ba code.
There are various reasons for the appearance of this error, and we made sure to provide the list of applicable solutions.
In case you’re plagued with the aforementioned Windows Defender error code 0x80016ba, make sure to check it out.
How do I fix Windows Defender error 0x80016ba?
- Disable Windows Defender
- Update the system
- Exclude large compressed files from scanning (ZIP, ISO, CAB)
- Check the Windows Defender service
- Reset your PC
1. Disable Windows Defender
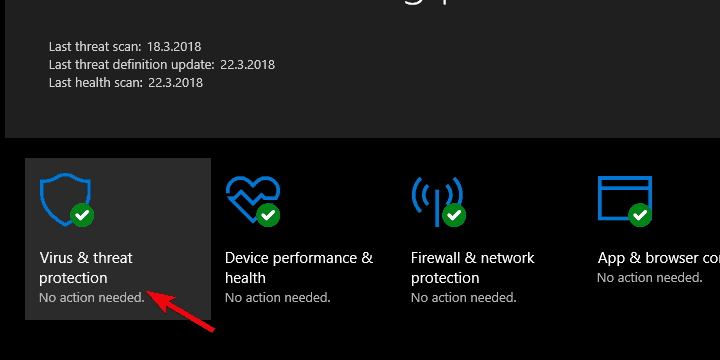
- Open Windows Security from the notification area or use the search bar.
- Select Virus & threat protection.
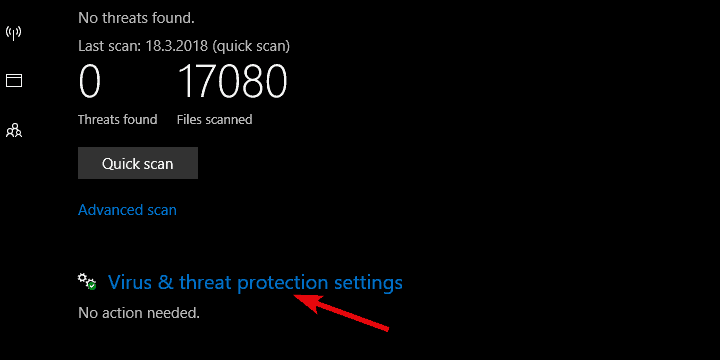
- Open Virus & threat protection settings.
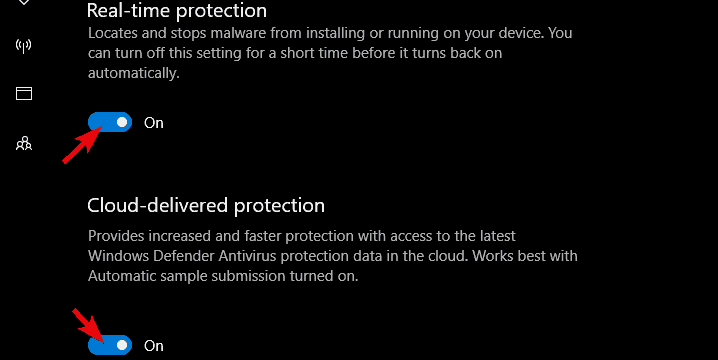
- Disable both Real-time protection and Cloud-delivered protection.
- Exit Windows Defender Center and enable the third-party antivirus again.
Due to system conflicts, there can be only one antimalware tool enabled at the time. The dual antivirus presence when both of them work in the background and provide real-time protection is a no-go.
So, you need to make a choice. Whether you’ll use a native antimalware tool or you’re more prone to use a third-party alternative.
Furthermore, even though most antivirus solutions will disable Windows Defender upon installation, some of them might not.
Therefore, in case you’ve made your choice and you just installed a third-party antivirus, make sure Windows Defender is disabled afterward.
This, of course, applies only if you’re using a dedicated antivirus solution. In case you want to use Windows Defender instead and the error reappears frequently, make sure to continue with the steps.
2. Update the system
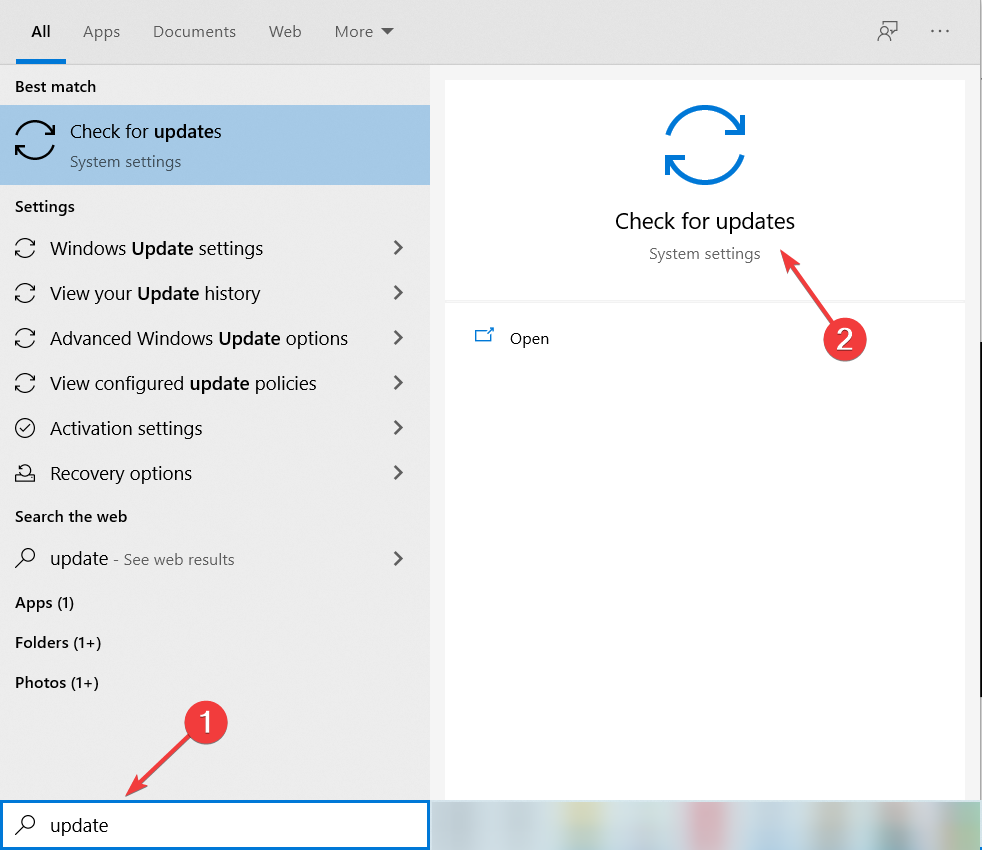
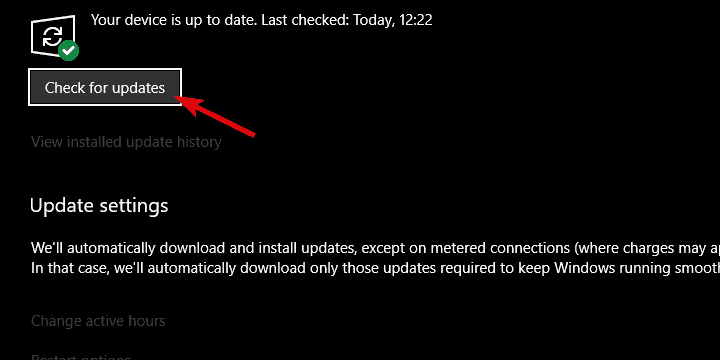
- In the Windows Search bar, type update and open Check for updates from the results.
- Click on the Check for updates button and install any pending updates.
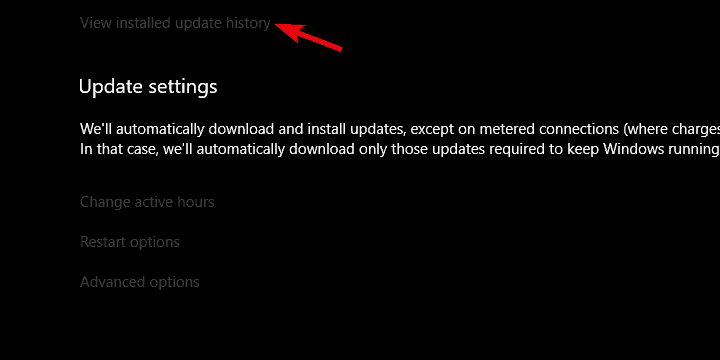
- On the other hand, under the same section, you can open View installed updates history.
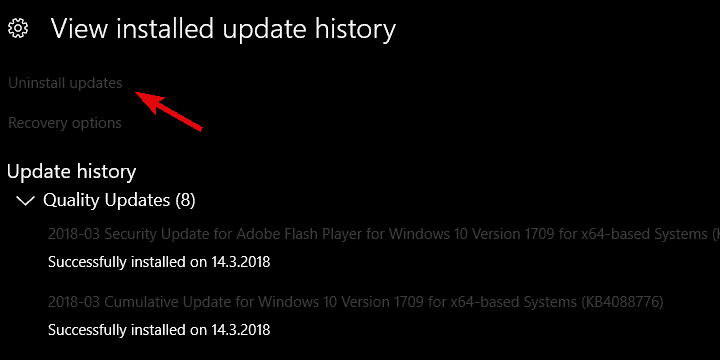
- Now, click on Uninstall updates and then remove the latest security update.
The error with the 0x80016ba code can be caused by various things and the faulty definition update is one of them.
If you’re unable to locate Windows Defender or just unable to perform a scan, we advise you to update your system.
Security updates are the most commonly distributed on Windows 10 and there’s a chance that one of them inflicted the error at hand.
Now, updates are mostly provided automatically, but, depending on your settings, they might get postponed. Therefore, checking for updates manually isn’t a bad idea.
Also, you can uninstall recent Windows Defender-related updates and look for improvements.
3. Exclude large, compressed files from scanning (ZIP, ISO, CAB)
- Create a new folder and name it as you wish.
- Move all large, archived files in this newly created folder.
- Open Windows Defender from the notification area.
- Choose Virus & threat protection.
- Open Virus & threat protection settings.
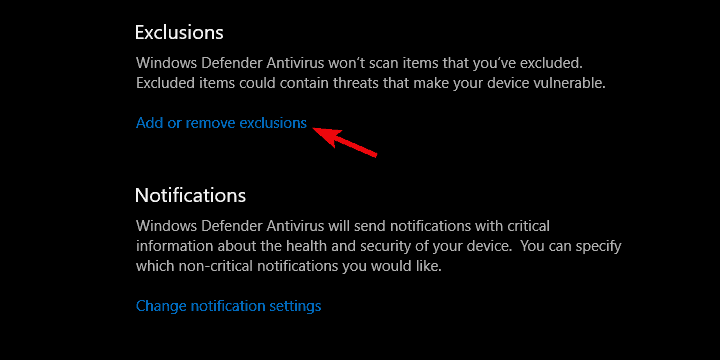
- Scroll down and click on Add or remove exclusions.
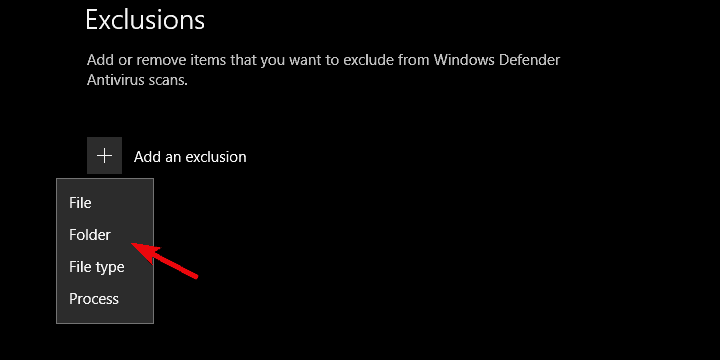
- Click on Add an exclusion and choose Folder from the drop-down menu.
- Browse for the chosen folder and add it as an exclusion.
Some users noticed that large chunks of compressed data can also cause this error. Namely, the scanning procedure worked as intended until the compressed or archived files come into play.
That’s when the Defender crashes and the error prompt appears. This covers all conventional file formats, starting with ISO files and reaching to Microsoft-own CAB extensions.
In comparison to third-party tools, Windows Defender kind of makes file format exclusions hard to work with.
What you can do is group all large, archived files into one folder and exclude that folder from future scans. This should resolve the in-scan errors.
However, since those formats tend to be the source of malware too often, this carries a certain danger factor.
If you want to exclude a single folder from the Windows Defender’s scanning procedure, follow the steps we provided above.
4. Check the Windows Defender service
- Uninstall a third-party antivirus and restart your PC.
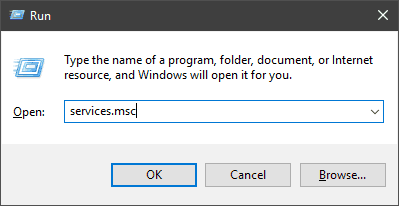
- Press Windows key + R to open the elevated Run command-line tool.
- In the command line, type services.msc and press Enter.
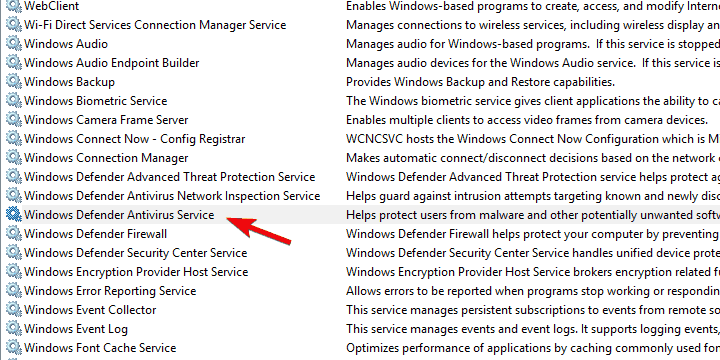
- Scroll down until you reach Windows Defender Antivirus Service.
- It should start Automatically (this is mandatory) but, due to collision with an alternative tool, it can get switched to Manual. If that’s the case, right-click on it and open Properties.
- Set its Startup type to Automatic and confirm the changes.
- Restart your PC.
You can’t remove Windows Defender from Windows 10. It can be subdued (as we explained above), but its dedicated service will still work in the background.
Unless it’s stopped manually or by the third-party antivirus. That service is, on many occasions, the probable cause of Windows Defender failure.
Namely, the dedicated service should always run in the background, automatically starting with the system shell.
Especially if you’re using Windows Defender for either real-time protection or for scheduled scans. Now, for some peculiar reason, the Windows Defender service tends to get disabled.
Some third-party tools will limit it, but if you’re using solely Windows Defender for the sake of system protection, it should be enabled all the time.
For that reason, we recommend checking Windows Defender’s dedicated service as indicated in the steps above.
5. Reset your PC
- Back up all files you deem important from the system partition onto a data partition, external drive, or cloud.
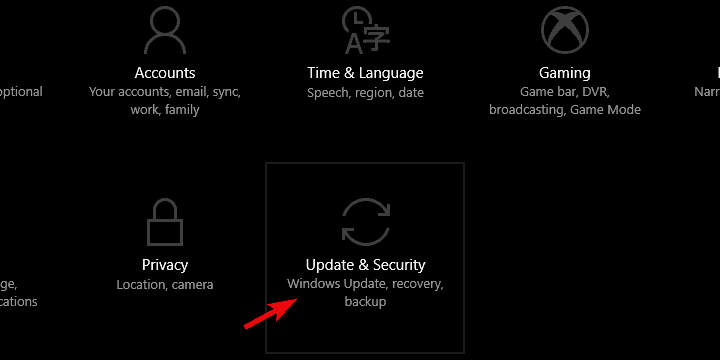
- Press Windows key + I to open Settings.
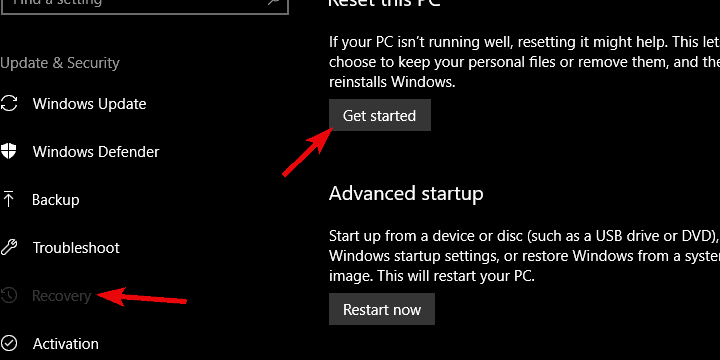
- Choose Update & Security.
- Select Recovery.
- Click Get started under Reset this PC.
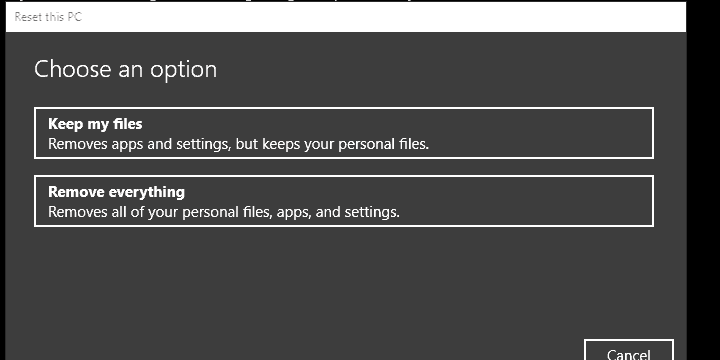
- Choose Remove everything and start the restoring procedure.
Finally, there’s turning to recovery options in order to resolve the issue completely and without chances of relapse.
Namely, some users suggest that the system upgrade is causing issues with Windows Defender on Windows 10.
As some users upgraded to Windows 10 over Windows 7, Microsoft Security Essentials were not uninstalled properly. This invokes the collision between the new native security solution and the old one.
For that purpose, the best solution that comes to my mind is (besides the clean system reinstall) to reset your PC to factory settings.
That way, you’ll have an effectively brand-new Windows 10 system without colliding Windows 7 files. We agree that this can be time-consuming, and you’ll lose some of your data.
But we reckon this is a small sacrifice for a good-performing system. In case you’re not sure how to reset your PC to factory values, make sure to follow the steps we provided above.
We hope that our solutions helped you fix the Microsoft Security Essentials error code 0x80016ba in Windows 10.
However, if you’re still suffering from this built-in software, you can always install one of the best antiviruses with unlimited licenses to upgrade your security.
We also recommend you a lightweight antivirus that provides complex digital security anytime you’re in trouble, namely ESET HOME Security Essential.
That’s a wrap-up. In case you have any alternative approach or maybe a question regarding the enlisted solutions, make sure to tell us in the comments section.



User forum
0 messages