Failed to Start your Wi-Fi Hotspot 1002: 4 Quick Ways to Fix
Uninstalling your network adapter should do the trick here
3 min. read
Updated on
Read our disclosure page to find out how can you help Windows Report sustain the editorial team. Read more
Key notes
- If you are getting the failed to start your WiFi hotspot 1002 error, it might be due to your network adapter.
- You can fix this issue by running the network adapter troubleshooter.
Users have reported having issues when trying to create Wi-Fi from their Windows 10 operating systems. They get a message that reads: failed to start your WiFi hotspot 1002.
This issue can be extremely annoying and can stop you from using your internet connection the way you want to. The frustration of users increased considerably as they had used Windows 7 before and had not encountered any similar issues.
How can I fix the failed to start your Wi-Fi hotspot 1002 error?
1. Change adapter settings
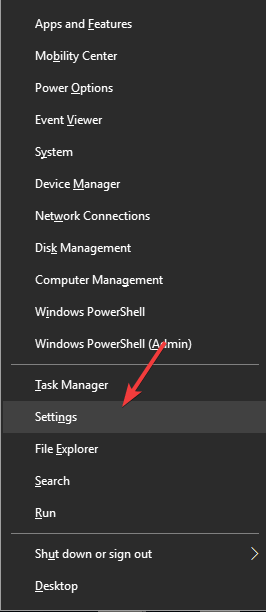
- Press the Windows key + X and select the Settings option.
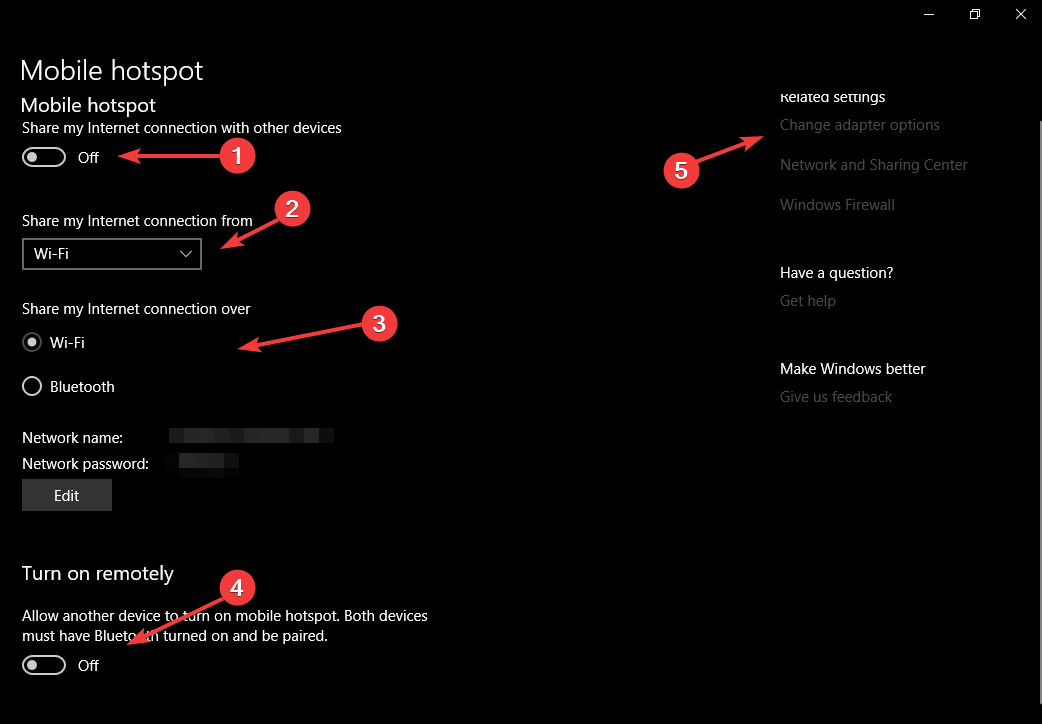
- Inside the Settings window, choose Network and Internet > Mobile Hotspot.
- Toggle Mobile hotspot -> On.
- From the section ‘Share my Internet connection from’ select the source of the internet (In my case, it’s Wi-Fi).
- Select how you want to share your Internet connection (Wi-Fi or Bluetooth).
- Activate the option ‘ Turn on remotely’.
- Click on ‘Change adapter options’.
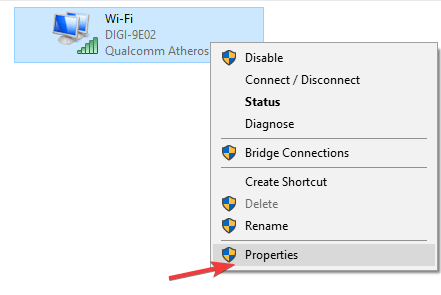
- Right-click on the connection that has access to the Internet -> select Properties.
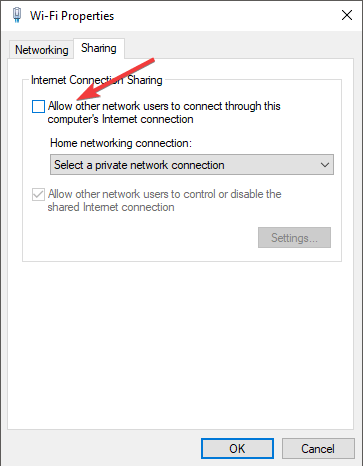
- Inside the Properties window, choose the Sharing tab -> tick the box next to ‘Allow other network users to connect through this computer’s Internet connection’ -> Click ‘Ok’.
- Check to see if the issue with the Wireless card doesn’t support Wi-Fi hotspot creation on Windows 10 still exists.
2. Update both your Network adapter drivers
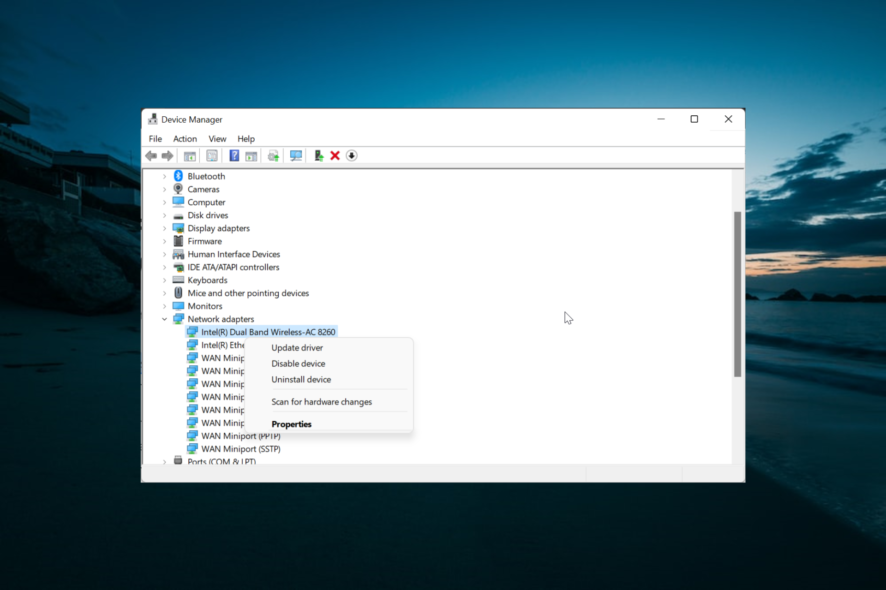
- Press the Windows key + X -> Device Manager.
- Expand the ‘Network adapters‘ section.
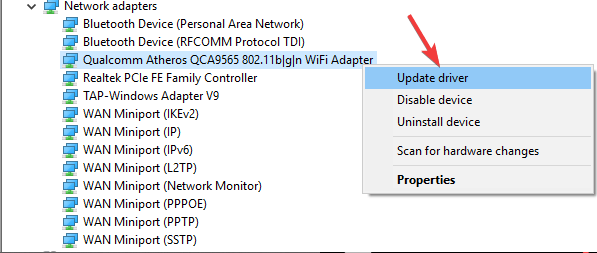
- Right-click on your adapter -> Update driver.
- Close Device Manager and restart your PC.
Also, you can fix the secure hotspot is not supported by your network adapter issue by using automated software such as PC HelpSoft Driver Updater if you want to make the process quicker and easier. You can set it up to regularly update your drivers so you won’t have this issue ever again.
3. Uninstall your virtual adapters
- Press the Windows key + X on your keyboard and select Device Manager.
- Expand the Network adapters section.
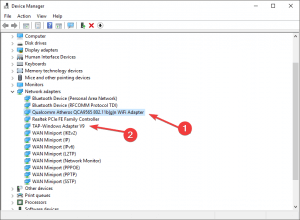
- Right-click and select ‘Uninstall’ for all virtual adapters.
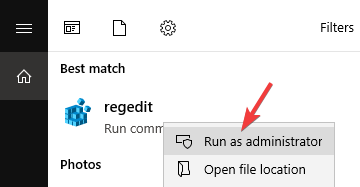
- Click on the Cortana search bar -> type ‘Regedit’ (without quotes) -> Right-click -> Select ‘Run as administrator.
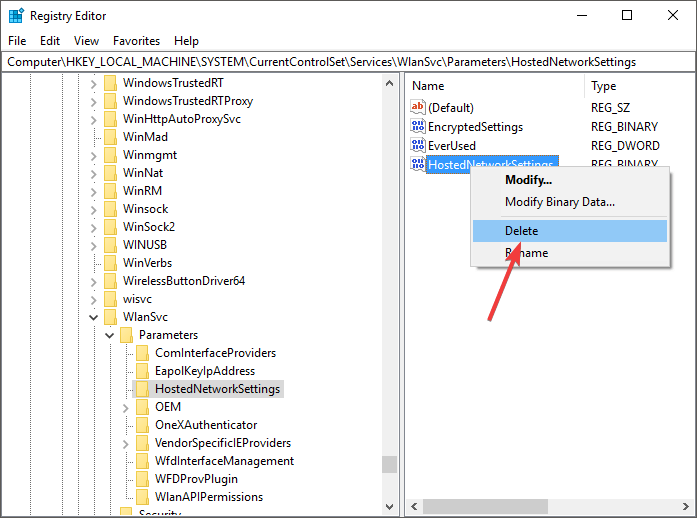
- Navigate to this registry:
Computer\HKEY_LOCAL_MACHINE\SYSTEM\CurrentControlSet\Services\WlanSvc\Parameters\HostedNetworkSettings - Delete the key called HostedNetworkSettings by right-clicking on it.
- Restart your PC and check to see if the issue persists.
4. Run the Network adapter troubleshooter
- Press the Windows key + X and select Settings.
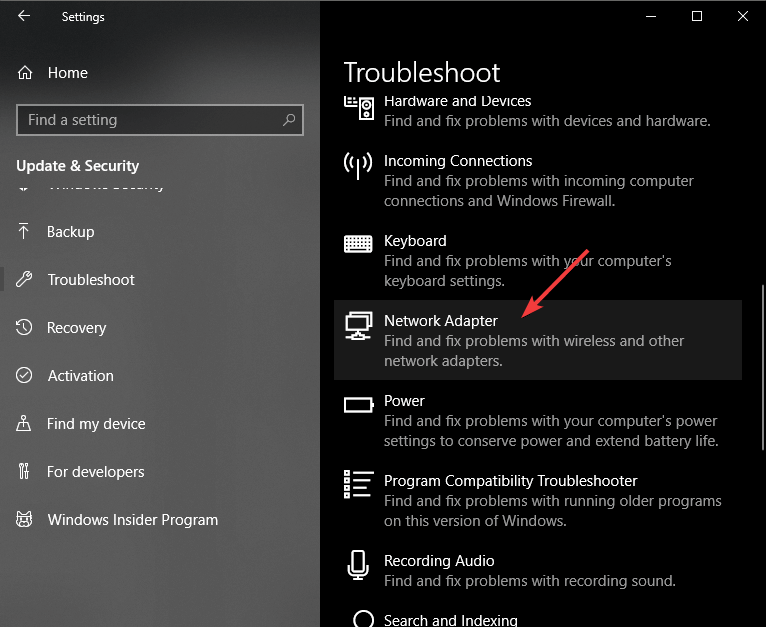
- Choose Update and Security -> Troubleshoot.
- Scroll down and select ‘Network adapters’.
- Click on ‘Run the troubleshooter’.
- After the process is completed, restart your PC and check to see if the problem with the Wireless card doesn’t support Wi-Fi hotspot creation Windows 10 is solved.
Hopefully, you will be able to fix the failed to start your WiFi hotspot 1002 issues with your Wireless card. If your mobile hotspot is not working on Windows 11, check our detailed guide to fix it.
Feel free to let us know the solution that helped you fix this issue in the comments below.


User forum
0 messages