What is WmiPrvSE.exe and How to fix Its Issues on Window
Solve any wmiprvse.exe issue using the solutions provided
Key notes
- Some third-party applications use Wmiprvse.exe to tie into management and monitoring services in Windows 10, so it is important in certain situations.
- Like all Windows 10 services, Wmiprvse.exe can have its fair share of issues. When that happens, simply follow the steps listed in the guide below.
- This article was constructed to solve most of the wmiprvse.exe errors you encounter.

Windows 10 relies on processes and services in order to run properly, and even though processes are important, sometimes certain processes can cause problems. Users reported that wmiprvse.exe is causing problems for Windows 10 users, so let’s see how to fix those issues.
What is the WMI Provider Host (wmiprvse.exe process)?
Wmiprvse.exe is the process of the Windows Management Instrumentation Provider Service, which has the function of reporting important errors and monitoring other programs.
This process might be used by some other third-party applications to connect to Windows management and monitoring services. In most cases, disabling or stoping WMI processes or services can cause problems.
How do I fix problems with wmiprvse.exe on Windows 10?
1. Restart Windows Management Instrumentation service
- Press Windows Key + R and enter services.msc.

- When Services window opens, locate Windows Management Instrumentation service, right click it and choose Restart from the menu. If restart option isn’t available, simply stop the service and start it again by choosing the appropriate options.

- After you’re done, close Services window and check if the issue is resolved.
According to users, you can fix problem with high CPU usage simply by restarting Windows Management Instrumentation Service.
Some users are suggesting to permanently disable this service, so you might want to try that as well. To disable Windows Management Instrumentation service permanently, do the following:
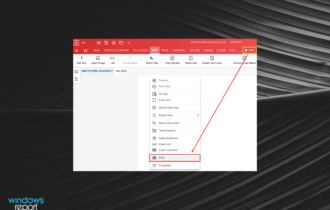
- Locate Windows Management Instrumentation service and double click it to open its properties.
- Set Startup type to Disabled and click Apply and OK to save changes.

2. Restart other services
As we already mentioned, you can fix this problem by restarting certain services, and in order to quickly restart the necessary services you can use command line tool. To restart these services, do the following:
- Press Windows Key + X to open Power User Menu. Choose Command Prompt (Admin) from the menu.

- When Command Prompt starts, run the following commands:
- net stop iphlpsvc
- net stop wscsvc
- net stop Winmgmt
- net start Winmgmt
- net start wscsvc
- net start iphlpsvc
After the commands are executed, restart your PC and check if the issue is resolved.
3. Use Event Viewer to find the problematic process
- Press Windows Key + X and choose Event Viewer from the menu.

- Go to the View tab and make sure that Show Analytic and Debug Logs option is enabled.

- In the left pane navigate to Applications and Services Logs > Microsoft > Windows > WMI-Activity > Operational.

- Select any error from the list and locate ClientProcessID. In our case the ClientProcessID was 6976.
- Write down this number because you’ll need it for the next step.

- Press Ctrl + Shift + Esc to open Task Manager.
- Go to the Services tab and look for the process that has the same ClientProcessID.
- In our example that was 6976 and the related service was WMPNetworkSvc.

- In our example that was 6976 and the related service was WMPNetworkSvc.
- Stop the service by right clicking it and choosing Stop from the menu.

- If the service is related to a third-party application, you can try removing that application from your PC. In addition, you can also try stopping this service from running by setting the Startup type to Disabled in the Services window.
Event Viewer is a powerful tool that allows you to view computer logs. Using this tool you can find which process is causing this problem, and to do that you need to follow the steps listed above.
Keep in mind that you’ll probably get a different ClientProcessID number, so be sure to use that number and not the one that we used in our example.
4. Check your PC for malware
- Open Task Manager and go to the Details tab.
- Locate the process that is related to Search Conduit and choose End Task option.
- After that, go and uninstall the Search Conduit application.
Few users reported that malware can also cause this error to appear, so if you’re having this error we strongly suggest that you perform a scan and check your PC for malware. After removing the malware the issue with wmiprvse.exe should be fixed.
Users reported that malware called Search Conduit caused this issue, and to fix this problem you need to disable this application and remove it from your PC.
Many users reported that Search Conduit is the main culprit for this problem, and after removing the application, the issue was completely resolved.
5. Remove HP Wireless Assistant
According to users, HP Wireless Assistant can also cause this problem on Windows 10. Stopping the HP Wireless Assistant service fixes the issue, but we also recommend that you remove this software from your PC if you want to permanently fix this problem.
6. Stop certain services
- Open Services window and locate VMWare USB, VMWare USB Arbitration Service and Hyper-V Virtual Machine Management services.
- Be sure to disable all three services by right clicking each of them and choosing Disable from the menu.
- Once all aforementioned services are disabled, restart Windows Management Instrumentation service and the problem should be fixed.
Users reported that VMWare USB, VMWare USB Arbitration Service and Hyper-V Virtual Machine Management services are related to wmiprvse.exe and that they can lead to high CPU usage. To fix this problem it’s recommended that you disable those services and restart winmgmt service.
7. Remove any unwanted programs
Unwanted applications can sometimes be installed to your PC and cause high CPU usage. Users reported that applications such as SaveSense, WebSteroids, PremierOpinion, and Relevant Knowledge can cause this issue to appear, so be sure to remove these applications from your PC.
Sometimes those applications will install their own updater and sync programs, so be sure to completely remove them from your PC. Many regular applications will sometimes install certain unnecessary software, so be sure to check your PC and remove any applications that you don’t recognize or remember installing.
8. Remove certain third-party applications
Sometimes regular applications aren’t fully compatible with Windows 10, and that can cause problems with wmiprvse.exe. Users reported problems with GoPro Studio, Beats Updater and Scipe.
To fix this problem, you can remove the problematic applications or end them in Task Manager. You might be able to fix this problem by updating the problematic applications or by using some of the older versions.
9. Perform SFC and DISM scan
Problems with wmiprvse.exe can occur if your Windows 10 installation is corrupted, and you can fix this problem by performing sfc and DISM scan. To do that, follow these steps:
- Open Command Prompt as administrator.
- When Command Prompt opens enter sfc /scannow and press Enter.
- Wait for the process to finish.
- After the sfc /scannow process ends, check if the problem is resolved. If the issue persists, enter DISM /Online /Cleanup-Image /RestoreHealth in Command Prompt and press Enter to run it.
10. Disable the spmgr service
According to users, spmgr service can sometimes cause this problem on your PC, so in order to fix it you need to disable the problematic service.
This service is in control of Asus PC Probe application, and to fix this problem you can disable spmgr service or simply uninstall Asus PC Probe application.
Problems with wmiprvse.exe are usually caused by certain services or third-party applications, but you can easily fix them by using one of our solutions.
We covered a similar service in our What is WbemCons.exe and how to address its application issues guide, so don’t miss it.
What method did you use to fix this problem? Let us know in the comments below.
Read our disclosure page to find out how can you help Windows Report sustain the editorial team. Read more


Improve this guide


User forum
0 messages