Fix: Xvdd SCSI Miniport Issues on Windows 11
First, restart your computer in clean boot to identify the cause
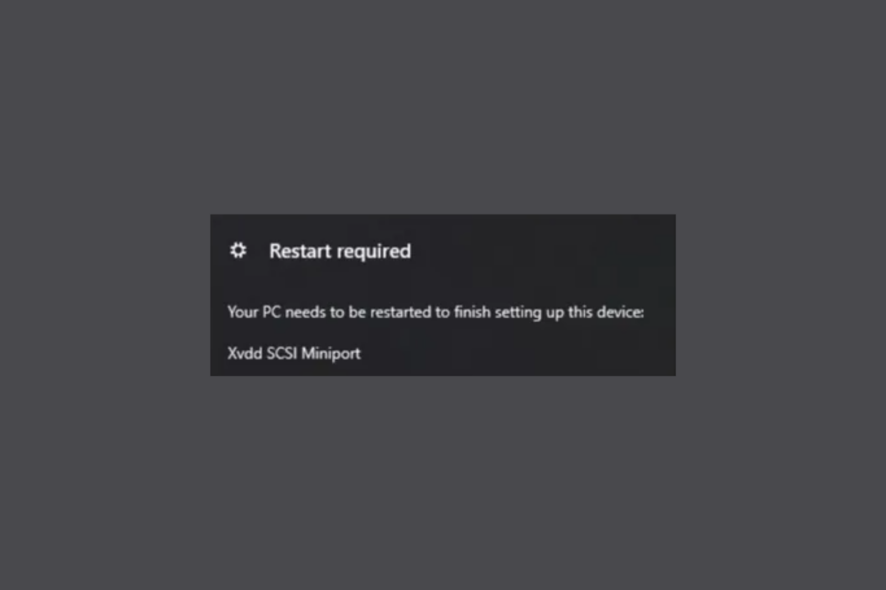
If you have encountered Restart Required – Your PC Needs to be restarted to finish setting up this device: Xvdd SCSI Miniport, update or reinstall the gaming service, update the storage driver, and run SFC & DISM scans.
These are the first steps to take because Xen Virtual Disk Drive or Xvdd is a virtual disk used mainly by Xbox App / Xbox Gaming Services, and issues related to it can occur due to virus infection, game data not mounted properly, or outdated device drivers.
How can I fix the Xvdd SCSI Miniport issue?
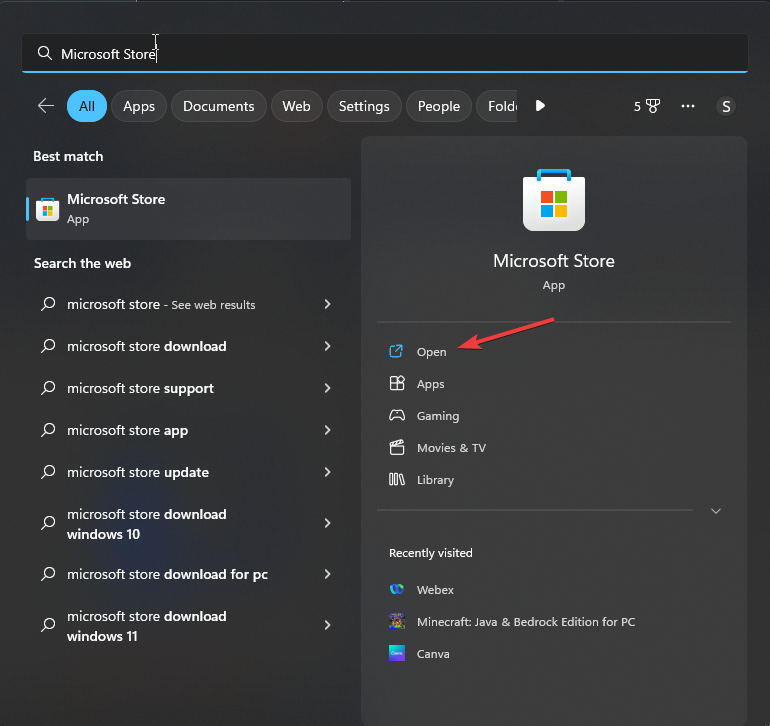
1. Update the Gaming Services & Xbox app
- Press the Windows key, type ms store and click Open.
- Click the Library icon from the bottom left corner, and select Get updates.
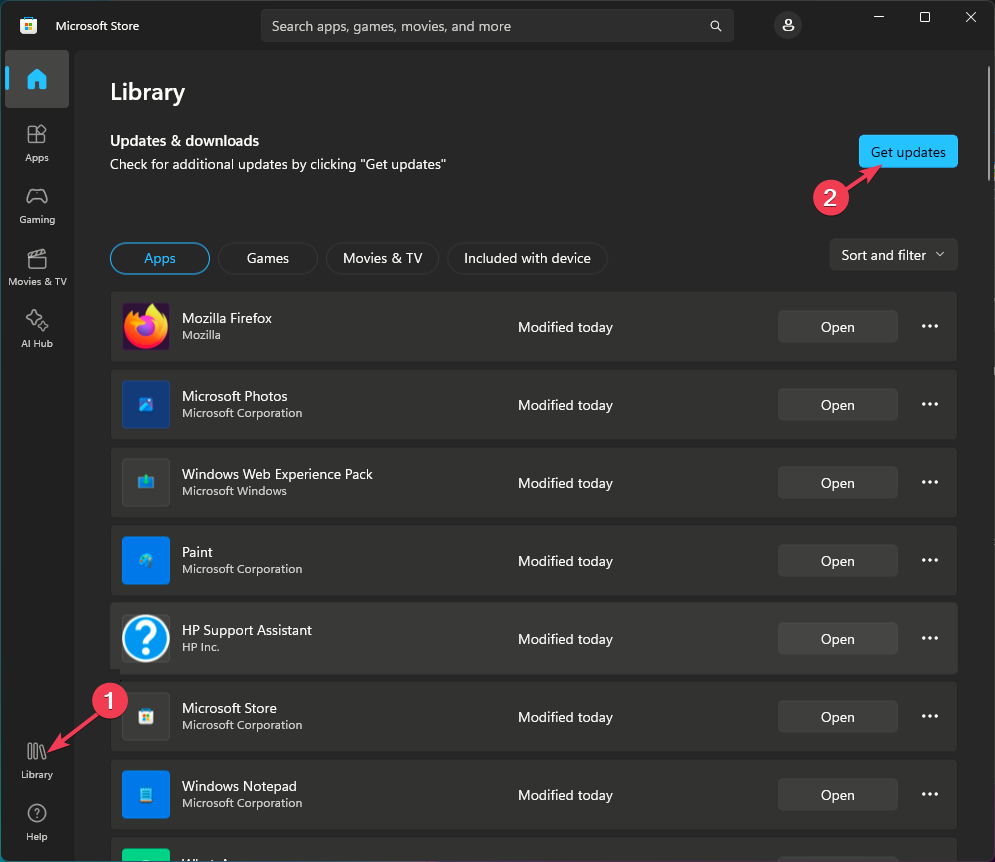
- Look for the Xbox and Gaming services app, and click Update for both to install the latest version.
Speaking of updates, make sure your Windows is also updated to the latest version. If you suspect the issue is caused after installing a new app or downloading a file, reboot your computer in clean boot and run a deep scan using a reliable antivirus tool.
2. Reinstall the Gaming Services app
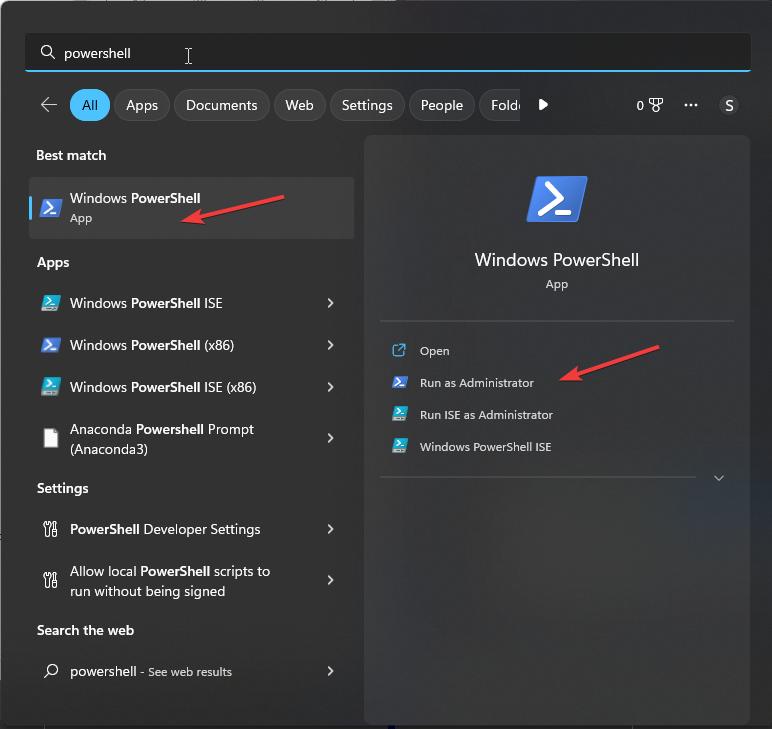
- Press the Windows key, type powershell in the search box, and select Run as administrator.
- In the Windows PowerShell window, copy & paste the following command to remove the Gaming Services app and press Enter:
get-appxpackage Microsoft.GamingServices | remove-AppxPackage -allusers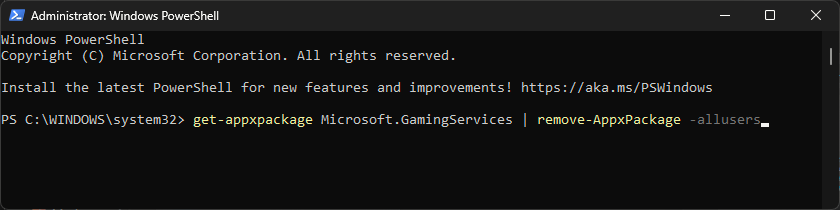
- In the same window, type the following command and hit Enter:
start ms-windows-store://pdp/?productid=9MWPM2CQNLHN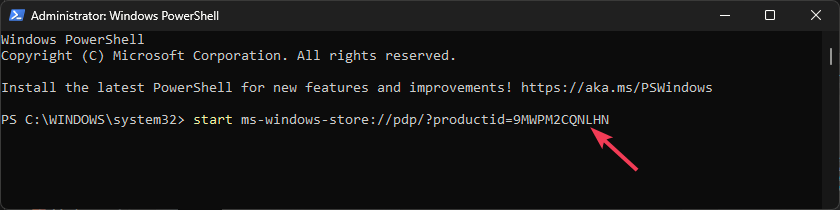
- You will directed to the Microsoft Store, and click Get to install the Gaming Services app.
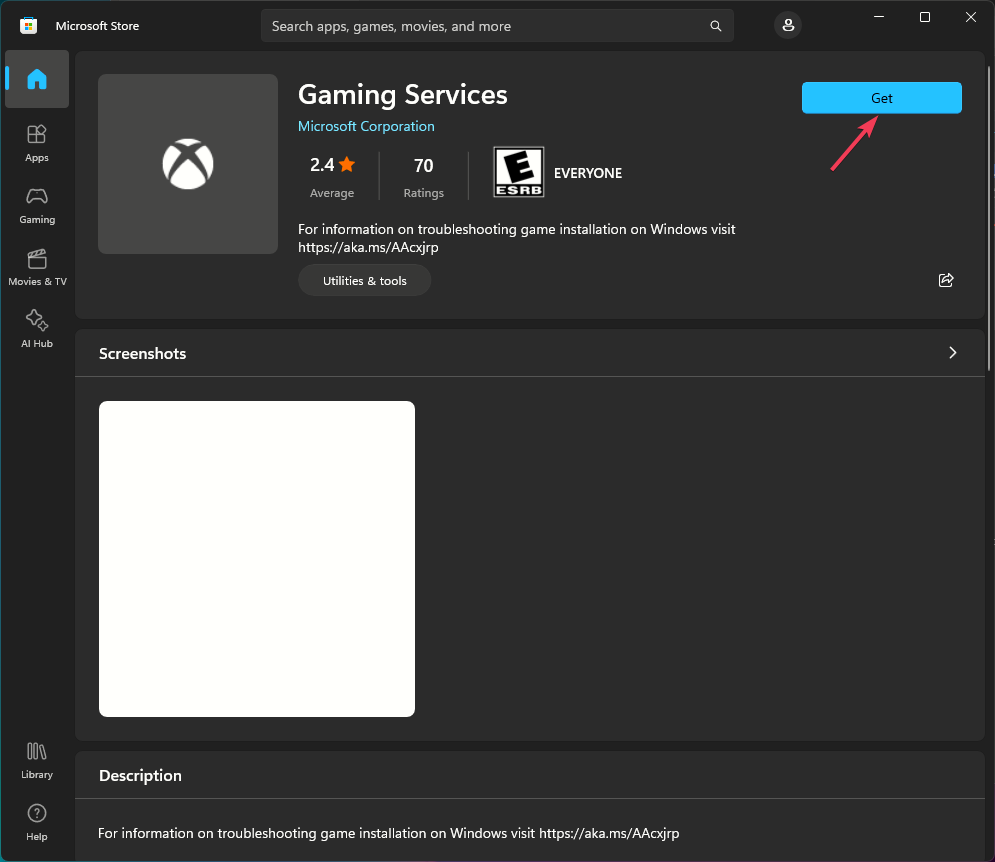
- Click Yes when you receive the User Account Control (UAC) prompt.
- Restart your computer to let the changes take effect.
3. Update the storage driver
- Press Windows + R to open the Run dialog box.
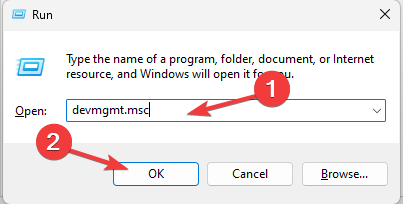
- Type devmgmt.msc and click OK to open the Device Manager app.
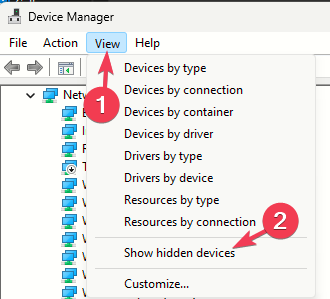
- Go to View and select Show hidden devices.
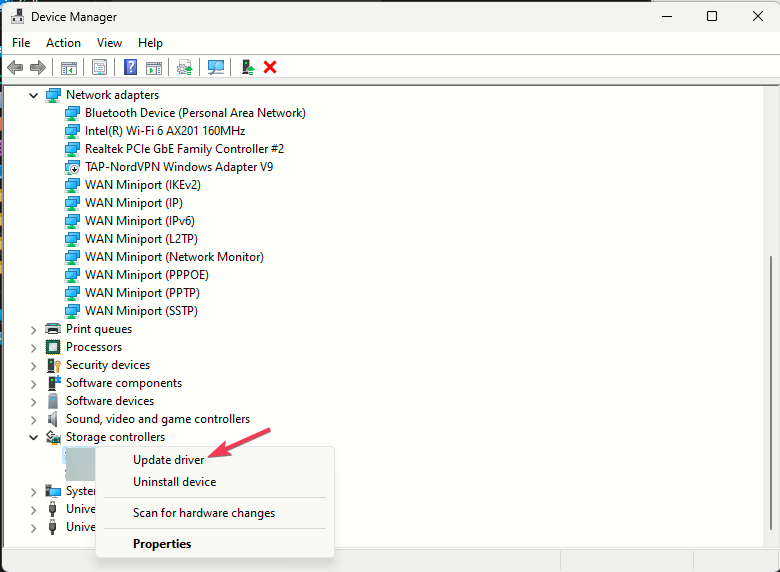
- Go to Storage controllers, and click it to expand.
- Locate Xvdd SCSI Miniport, right-click it and select Update driver from the context menu.
- Click Search automatically for drivers.
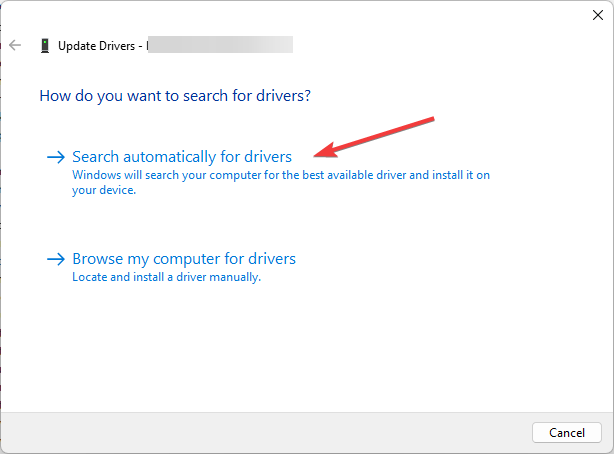
- Follow the on-screen instructions to install the latest version of the driver.
Updating a driver can also help you fix other USB device issues like USB Attached SCSI (UAS) mass storage device not detecting on Windows, read this guide to learn more.
4. Run SFC & DISM scans
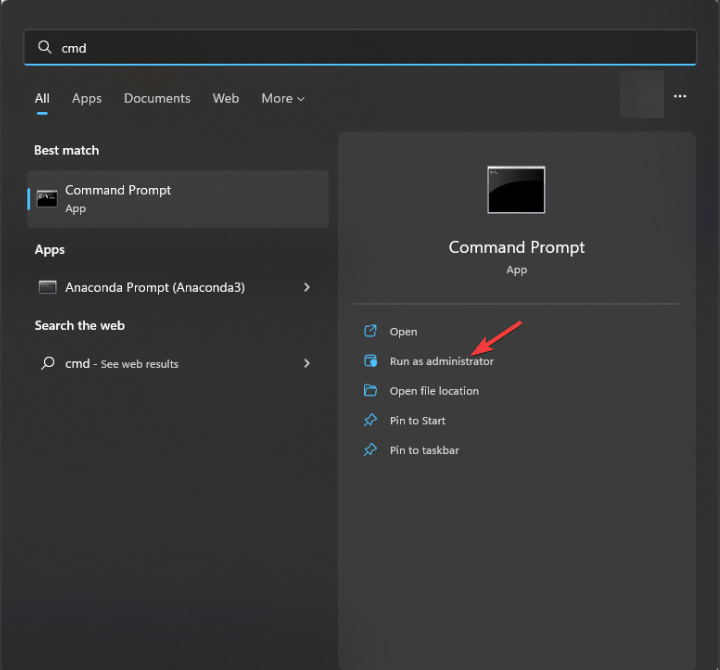
- Press the Windows key, type cmd in the search box and click Run as administrator.
- Type the following command to repair system files on your computer and press Enter:
sfc/scannow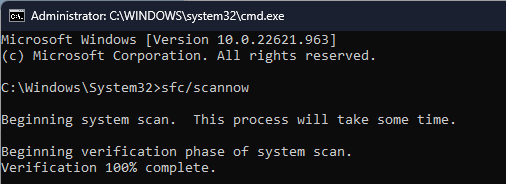
- Copy & paste the following command to restore Windows system image files and hit Enter:
DISM /Online /Cleanup-Image /RestoreHealth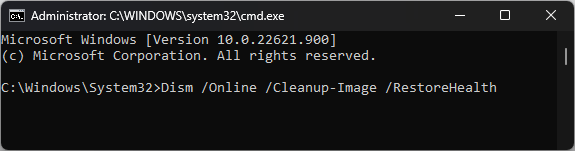
- Reboot your PC to save the changes.
5. Run the CHKDSK utility
- Press the Windows key, type cmd in the search box and click Run as administrator.
- Type the following command to scan the disk for bad sectors and hit Enter:
chkdsk C: /F /R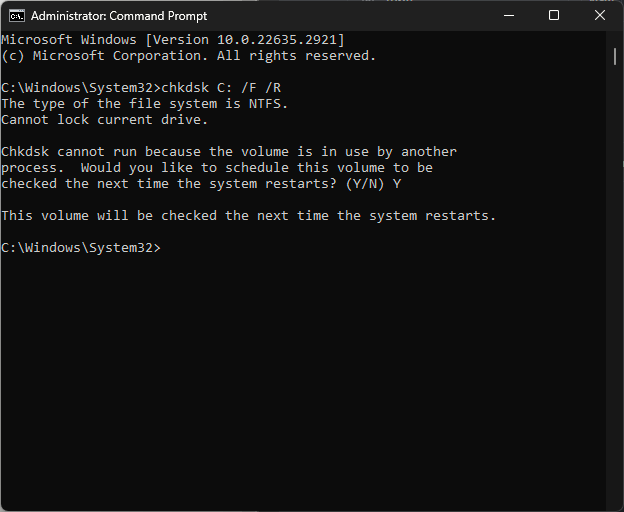
- Type Y and press Enter to continue.
- Restart your PC, and the tool will scan your drive for errors and try to repair if there are any damaged sectors on it. The scan will take a few minutes to complete; once done, reboot your computer.
6. Re-enable the Xvdd SCSI Miniport device
- Press Windows + R to open the Run dialog box.
- Type devmgmt.msc and click OK to open the Device Manager app.
- Go to Storage controllers, and click it to expand.
- Locate Xvdd SCSI Miniport, right-click it and select Disable device from the context menu.
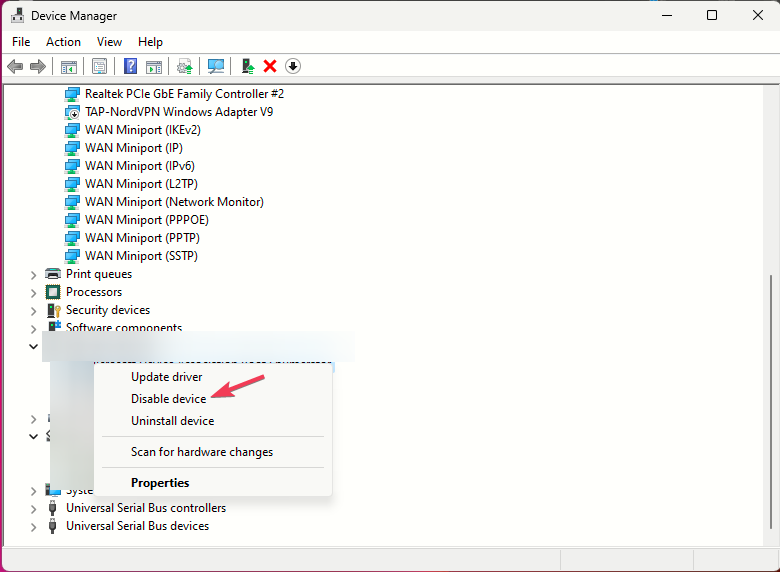
- Restart your computer, then follow the same steps from 1-4 and this time, select Enable device from the menu.
If nothing has helped you, you may want to consider performing a system restore and choose a point before the issue started to fix the problem.
In case you get System Restore doesn’t complete successfully message, read this guide to learn the solutions.
In conclusion, to get rid of the Xvdd SCSI Miniport pop-up, you can uninstall the gaming services app, run the system repair scans, re-enable the device, or update the related storage driver.
If you are having problems like fatal errors on the external hard drive, read this guide to learn the fixes to resolve it.
Did we miss a step that helped you fix the problem? Feel free to mention it in the comments section below. We will add it to the list.
Read our disclosure page to find out how can you help Windows Report sustain the editorial team. Read more


Improve this guide


User forum
0 messages