External Hard Drive Error: 6 Methods You Can Use to Fix It
Running a few commands on Command Prompt should fix this issue
What happens when you receive an external hard drive error on the disk? Well, it’s not pleasant, but it’s not the end of the world. It can be fixed.
There are various reasons your external hard drive is not working well, including:
- an unformatted external driver
- faulty USB driver
- unassigned driver letter
- memory problems
How can I fix the external hard drive error?
First, disconnect your hard drive and restart your PC. Try using it on another computer. If it’s not working, keep reading:
1. Run the CHKDSK scan
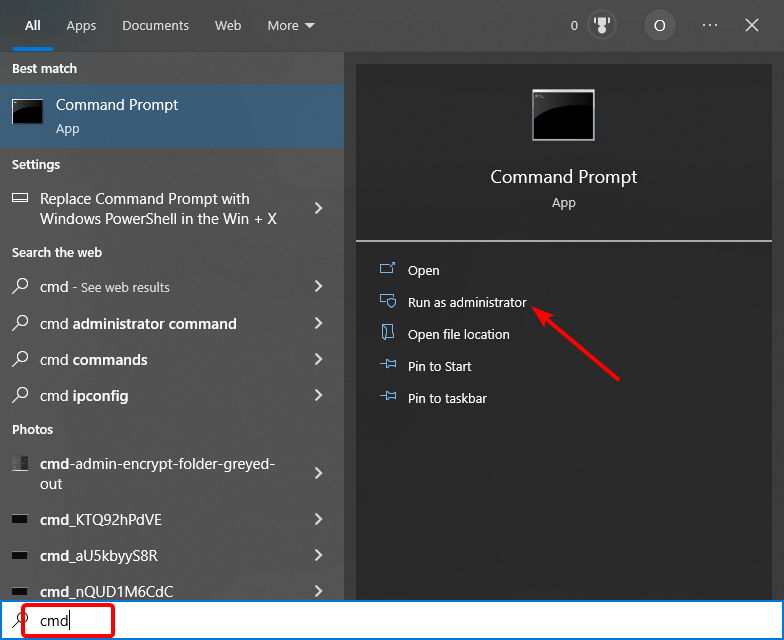
- Press the Windows key, type cmd, and click Run as administrator under Command Prompt.
- Type the command below (replace C with the drive letter) and hit Enter:
chkdsk c: /r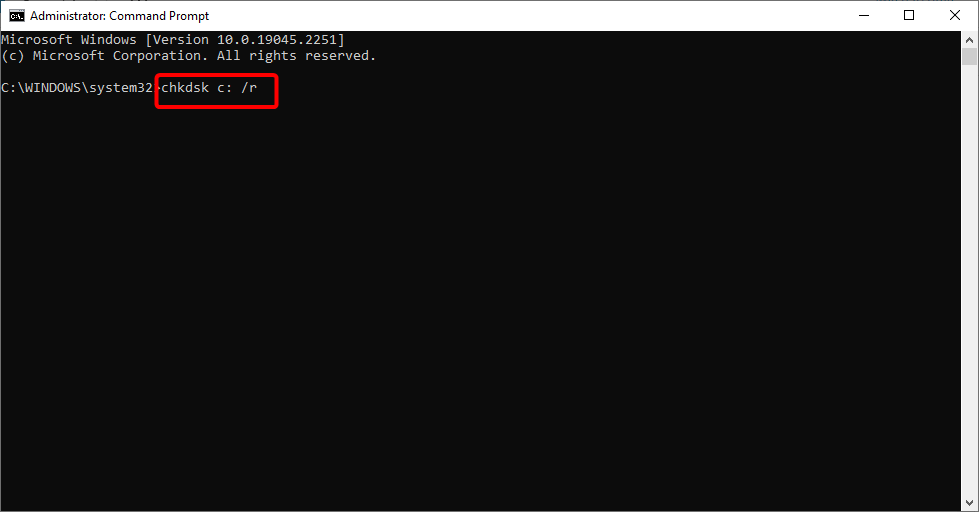
- Wait for the command to finish running and apply any recommendations.
CHKDSK is a built-in tool that fixes many hard disk issues on Windows. For example, it can improve the problems causing the external hard drive error 0x80071ac3 and other versions of the error.
Remember to restart your PC after applying the recommended fixes.
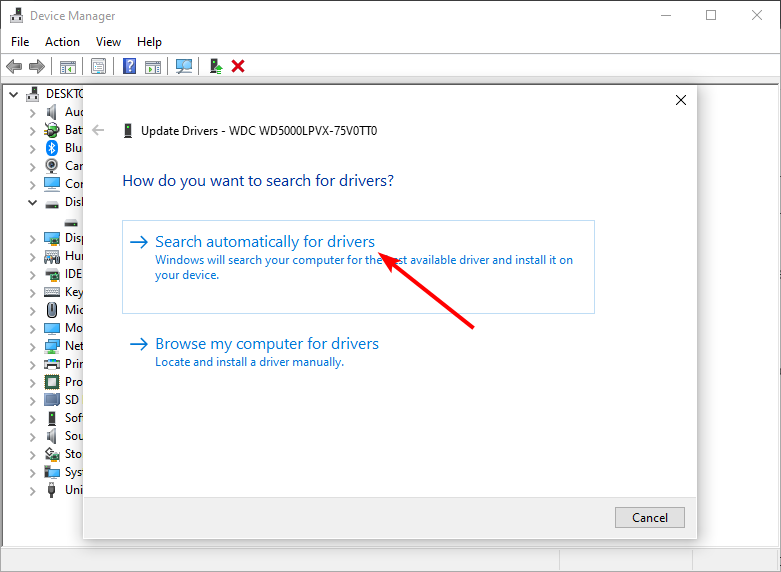
2. Update drivers
- Press the Windows key + X and select Device Manager.

- Double-click the Disk drives option and right-click your external driver.
- Select the Update driver option.
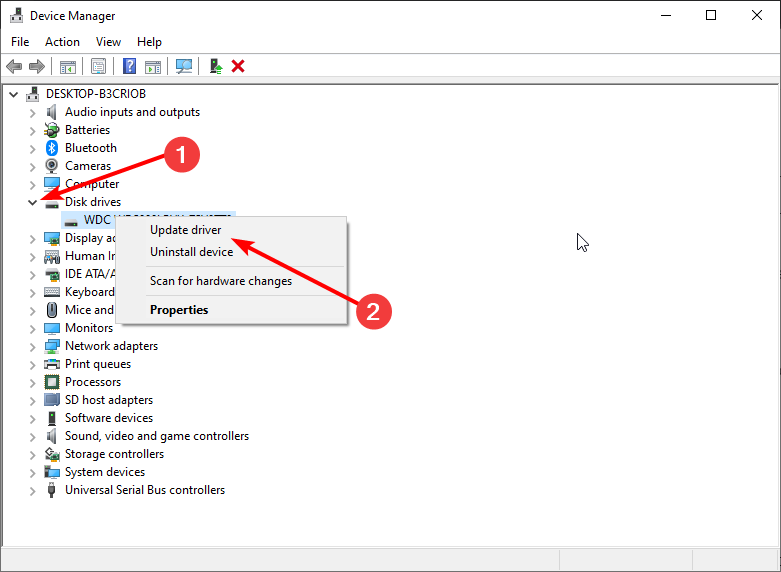
- Now, choose Search automatically for drivers and install any available update.
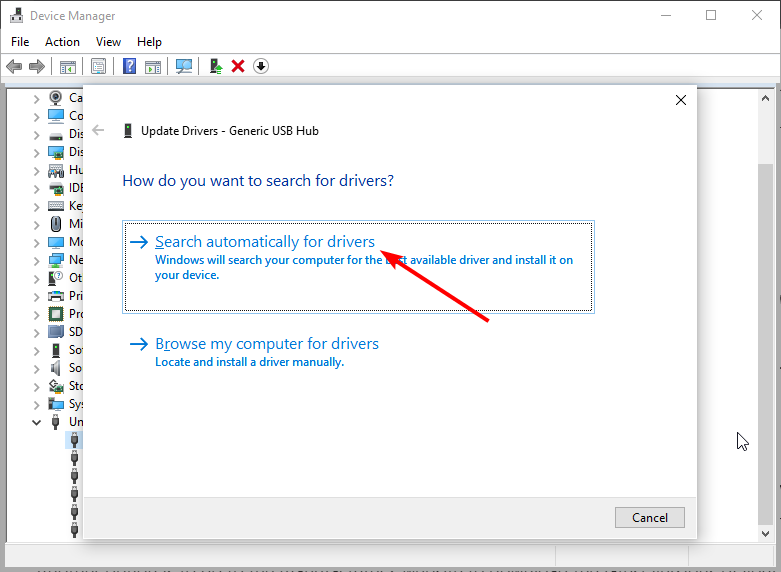
- Click the arrow next to the Universal Serial Bus controller option.
- Right-click each device there, select Update driver, and choose the Search automatically for drivers option on the next page.
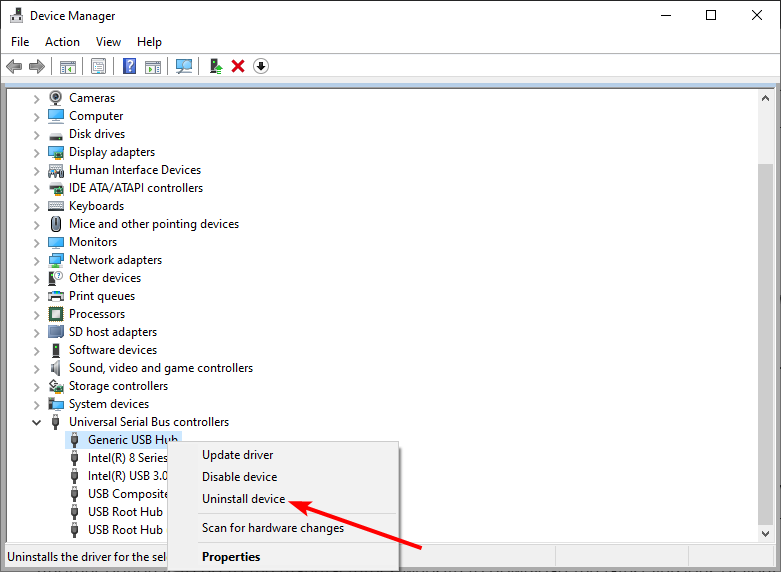
- Better still, if you find any device with a yellow exclamation sign, right-click it and select Uninstall device.
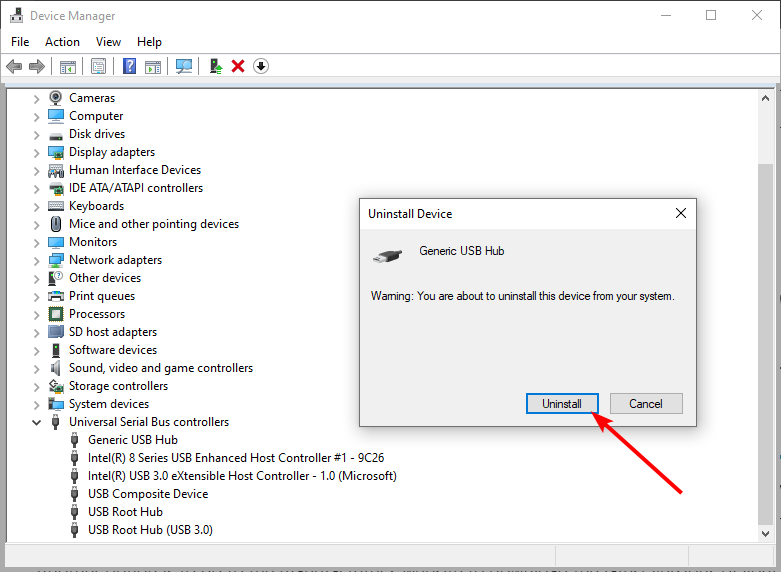
- Now, click the Uninstall button and restart your PC.
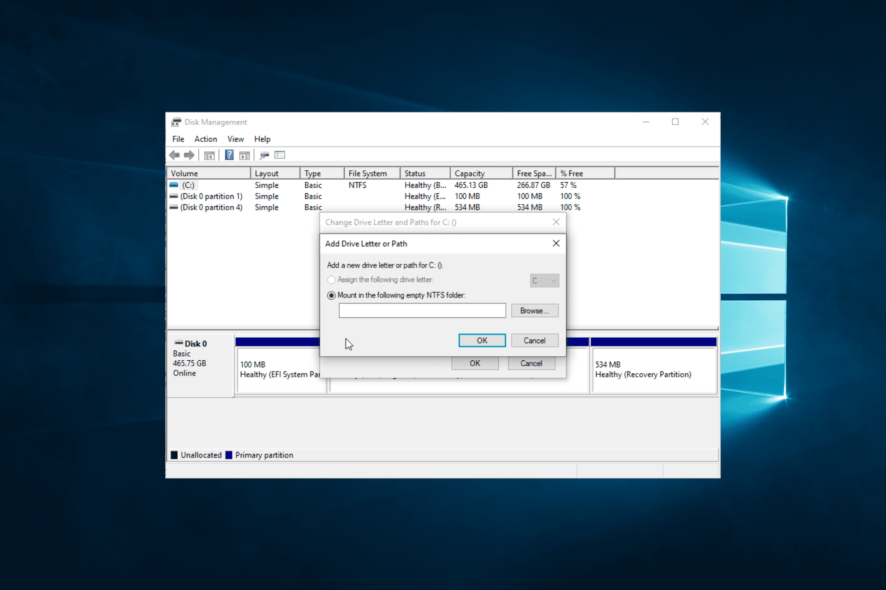
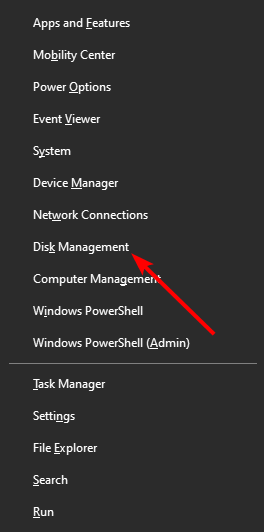
3. Assign a drive letter
- Press the Windows key + X and select Disk Management.
- Right-click the external drive and select Change Drive Letter and Paths.
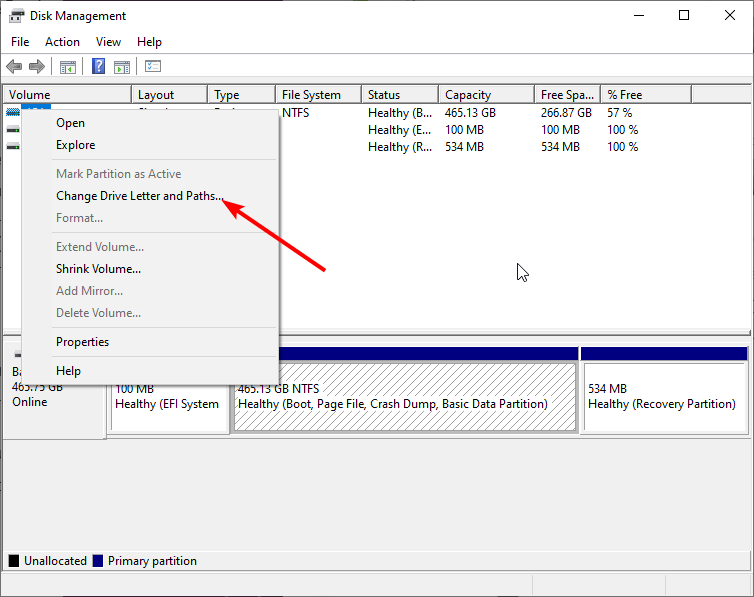
- If the drive already has a letter, click the Change button. If it does not have, click the Add button.
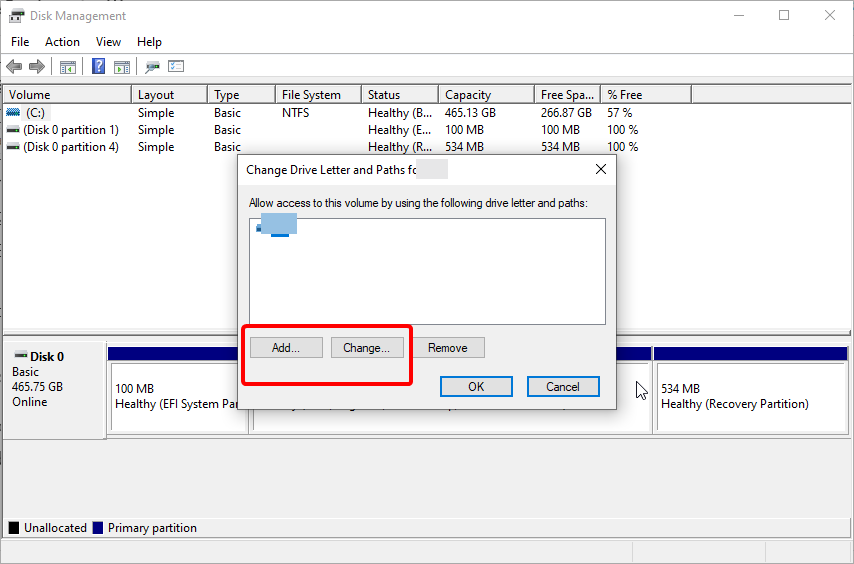
- Now, choose a drive letter and click the OK button.
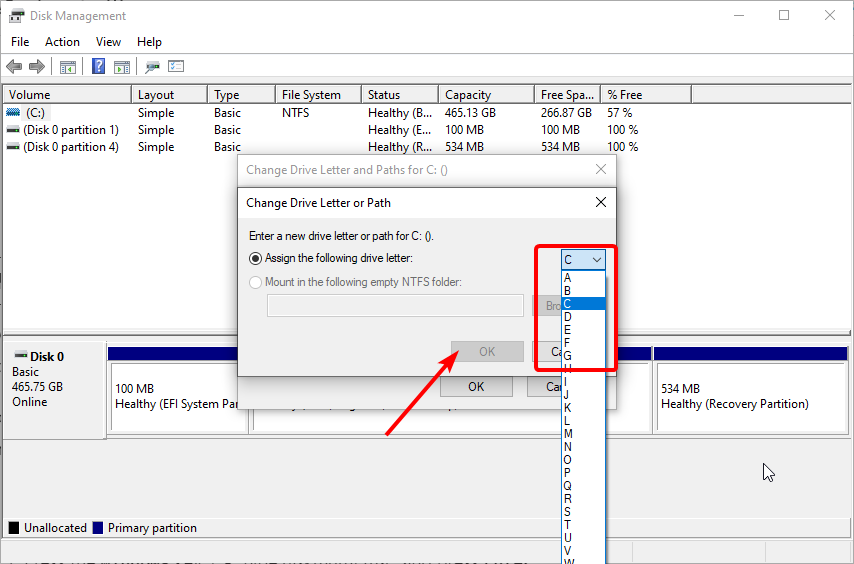
Drive letters make it easy to access your disks. So, if you are getting an I/O device error on your external hard drive, you might need to assign or change its letter.
4. Initialize disk
- Launch Disk Management and right-click your external hard drive.
- Select the Initialize Disk option.

- Select the disks you want to initialize, select either MBR or GPT partition styles and click OK.
Initializing your hard drive is a way of activating it. This should clear any roadblocks that might be giving the error you are getting on your external hard drive.
5. Change the drive format
- Right-click the Start icon and select the Disk Management option.
- Right-click the drive and select Format…
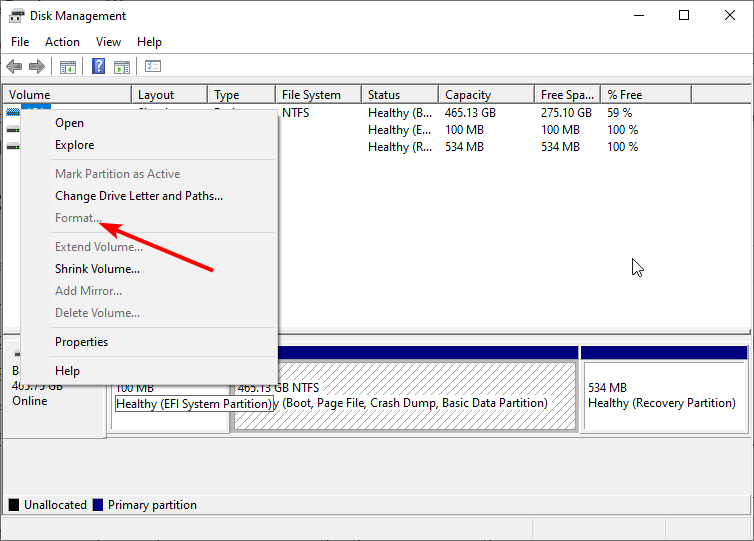
- Select the NTFS or exFAT option, tick Quick format, and click the OK button.
You will likely face different errors if your external hard drive is in the wrong format. Changing the format to accessible ones should eliminate these issues and restore normalcy.
This solution can also help with Disk read error occurred error that we covered earlier.
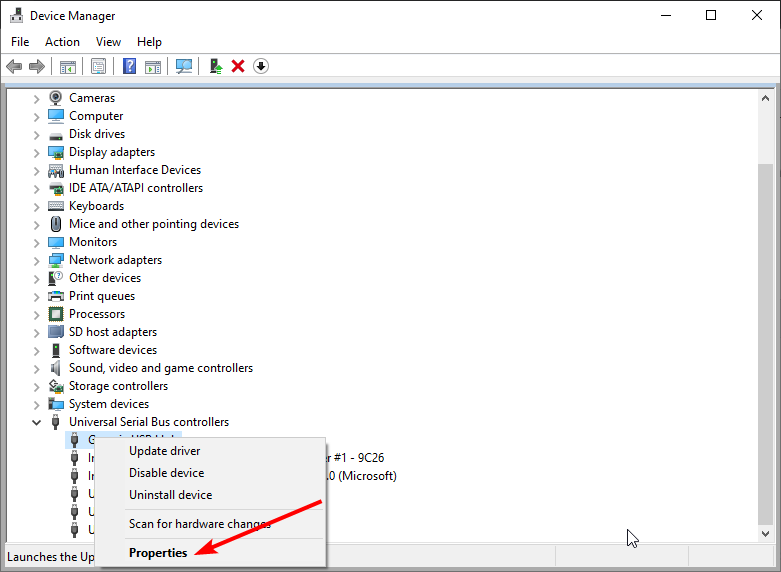
6. Change the power setting for the USB driver
- Press the Windows key + X and select the Device Manager option.

- Double-click the Universal Serial Bus controllers option to expand it and right-click the driver there.
- Choose the Properties option.
- Now, click the Power Management tab at the top.
- Finally, uncheck the box for Allow the computer to turn off this device to save power and click OK.
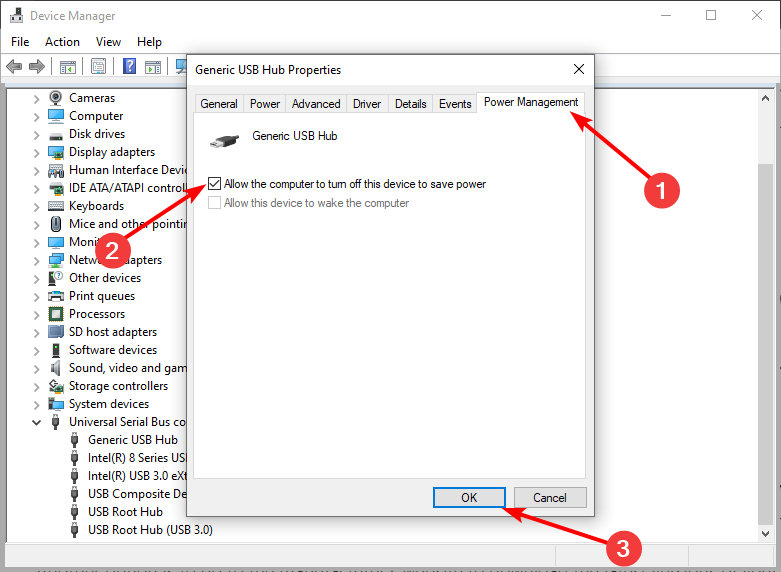
Your external hard drive needs the required power to function correctly. If the USB port device is set to turn off to save energy, your external disk might give error messages when the feature is activated.
The external hard drive error can be frustrating, as it might lead to the loss of crucial data. But by applying the fixes above, you should be able to fix them quickly.
If you are facing the external hard drive not showing on Windows 10 issue, check our detailed guide to regain access to it quickly.
Let us know the solution that worked for you in the comments below.
Read our disclosure page to find out how can you help Windows Report sustain the editorial team. Read more


Improve this guide


User forum
0 messages